
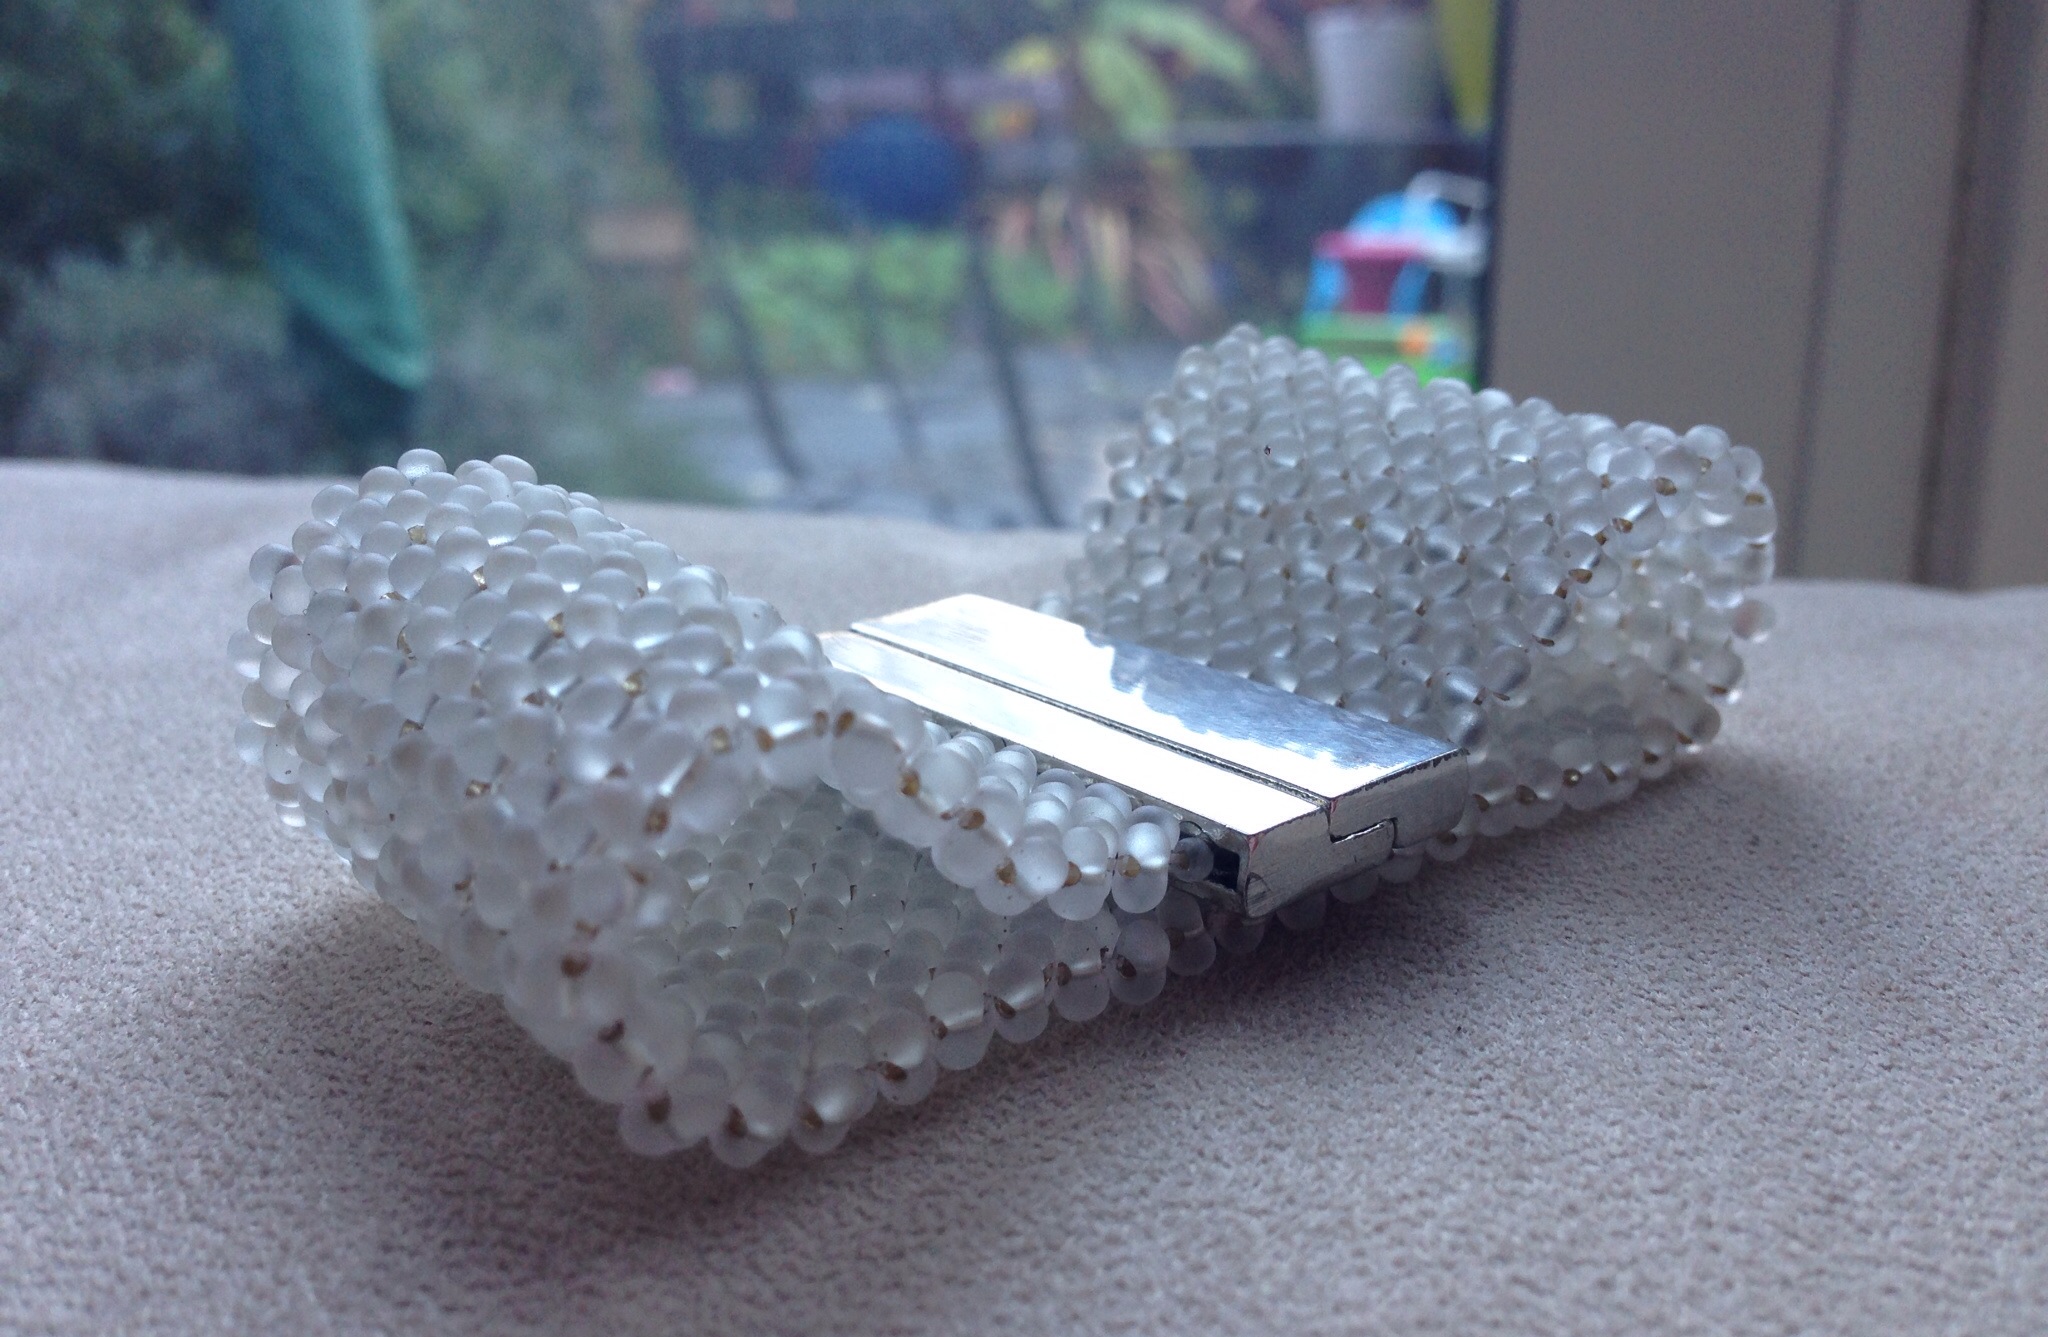
I’m scared of glue – in beadwork it always seems to let me down. I know that just as when a wholly stitched piece fails it’s my technique that is at fault, but I still avoid it rather than learning how to use it correctly. However, I spotted some interesting clasps on Etsy which solve the age old problem of how to finish a flat beaded cuff without interrupting the simplicity of the shape, and the only way to attach my flat beadwork to them was to get out the glue. So far it has held………
Recipe
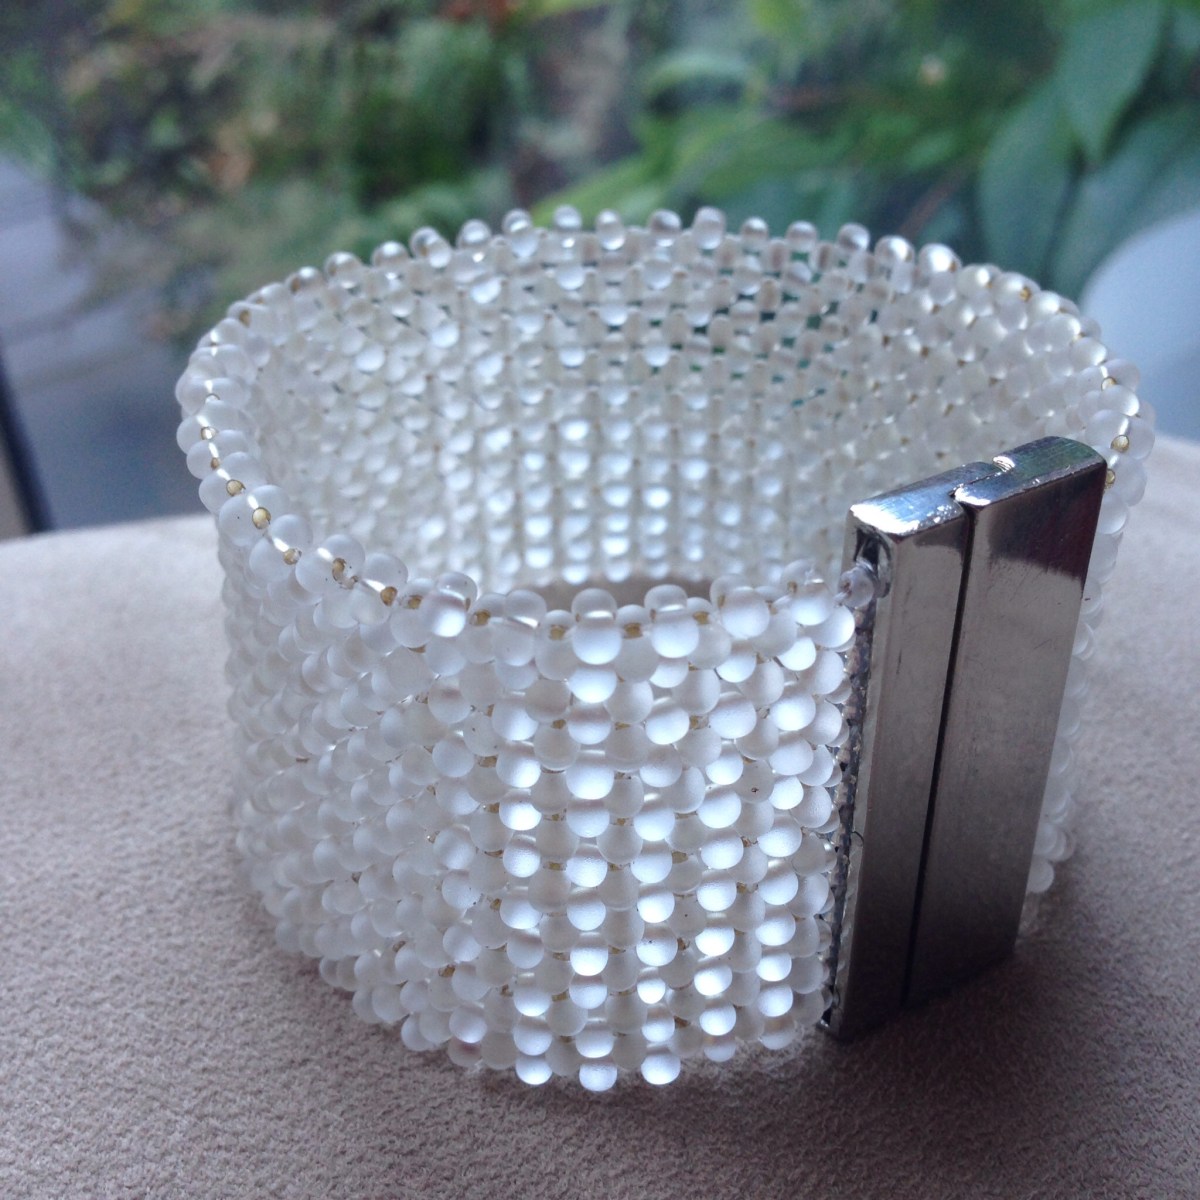
34g peanut beads in silver lined frosted crystal (Stitch N Craft)
1g size 11 seed beads in silver lined frosted crystal
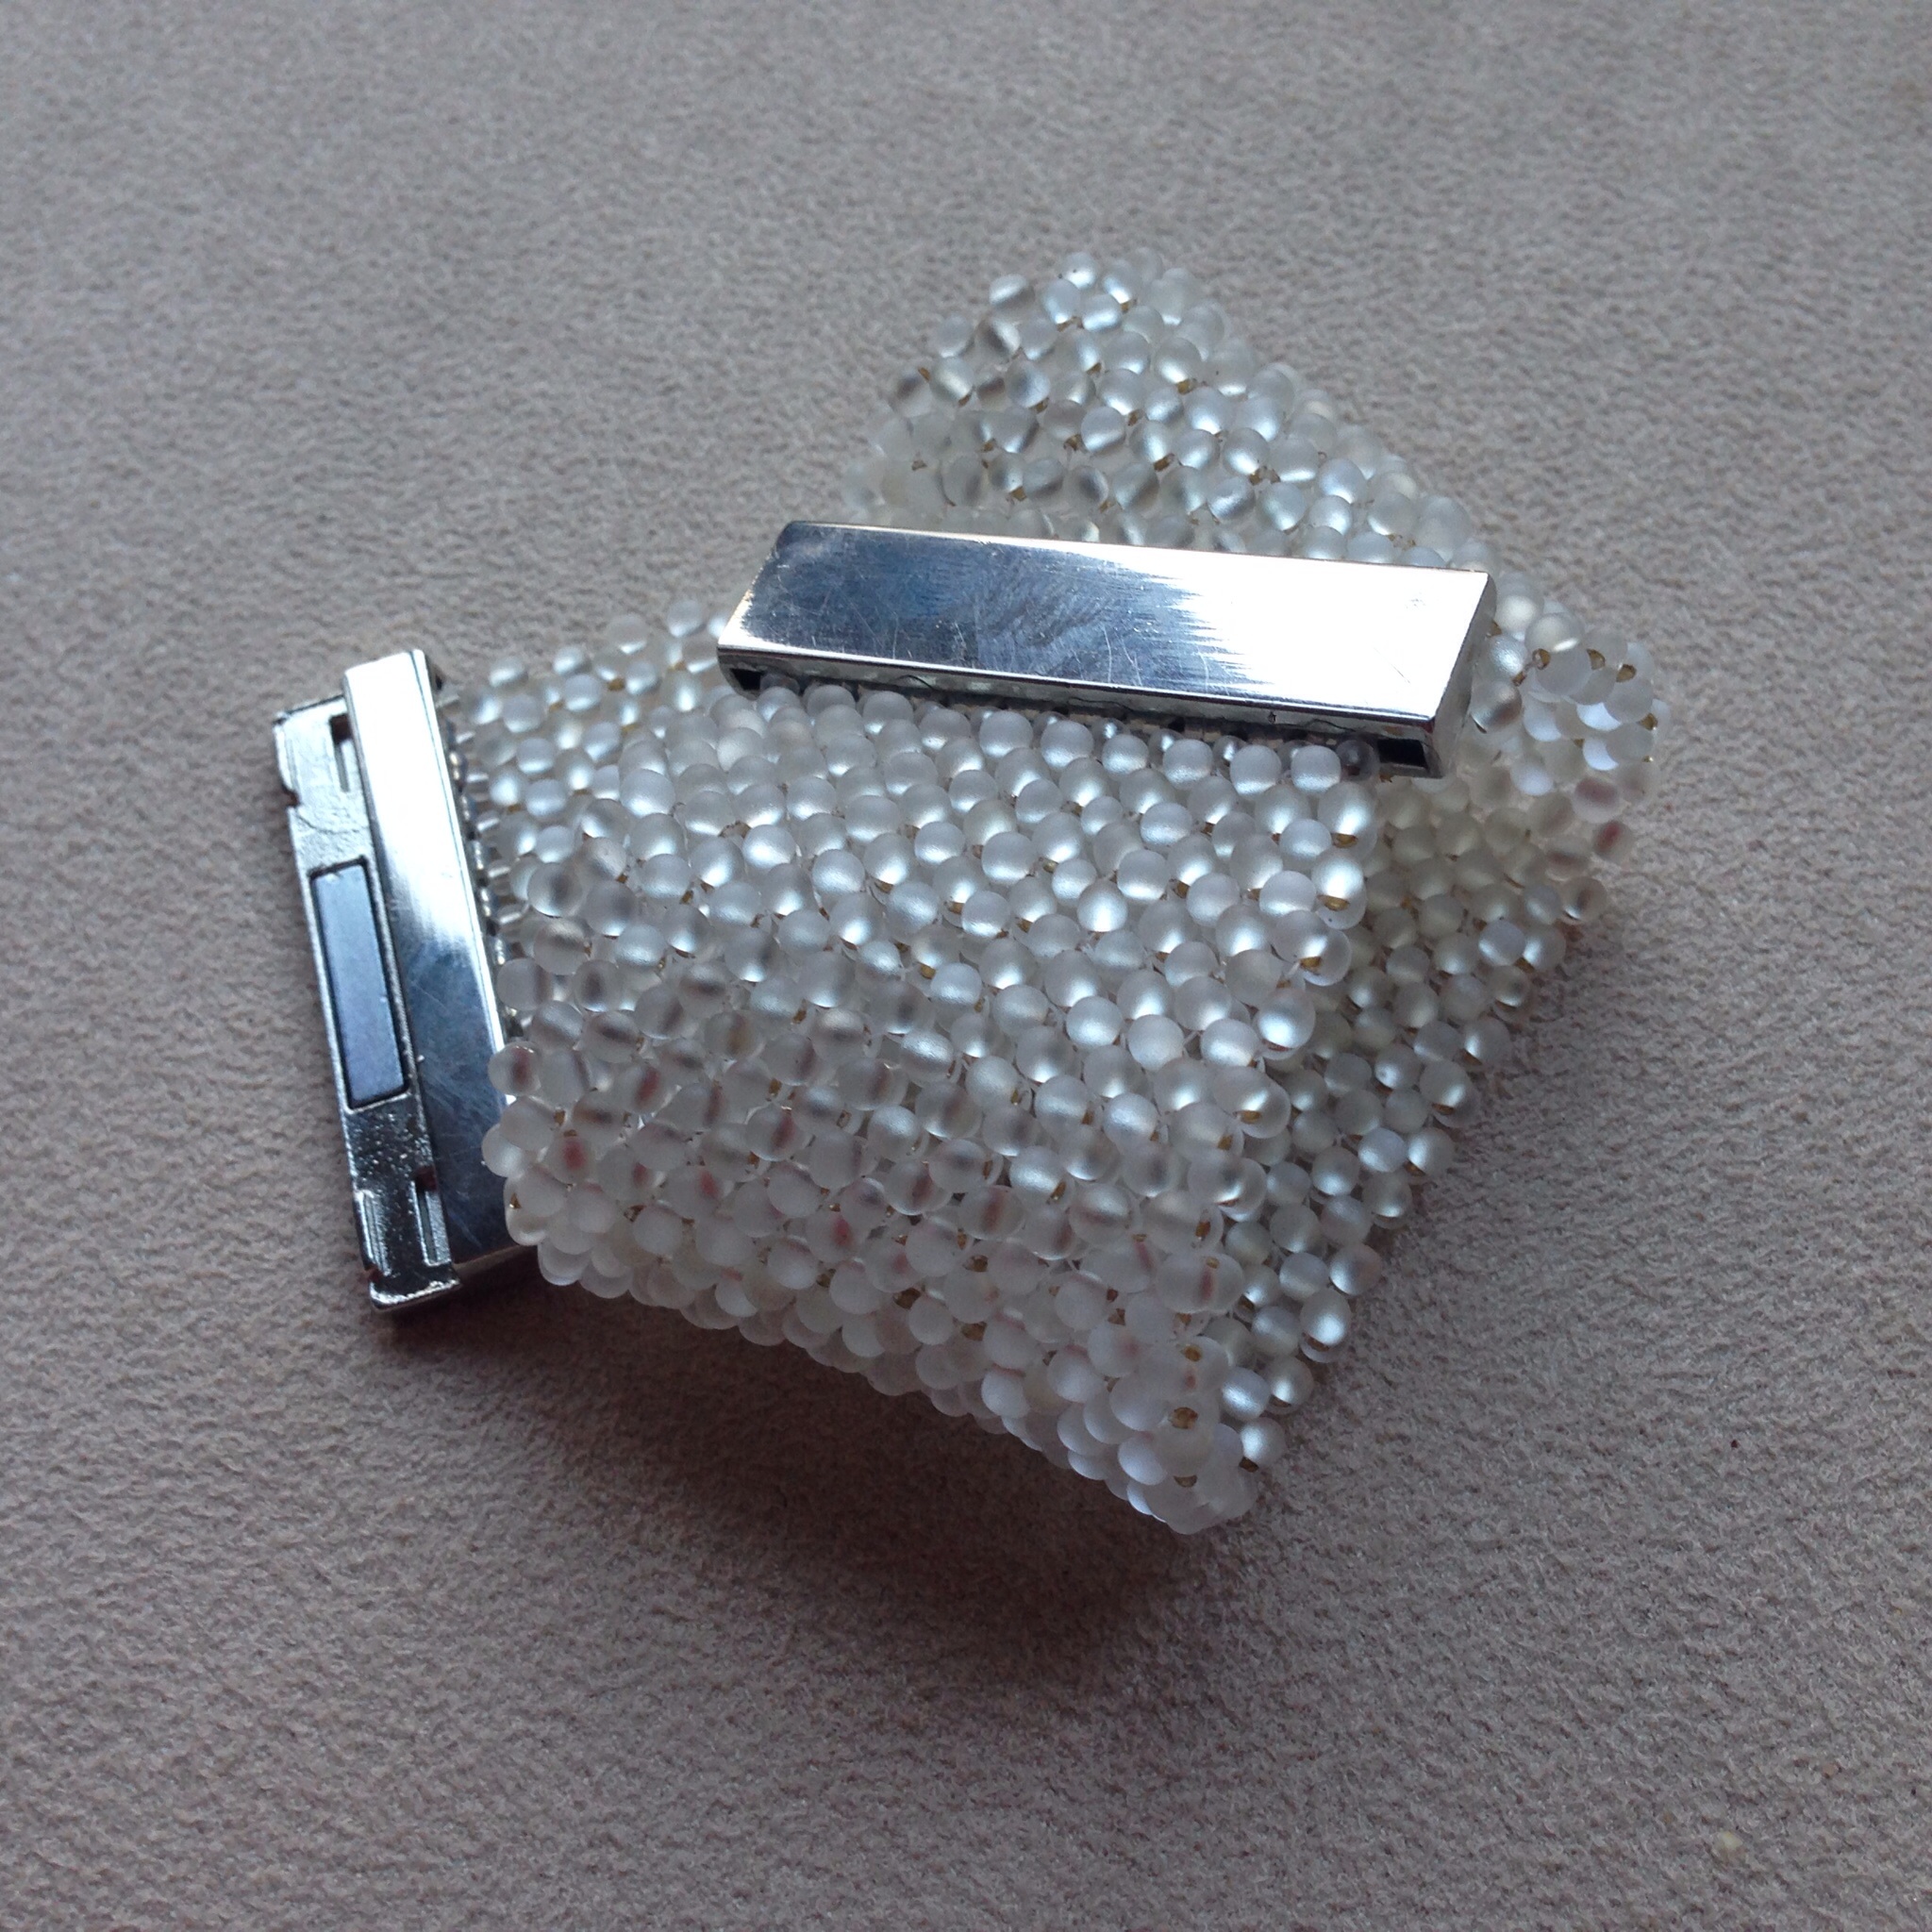
Magnetic box clasp
Thread of your choice
Glue/cement of your choice
Method
This bracelet is based on lots of pieces I’ve seen around the beading world using plain RAW and farfalles/peanut beads, so although its simplicity (flat RAW – not exactly revolutionary) means I did strictly speaking manage to design it myself, the credit for the concept belongs to others – so if you want a proper pattern head over to Etsy and look at Shelley Nybajke‘s splendid downloads using some bigger lovely etched beads. I bet she isn’t scared of glue. Aurelio Castano has also done some lovely things with similar clasps, and Beading Daily blogged about both of their work (which is what made me order the clasps in the first place).
Anyway, it consists of 43 rows of RAW 10 units wide using the farfalles. Then to create a tab to glue into the clasp I sized down using 11s and then did a row or two using pairs of 15s (have a play to see what will fit into your clasp).
Tips
Use a double length of thread – work with one half, then go back and build out in the opposite direction using the other half.
Fasten off and attach a new thread for the 11s as then if something goes wrong with the catch you won’t trash the main part of the beadwork.
Next time I’d make this wider rather than narrower than the catch – I just think it will look better. One or possibly two more units per row.
I’d also make it a touch snugger on the wrist as it will sit better and not flap around. Two or possibly three rows less (I have a 16 cm wrist – finished length was 19.5cm and I think 18cm would have been better).
These clasps were fine to play with, but if you have another source locally I’d go for something a little more expensive as the plating has already started to wear a little. Also the holes on this colour (which looked like they might be useful for glue avoidance) turned out to be a bit clogged up with plating and would have trashed my thread…….
