I have a new addiction. Don’t worry, it’s still bead related, I haven’t lost the plot.
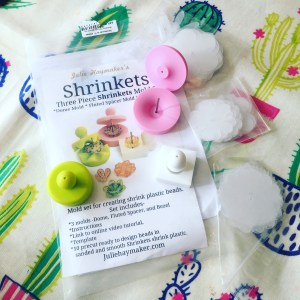
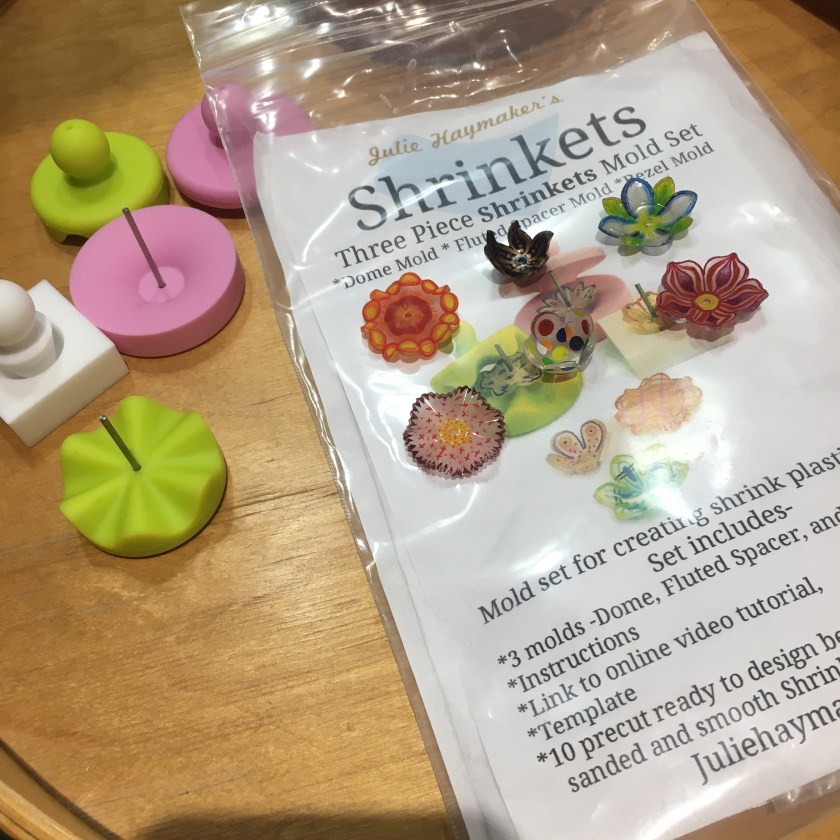
A few months back Marcia DeCoster and other American beaders started sharing pictures of work they were doing with shrink plastic – specifically with Shrinkets, and this work was quite interesting. Quite interesting because the Shrinkets brand is run by the lovely Julie Isaacs Haymaker, and she’s a shrink genius. She’s a master of decoration and techniques, and on top of that has developed a series of moulds which can be used to shape the shrink whilst it’s hot – curving, doming, fluting and generally making what to me had been a flat medium more enticing.
I watched this from afar, not quite able to justify the cost of shipping Julie’s mould sets from the US to the UK, and then a lovely thing happened. Super bead emporium Stitch n Craft starting selling them – well it was fate, I had to have some. I bought moulds and pre-cuts, joined Julie’s Shrinkets Facebook group and started reading and playing.
Initially I stuck to the methods I saw most in the group – coloured pencil ‘doodles’. Then I started using more naturalistic techniques, shading and blending. Each batch was different, but great fun to do.
Batch 1 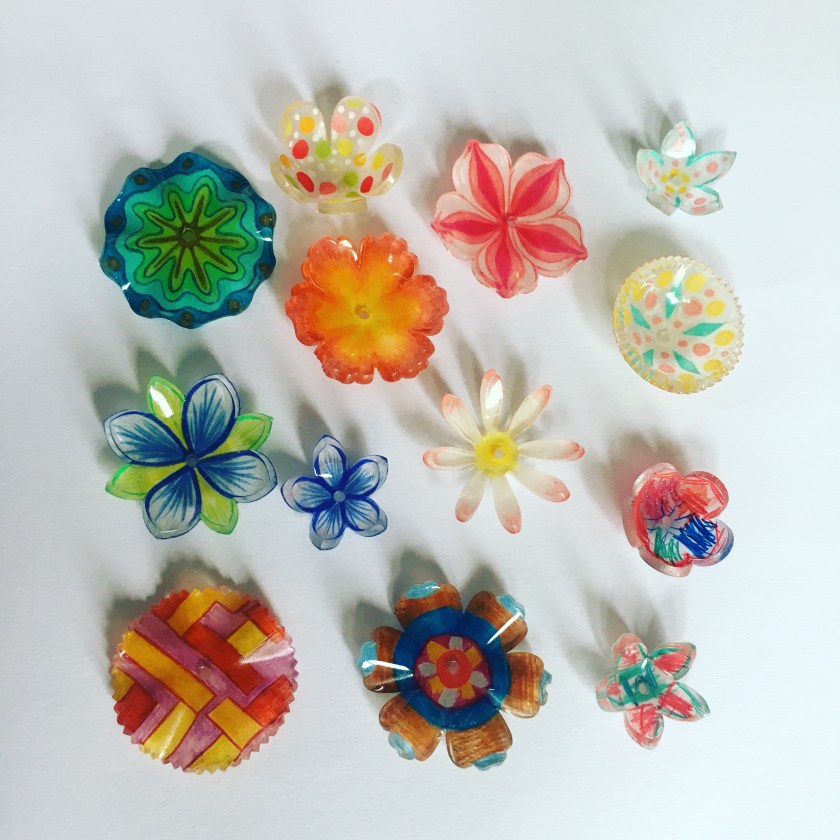
Batch 2 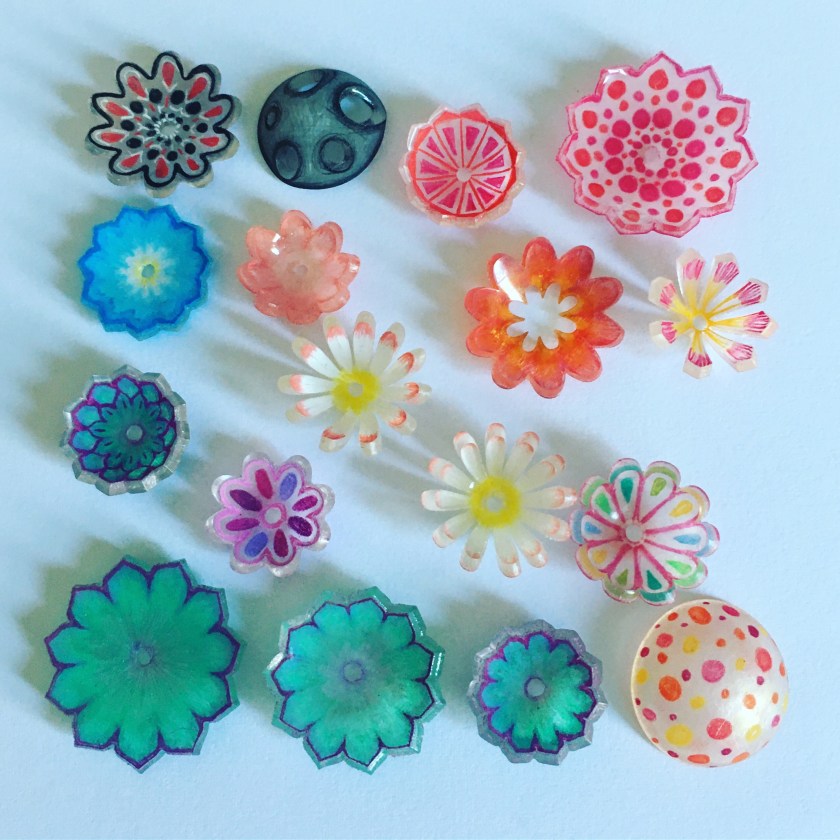
Batch 3 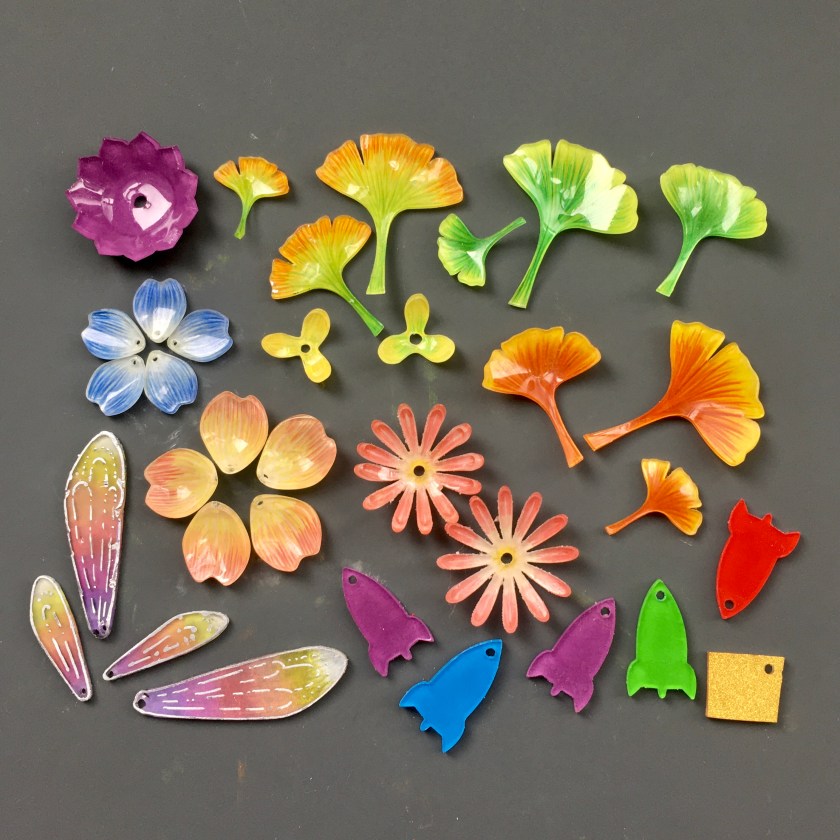
Batch 4 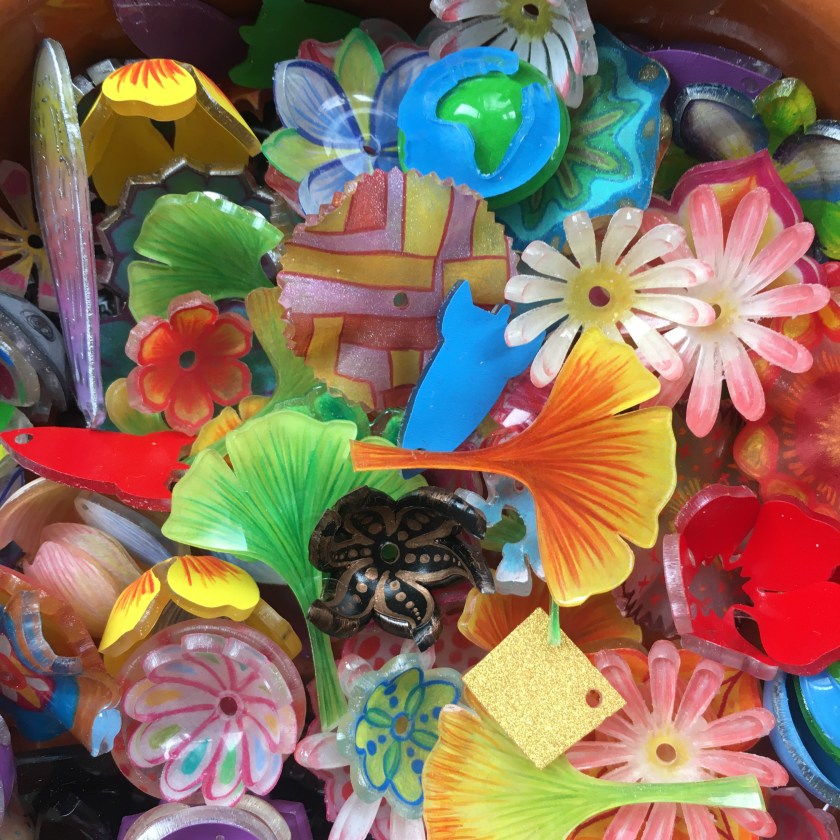
The collection grows
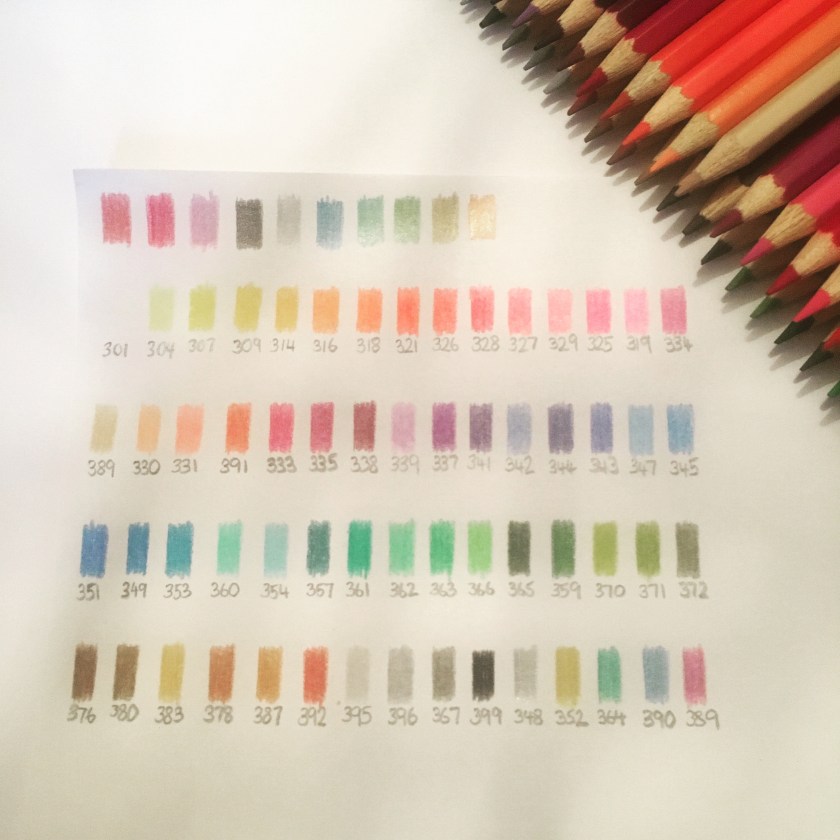
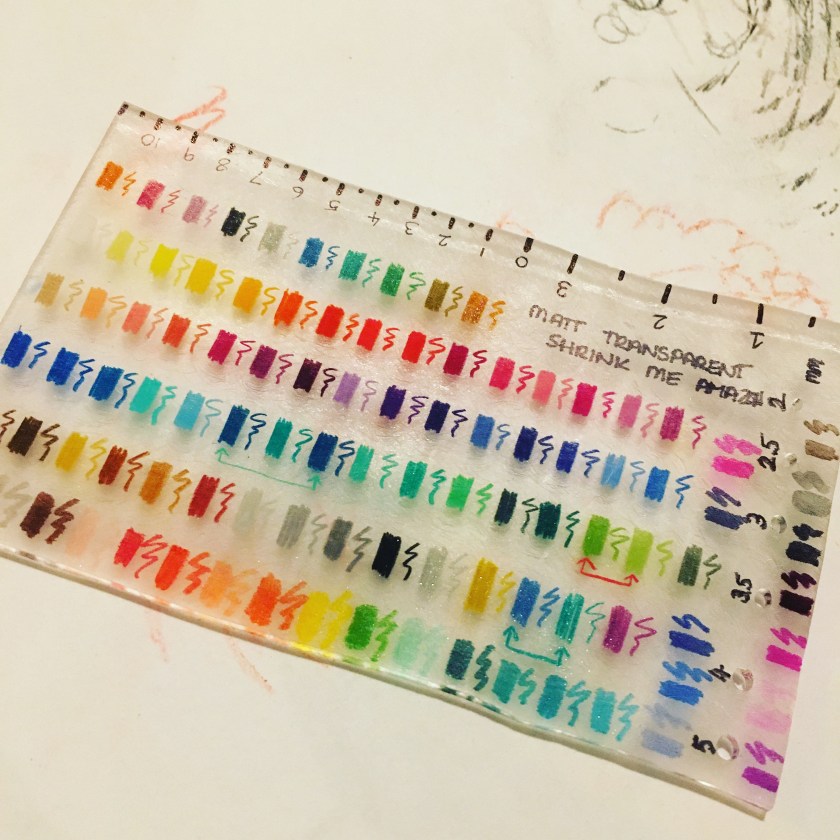
Some point after batch 2 I realised I wasn’t going to be able to afford to only use Julie’s pre-cuts (plus Stitch and Craft kept selling out), so I bought a little Sizzix Sidekick die cutter, and scoured the internet for interesting Thinlits dies. It’s quite tricky to get ones which are under the 6cm Sidekick plate size, but still big enough to be worth drawing on and shrinking, but I’ve got a decent selection now, so you can see more shapes from Batch 3 onwards. And I bought more coloured pencils – you need a good quality wax based pencil and I’m getting on really well with a set from Faber Castell, and like a true shrink pro and stationary addict I made a sample sheet on paper and on shrink (also with test holes and measurements so I can get the sizing right):
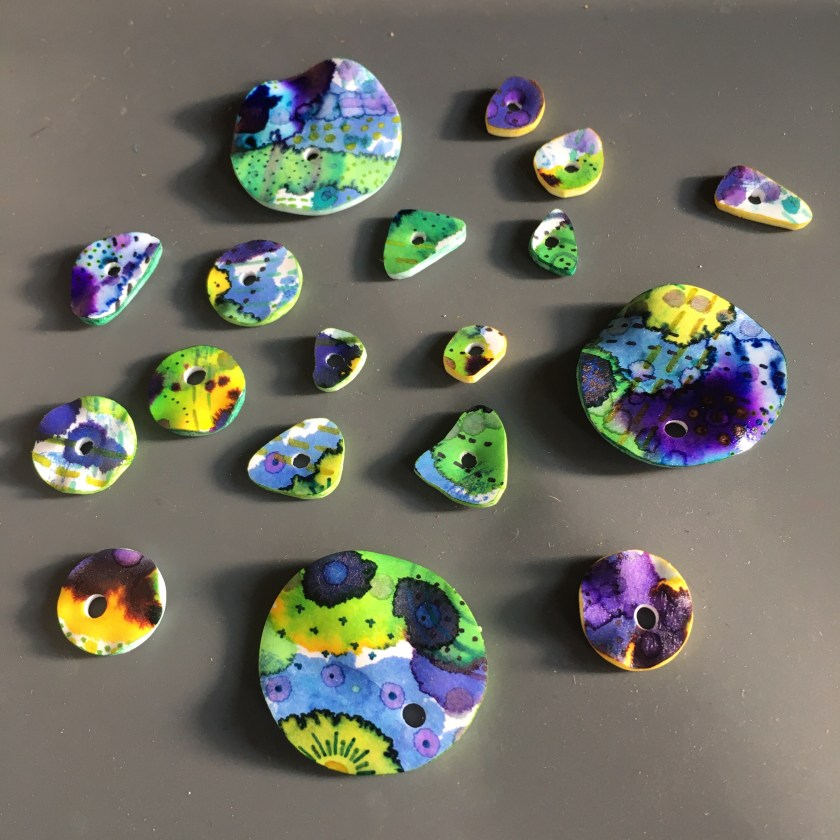
Then came a much needed break away for our summer holidays – not the holidays we had planned, but under the current circumstances still lovely. Coming back fresh, and finally getting the boys back to school and getting a little time to myself, I started trying some new techniques – helped by other group members who share so freely their knowledge. I tried more abstract designs, worked with circles instead of flowers, made rings and little cups.
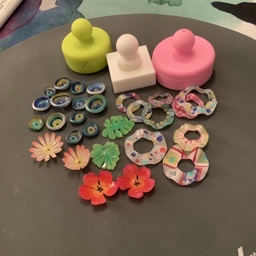
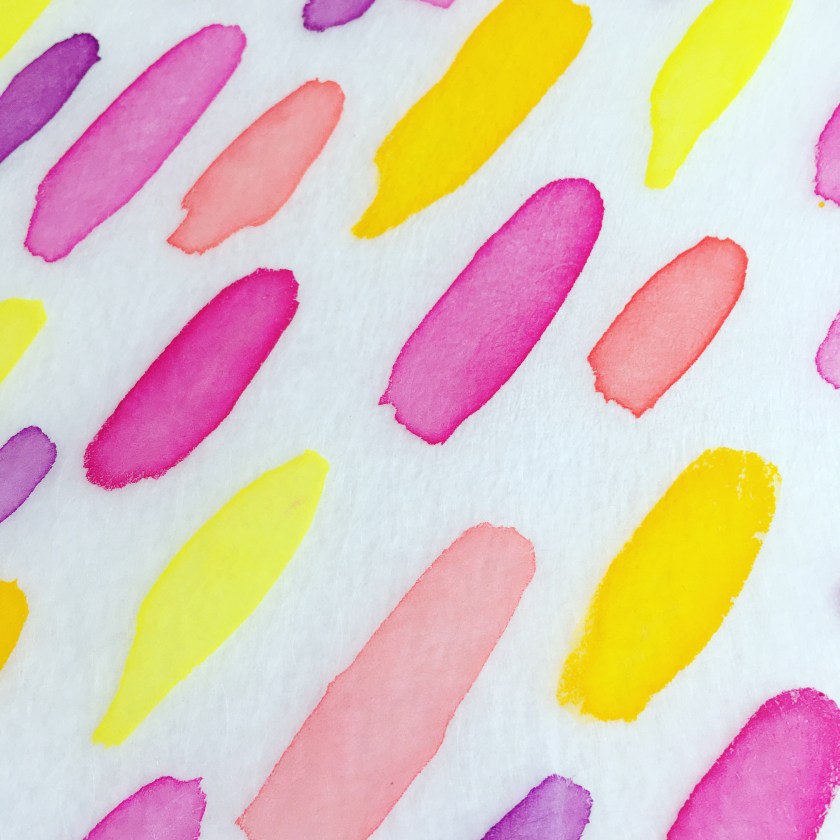
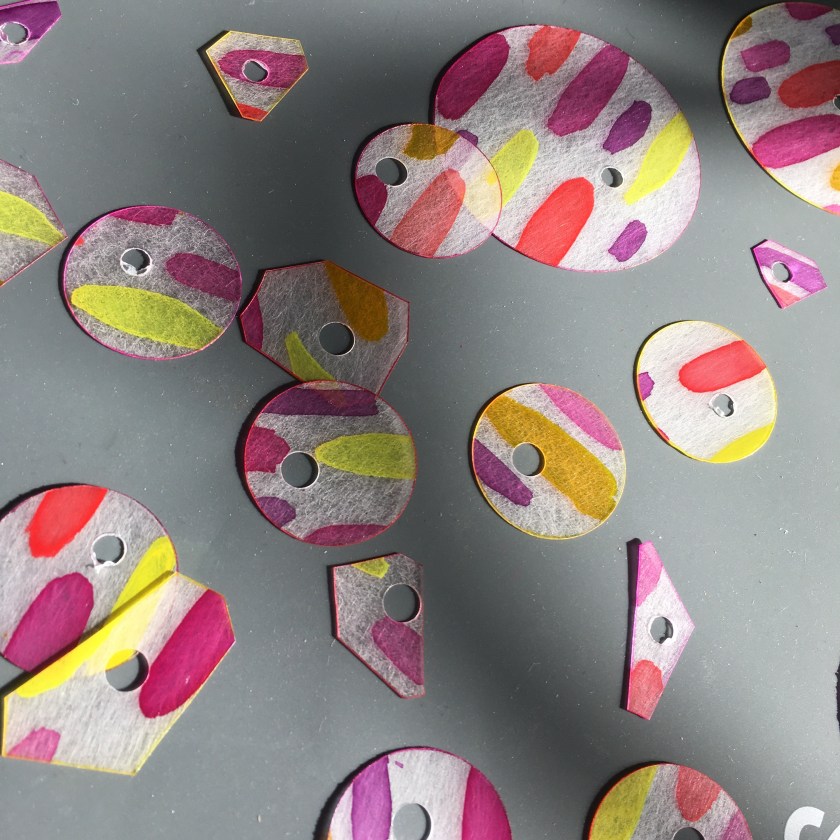
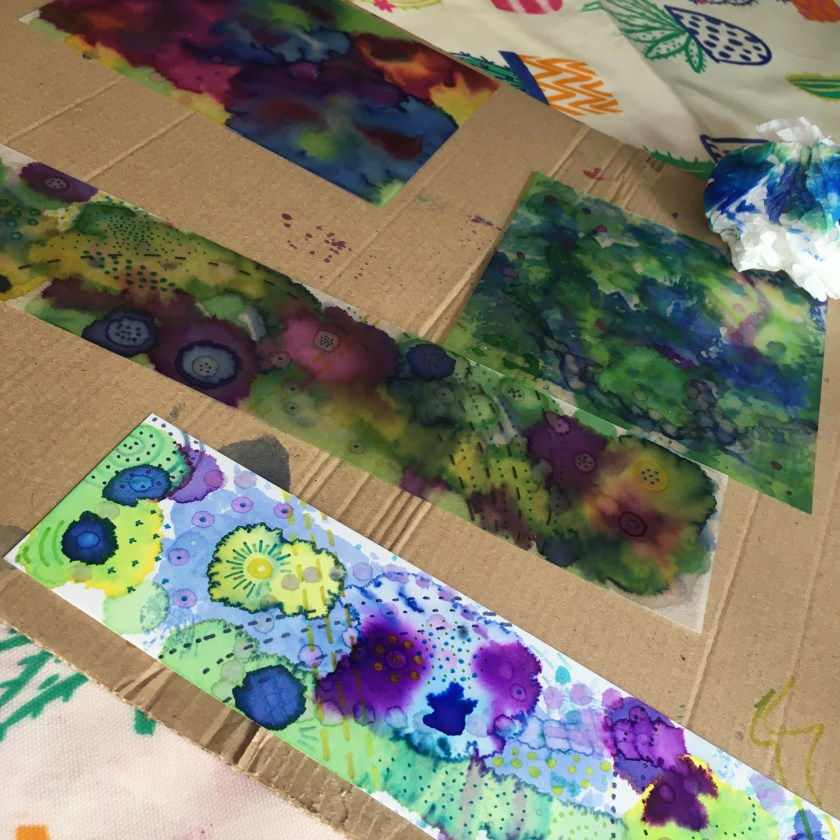
I had some acrylic inks, and had used them to create a mottled plain base colour which I then embellished after shrinking with embossing powders. Then wondered if I could be more ‘painterly’ – grabbed a brush and painted, cut and shrank an abstract batch:
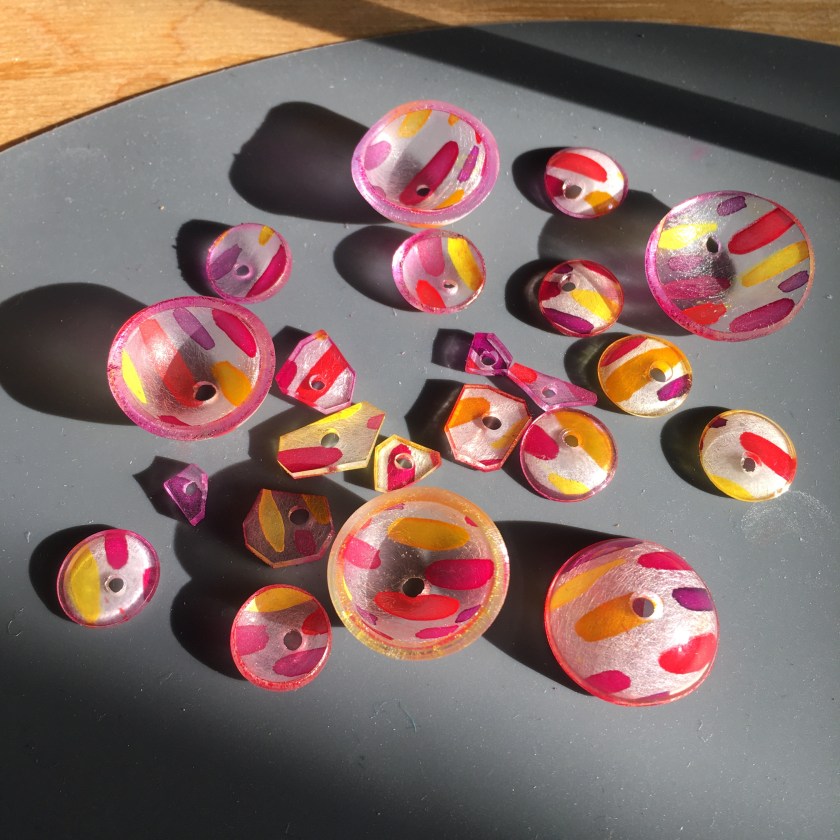
I played with some cheap alcohol inks – making blotchy designs and then augmenting them with pen and pencil doodles using a technique shared in the group by Kim van Antwerp (who sells amazing Shrinkets components here).
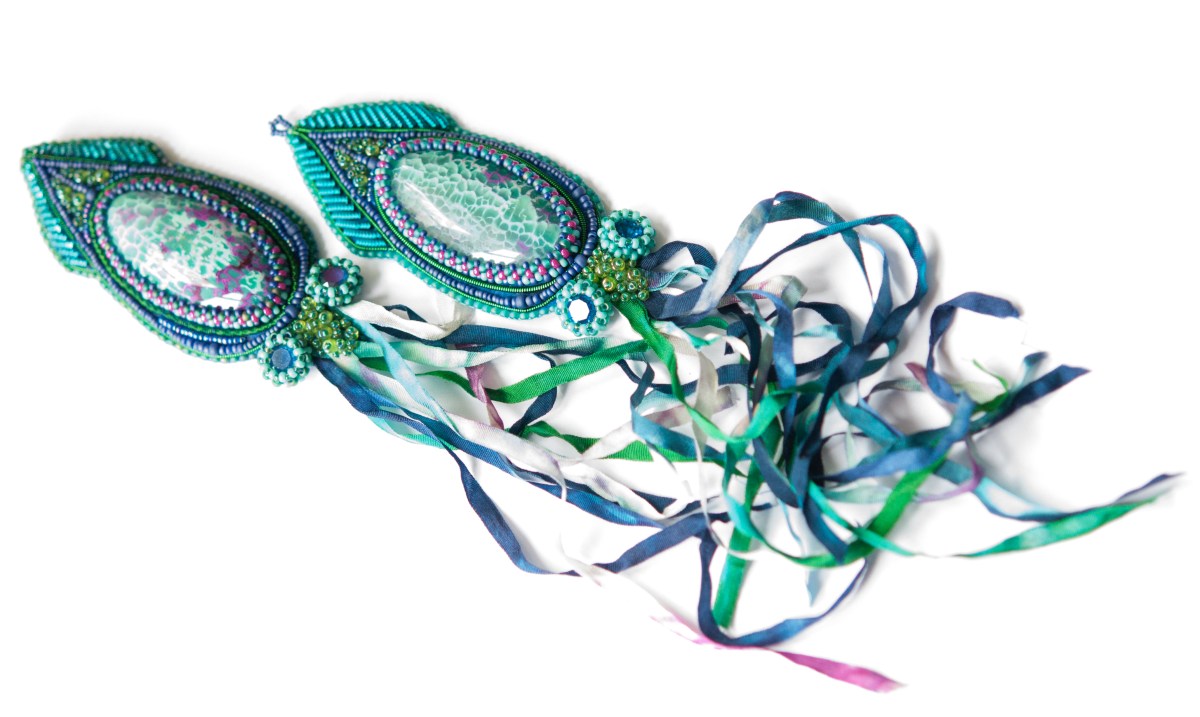
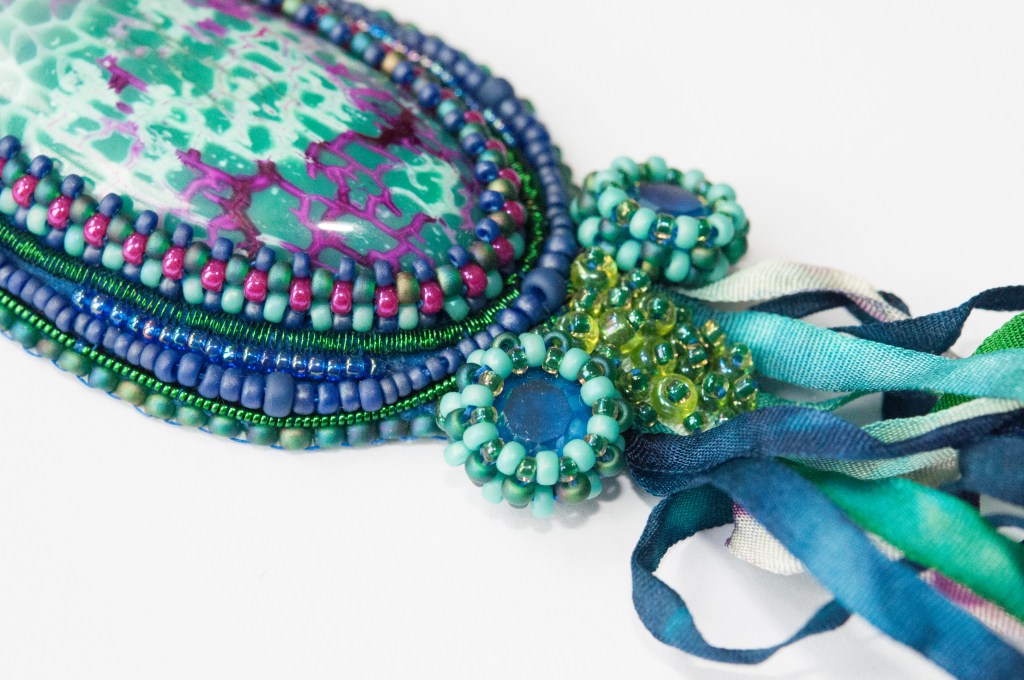
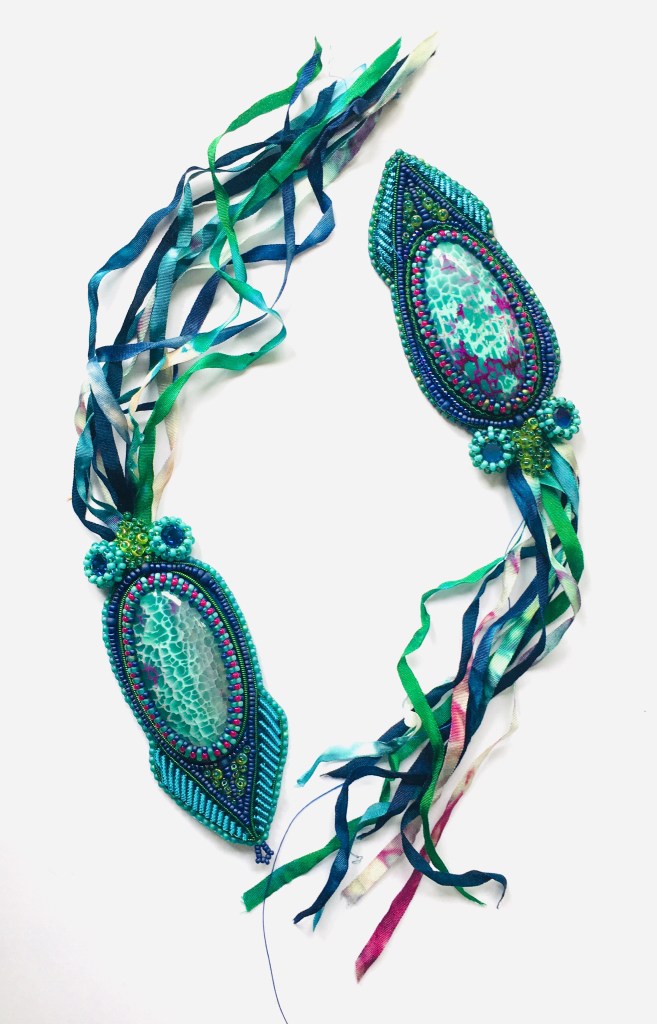
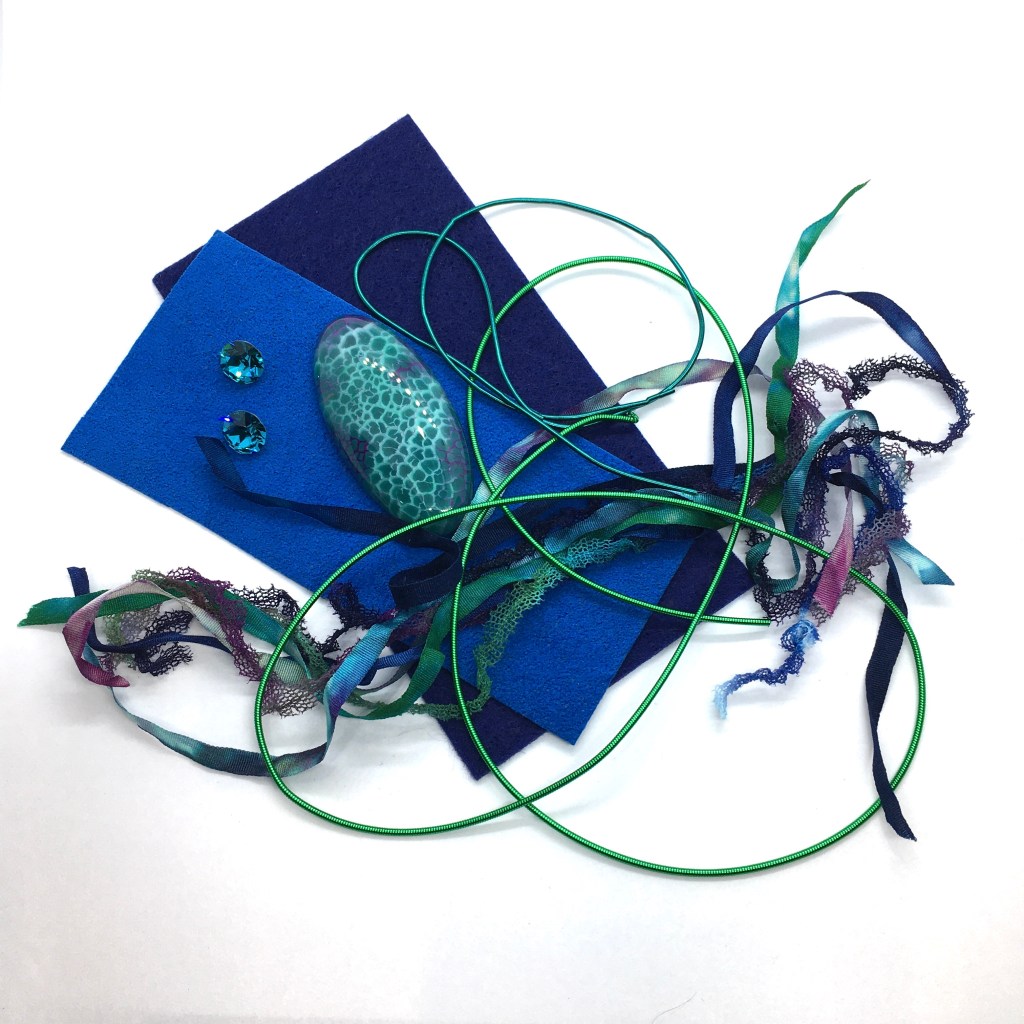
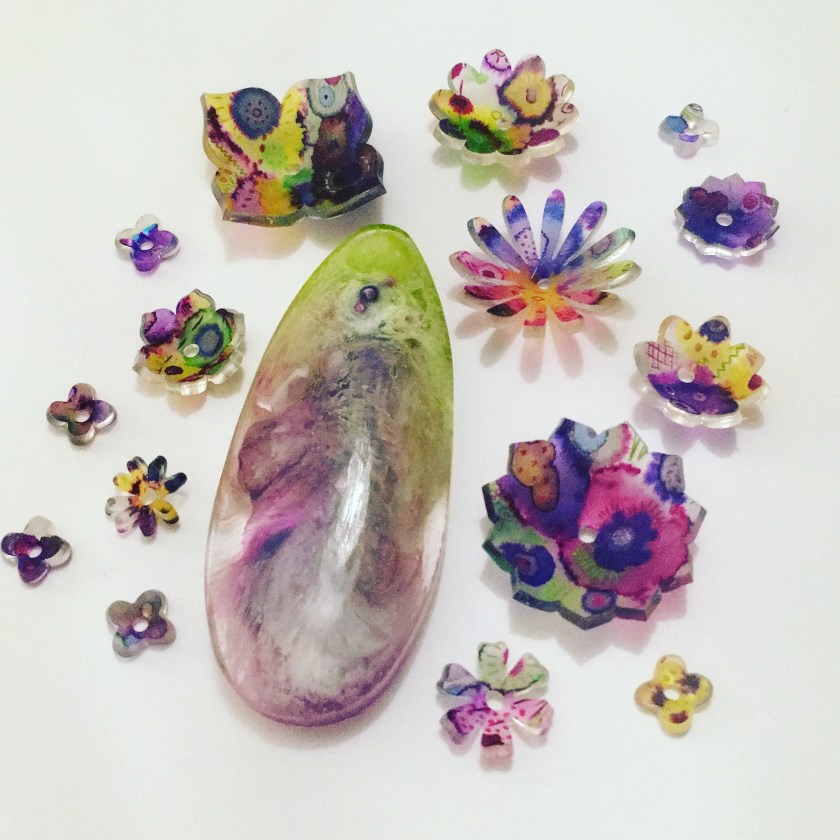
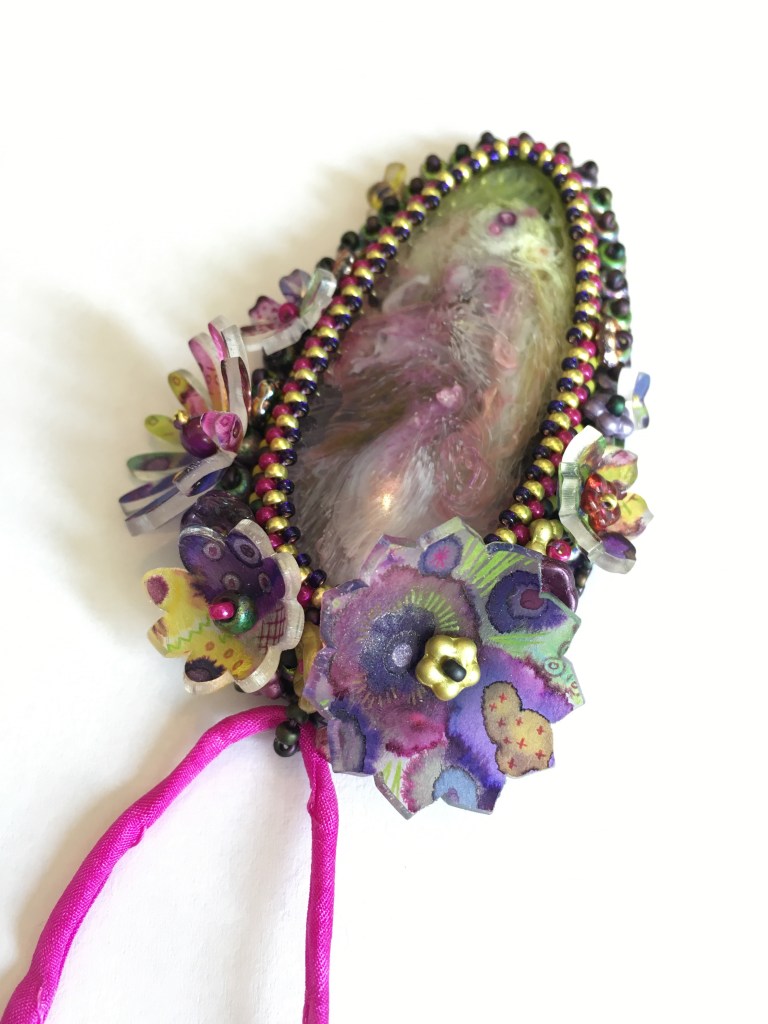
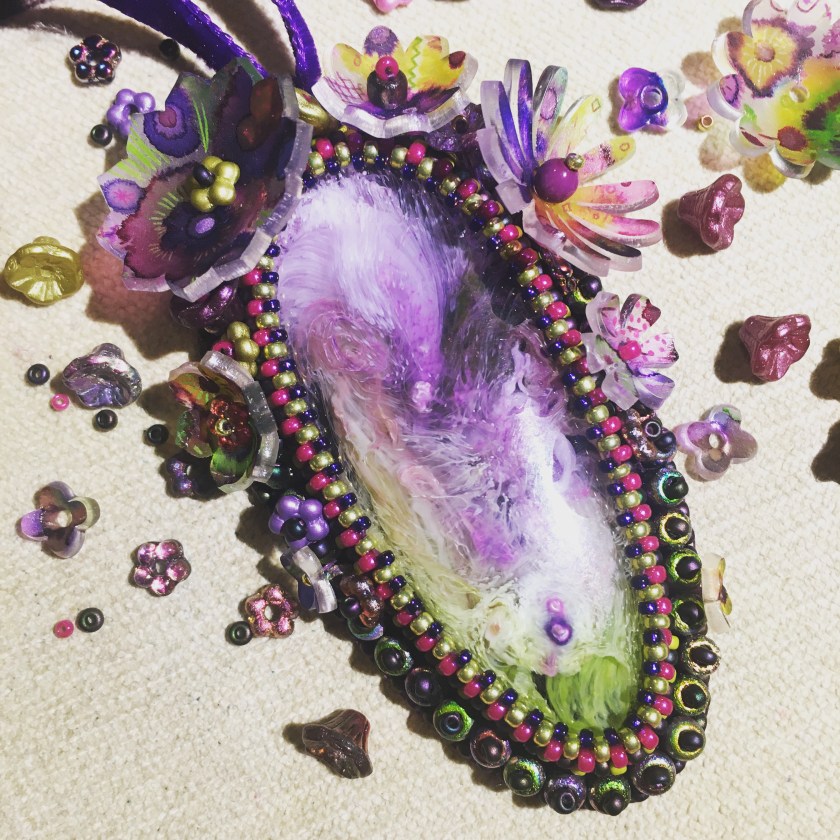
And that’s where I am now, and I think where I will stay for a bit. I’ve made a lot of shrunk beads, and learnt a lot, but finally this week I got to the point where I wanted to bead something with them. I bought an amazing petri resin cabochon from Designer Cabochons, and it arrived just as I shrank the first alcohol ink batch. So I did another batch specifically to match the cab, then made them all into a bead embroidered pendant, and I love it.
If you’d like to learn more about working with Shrinkets, please do look at Julie’s amazing website, or join the Facebook group here. And do ask me about the techniques and materials I’ve used in the comments.