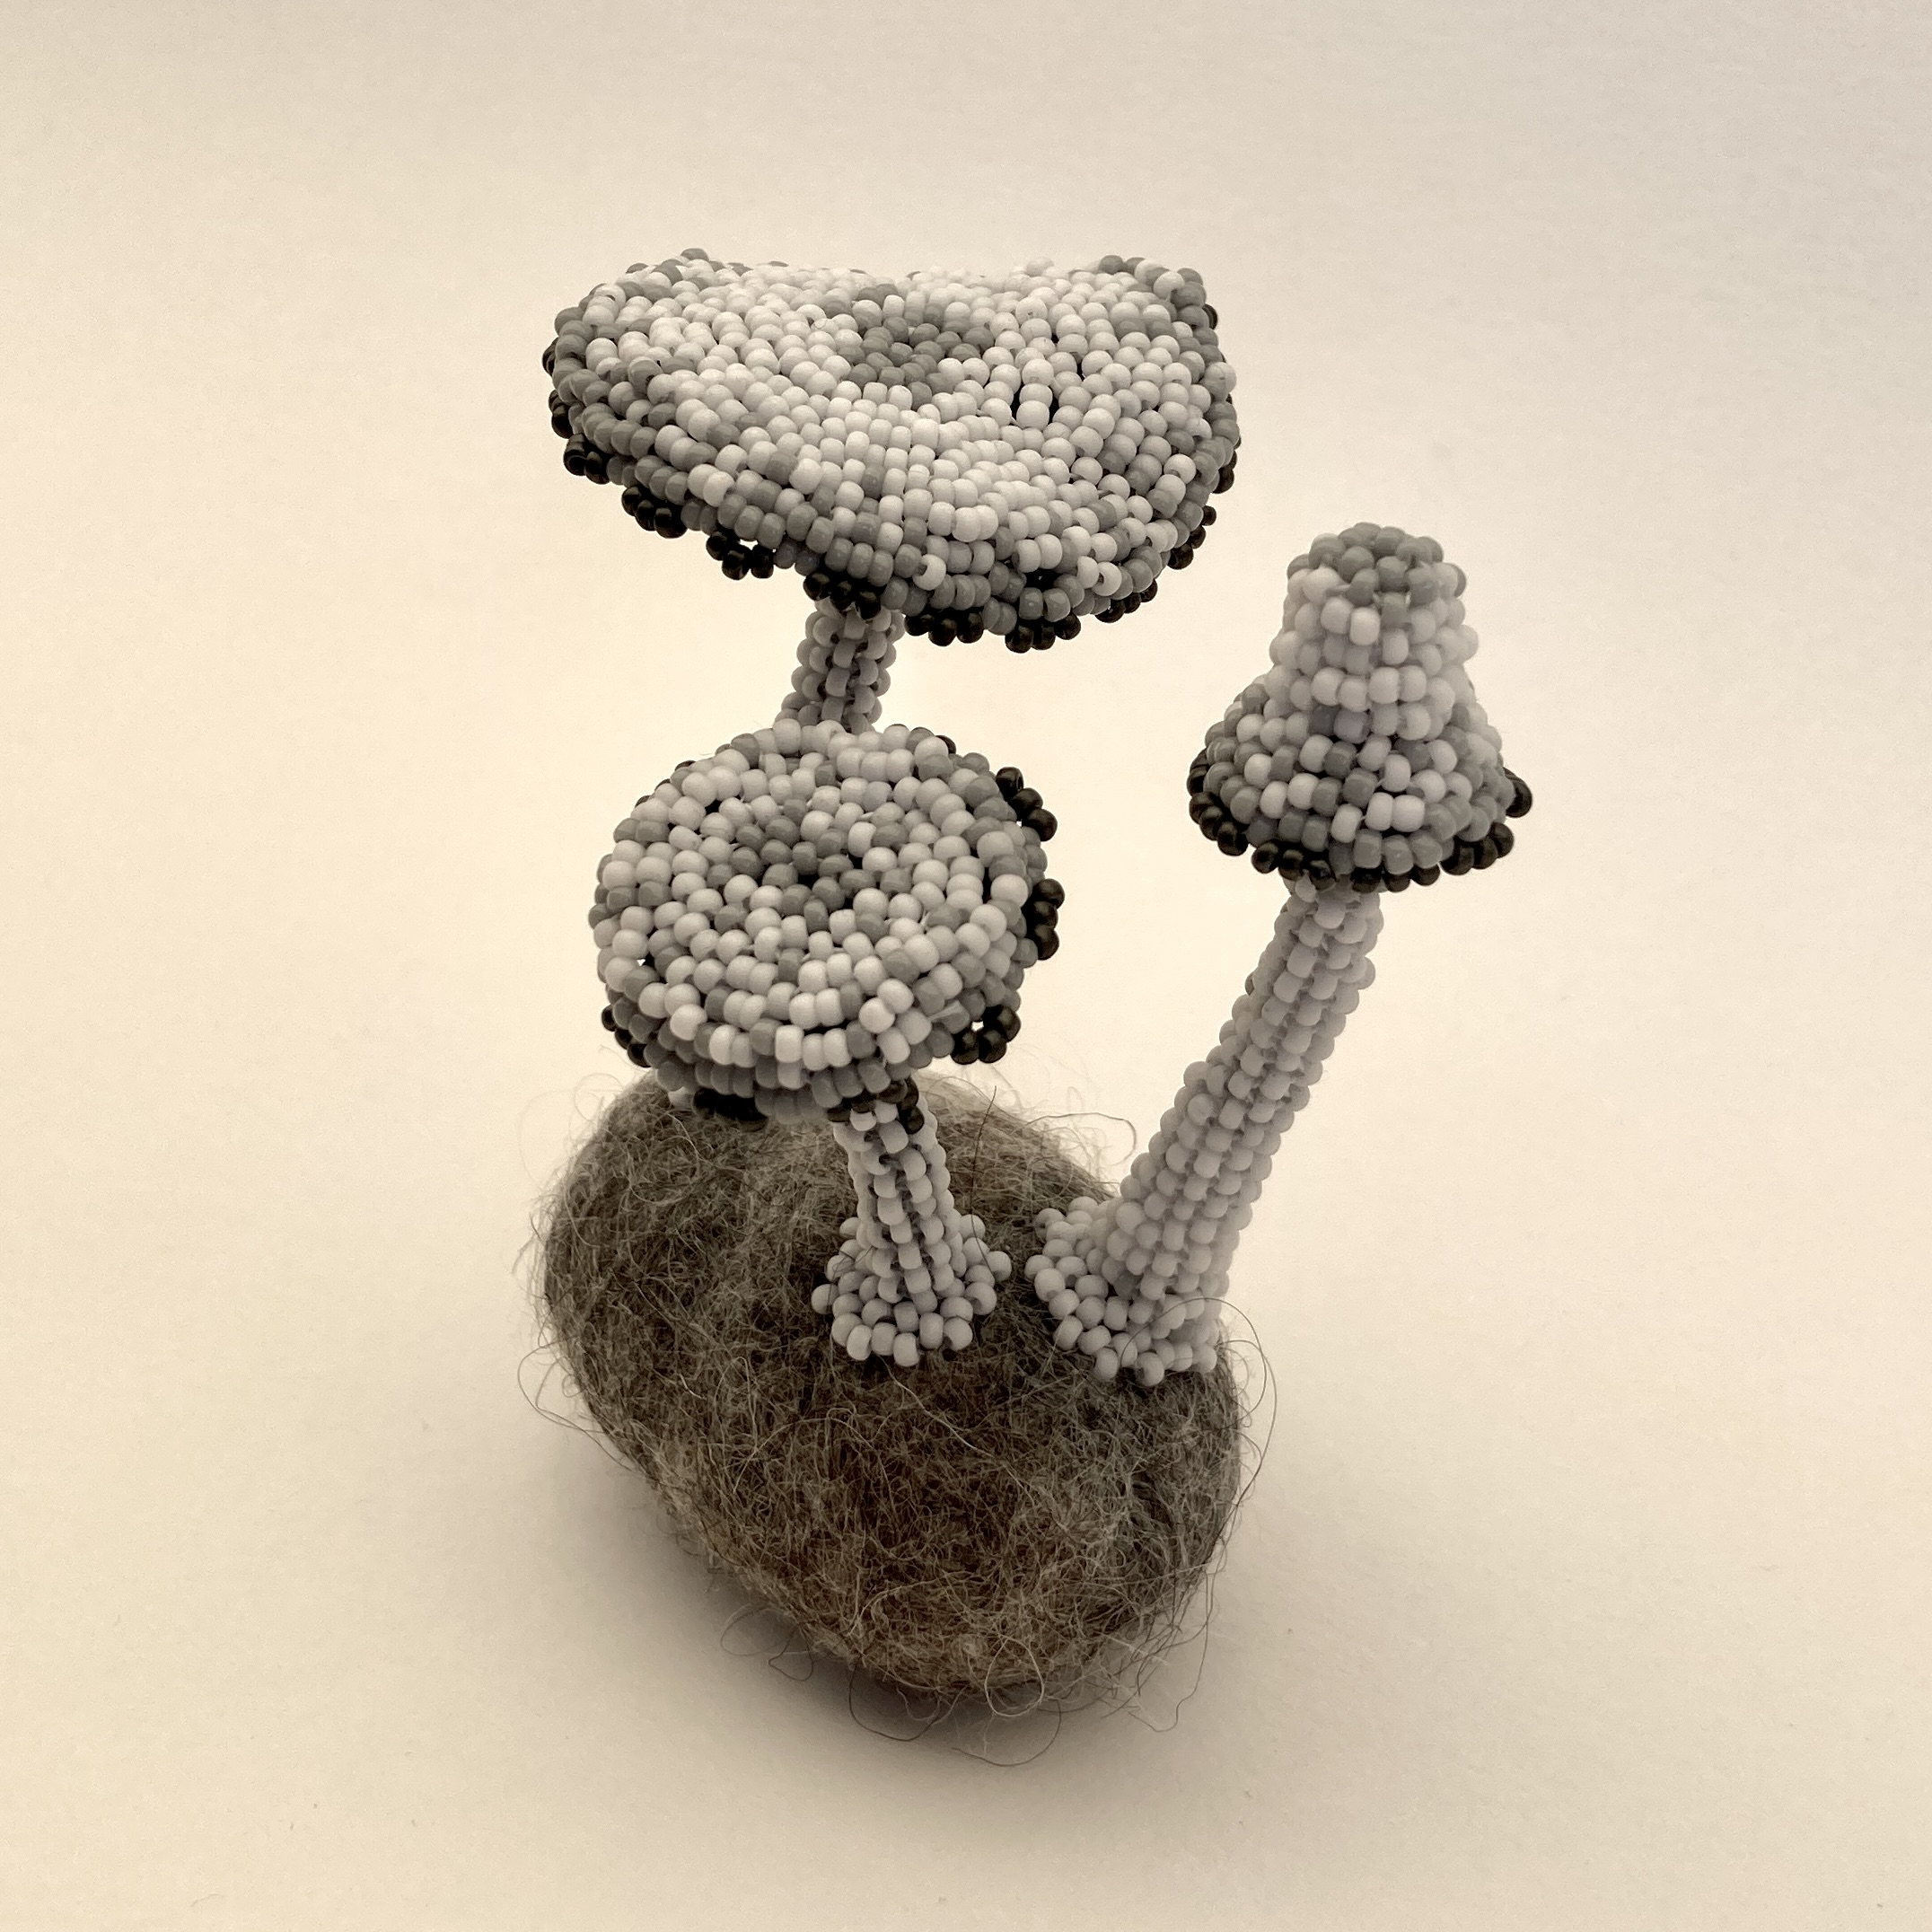
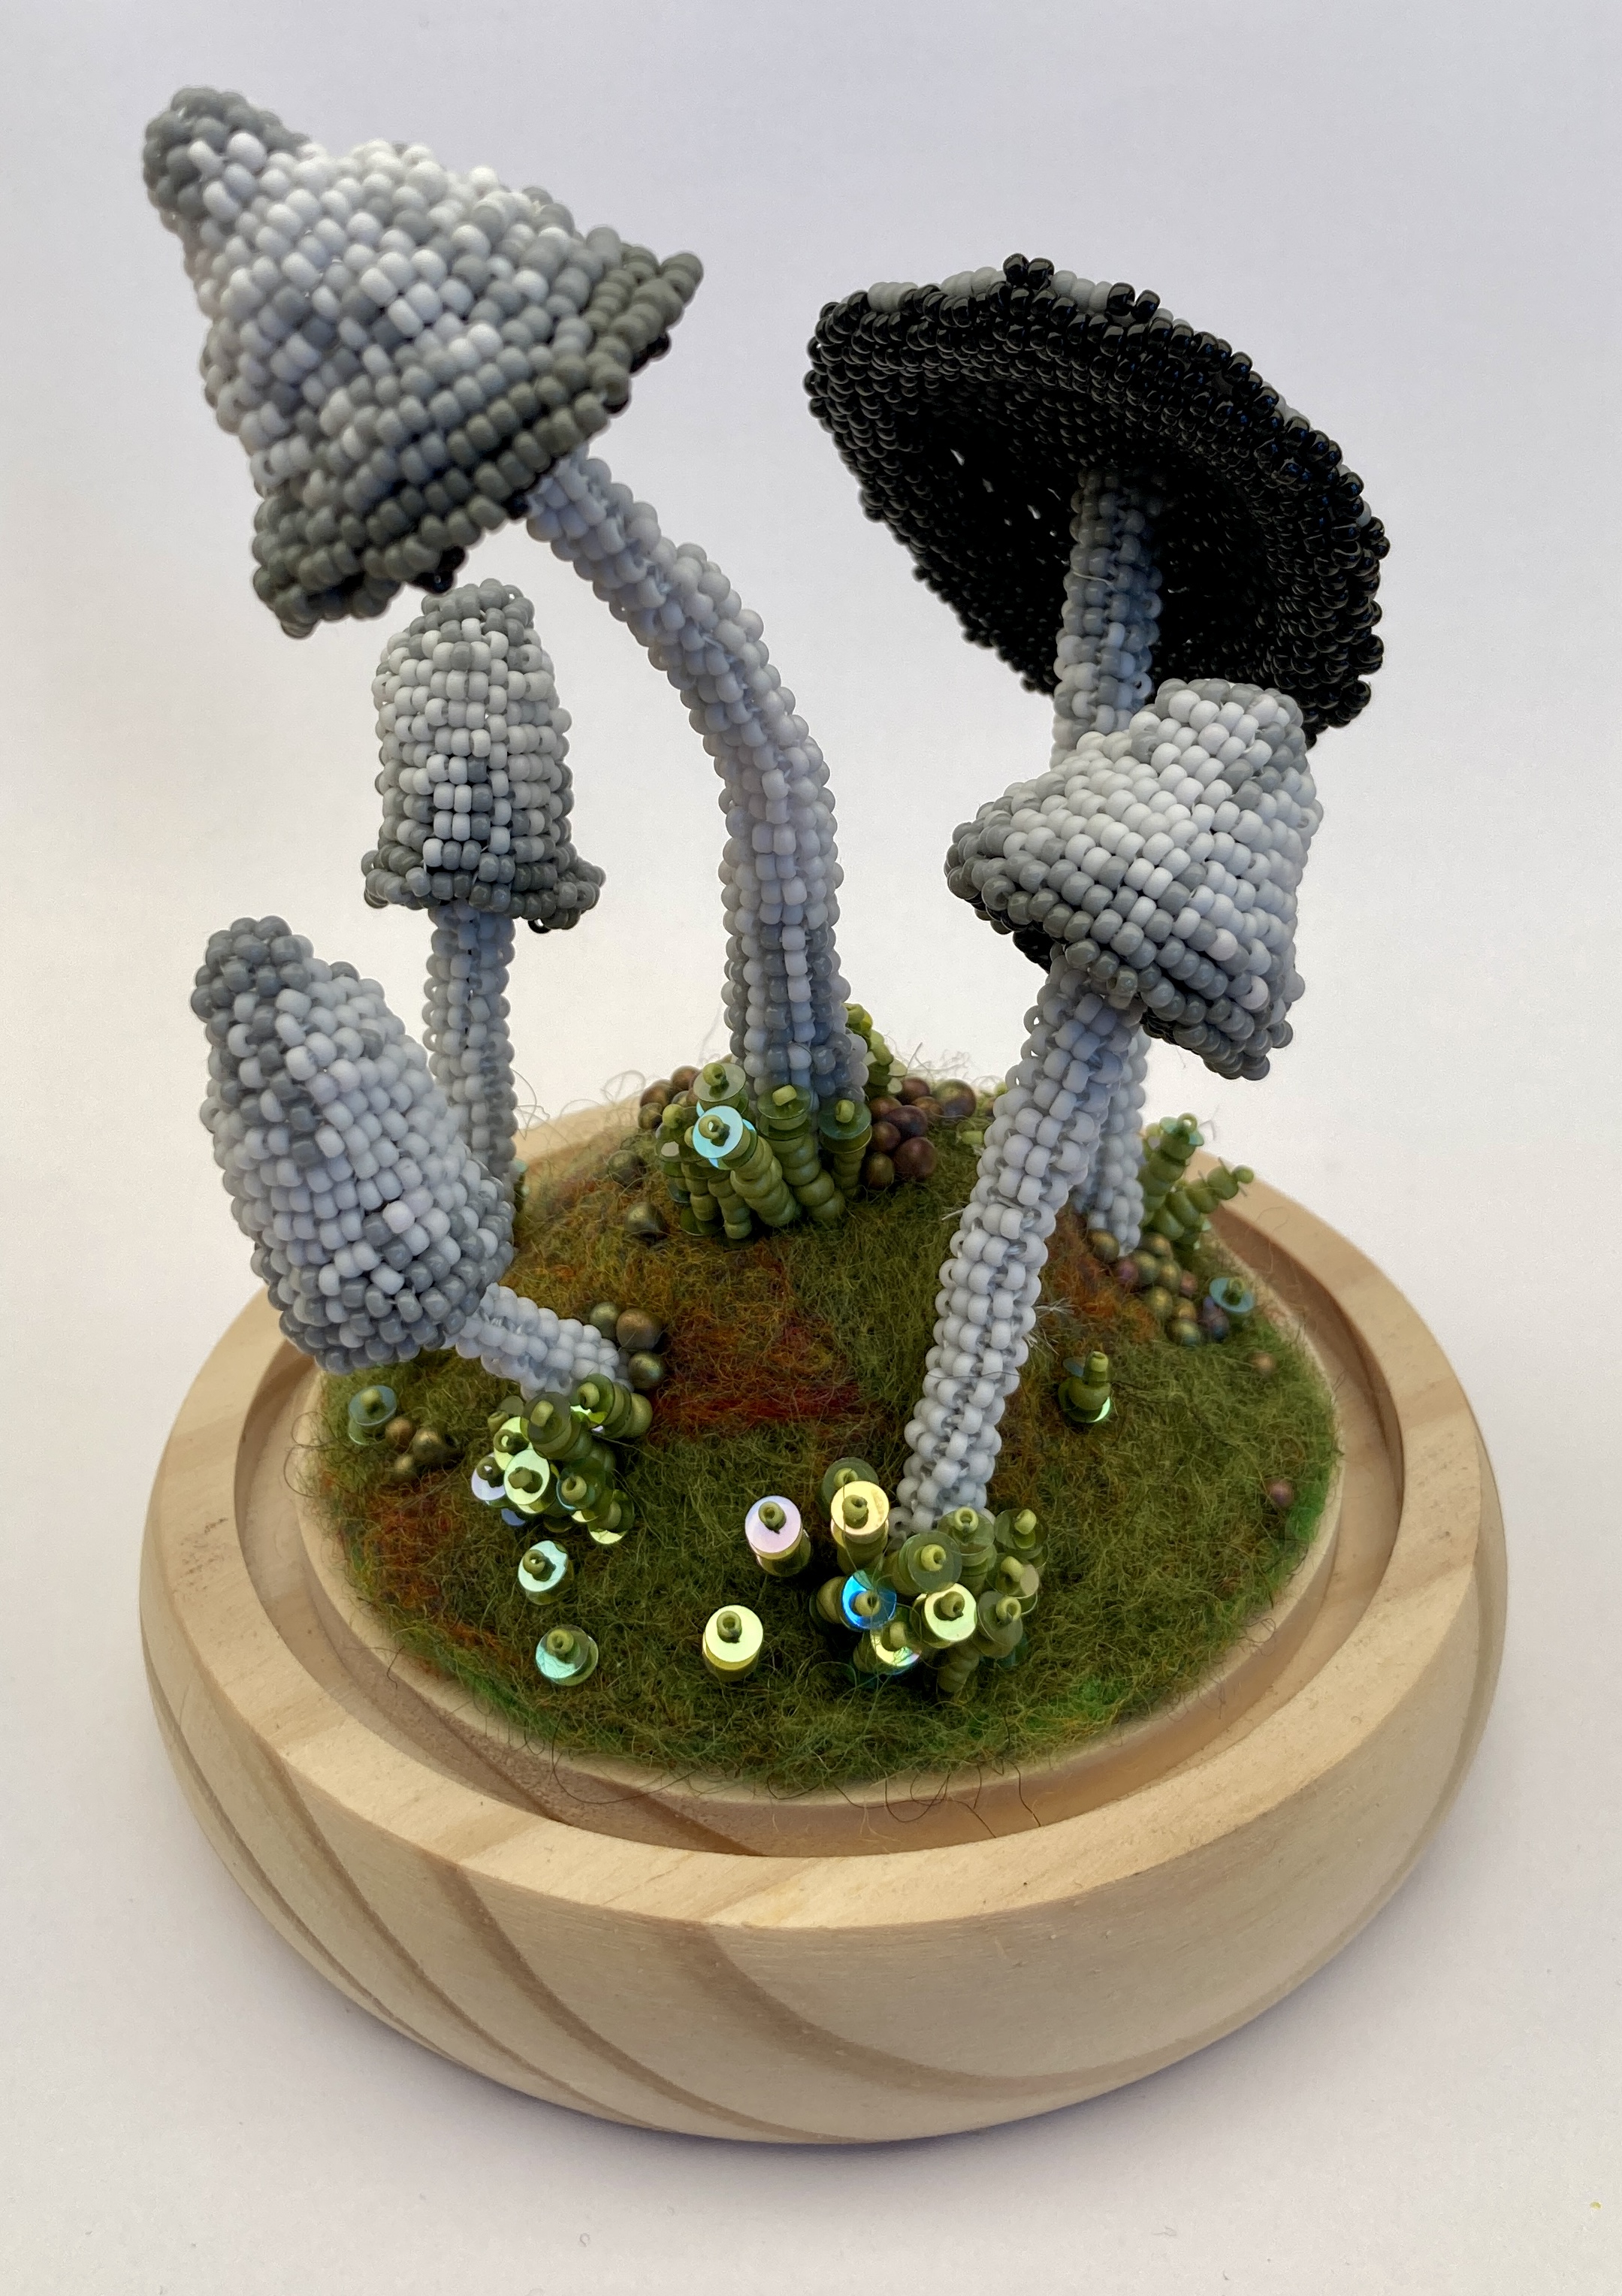
Last time I posted I mentioned that I was making some Sulphur Tuft mushrooms, and that I was putting bends into the stalks so they could be mounted vertically, as if they were growing from the surface of some cut, rotting wood. Well here they are, complete with a mossy/woody background.
The fungi themselves use my Fungi tutorial, with the tops using (left to right) options from the tutorial:
C with 4 segments, A with 4 segments, the start of a C and then less increases, a B exactly as the tutorial, another C with 4 segments.
You can find out more about adapting the basic shapes by changing the repeats on page 45 of the tutorial.
All of the stalks are based off stalk B in terms of size, but are improvised. I’ve done rather fiddly/irritating finagling to achieve the 90 degree bends and then frilled out the bases for attachments – I have an alternative idea as to how to do this next time which I’ll report back on.
The background is built up in layers – first I sketched out the finished layout and traced it onto a hard felt sheet, and marked on where would be moss, where wood and where the stalks would attach (the white marks).
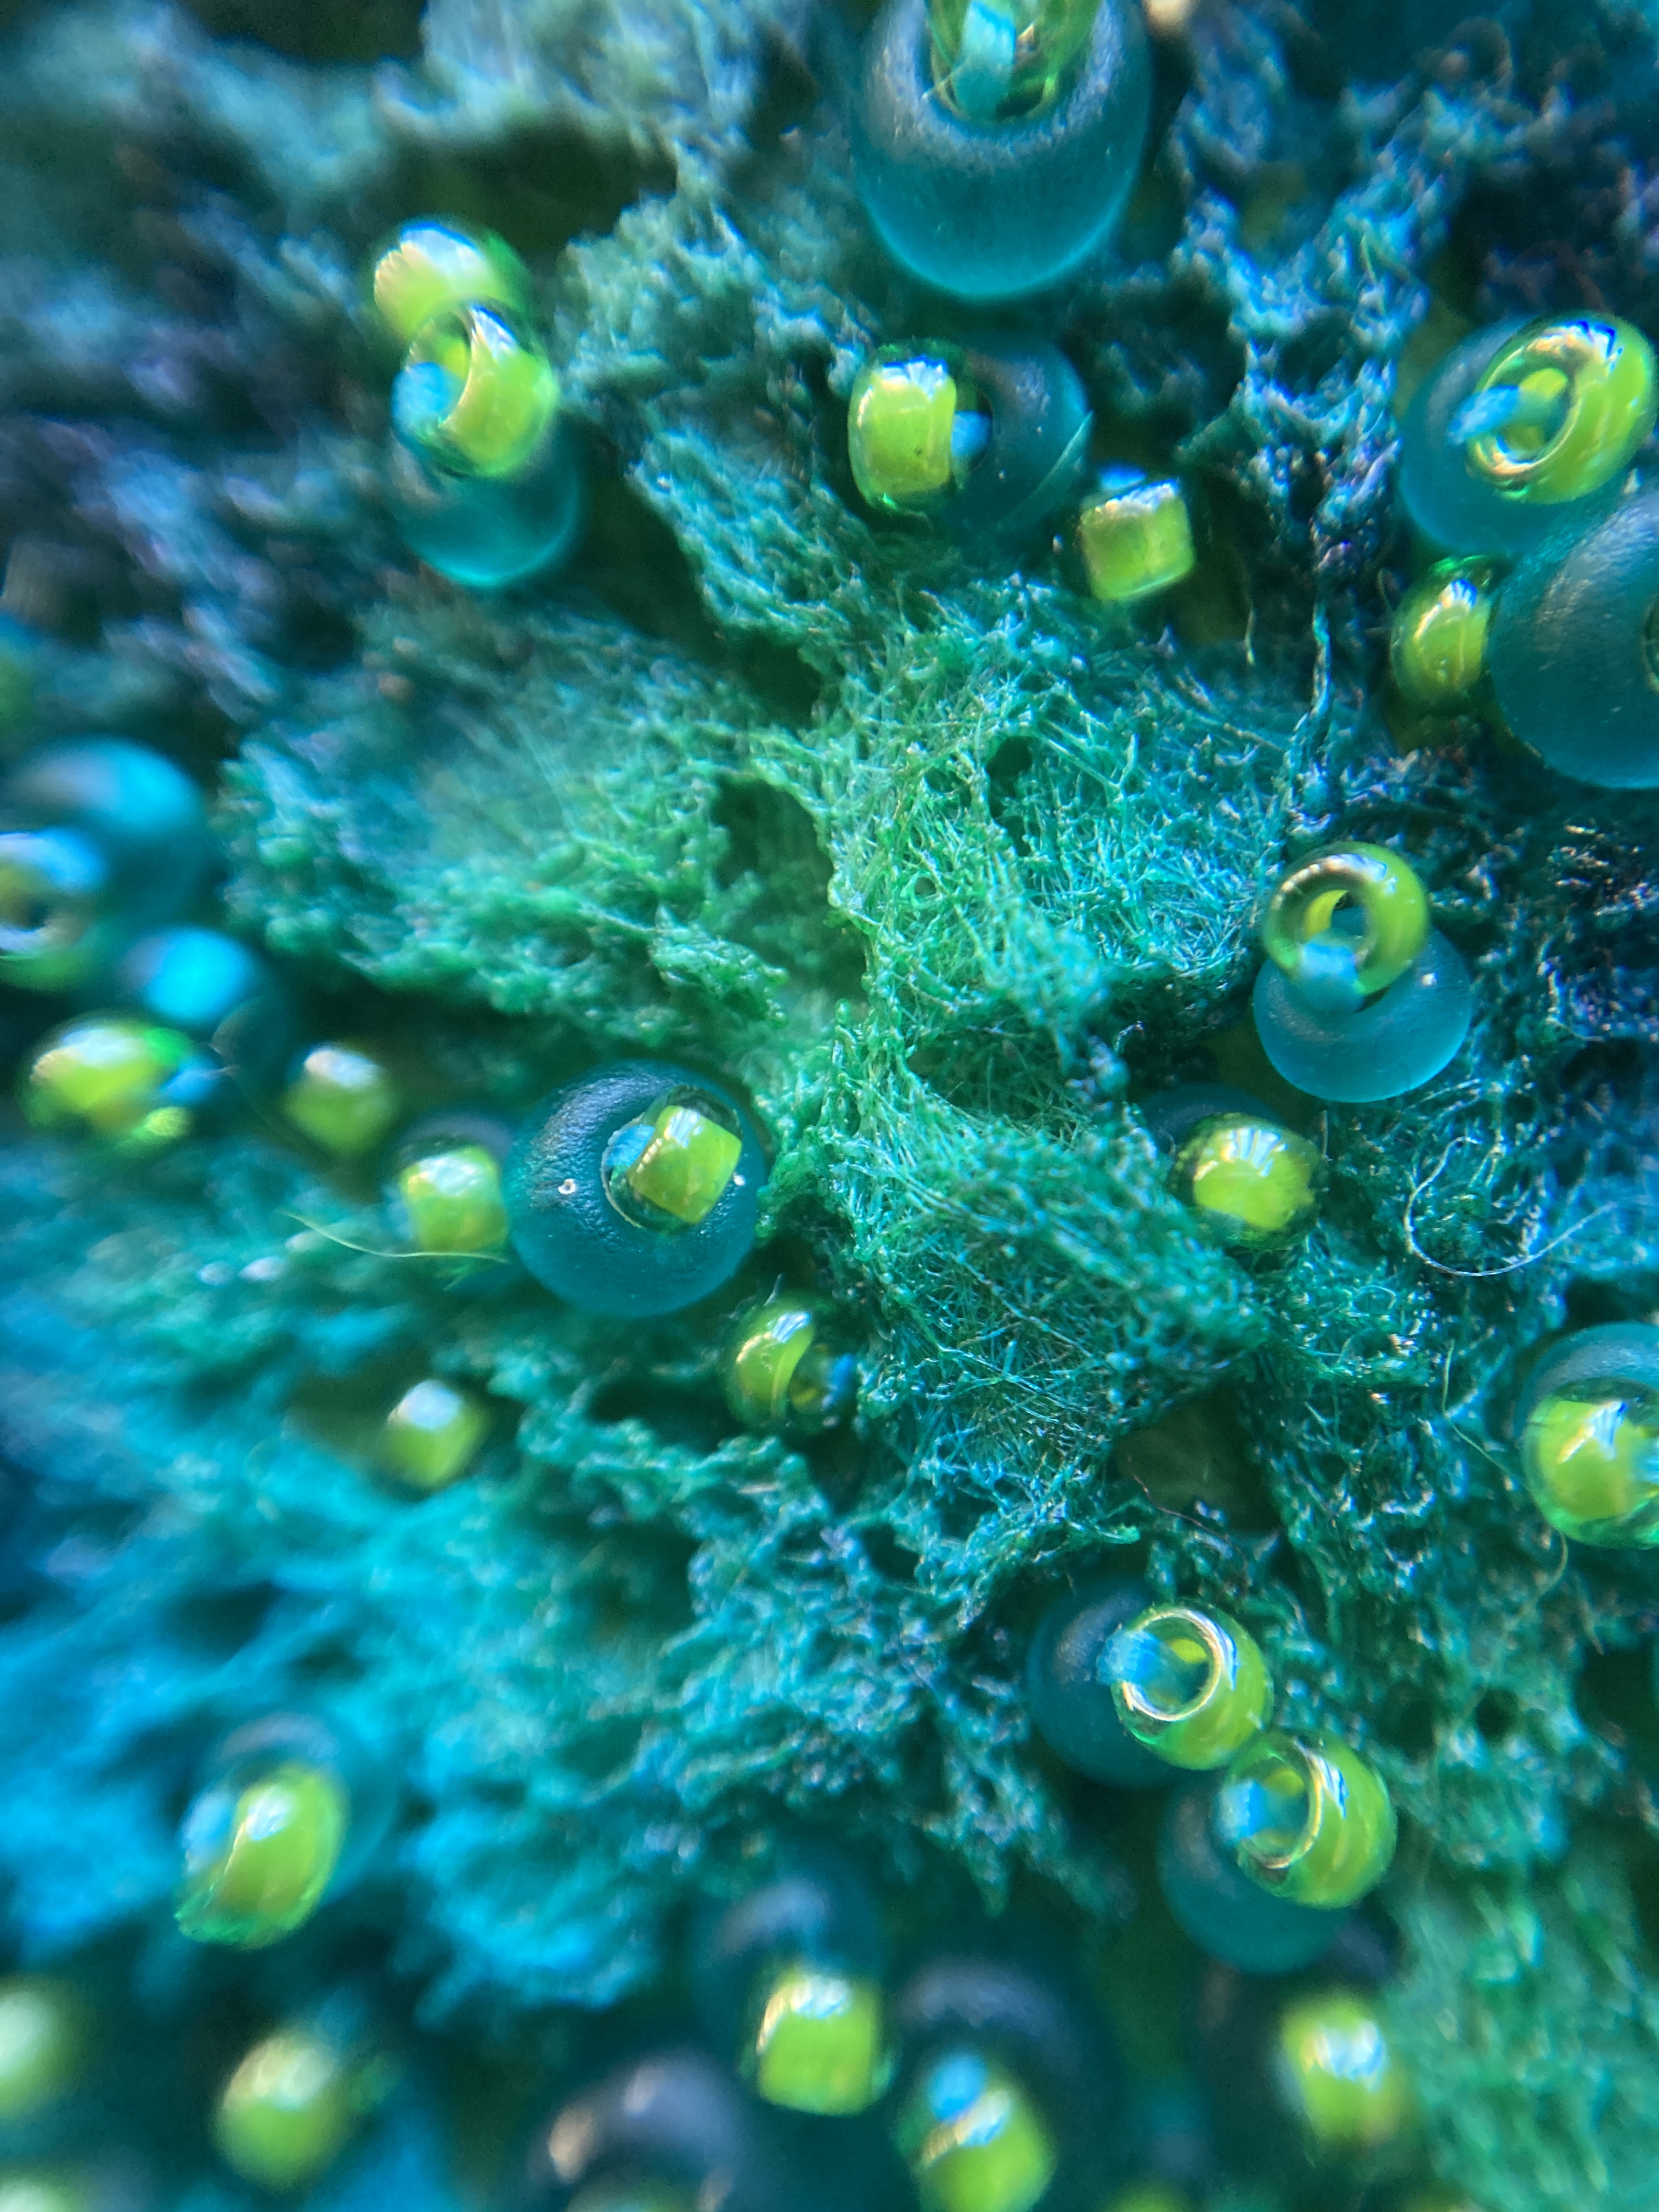
Then I made the bark using hand painted lutrador, and used a heat gun to manipulate the finished fabric. The heat effectively melts the fibres, forming holes and textured areas – the paint didn’t take well so you’ll notice it gets darker between initial layout and stitching on – I painted it a second time to make it more saturated. I also made some green tyvek bubbly bits for the moss at this point but decided not to include them in the final piece – they were a bit too dominant (but I’ll use them in an alternative piece later):
At this point I tacked the hard felt onto some tulle stretched over an embroidery frame – this allows me to work two handed, and better maintains tension for the embroidered sections – both really helpful for doing stitches like french knots later on. The lutrador was then stitched in place, and next the moss. I have a wonderful skein of hand spun art yarn from Hope Jacare which looks exactly like moss, so that was a very straightforward foundation, simply couched onto the base:
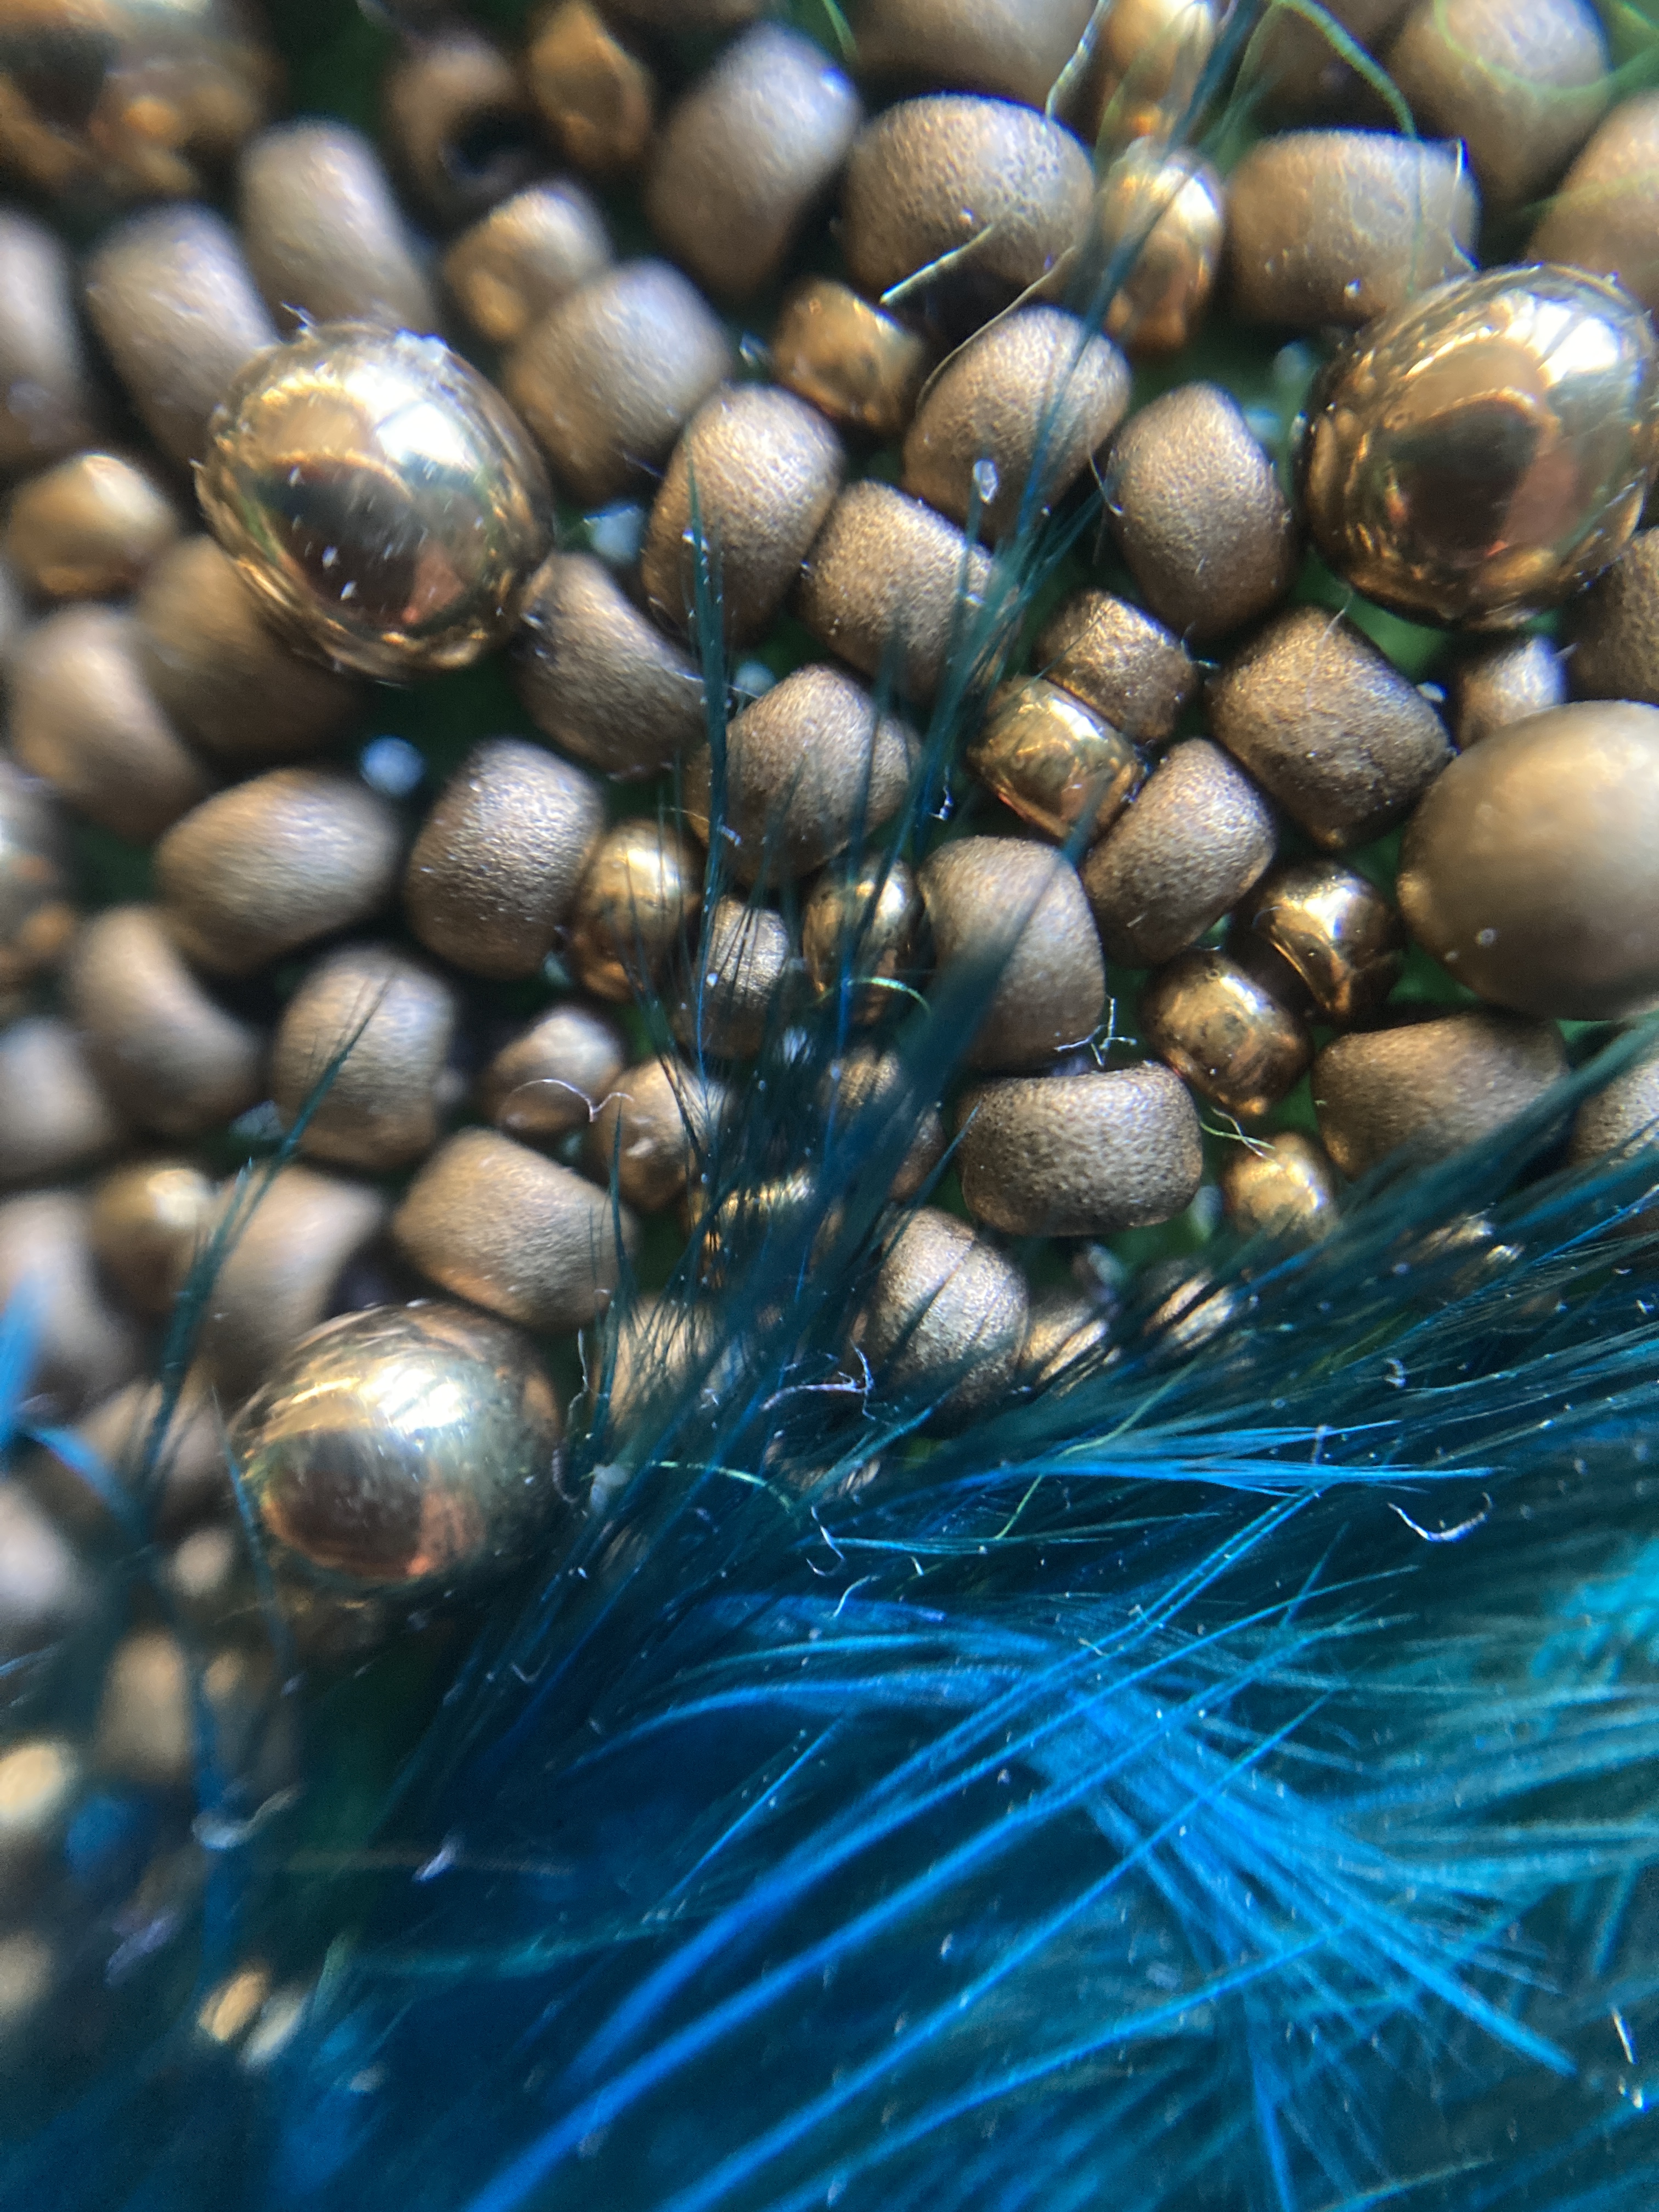
Next the bead embroidery – Miyuki drops in two sizes (2.8mm and 3.4mm) – standard go to for me in nature inspired pieces; larger drops which I bought on my Czech trip, stacked sequins & seed beads, then french knots using some silk thread (again from Hope Jacare). Finally I added more french knots using more hand dyed threads to the bark areas (I had originally planned to bead them but the scattering of french knots seemed to work better – a suggestion of lichen?):
Finally each mushroom was attached by weaving through the stalk base, and the whole piece mounted on black card (I had sized this to use the white mount provided in the frame, but I got the sizing wrong and then realised that black worked best anyway). The frame is a Sanahed from Ikea – a good depth and the ‘all black’ effect is surprisingly impactful.
One tip on using the Sanahed – as it doesn’t have anti-reflective glass (it’s very shiny perspex) – pop the perspex out to take pictures as otherwise you’ll mainly see yourself!
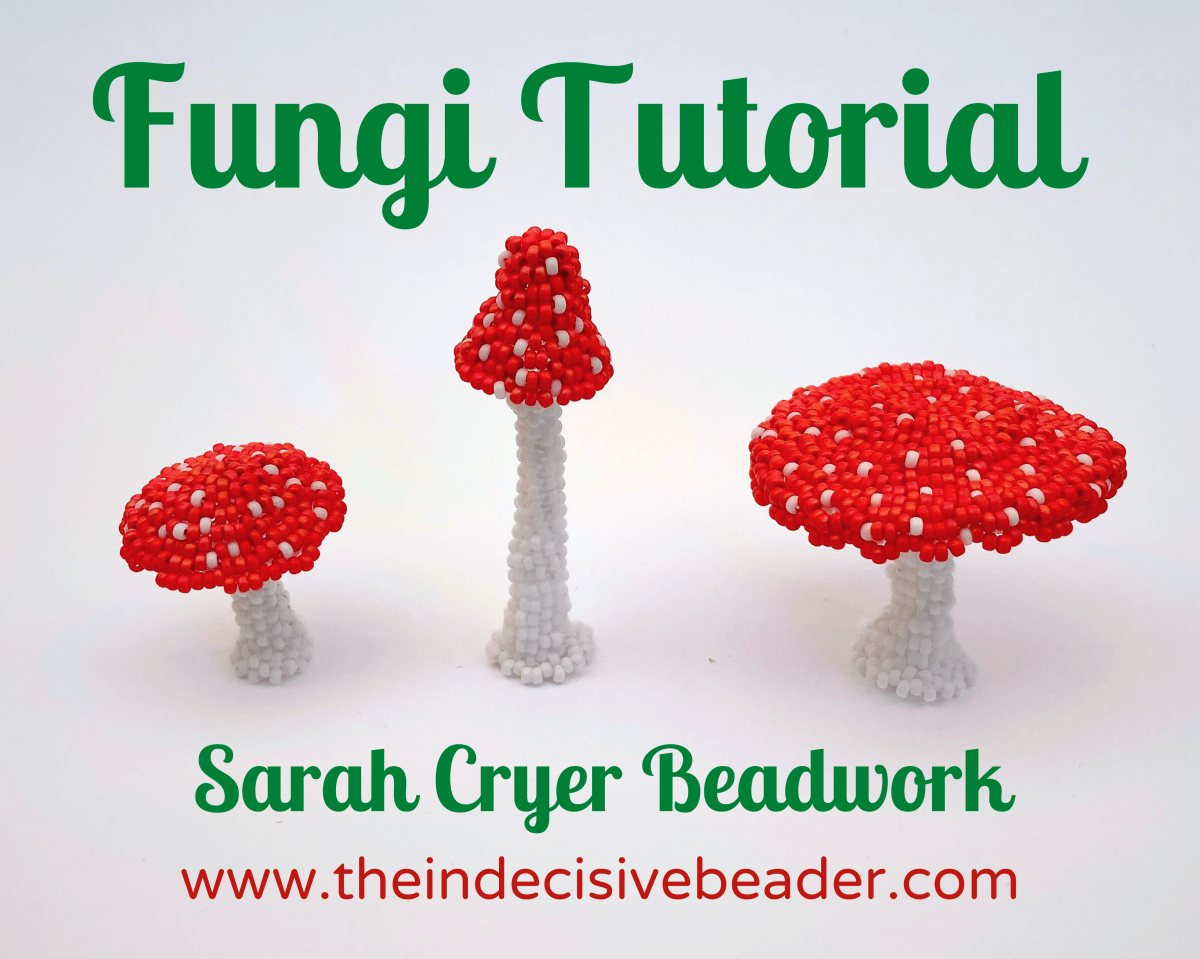
If you’d like to make your own Fungi and are an advanced beadweaver, then here are the tutorial details below. If you don’t beadweave, but would like to own some beadwoven fungi, contact me via the ‘contact us’ form in the right sidebar to see if I have any for sale.
The tutorial has fully stepped out instructions for three specific mushrooms – the flat top A, the pointy B and then slightly briefer instructions for a smaller flat C.
In the Variations section there are charts to convert A, B & C to fabulous shaggy Inkcaps with tips for expanding that set further, and colouring in pages with blank charts for your own patterns. There are also tips for altering key elements of the size or shape for the flat or pointy, and for changing the length or shape of the stems – these are not fully stepped out, instead they are guidelines so you can understand how to create your own unique, naturalistic forms, aided by the Gallery section which shows all of my versions plus some larger and more complex related pieces.
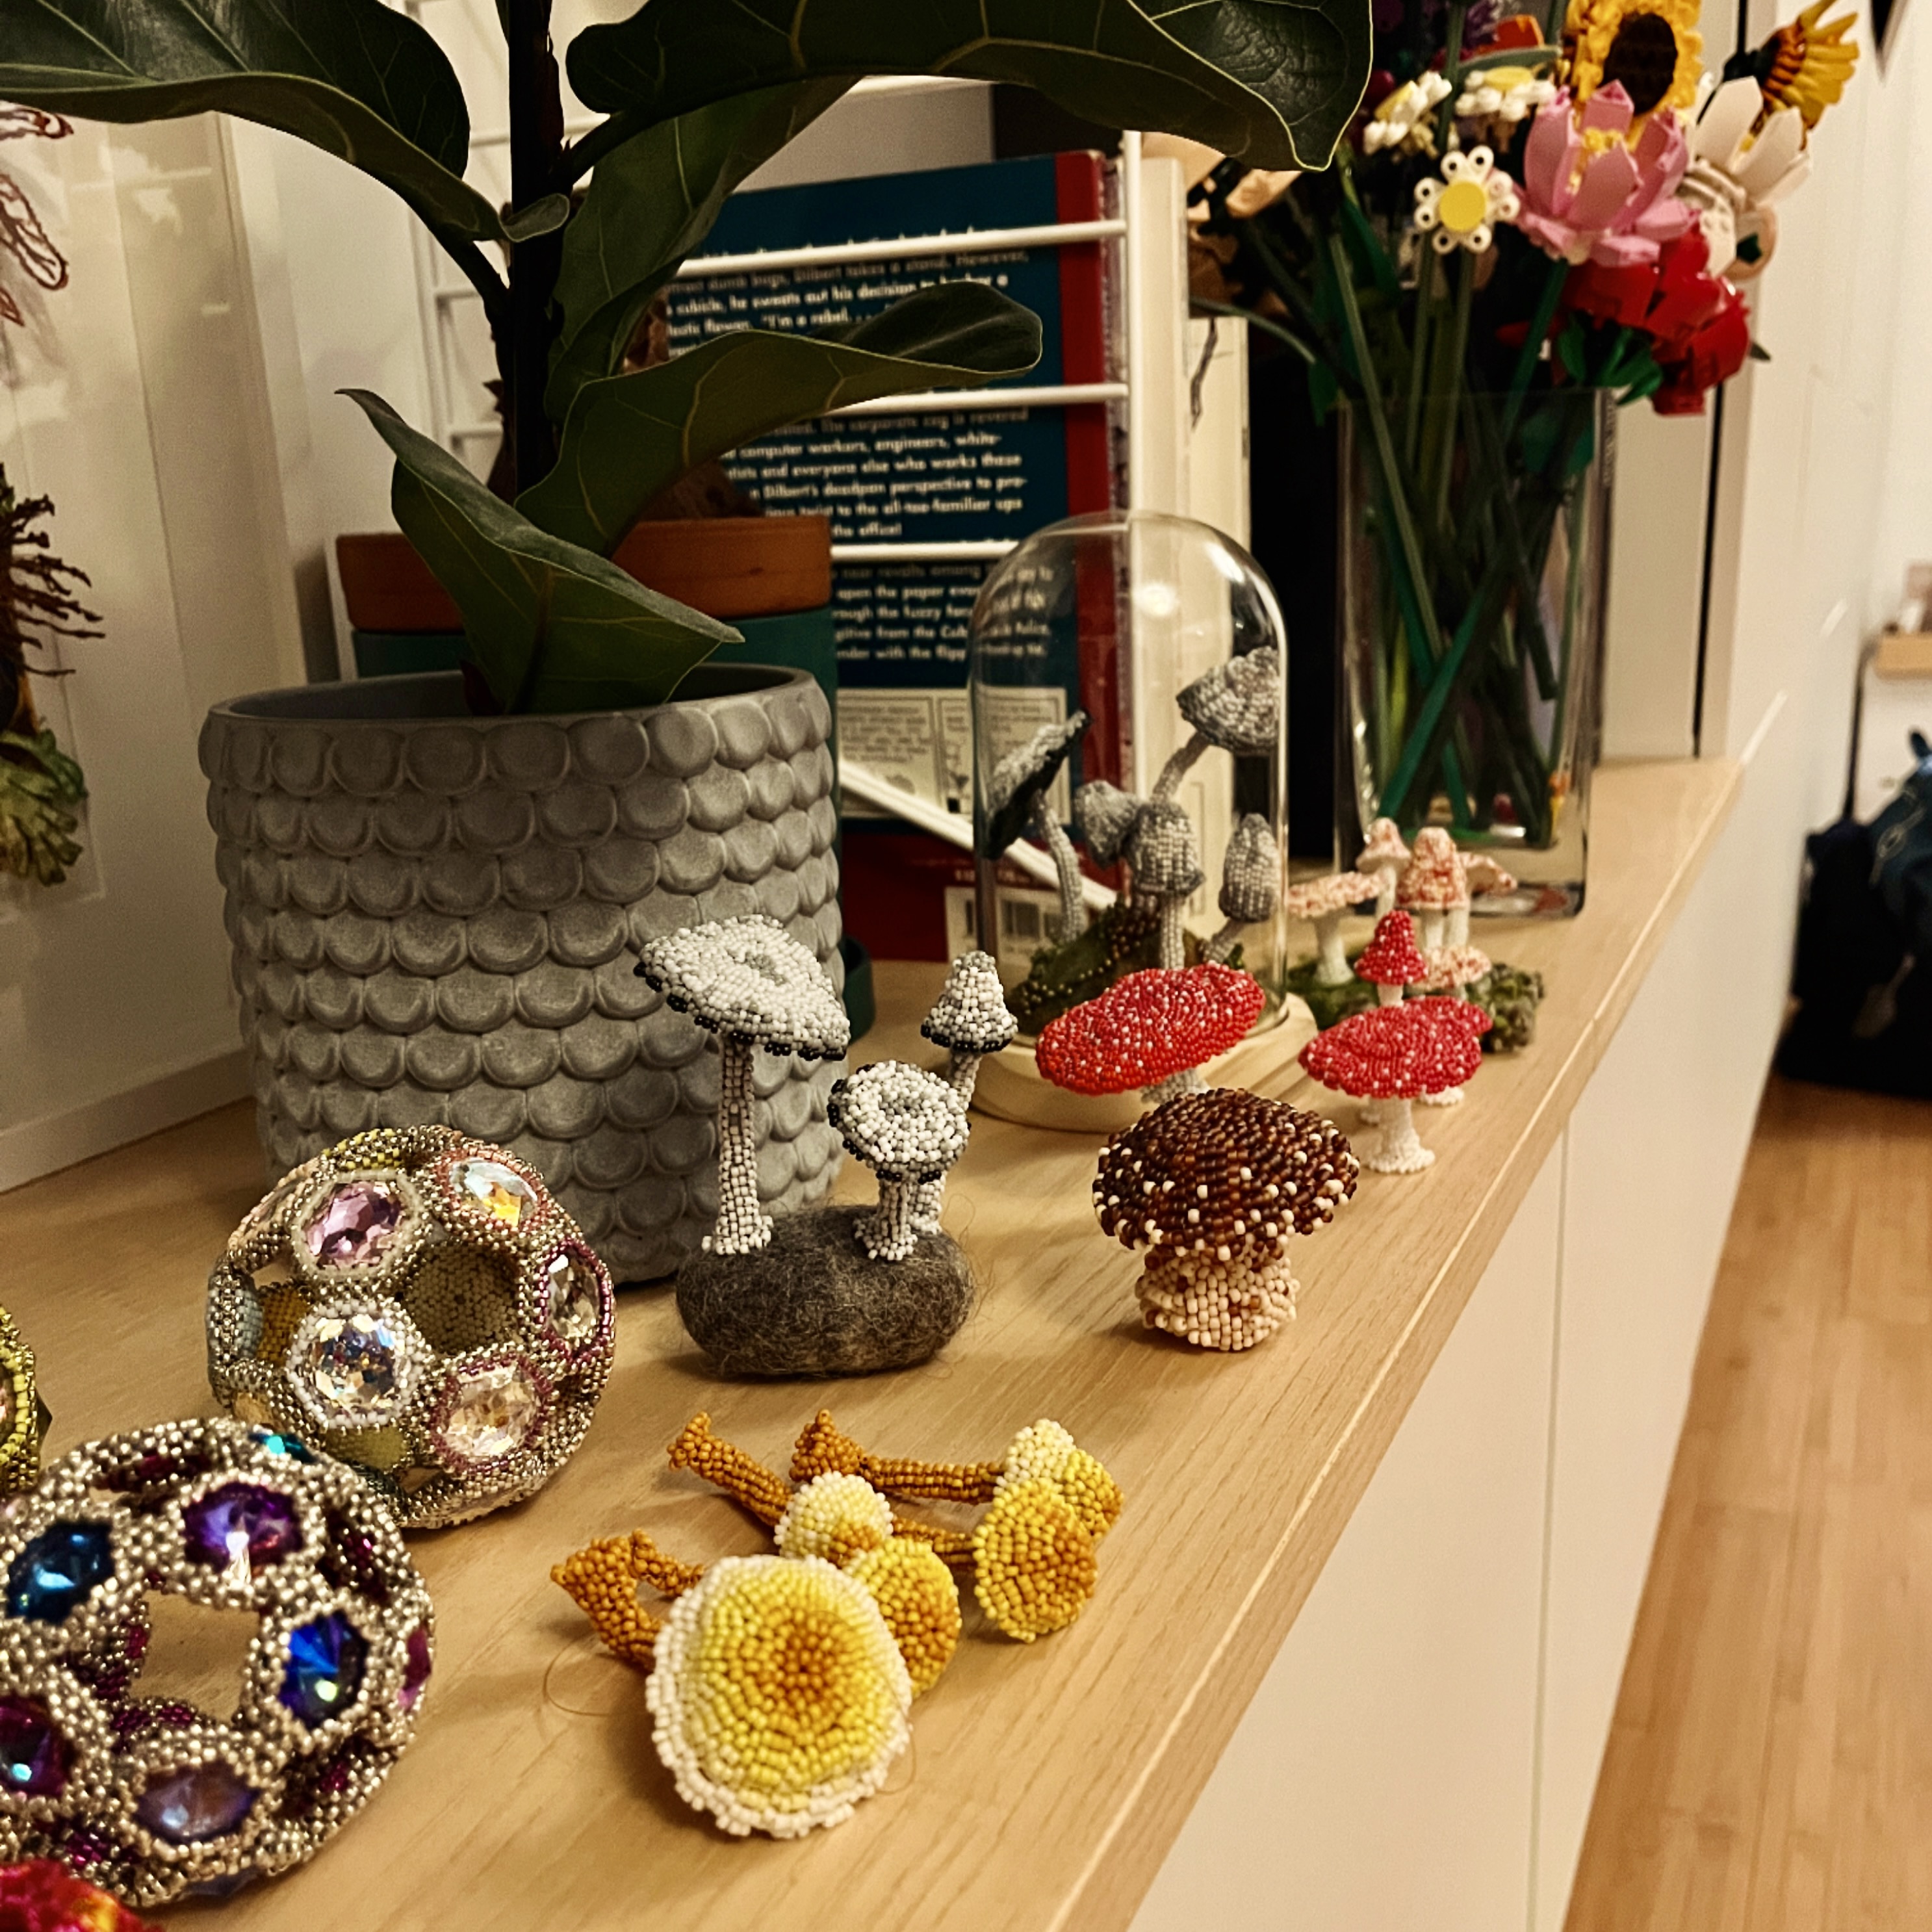
This trio are based on the Ink Cap mushroom, and there are charts and instructions for using the tutorial methods to make these on p47. They’re mounted on a lovely wet felted pebble.
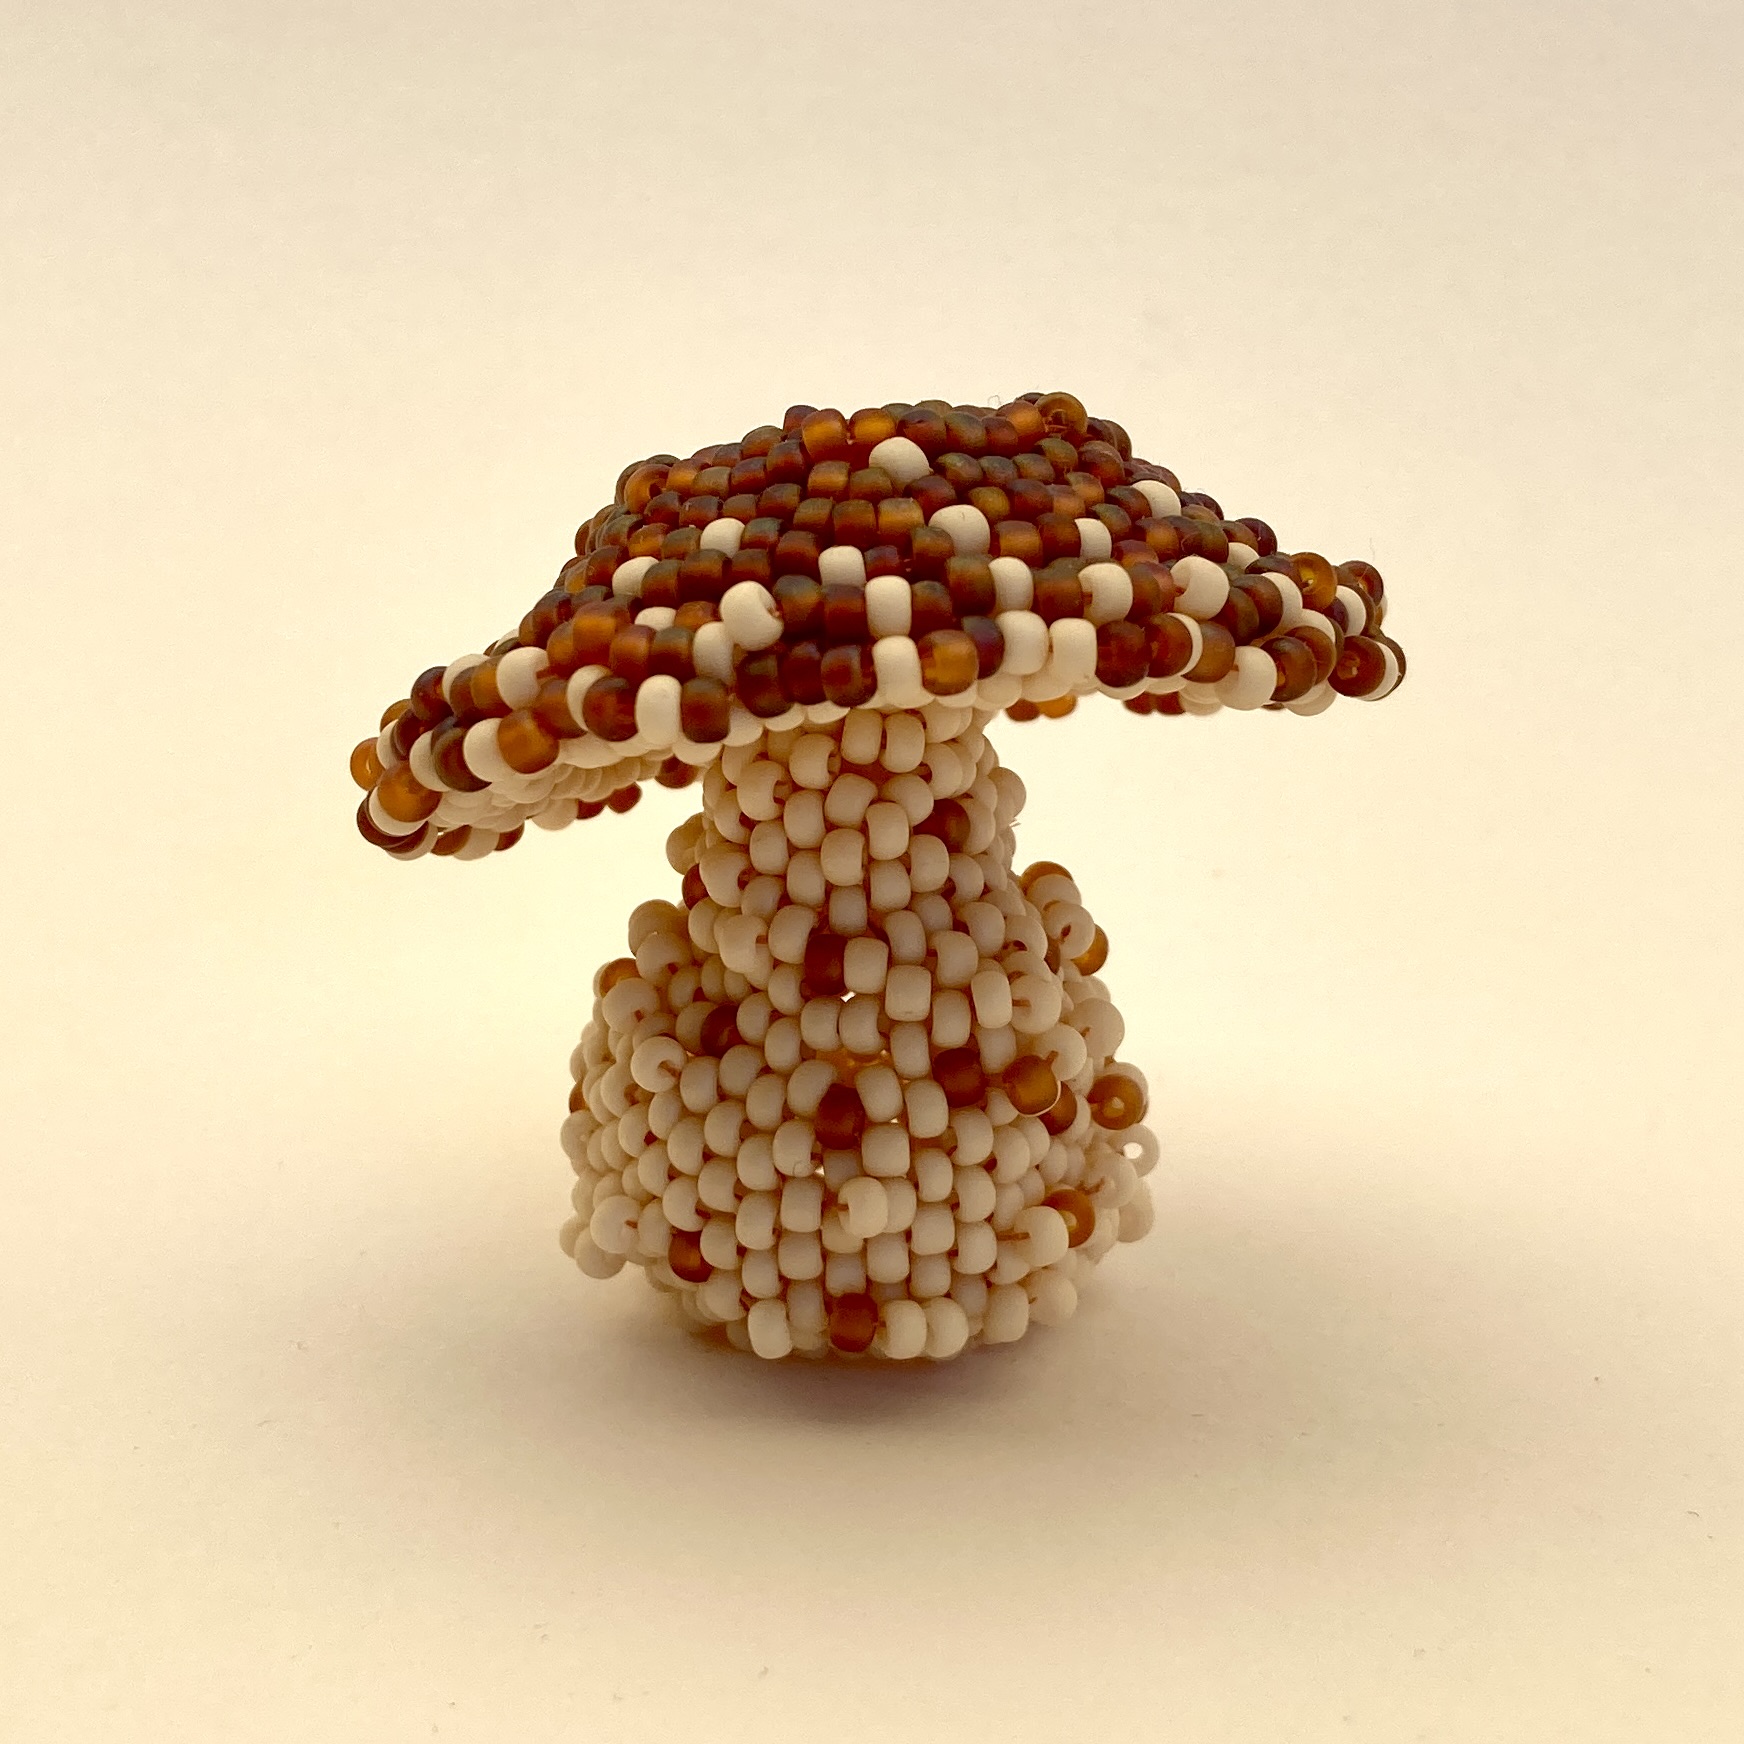
This little one is actually not that little, as it was made with size 8 seeds instead of the usual size 11. The top is a cone (4 repeat) version of the small flat top (notes on p45), with a fattened stalk made by adding increases from around row 5 of the stalk, then decreasing when it was nearly long enough to give a lovely fat belly. The shaping changes ever so slightly with 8s – they’re proportionally slightly wider than 11s, it’s really marginal but enough to make the 5 repeat flat tops too wavy and structurally unsound, so the having the 4 repeat cone option is great here.
As you can see from the collection on display here with a couple of my Orbits, I’ve now made quite a lot of these, and the range is still growing. In the foreground here you can see my ombre yellow ‘cone’ samples from the tutorial – Sulphur Tufts. I’m now making a couple more of these and am working on introducing bends into the stalks to allow them to be mounted on a vertical surface, as if growing from a cut log in the wild. More on that soon.
Last Autumn I visited the Knitting & Stitching Show at Alexandra Palace, and spent some time talking to the lovely Bev Caleno, a textile artist. I came away with a kit for a rock pool, which I’ve since made, but some of Bev’s other works with fabric fungi also intrigued me. When I made my Recycling box some years back I’d tried to add some beadwoven mushrooms to the top, but the scale was wrong and to some extent the box was too abstract for such literal forms. I put them away and promptly forgot about them. But Bev’s pieces reminded me of that attempt, and some time later I decided to have another go. This time I would go bigger, working pretty much life size, and the results after some trial and error were a series of unique sculptures. I was super pleased with them but every stitch, every row had been created individually – no two neighbouring stitches were the same, and there was no way that they were ever going to be suitable for tutorials. So that was that – I had some fantastic art pieces which I was really pleased with, and I was happy that they were unique.
Fast forward to our summer holiday this year, and whilst packing for our epic Interrailing trip (Brussels, Cologne, Hamburg, Copenhagen, Berlin & Amsterdam) I decided to take just size 11 seeds with me in a small range of colours. I’d loved the purity of only working with one size of beads on the sculptures, and wanted to repeat that with some new forms – but what to make? Well the answer surprised me – my creative brain decided that some smaller, simpler mushrooms were worth a try – could they in fact be simplified so that each row was normal repeated patterns of beads that I would actually be able to write up (and that a beader would be able to follow without loosing their marbles)? And thankfully the answer was at least partially ‘yes’ – the top parts absolutely could be simplified. The stalks however could not – as soon as I made them regular they looked completely unnatural – so they remain a pig to write up, but as they are smaller I’ve managed it.
So, some many hours of train travel later I had a set of 3 – a classic flat top toadstool shape, a striking pointy ‘cap’ shape, and a smaller opened up baby, plus a few more using those as a starting point. When we got home I set to writing them up, and some months and an awful lot more samples and test runs later, here we are.
The tutorial has fully stepped out instructions for three specific mushrooms – the flat top A, the pointy B and then slightly briefer instructions for a smaller flat C.
In the Variations section there are charts to convert A, B & C to fabulous shaggy Inkcaps with tips for expanding that set further, and colouring in pages with blank charts for your own patterns. There are also tips for altering key elements of the size or shape for the flat or pointy, and for changing the length or shape of the stems – these are not fully stepped out, instead they are guidelines so you can understand how to create your own unique, naturalistic forms, aided by the Gallery section which shows all of my versions plus some larger and more complex related pieces.
I’ve really loved making these and already have several new sets on the go. The Fungi world is huge and diverse, and it’s great to never be short of inspiration – no creative thinking required, just go to nature and copy!
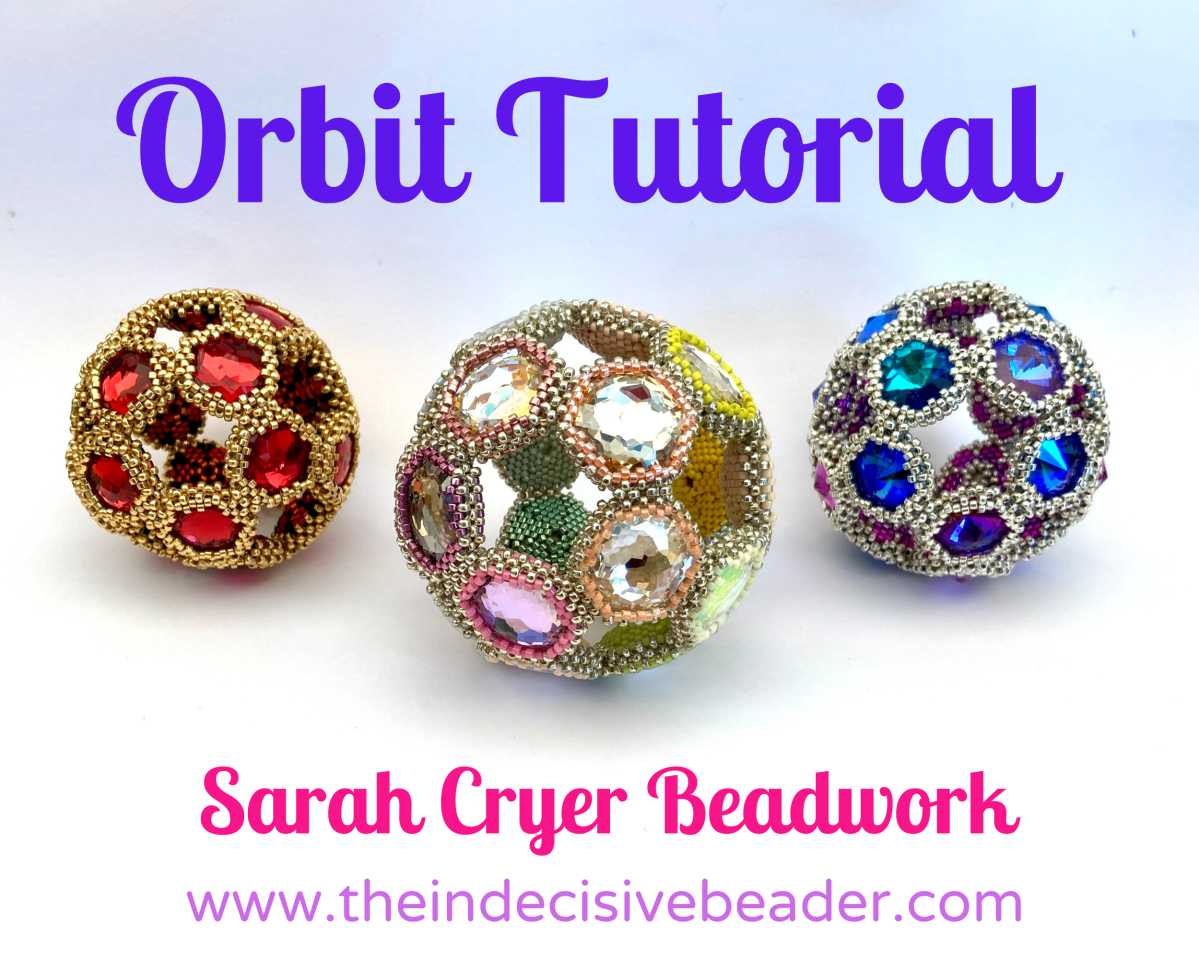
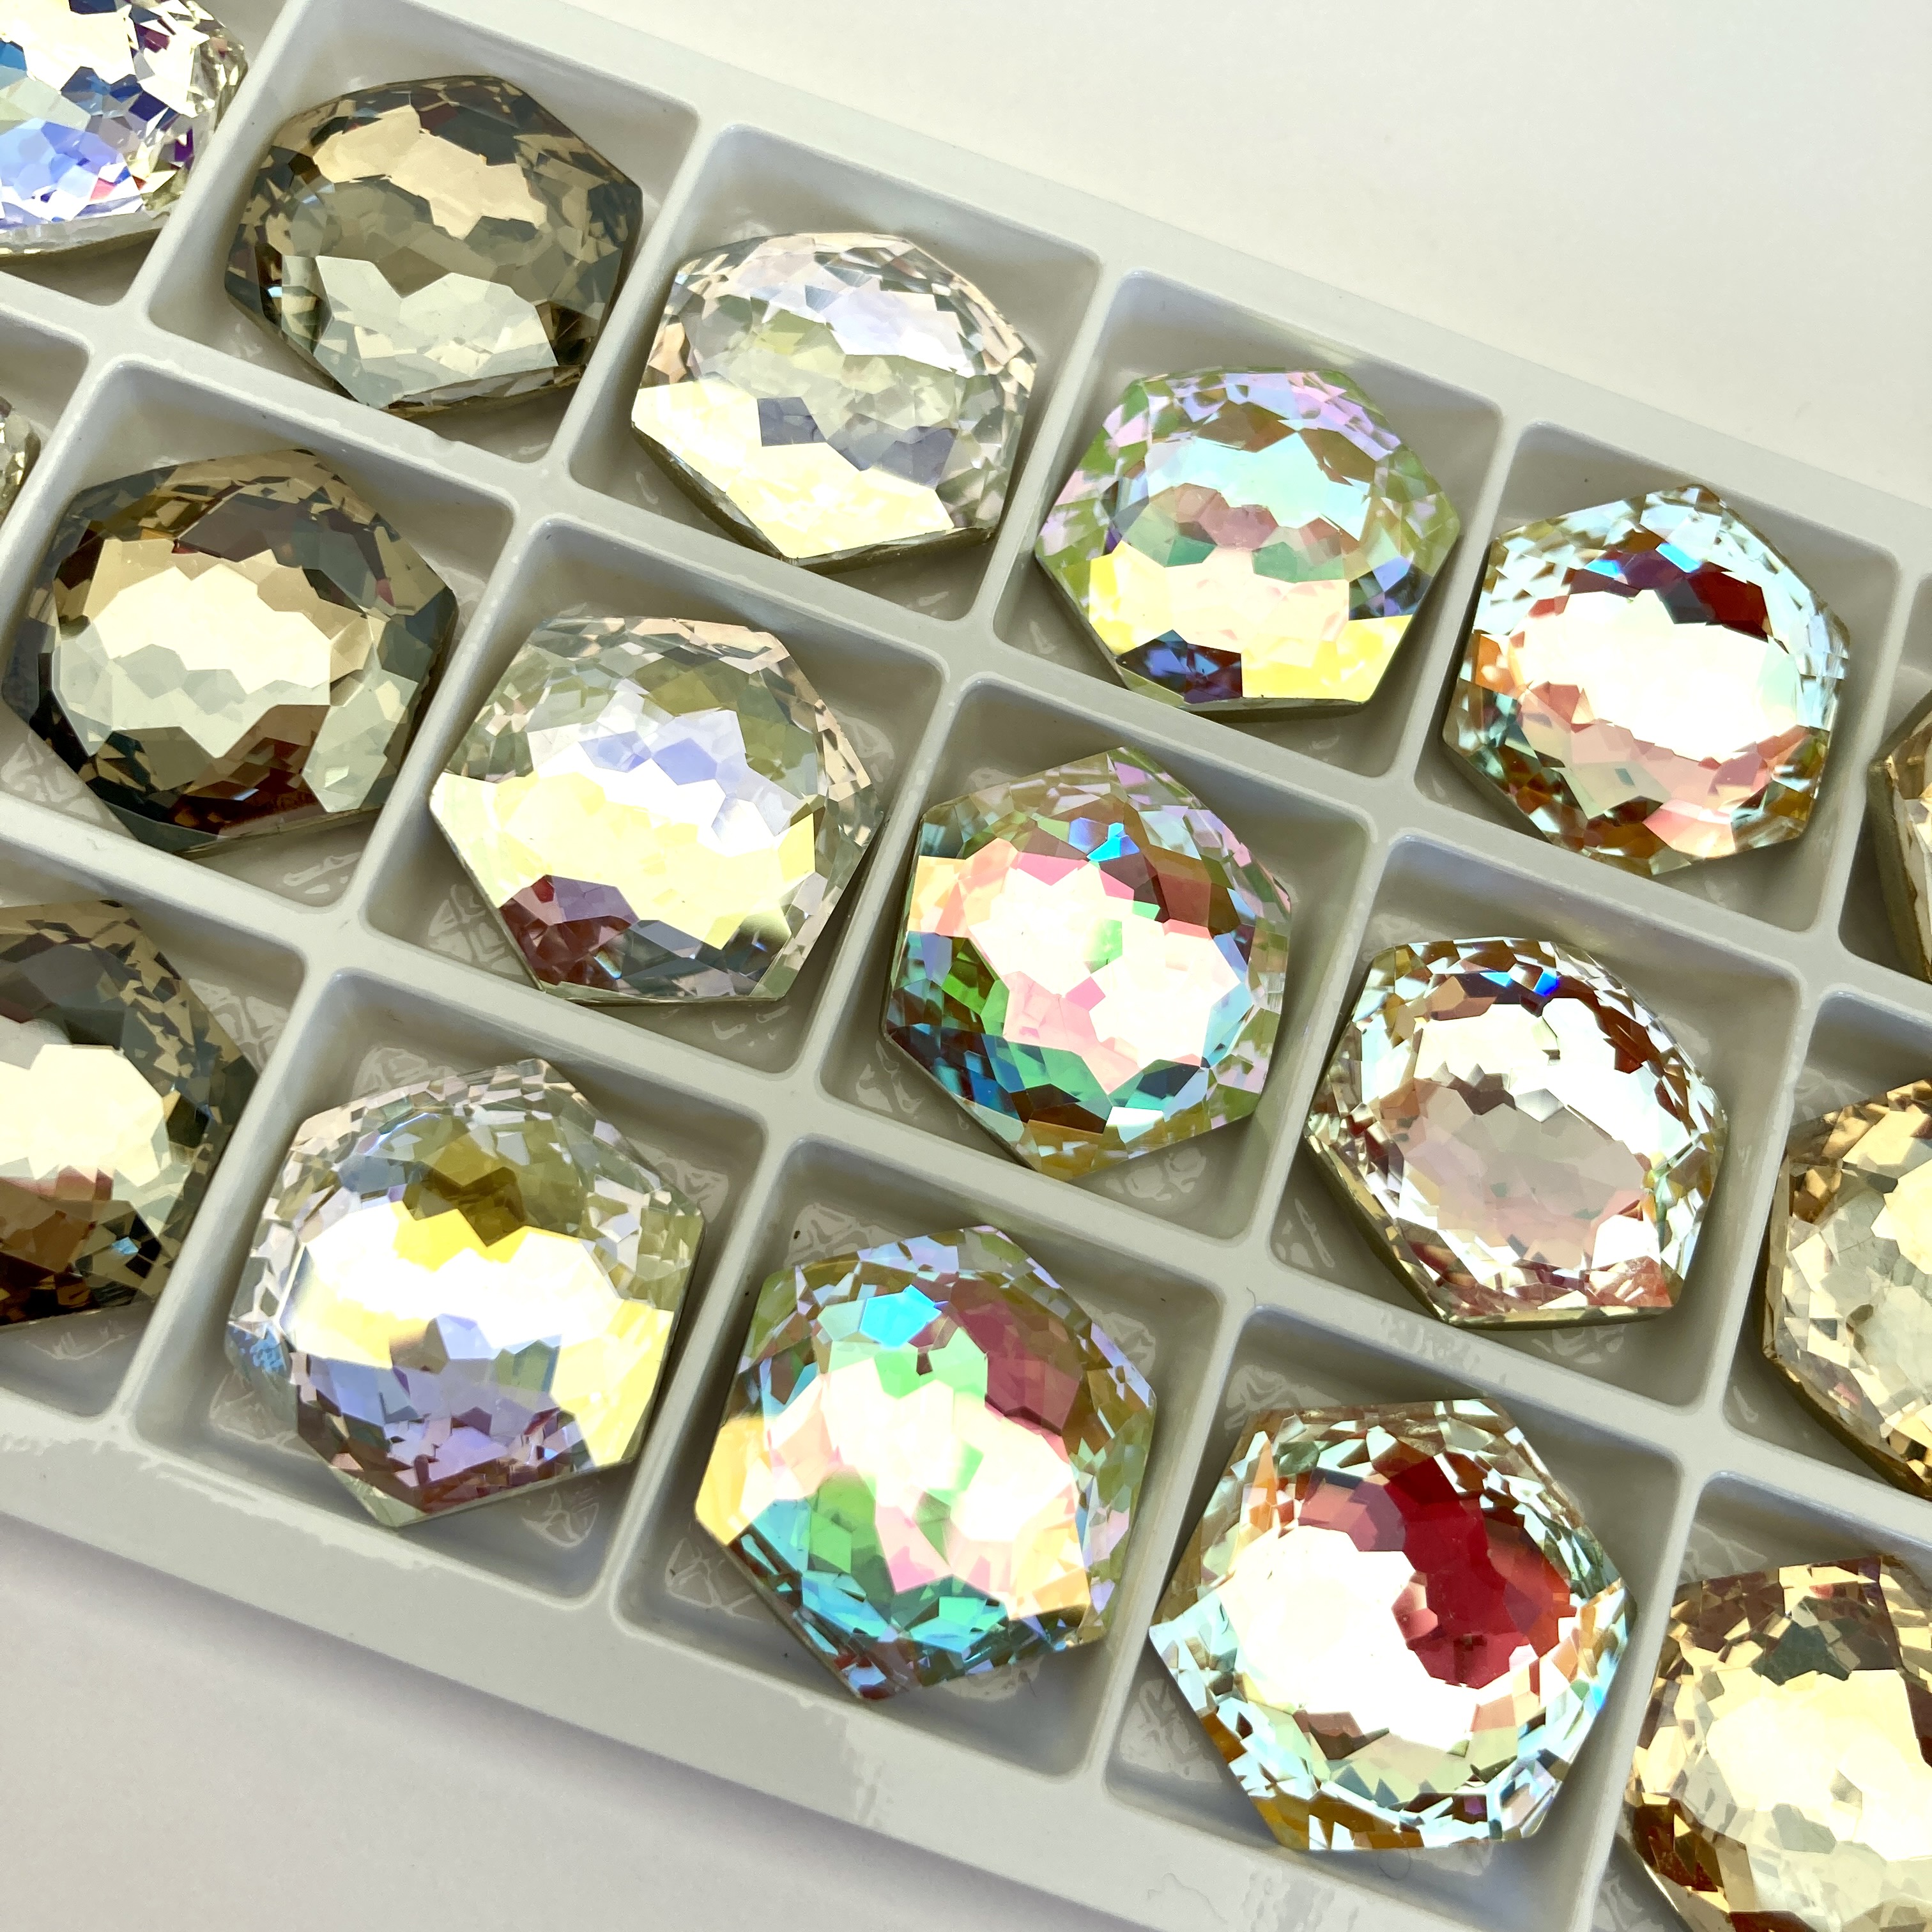
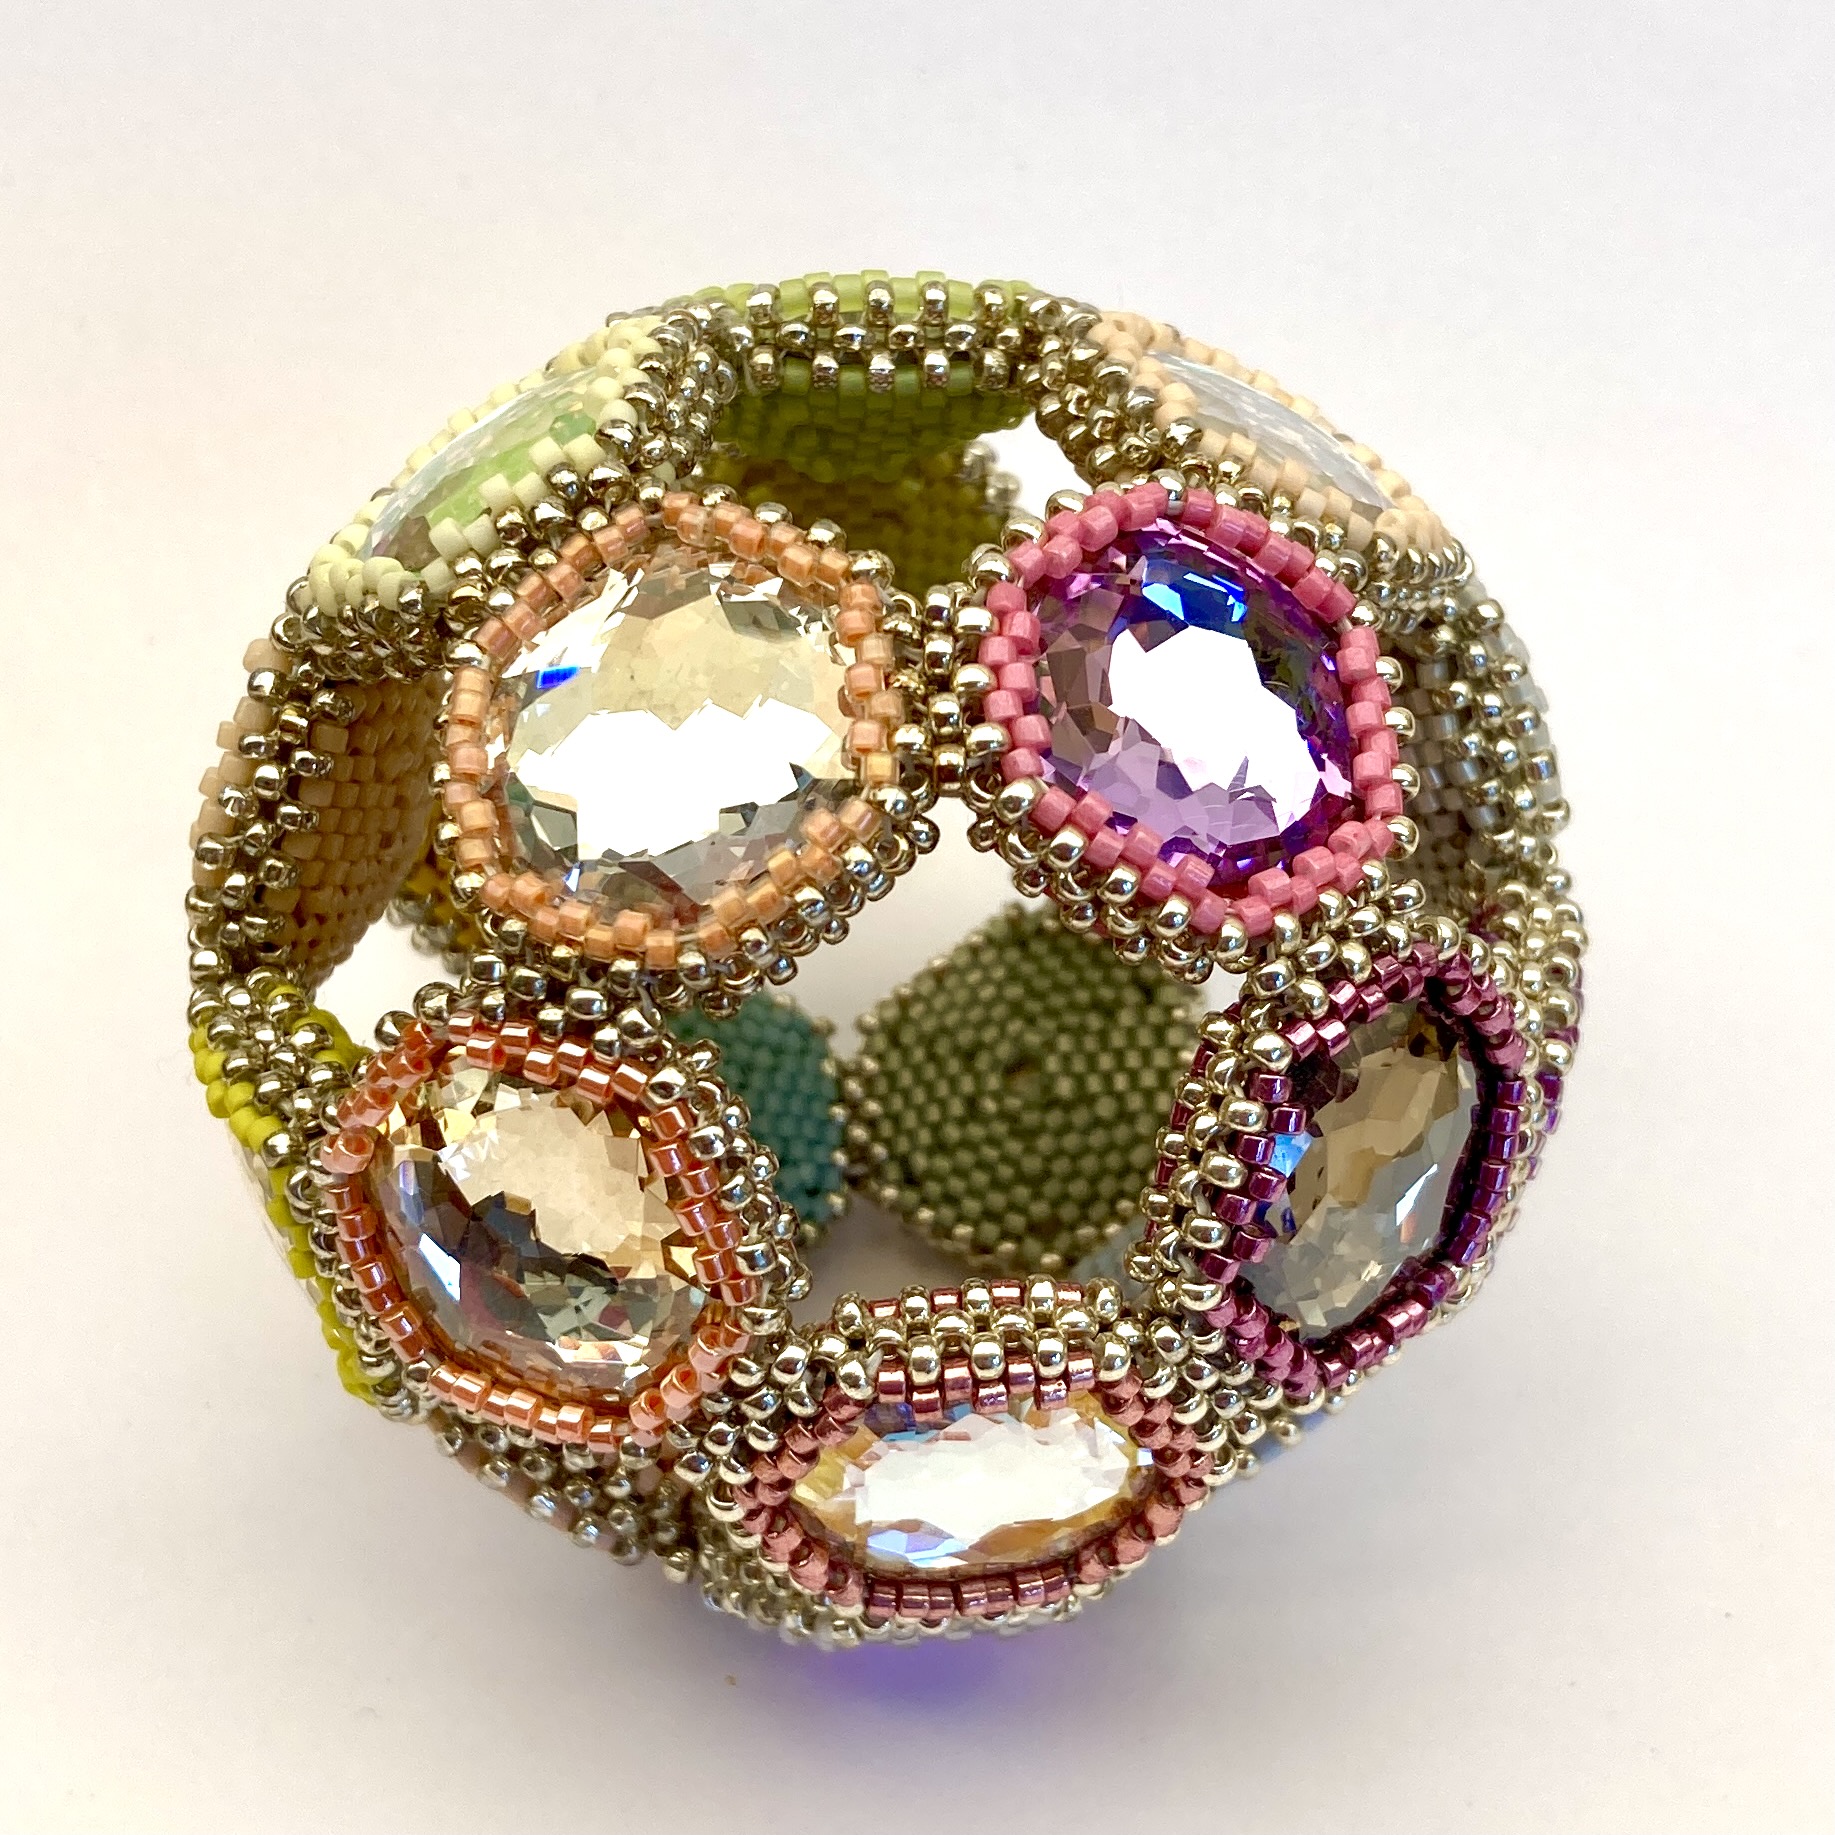
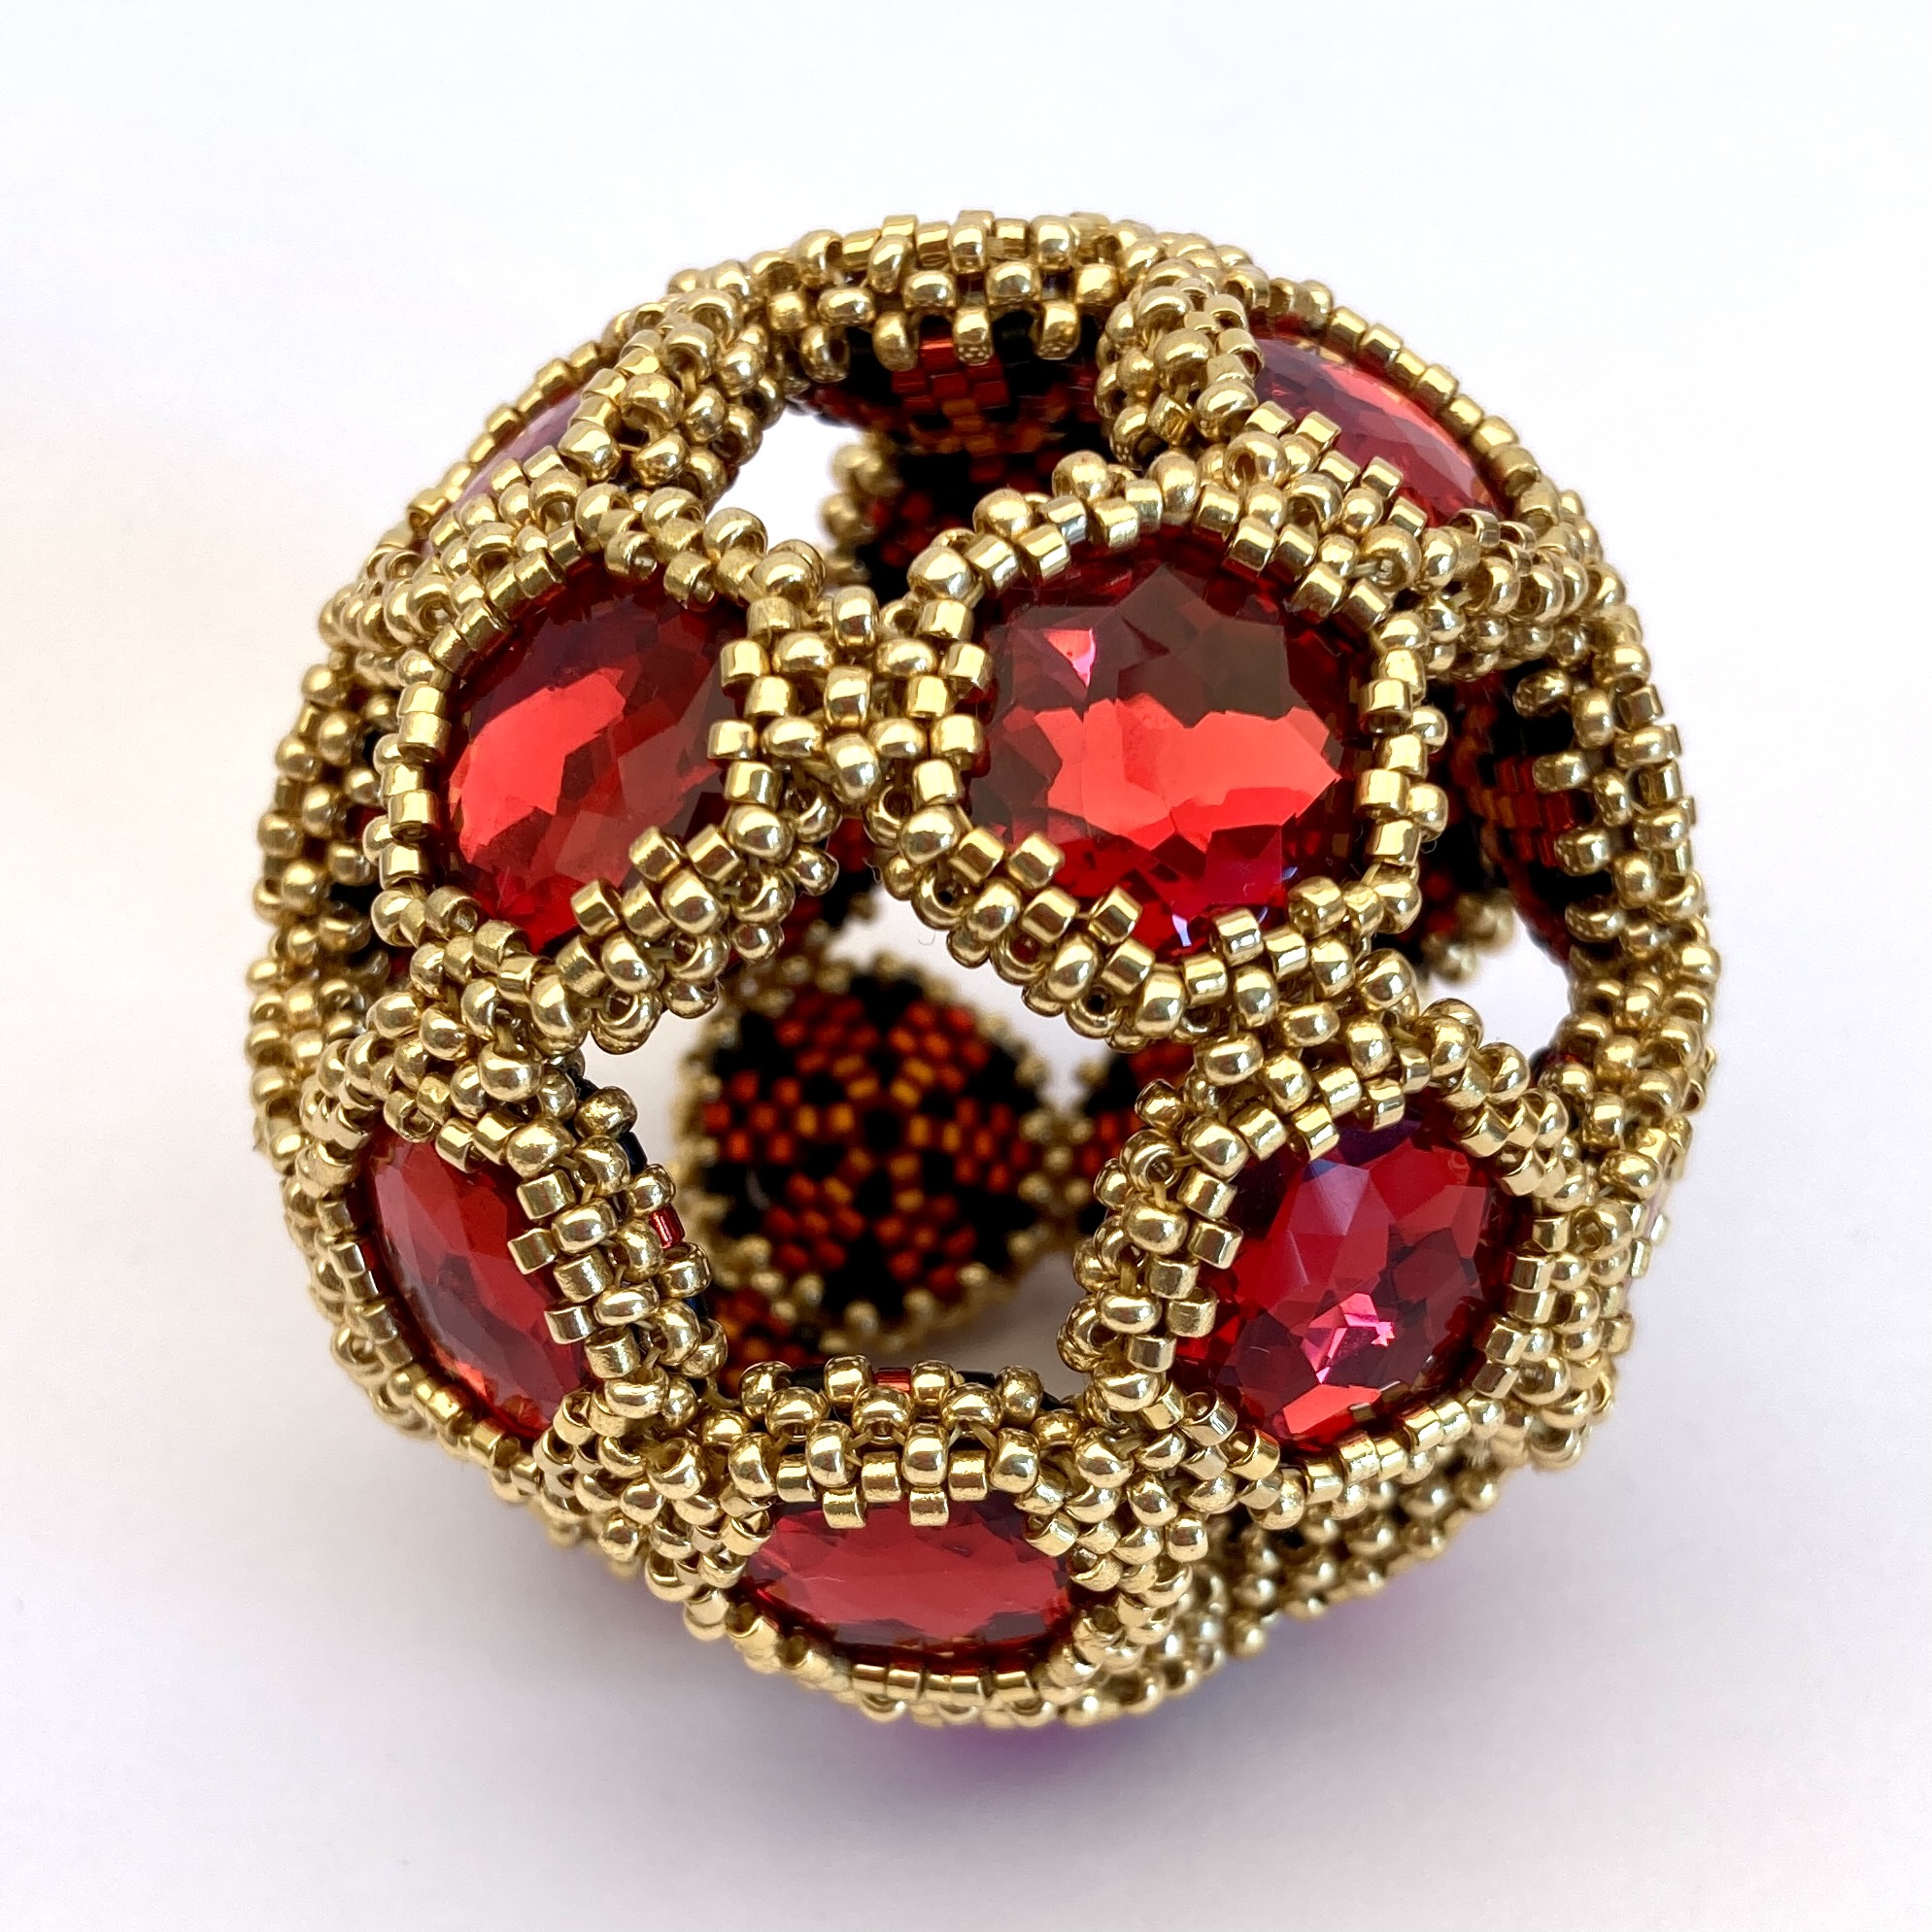
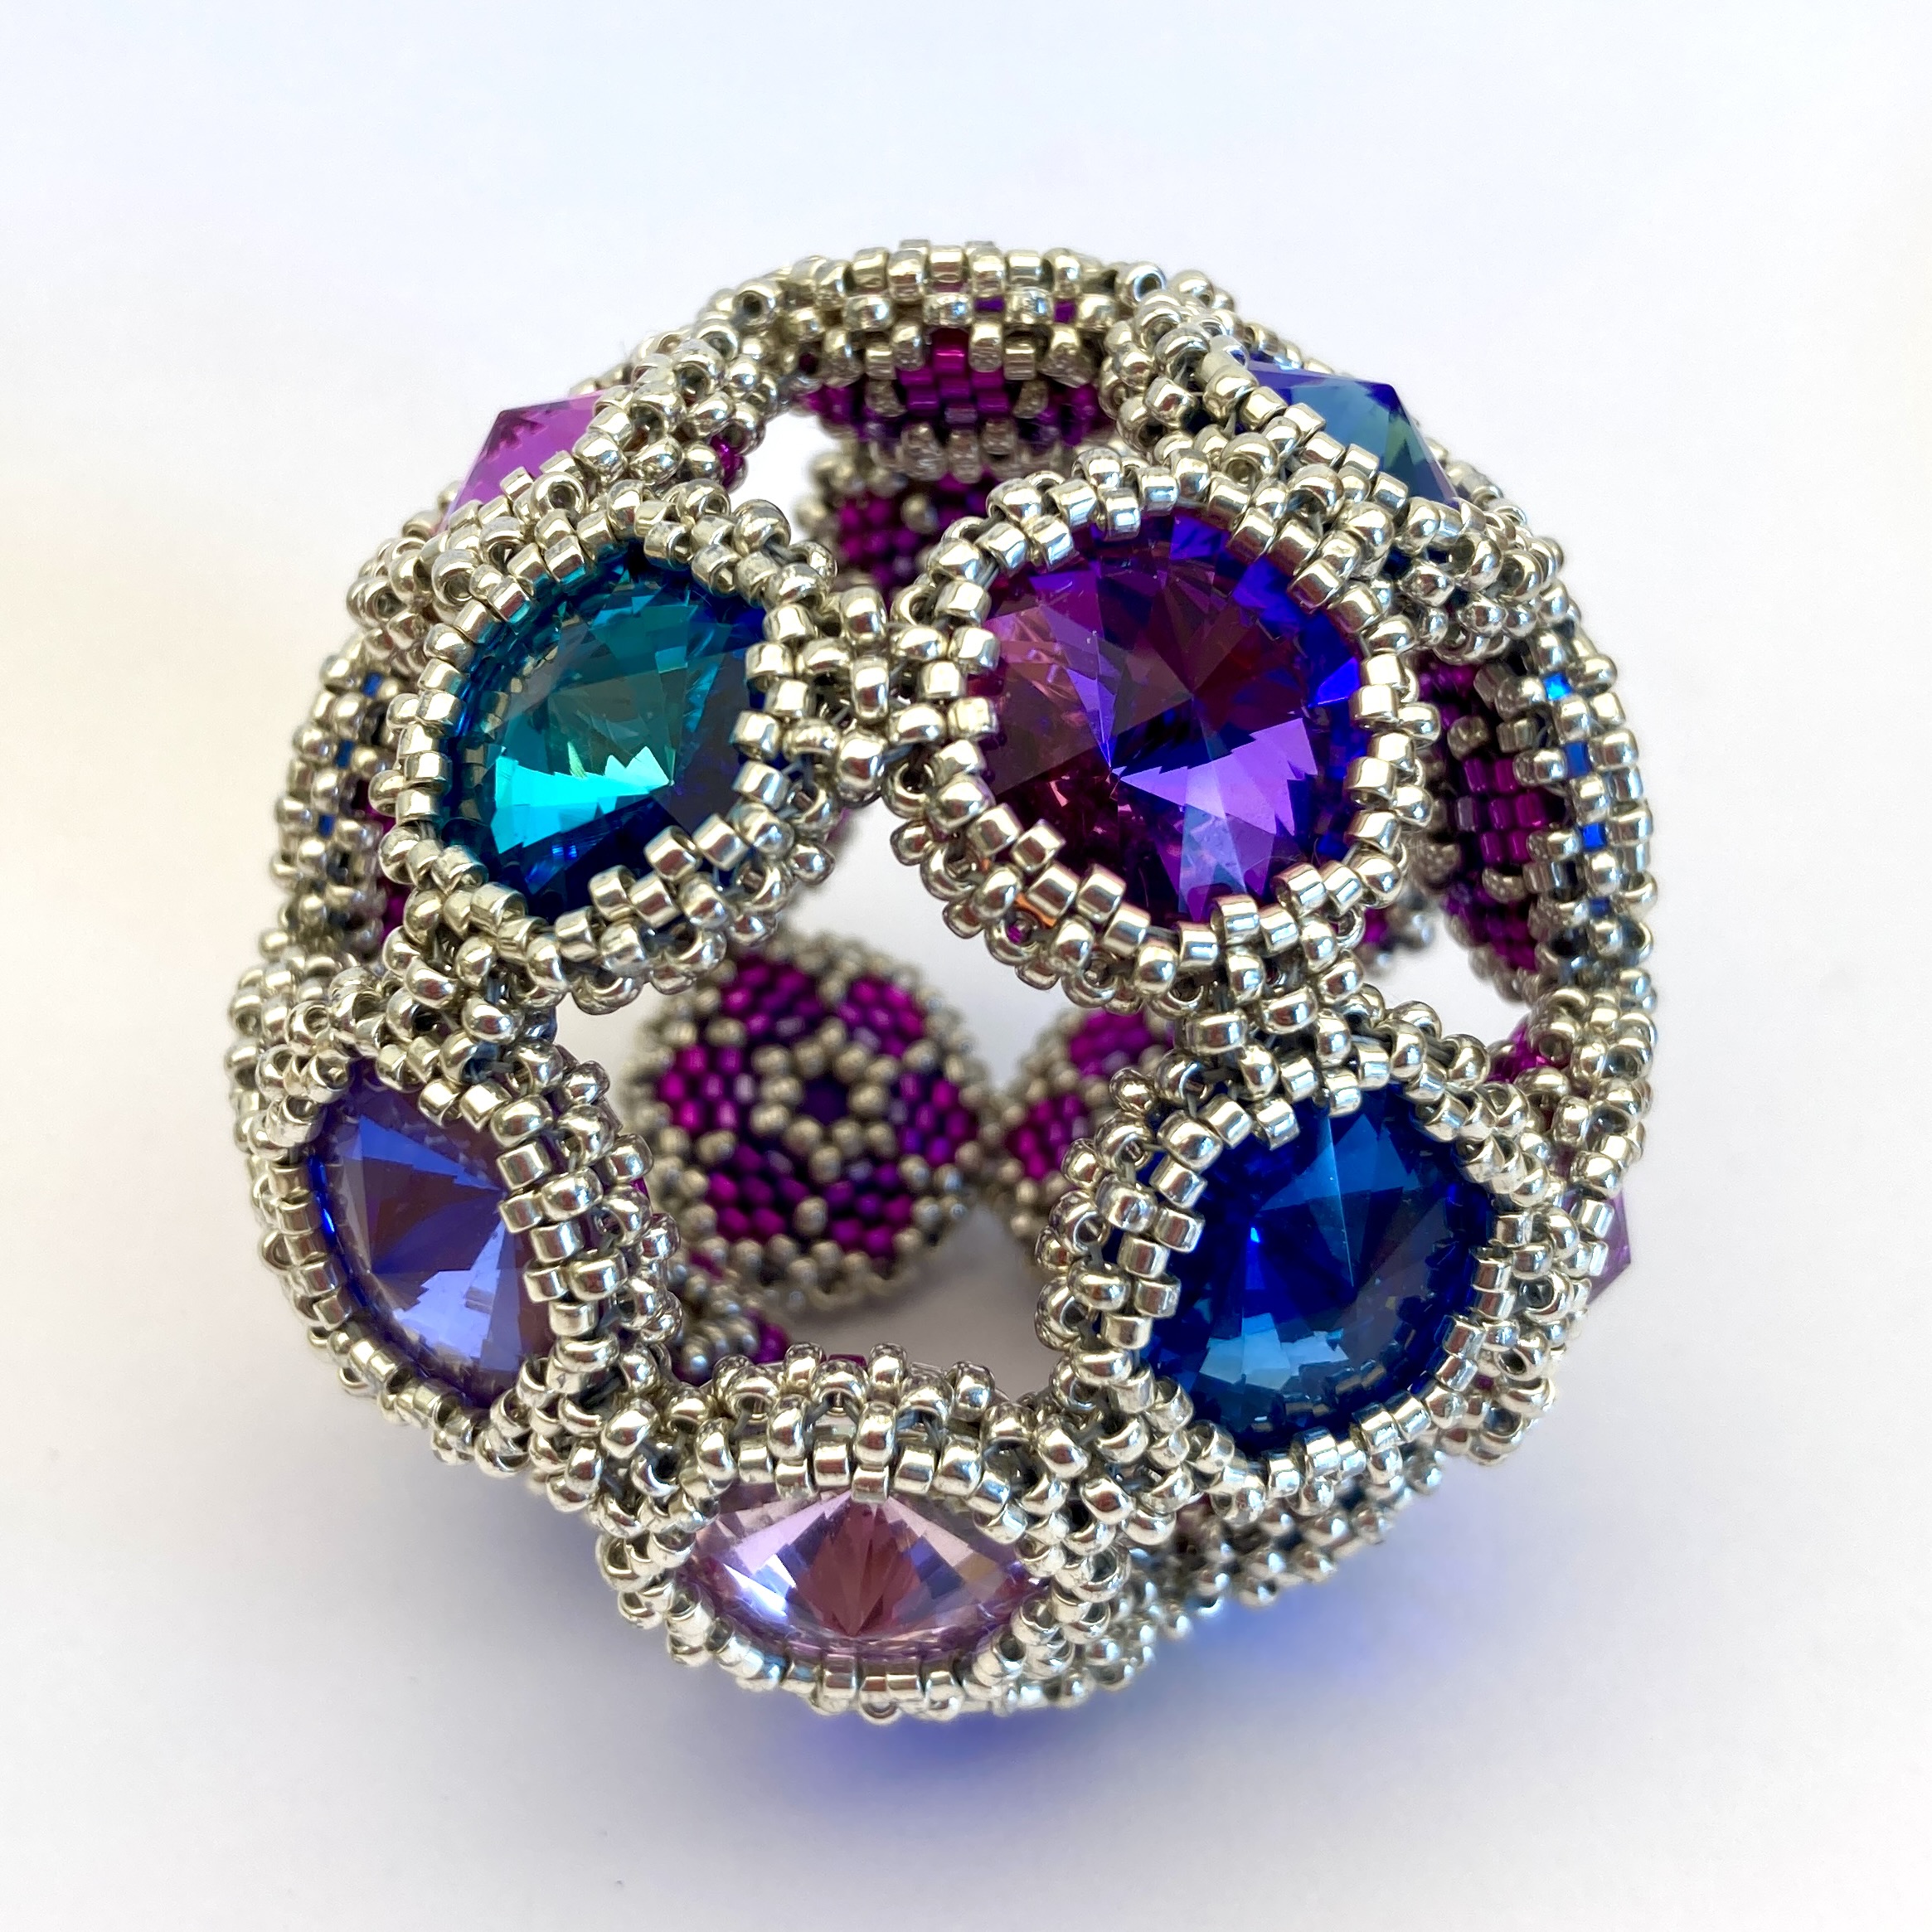
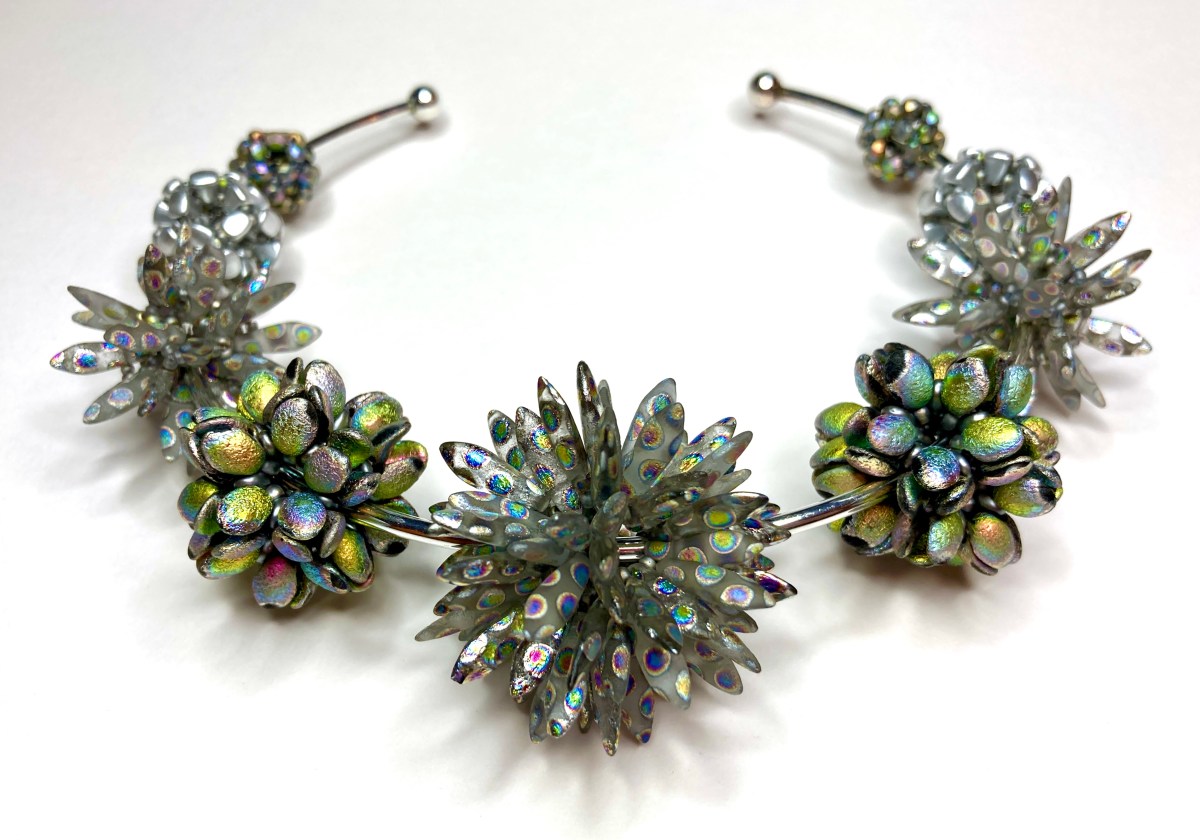
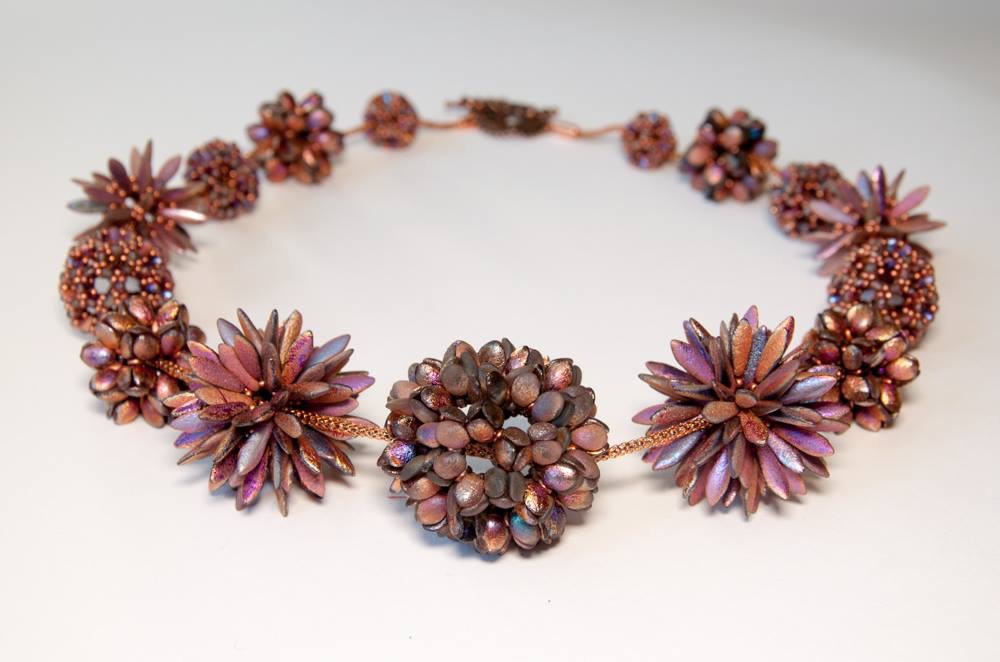
Orbit is a new tutorial, born from a pack of amazing intricately faceted hexagonal crystals from my regular supplier – I can’t resist trying new sparklies and a pack fell into my basket whilst I was restocking other lines.
Absolute whoppers at 18mm across (21mm point to point) the colours and finishes were amazing, but I needed to come up with a design to use them. If they’d have been pentagons they would have been so much more useful for making my favourite dodecahedra, but they weren’t – hexagons tessellate to a flat sheet, so only make 3d geometric figures if they’re combined with other shapes which weren’t available to match. So I put them away and moved onto other things.
A few months later I was looking at them again, and had a go at my favourite MRAW bezel to see how best to start using them. I always try that first with new cyrstals, and if that fails try peyote combinations, and finally complex 3D netting. It worked, and made a lovely solid bezel (particularly when I used a hexagon on the backs), but when I joined it to another I couldn’t get it to sit flat – whatever combinations of beads and stitches I tried I could only get a nice finish that was either concave or convex.
That took me away from flat sheets and back to 3d shapes and got me to thinking about the 3d Geometric shapes which do use Hexagons. The best known of these is of course the Truncated Icosahedron, also known as the Bucky Ball, seen everywhere as the basic patchwork layout for the football (or for the US peeps, a soccer ball). It uses pentagons, each surrounded by a ring of 5 hexagons. All the hexagons are joined, which made me wonder, what would happen if I just missed out the pentagons altogether and left the resulting gaps as voids, viewing windows into the delica bezel backs? Could I create a structure which was rigid enough to feel solid even with the voids? Would the curvature be correct? My engineering brain said ‘maybe, if you have a solid joint, rather than a hinge joint’. In peyote 3d shapes we usually use point beads to join, giving a hinge. If every side has a join then those hinges act in combination to give a solid shape. Any missing sides or joins mean flexibility returns, so the shape won’t be rigid. So I needed to come up with a joint which was solid – it would need a bit of flexbility to allow it to shift during construction, but ultimately needed to lock into a solid formation. Once again the curvature showed me the way to go, and in the tutorial you’ll see how the two part joint gives you the rigidity you need.
So a plan, but no way to see if I was right other than beading it, we departed for Christmas with 20 pots of pastel delicas and 20 hexagonal crystals. I doggedly beaded them half askeep in front of the post Christmas telly whilst the boys built Lego and played with my Dad’s train set, and by New Year I was relieved to see that my gamble had paid off, and Orbit was born.
Orbit – a Beadweaving Tutorial by Sarah Cryer Beadwork
Next, a lone Swarovski 14mm crystal in my stash of the same shape and cut beckoned, and I managed to alter the bead count to get a bezel to work for that too. Crystal Idea in Lithuania had a good stock, so 19 more were ordered, and the Poppy variation followed.
But those 14mm versions were eye wateringly expensive, what beader was ever going to chose them? I had been able to get enough stock of the 18mm original crystals for launch, but realistically that wasn’t going to serve more than a couple of dozen customers, so would really limit the market for the tutorial. Back to the bead mat then as I tried to make it work for different sizes of hexagons – 10mm NO, 12mm NO. More thinking. What about a 14mm Rivoli, the beader’s favourite – NO – too small. At this point I had drawn all the diagrams and invested a lot of time (and crystal money) and I was getting a bit discouraged.
Happilly one day I was working on the materials section of the tutorial and needed to measure the crystals, leading to one of those ‘doh’ moments when you realise you’ve been daft. They’re sized across the parrallel edges as 18mm or 14mm, but point to point they’re actually 20mm or 16mm. I had 2 lonely 16mm Rivolis in my stash and hooray, they fit the bead count for the 14mm hexagon. The bezel ended up circular, so the backs needed some changes to fill the gaps that opened up in the delica peyote, but eventually I came up with some slight tweaks to allow beaders to adapt the 14mm version to make this with 16mm rivolis – they’re way way cheaper and much easier to get hold of, so I very much hope this will allow more of you to enjoy making this piece. If I’m honest I prefer the look of the hexagon versions to the rivolis, and the join beads don’t sit quite as neatly. However, the 14mm hexagons were £70 in total, and the 18mm hexagons I sell are £20 for a set (plus post and packing) so it feels important to offer a lower cost option – I paid £10 for the 16mm Aurora Rivolis from Old Bicycle Shop Beads and I think you’ll agree that’s fantastic value.
At some point I will also try to put together a 20mm rivoli version – I have some gorgeous vintage rivolis (again from Old Bicyle Shop Beads) all ready to try this with but as they’re a less easy to find size I concentrated on getting the 16mm tested first.
So here it is – Orbit, made with just Miyuki size 11 seed beads, size delicas and 20 gorgeous crystals using RAW, MRAW and Peyote stitches.
18mm Hexagon crystals which I think make the best version are available from my Etsy shop in packs of 20 (exactly the right number of course) here. Alternatively you can purchase the 14mm 4683 (under the brand name Primero) from Crystal Idea here or from other Swarovski stockists, or the 16mm Rivoli from Old Bicycle Shop Beads here (and probably lots of other places).
Intermediate level, suitable for anyone who is confident with RAW and Peyote, and patient enough to make 20 identical components and carefully follow a net to join them correctly. As usual it is fully illustrated with both diagrams and photos, written out steps and even some listed out colourways (with bead numbers) or your own colouring in sheets if you’d like to plan your own colours. A full detailed list of bead requirements is available on the usual page here.
Available in my Etsy or PayHip shops as a PDF download. Etsy don’t like my decent quality illustrations or photos so force me to turn it into 3 PDFs to meet their teeny file limit- if that annoys you as much as it does me, the PayHip version is a single PDF and exactly the same price.
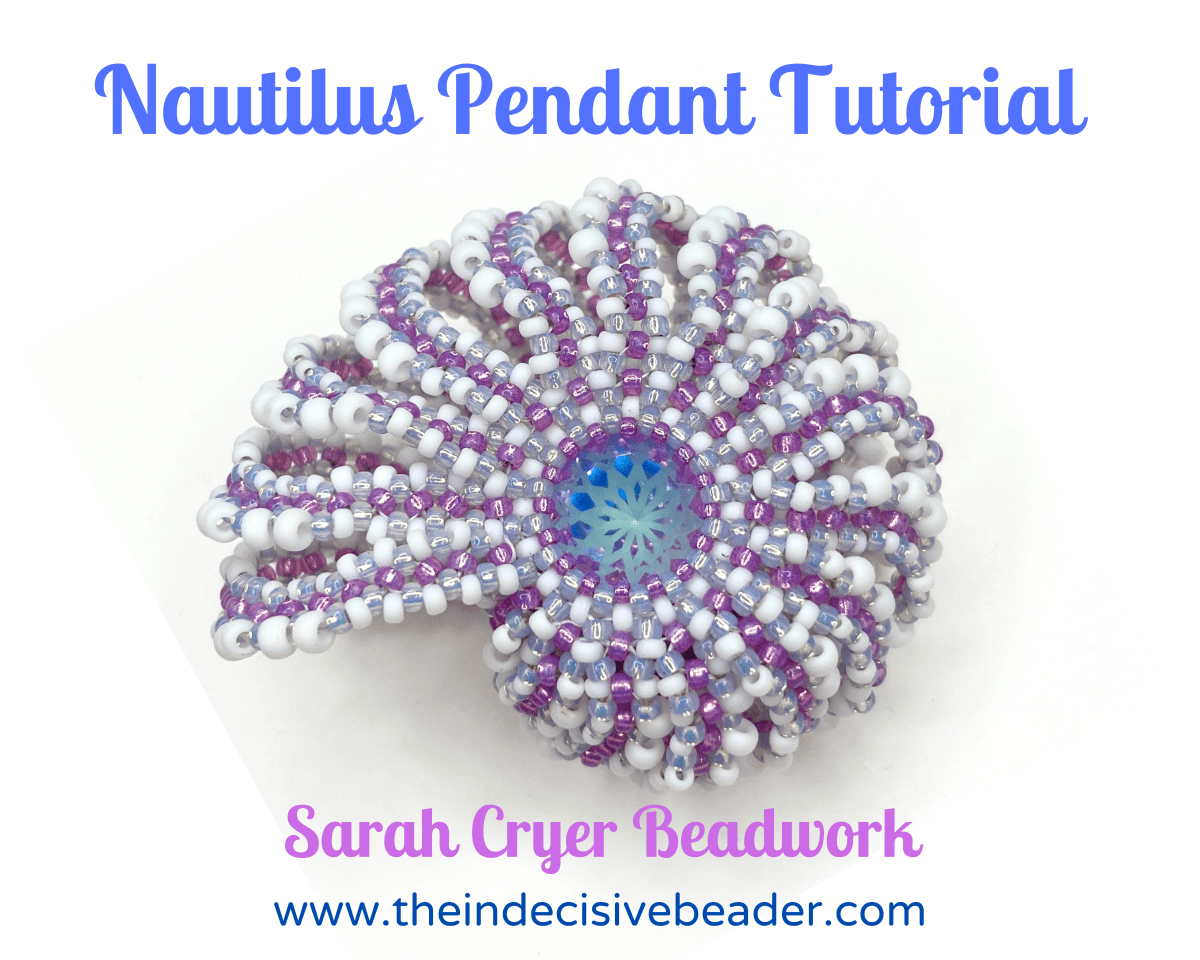
This year’s International Beading Week runs from 27th July- 4th August. I’ll be doing my bit for beaders everywhere by offering a massive 20% off all of the tutorials in my Etsy & PayHip shops, including my brand new ‘Nautilus’ and ‘Quintessence’. No code needed, they’re all reduced and ready to go right here!
As an IBW Ambassador I’ve also donated a very silly set of instructions for ‘Balloon Dog Weave’ which you can download from my website here, or from the Beadworker’s Guild site where there are lots more free patterns from a whole range of lovely designers here.
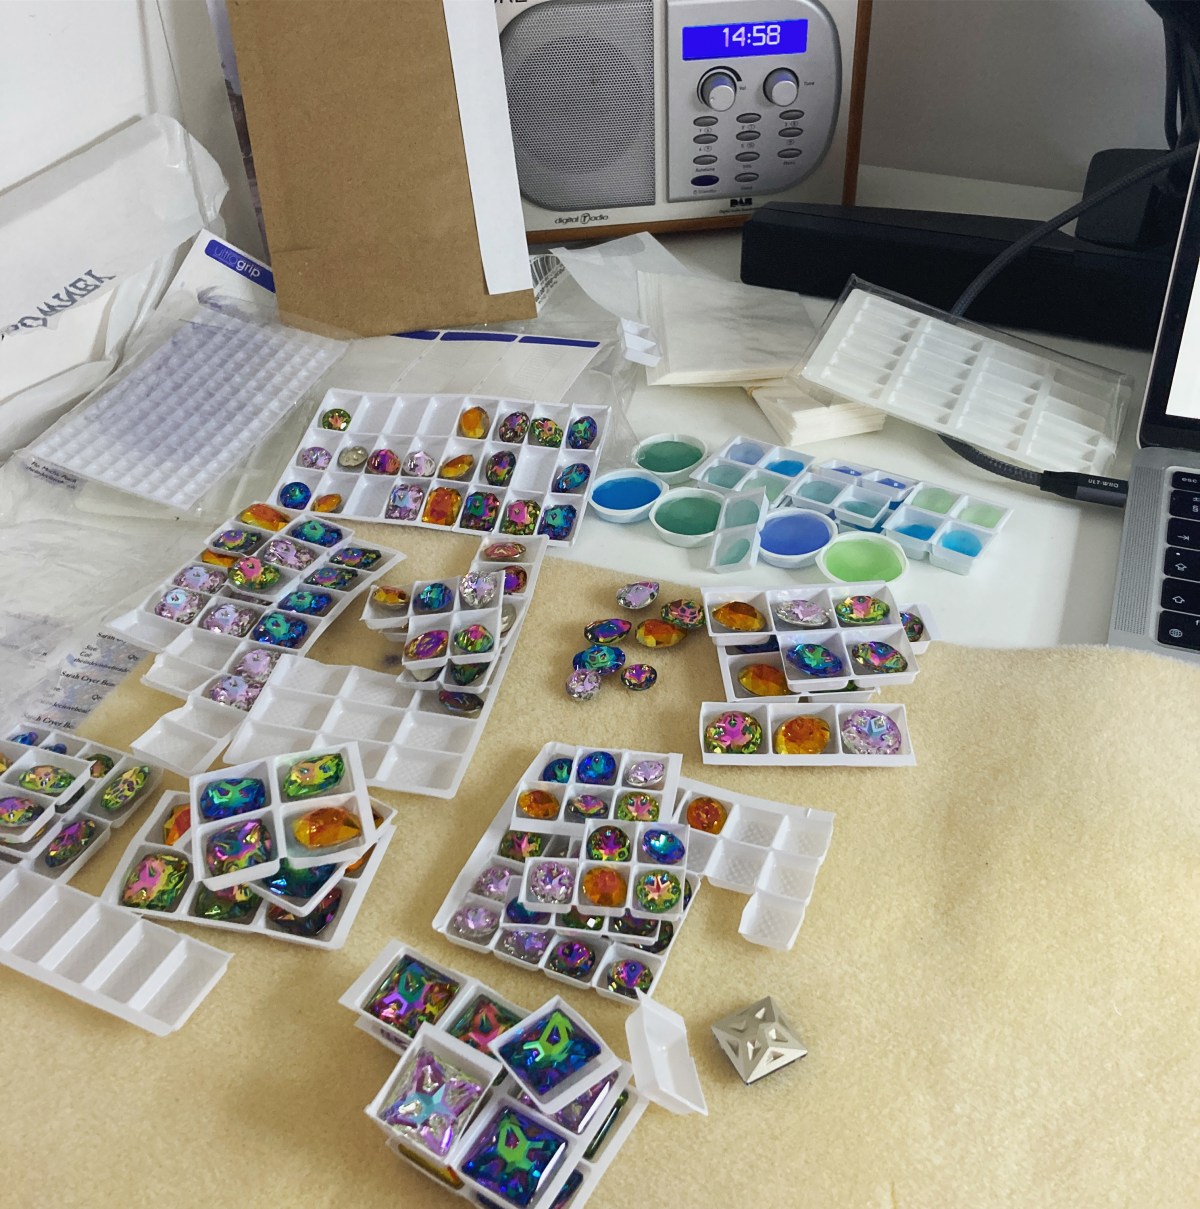
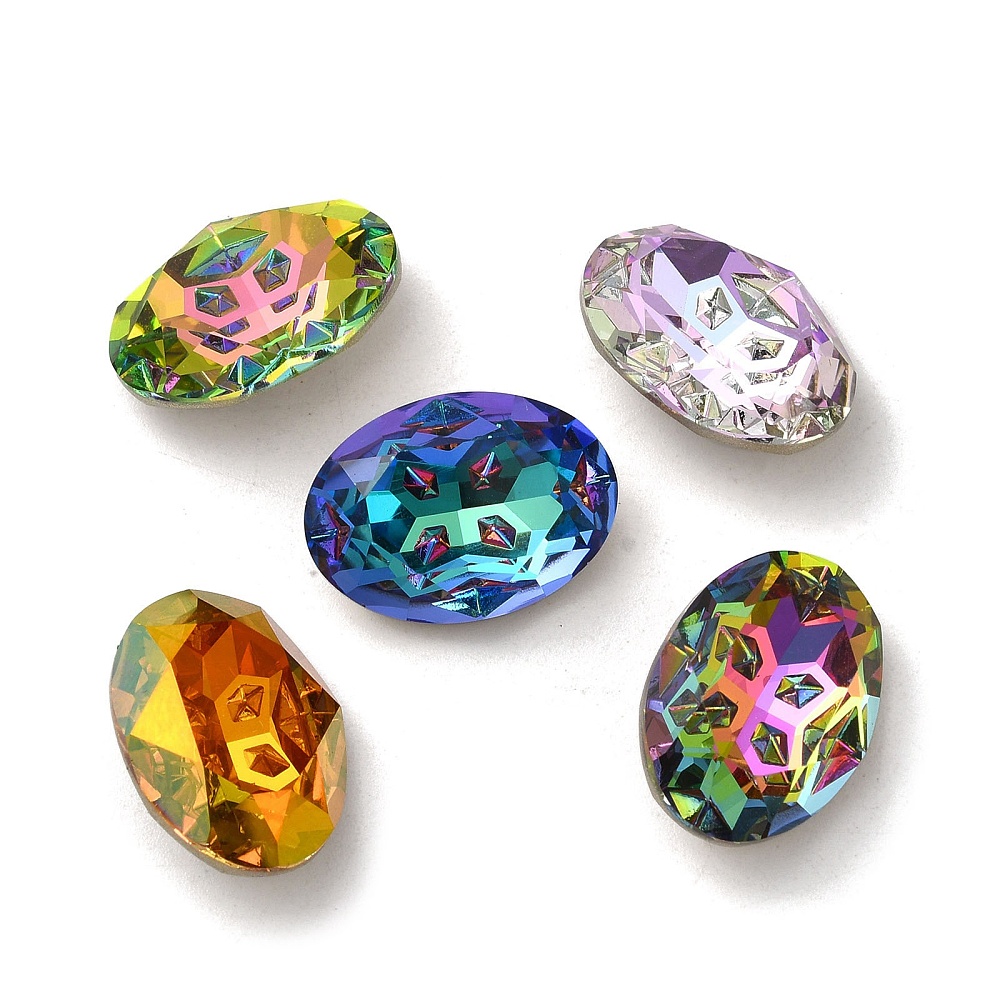
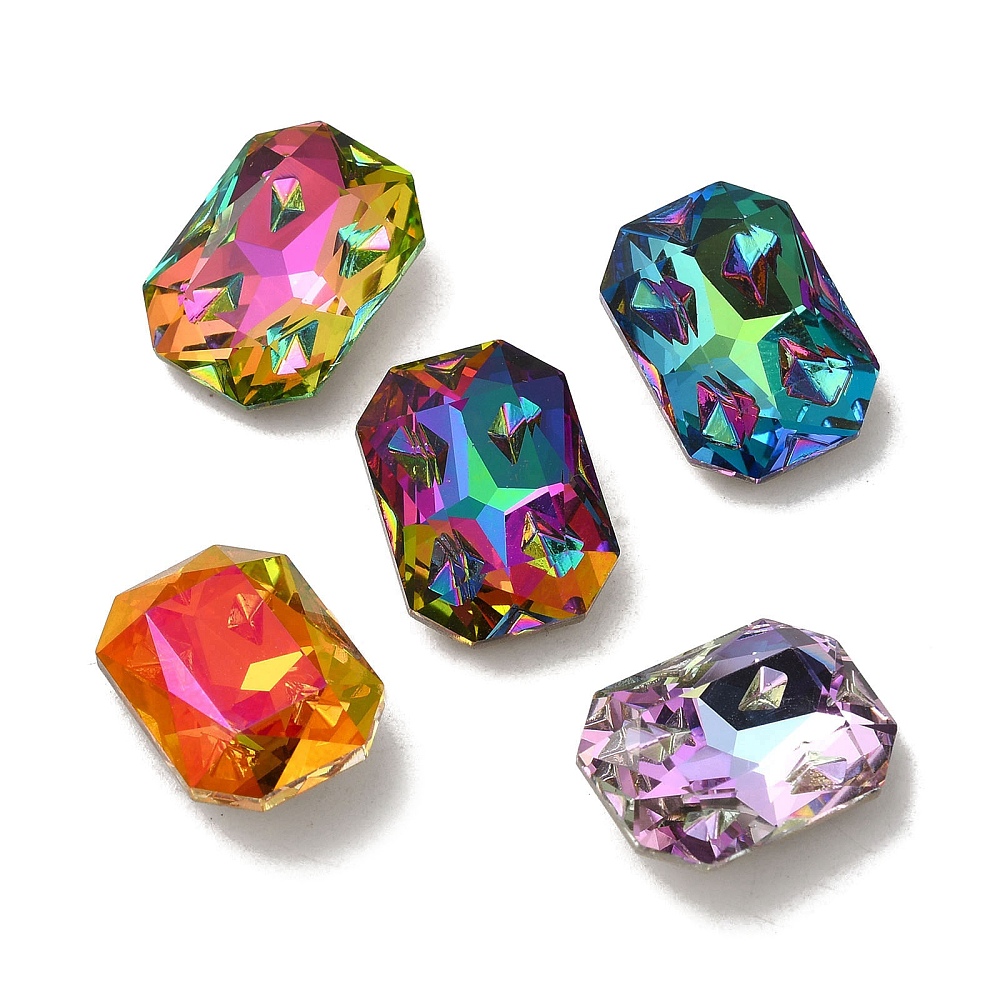
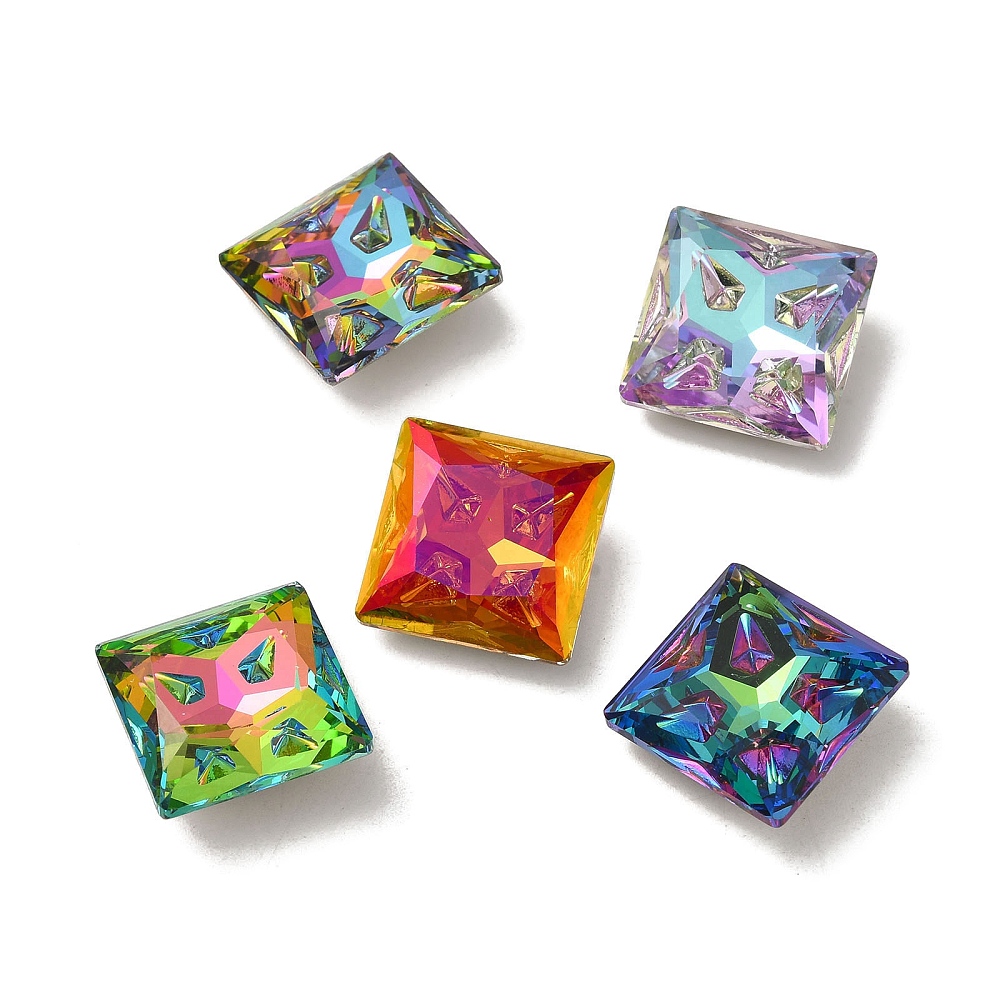
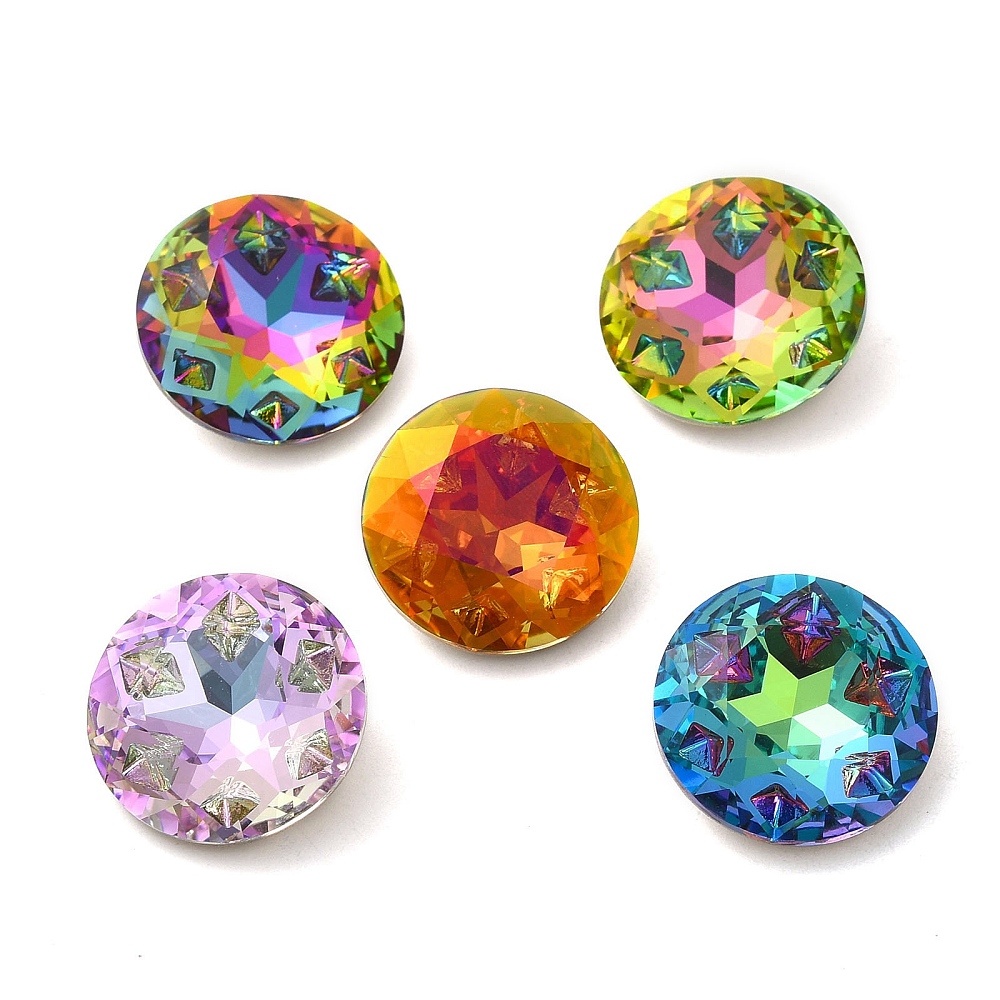
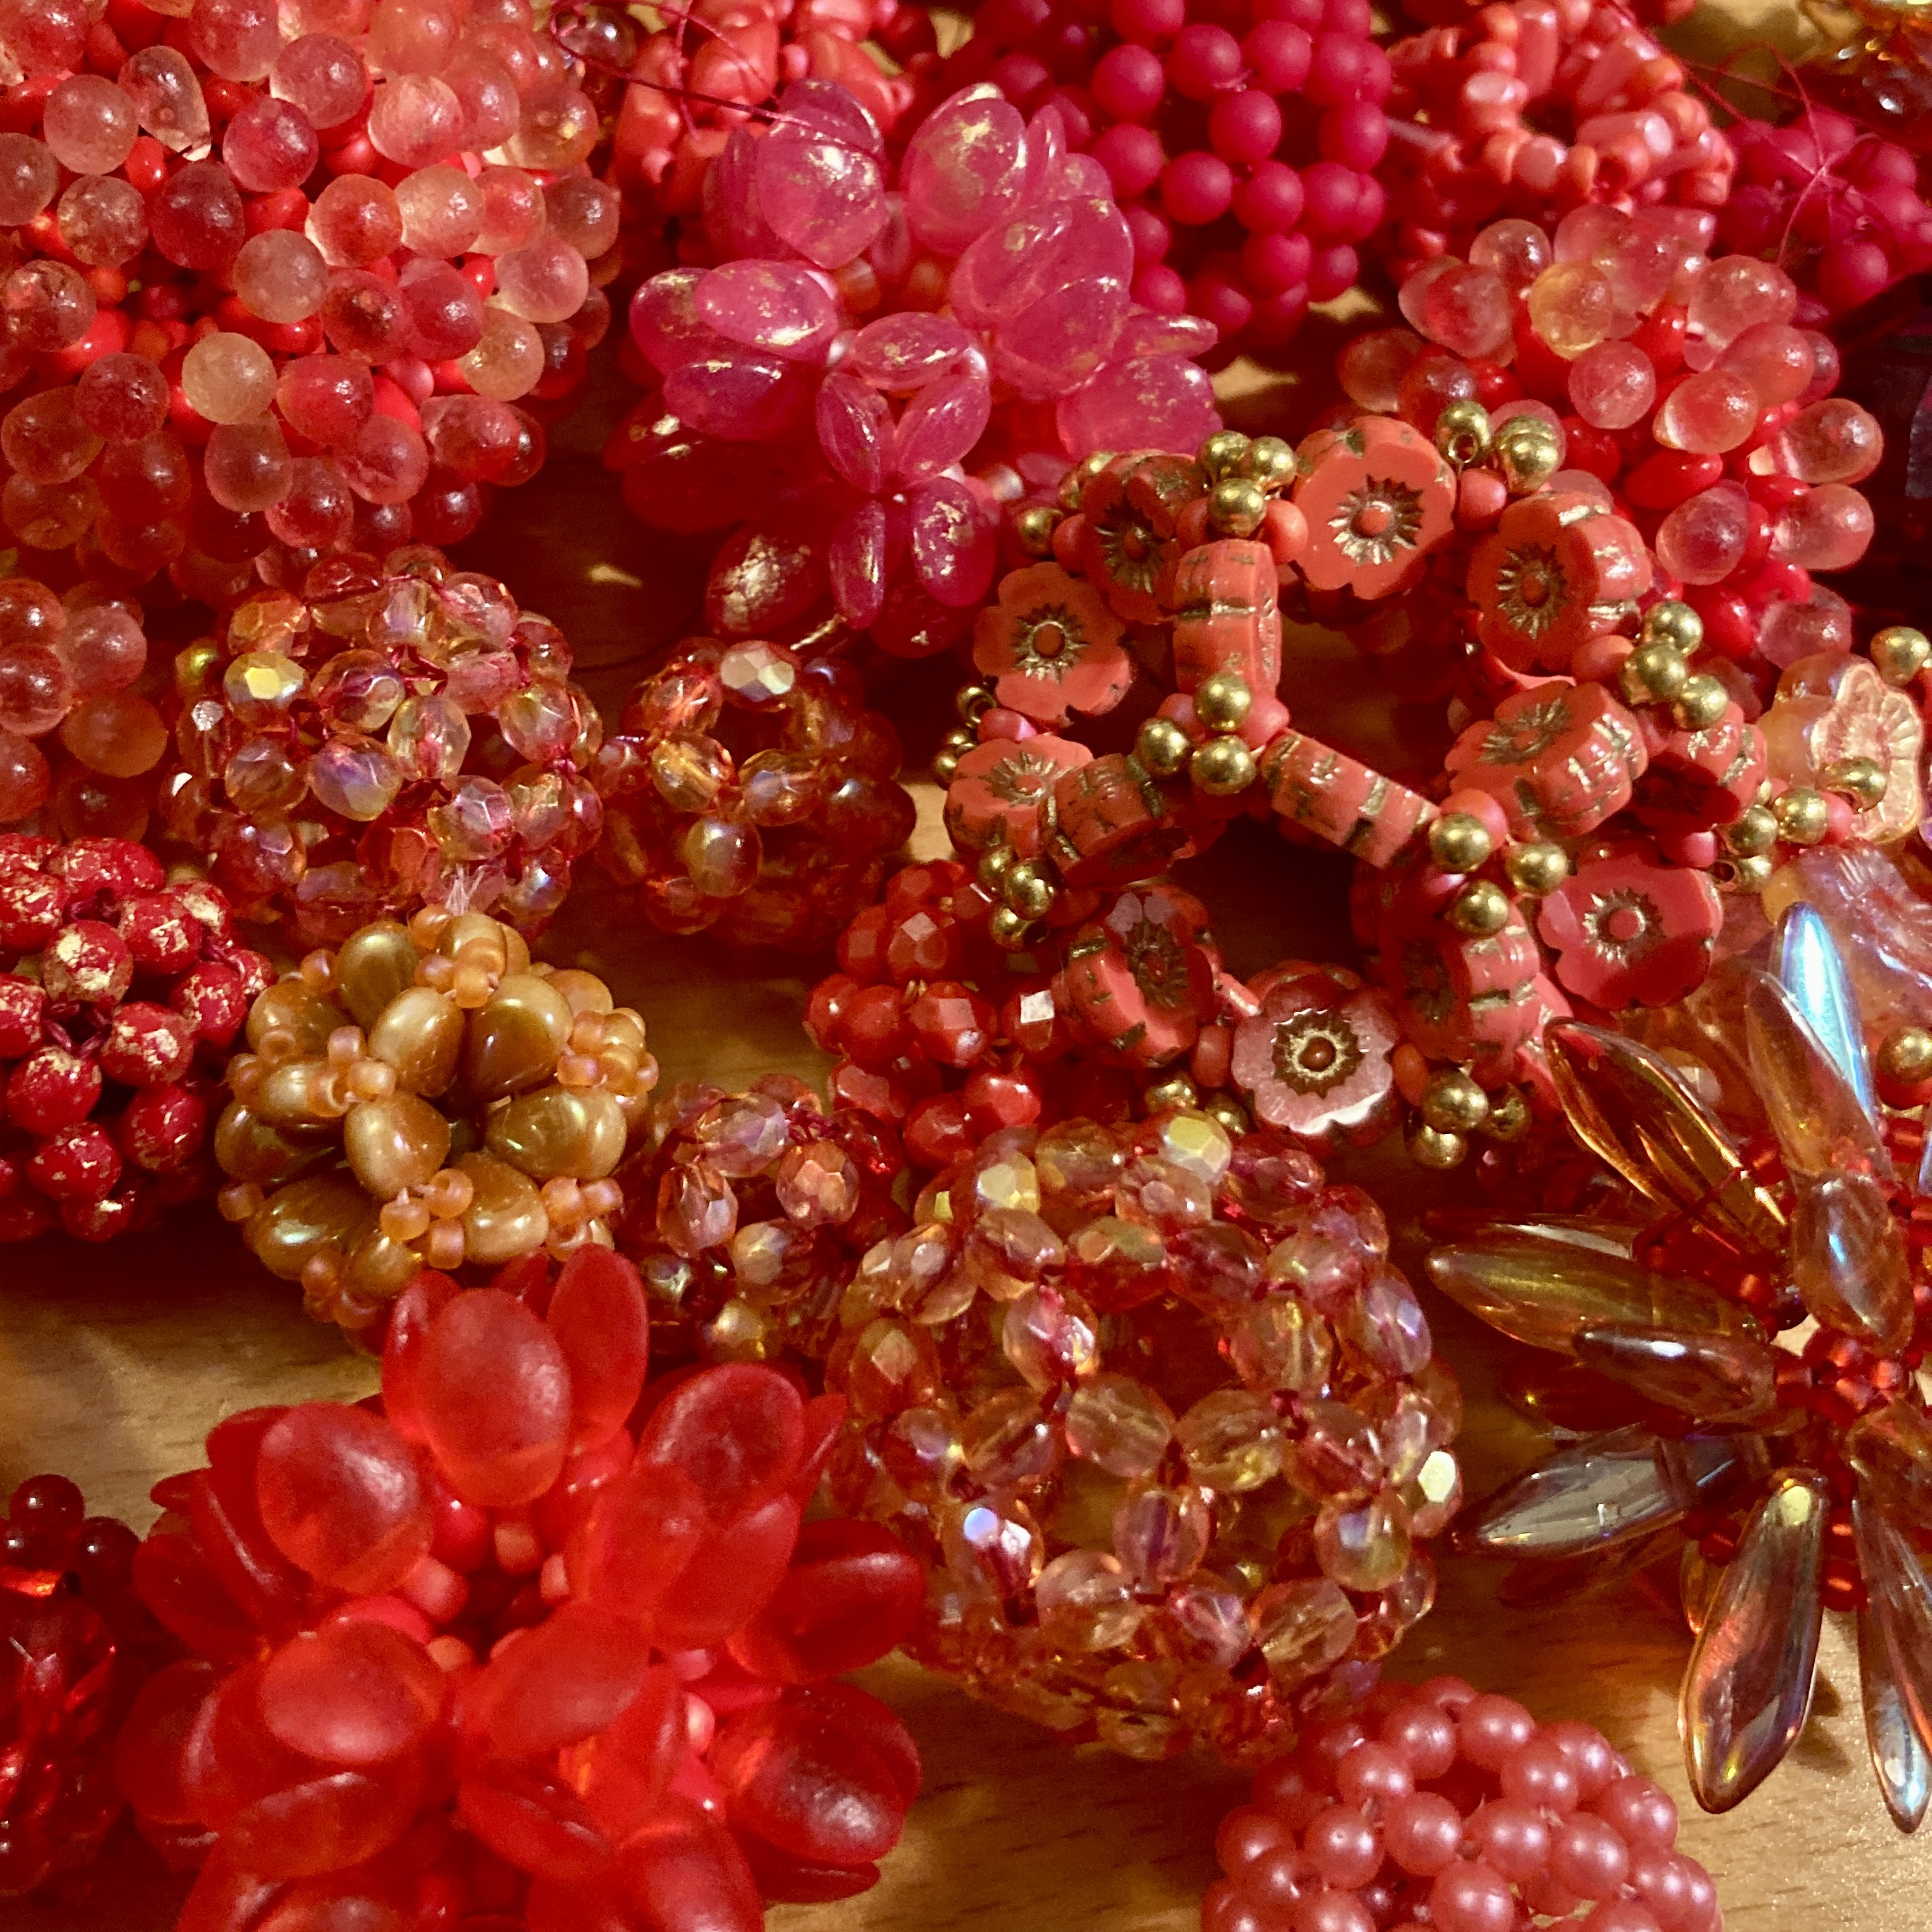
Never one to be decisive or minimal, when I was restocking a few Flower Chatons recently I also grabbed some packs from a couple of new ranges to try out (both for myself and for my Etsy Shop).
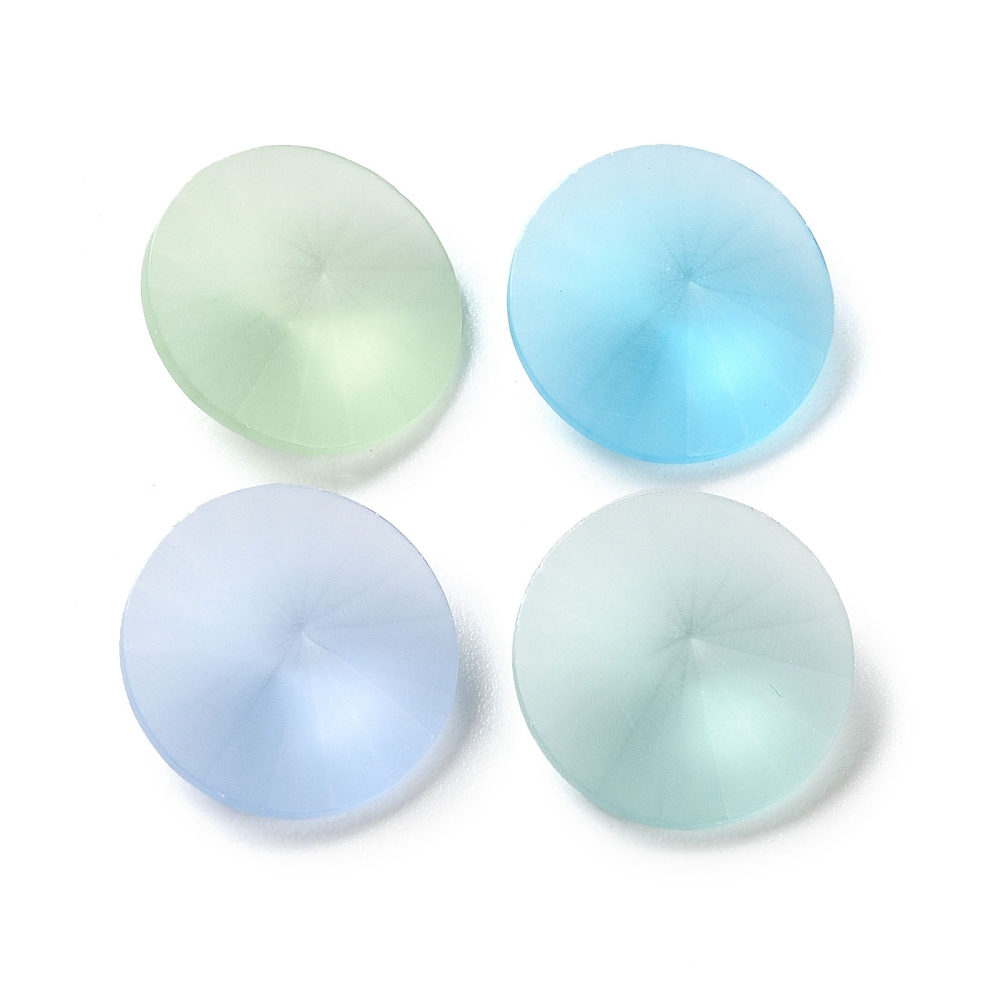
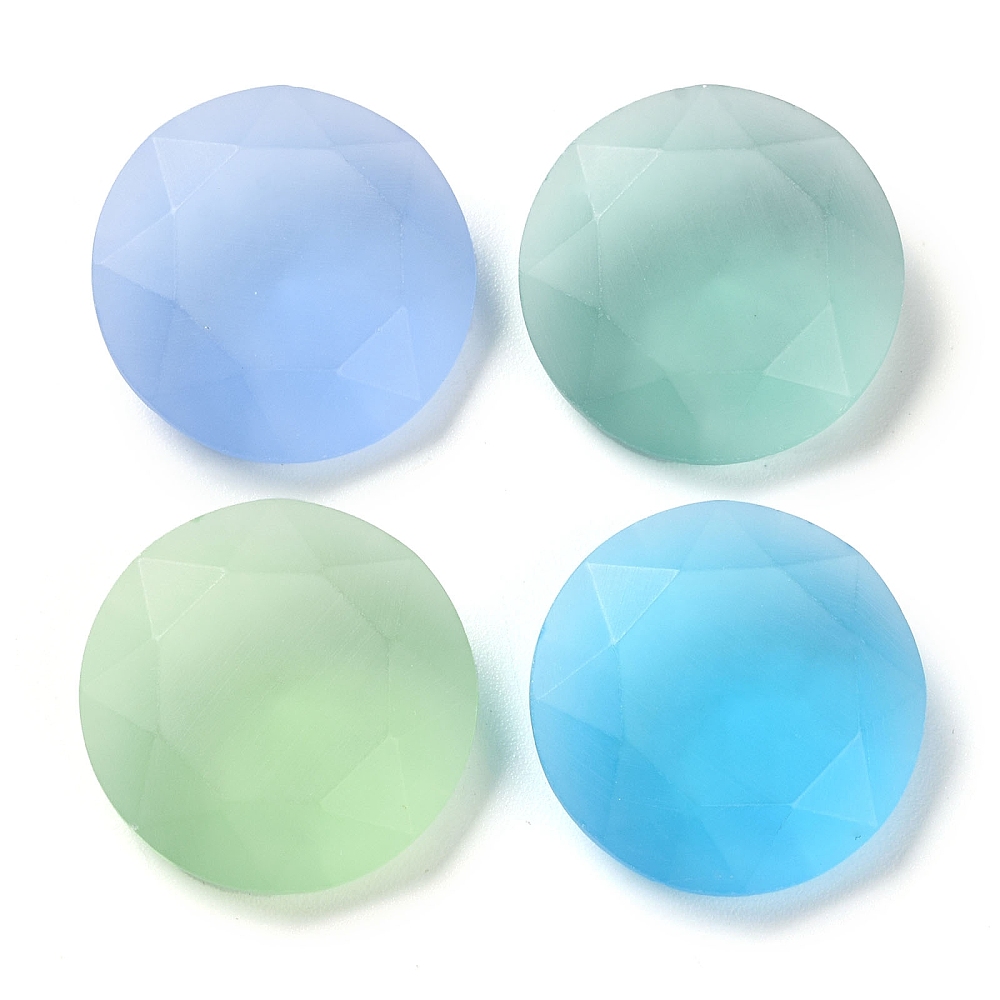
The first are already almost sold out, I think probably because they are very unusual – they’re a matted, unfoiled glass, in soft blue and green colours and they literally look like sea glass. I have them in a 14mm rivoli and 27mm chaton (like a crown stone) which are two really useful, standard beading sizes, so they’ll be great for lots of projects. I’m thinking something soft, subtle and summery – sometimes even beaders need day wear without the bling after all!
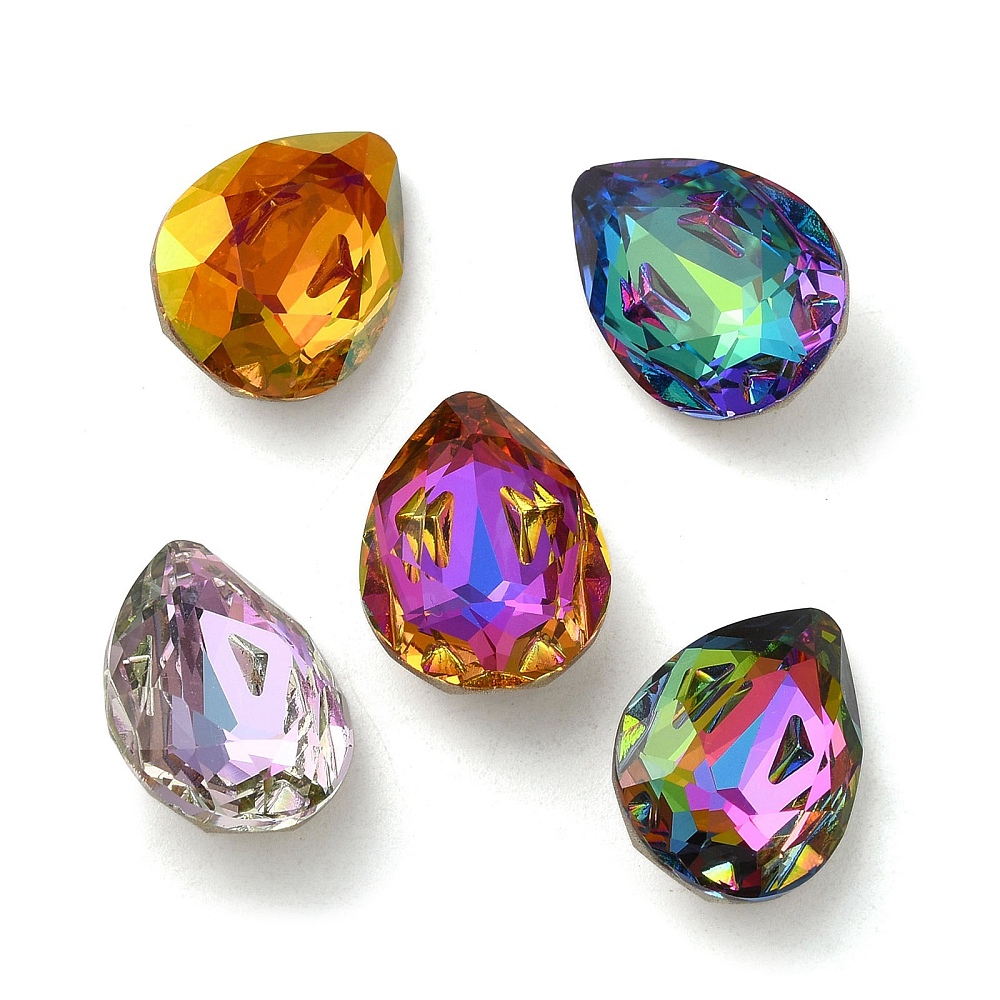
The second set are on first glance more conventional – in all the standard brightest crystal finishes (like Astral Pink or my favourite Vitrail Rose), and reasonably sensible shapes. Foiled backs, and I’ve gone for the larger sizes rather than any teeny ones as those tend to work better for beadweavers. But they have these really odd little reverse faceted dents in the back, almost like darts in dressmaking, and these seem to really up the sparkle, and importantly for me, they also introduce new surface directions so more colours show at once in the crystal, which plays really well to these extravagant coatings.
Shapes are (click on the links to go to my Etsy shop):
Round chaton in 18mm or 12mm (sorry, no 14mm in the range as yet which is a shame).
Both ranges are just a trial – if they sell I’ll try to get some more, but they’re all on the slightly pricier side so I may need to keep an eye out for sales at my supplier so I can keep them at a sensible price for you (and me).
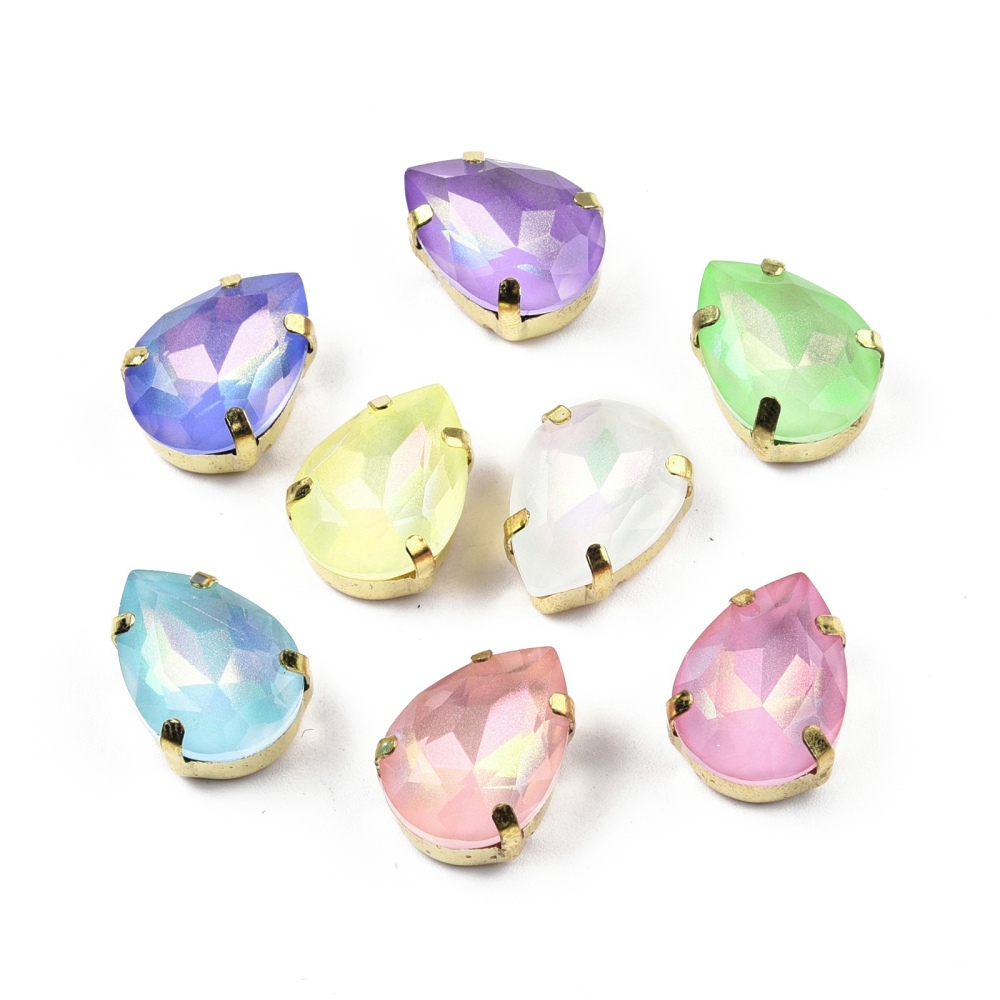
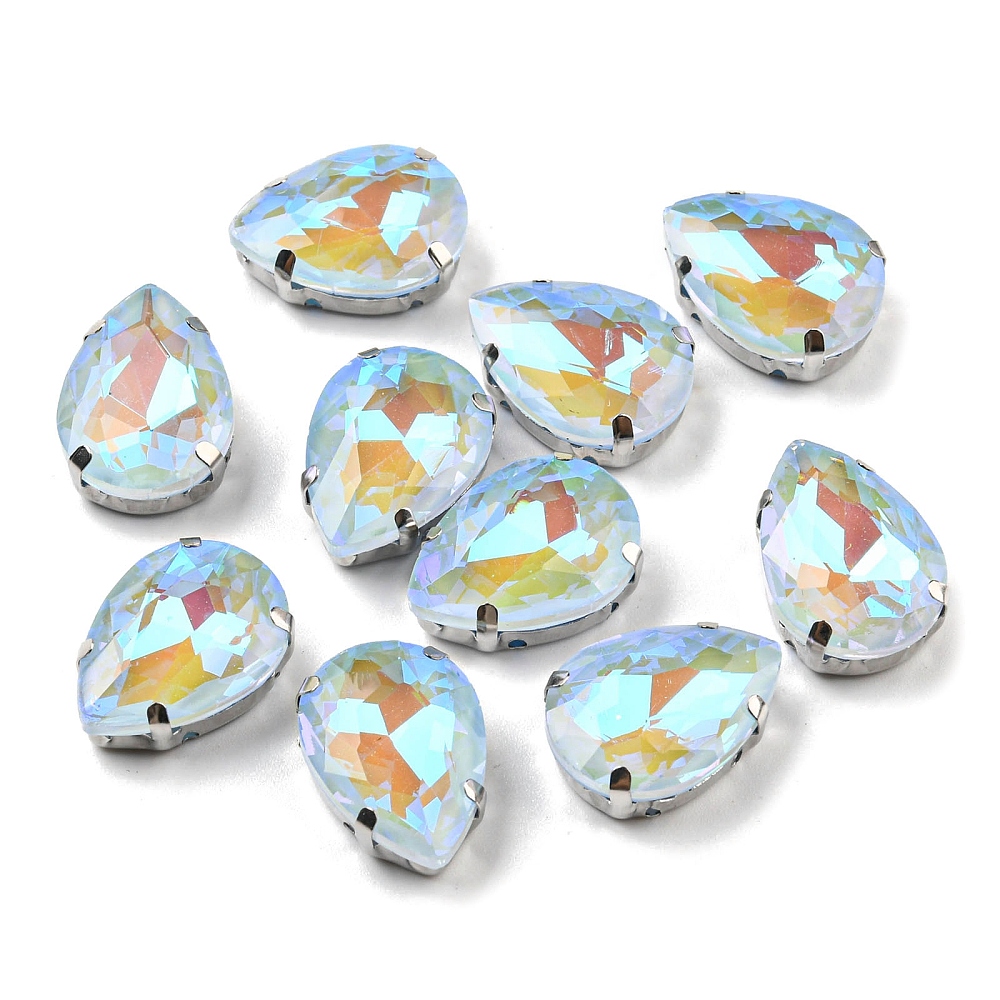
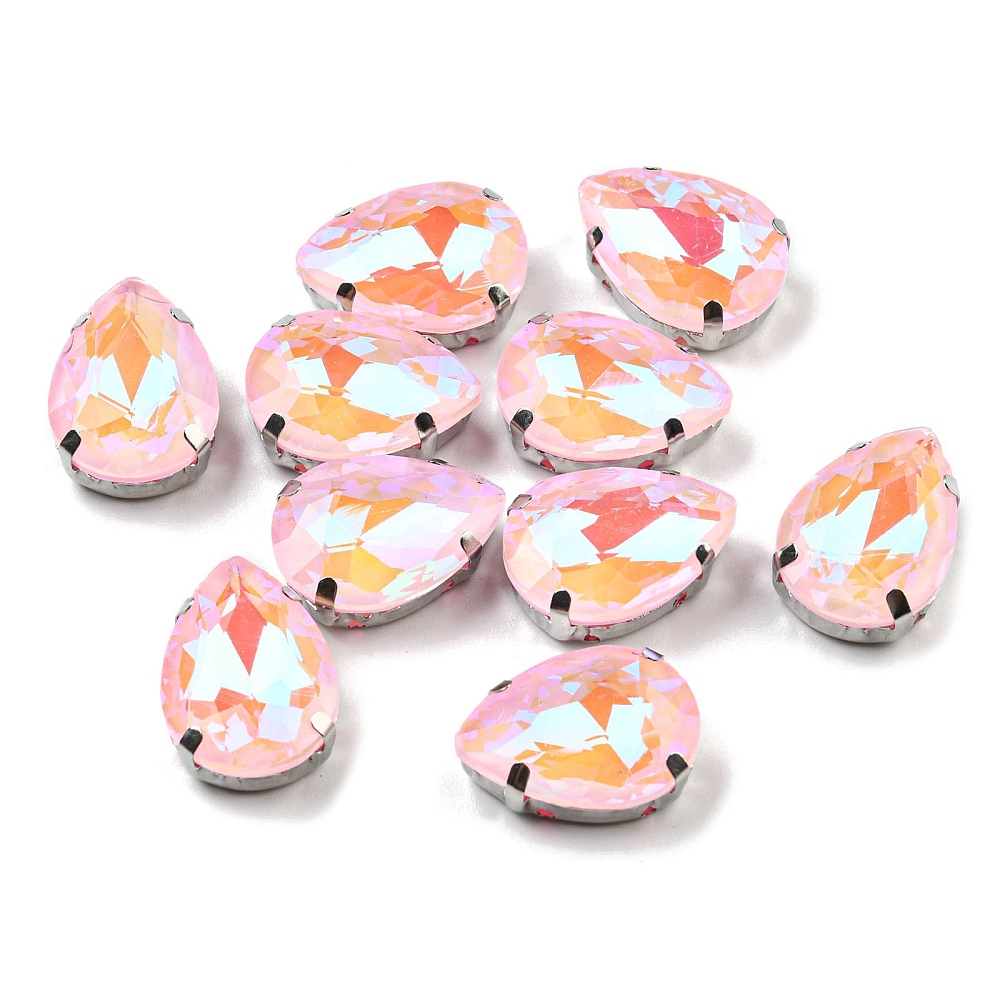
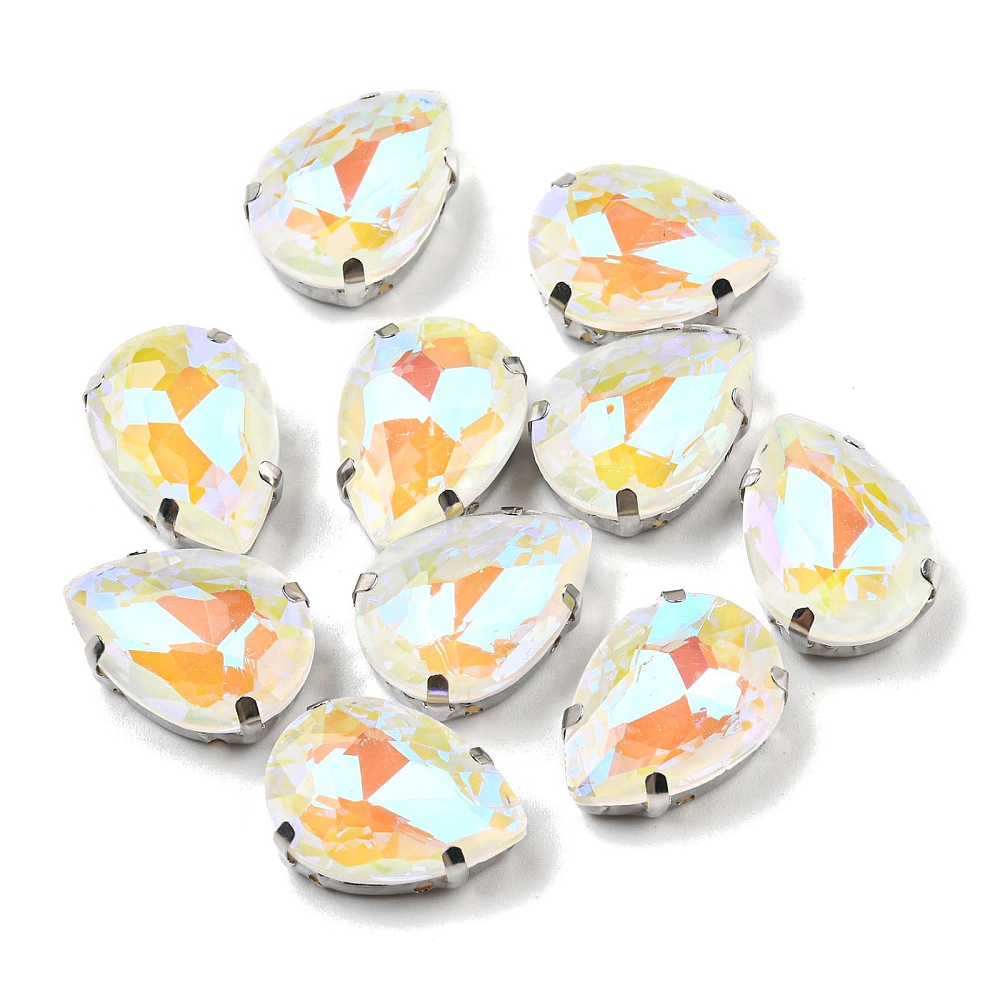
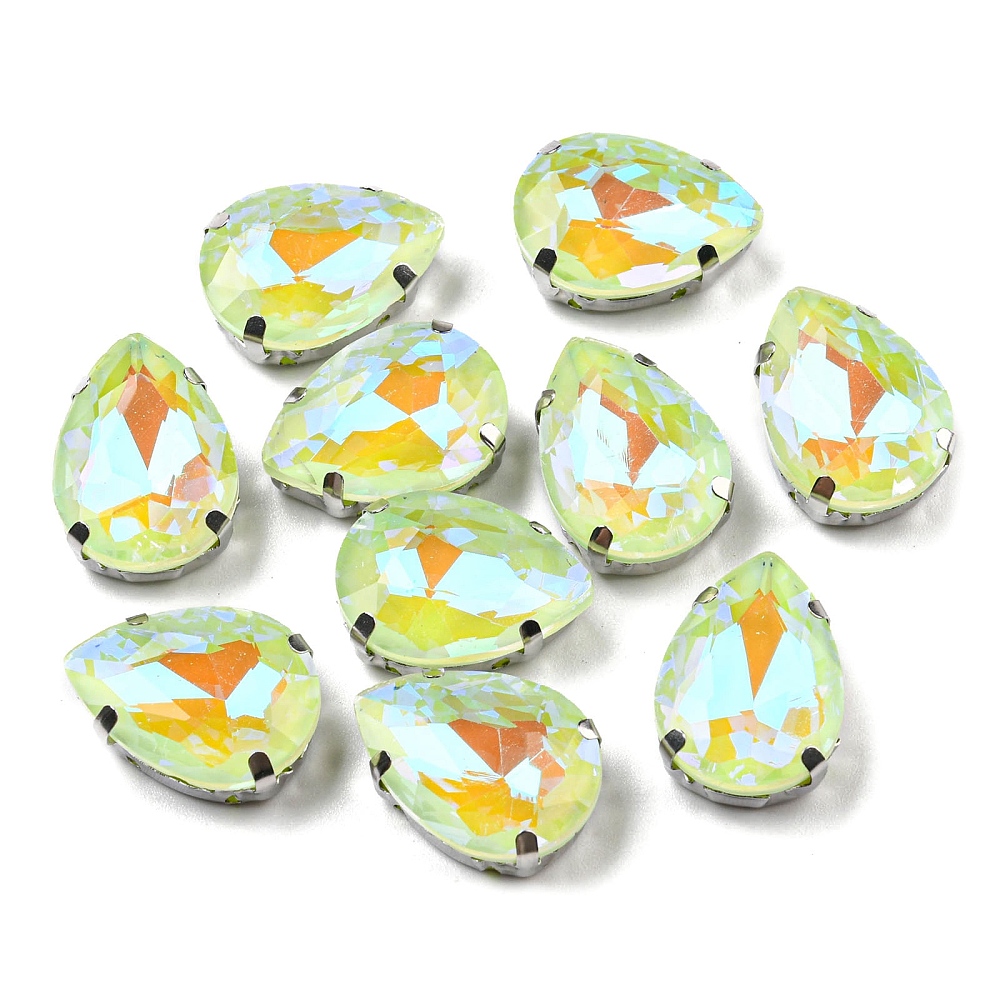
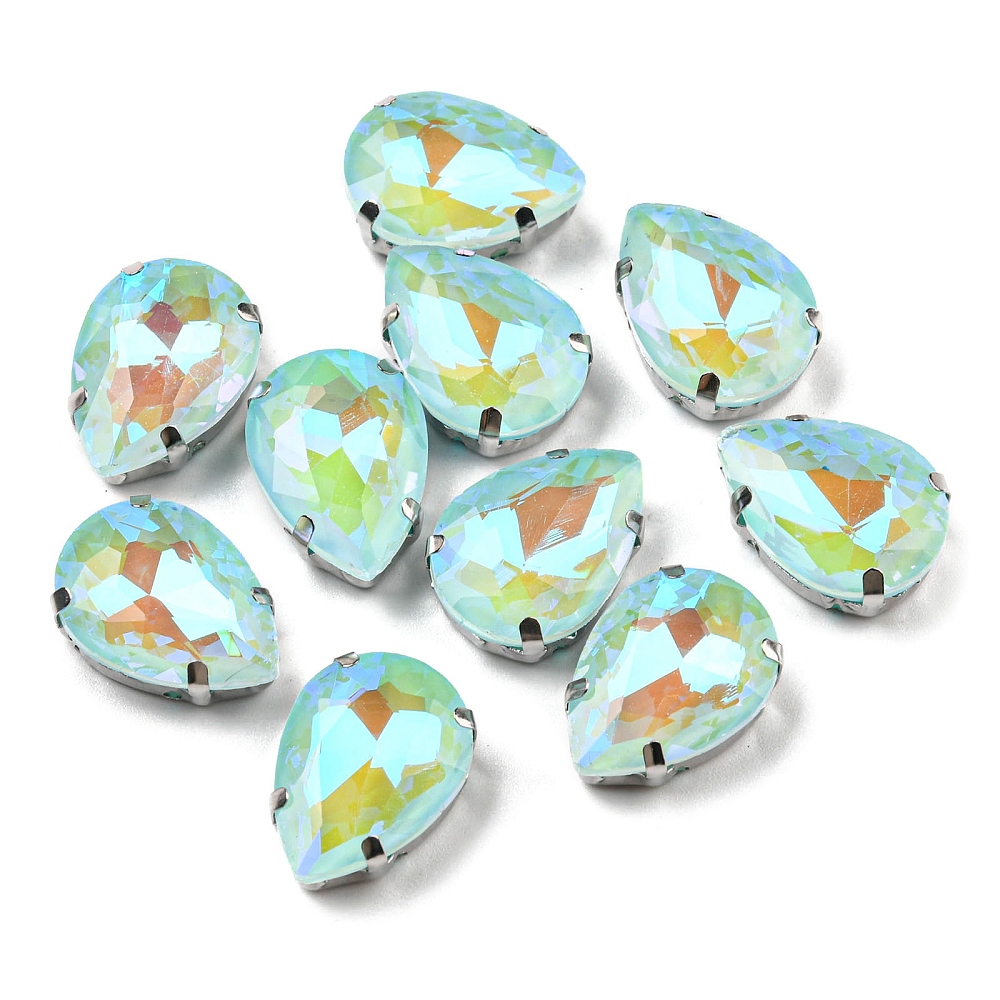
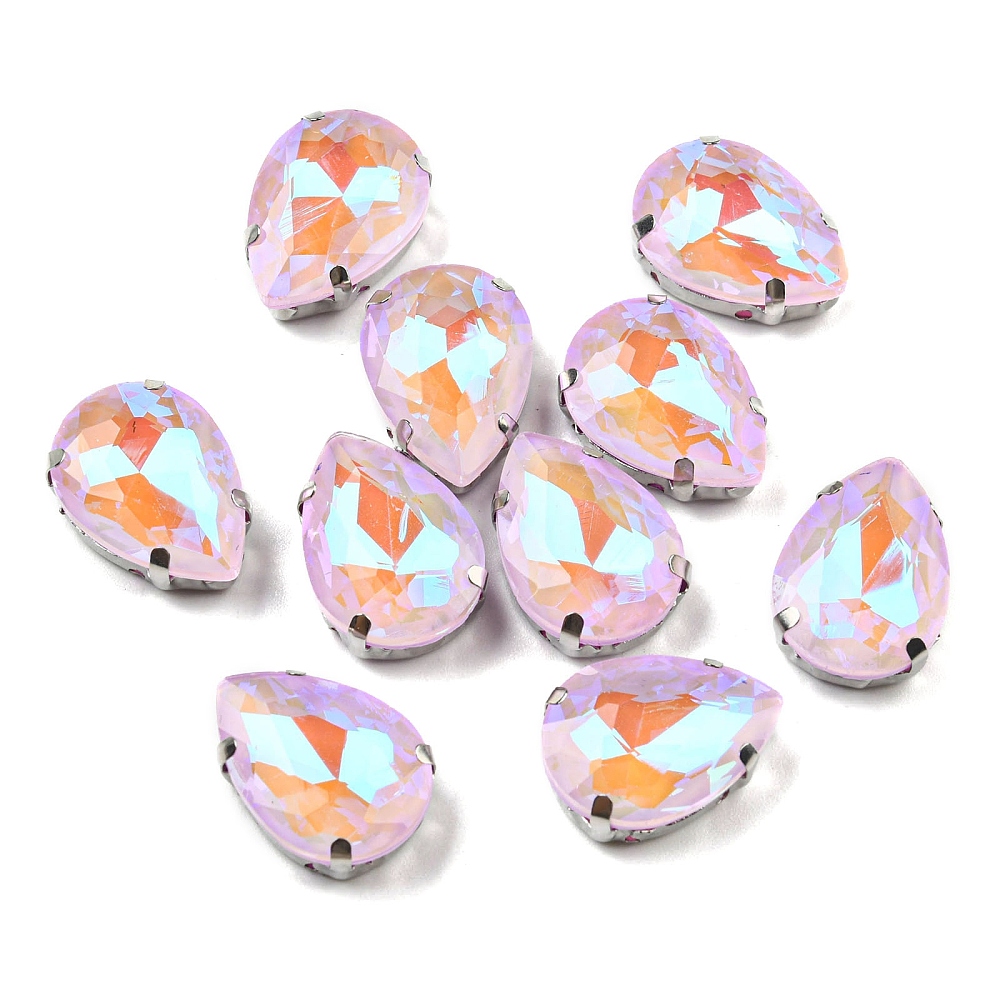
In addition I’ve also introduced some more crystals in settings – these have always been popular with bead embroiderers, and we’re now seeing them more and more in beadweaving too, thanks to beaders like Pikapolina and Erika Sandor. This particular size (18x13mm) and shape (pear) was requested by a customer, and as usual I couldn’t pick a range so there are two – both pastels, both summery. Both have a pastel coloured backing rather than being foiled, one with an opaque backing and a shimmer coating, and the other with an opaque but slightly shimmery, glittery backing and no coating. That makes the latter more subtle, and the former more blingy, so once again I have both camps covered!
I know, I’m on a roll, two new tutorials in a row! This one is another pure beadweaving tutorial – I’ve been doing a lot of bead embroidery and goldwork as part of other projects, so I’ve returned to beadweaving as a break from the stress of very creative work, spending some time refining some samples made a little while ago and writing them up.
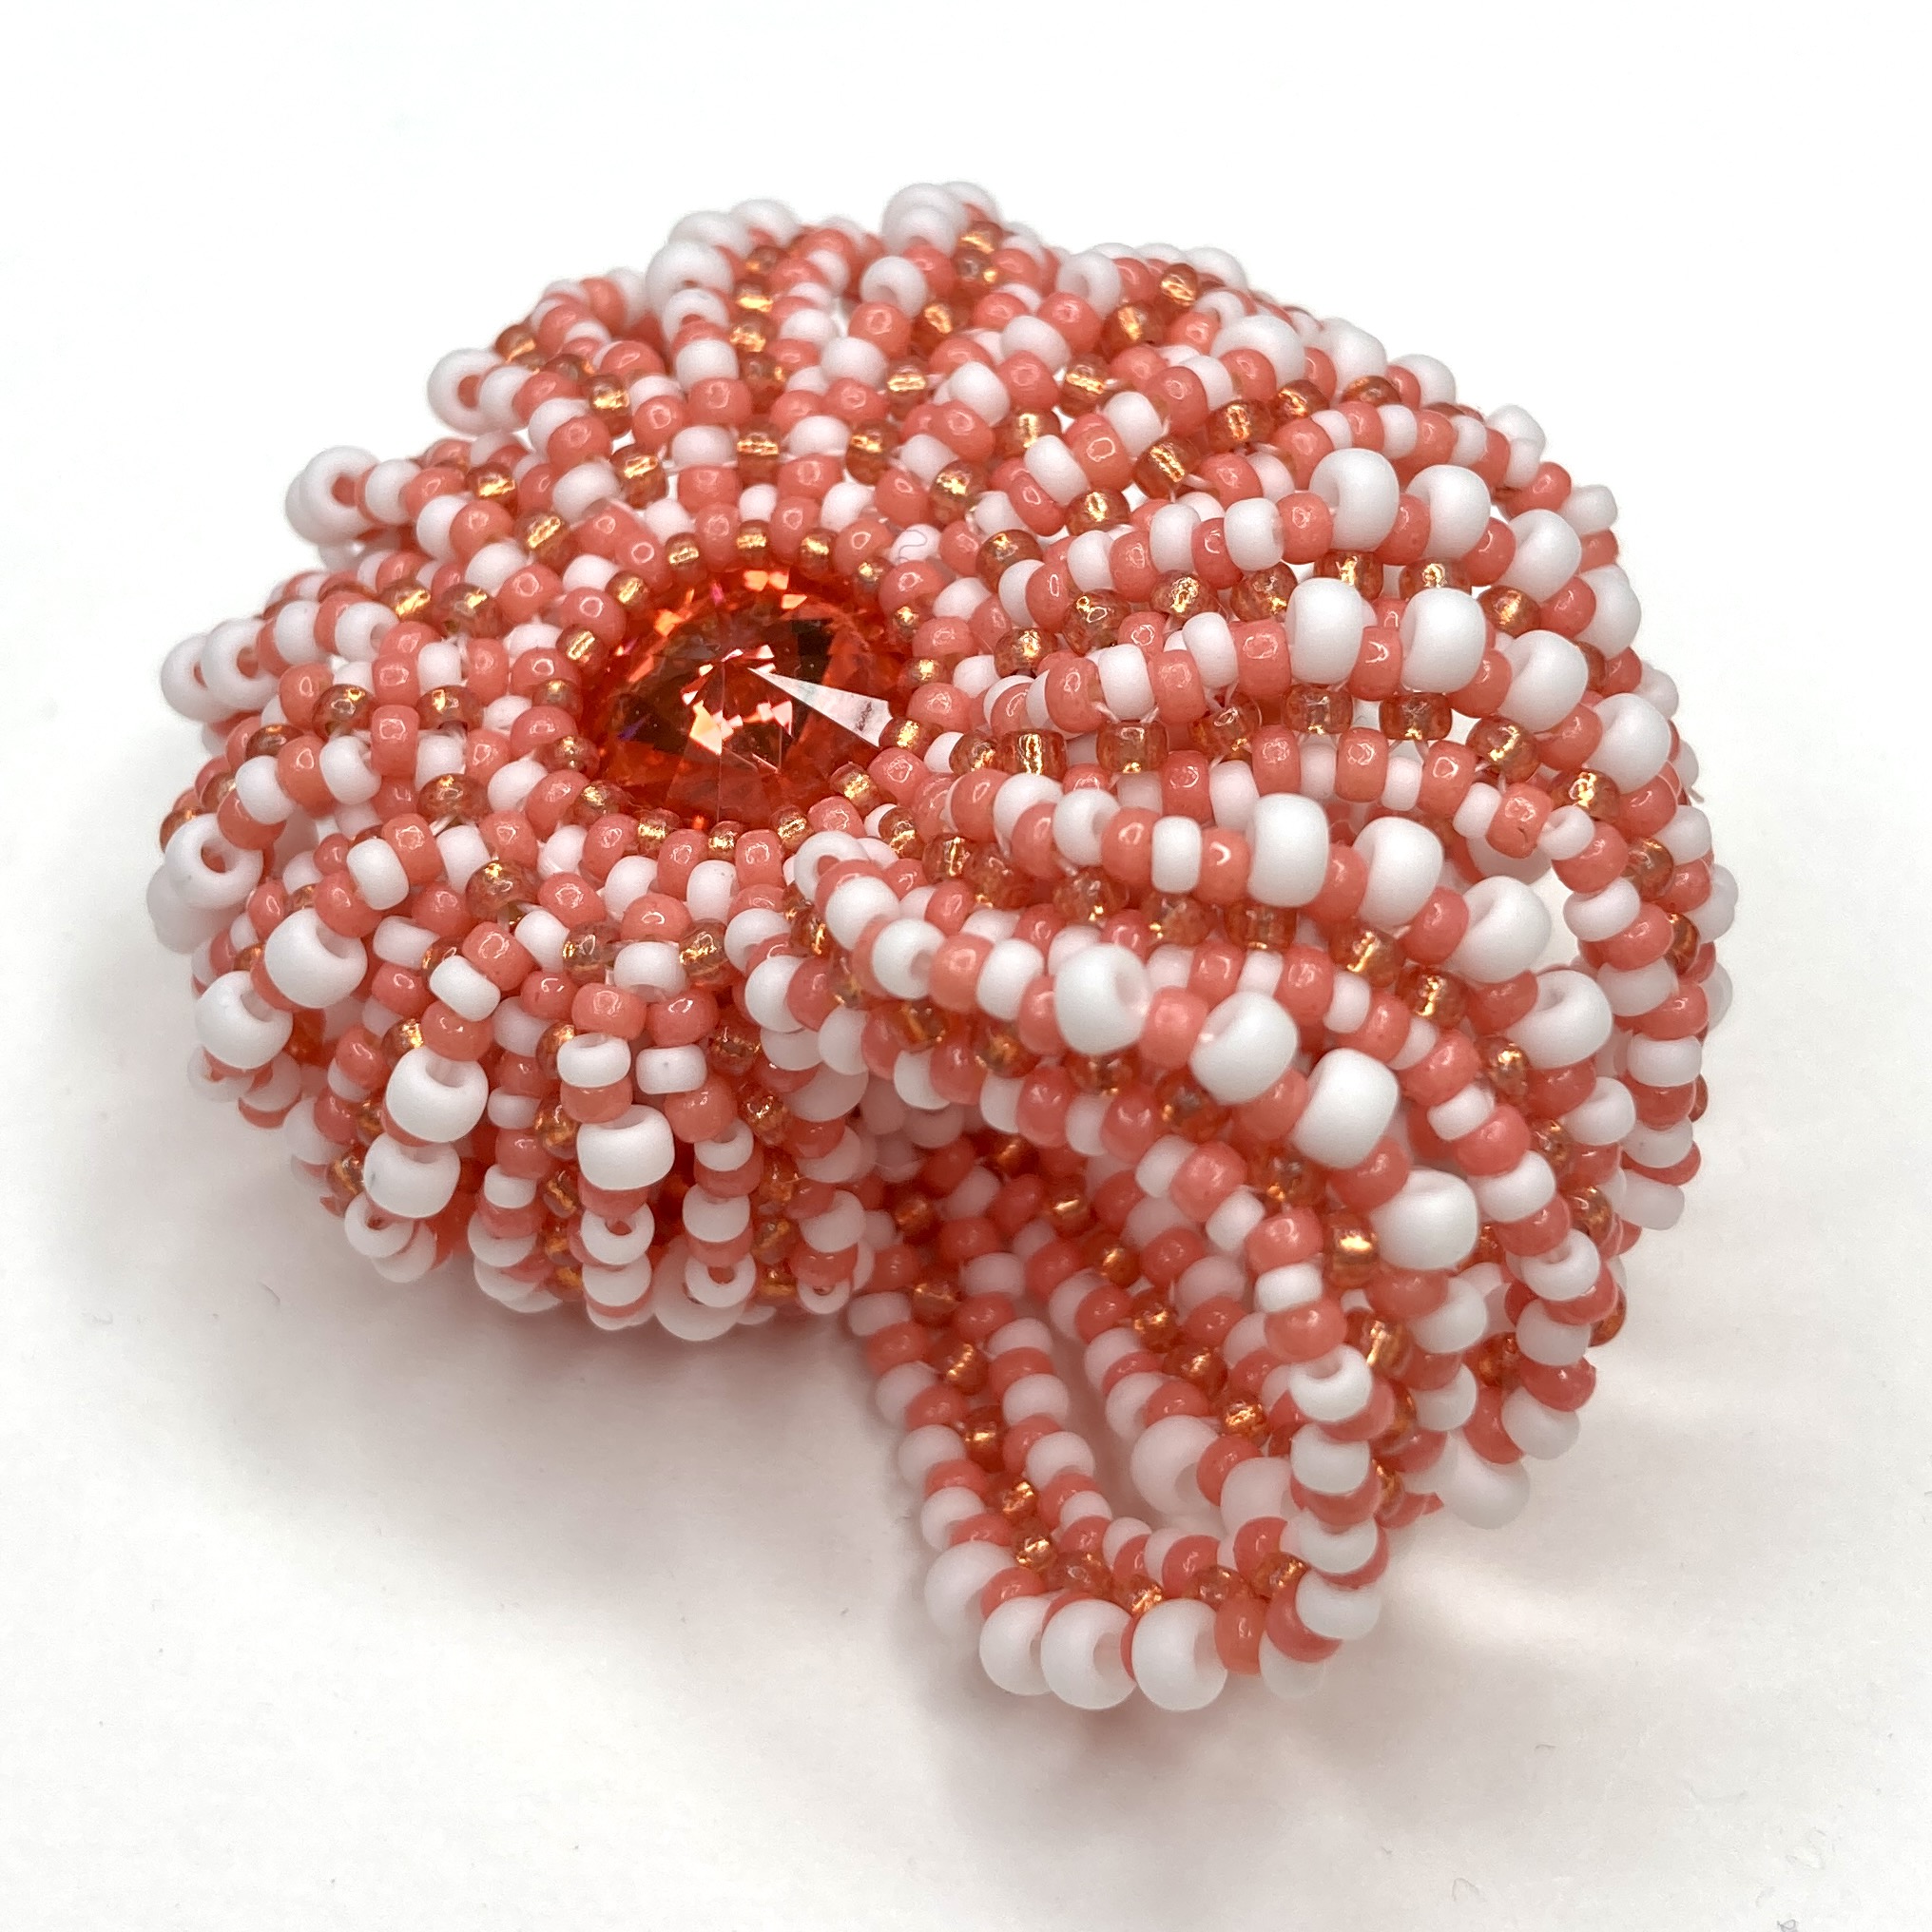
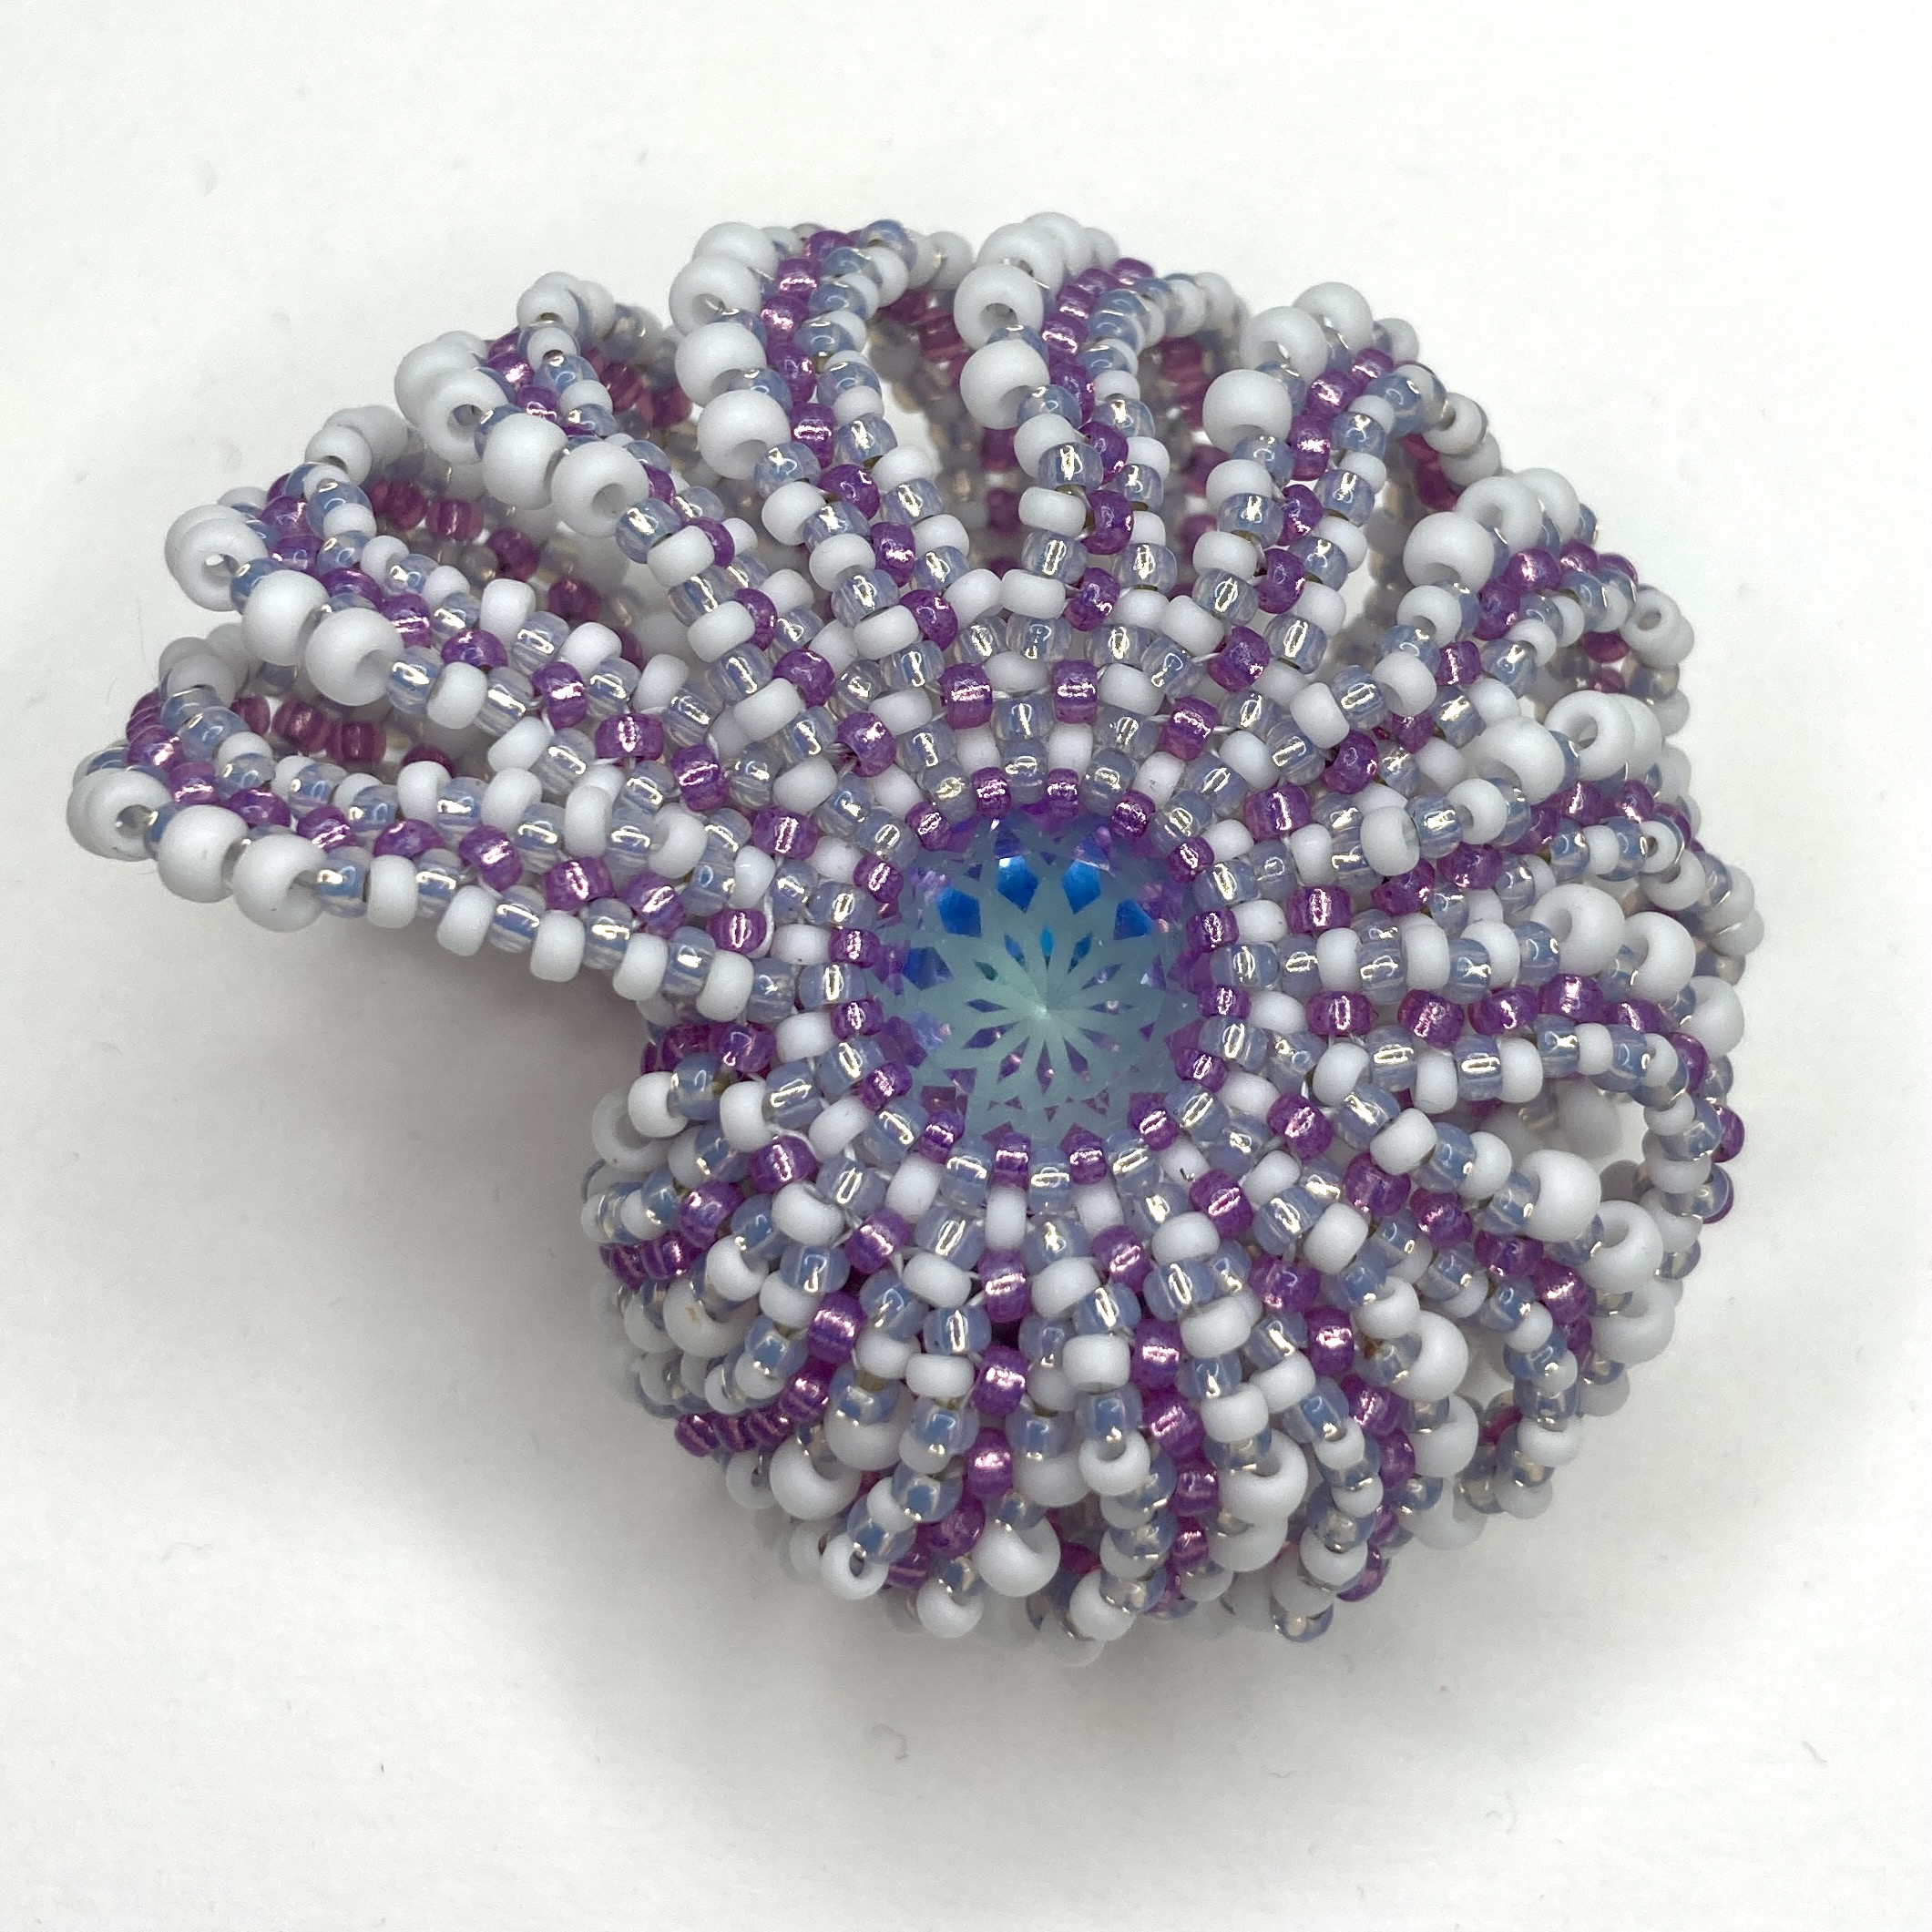
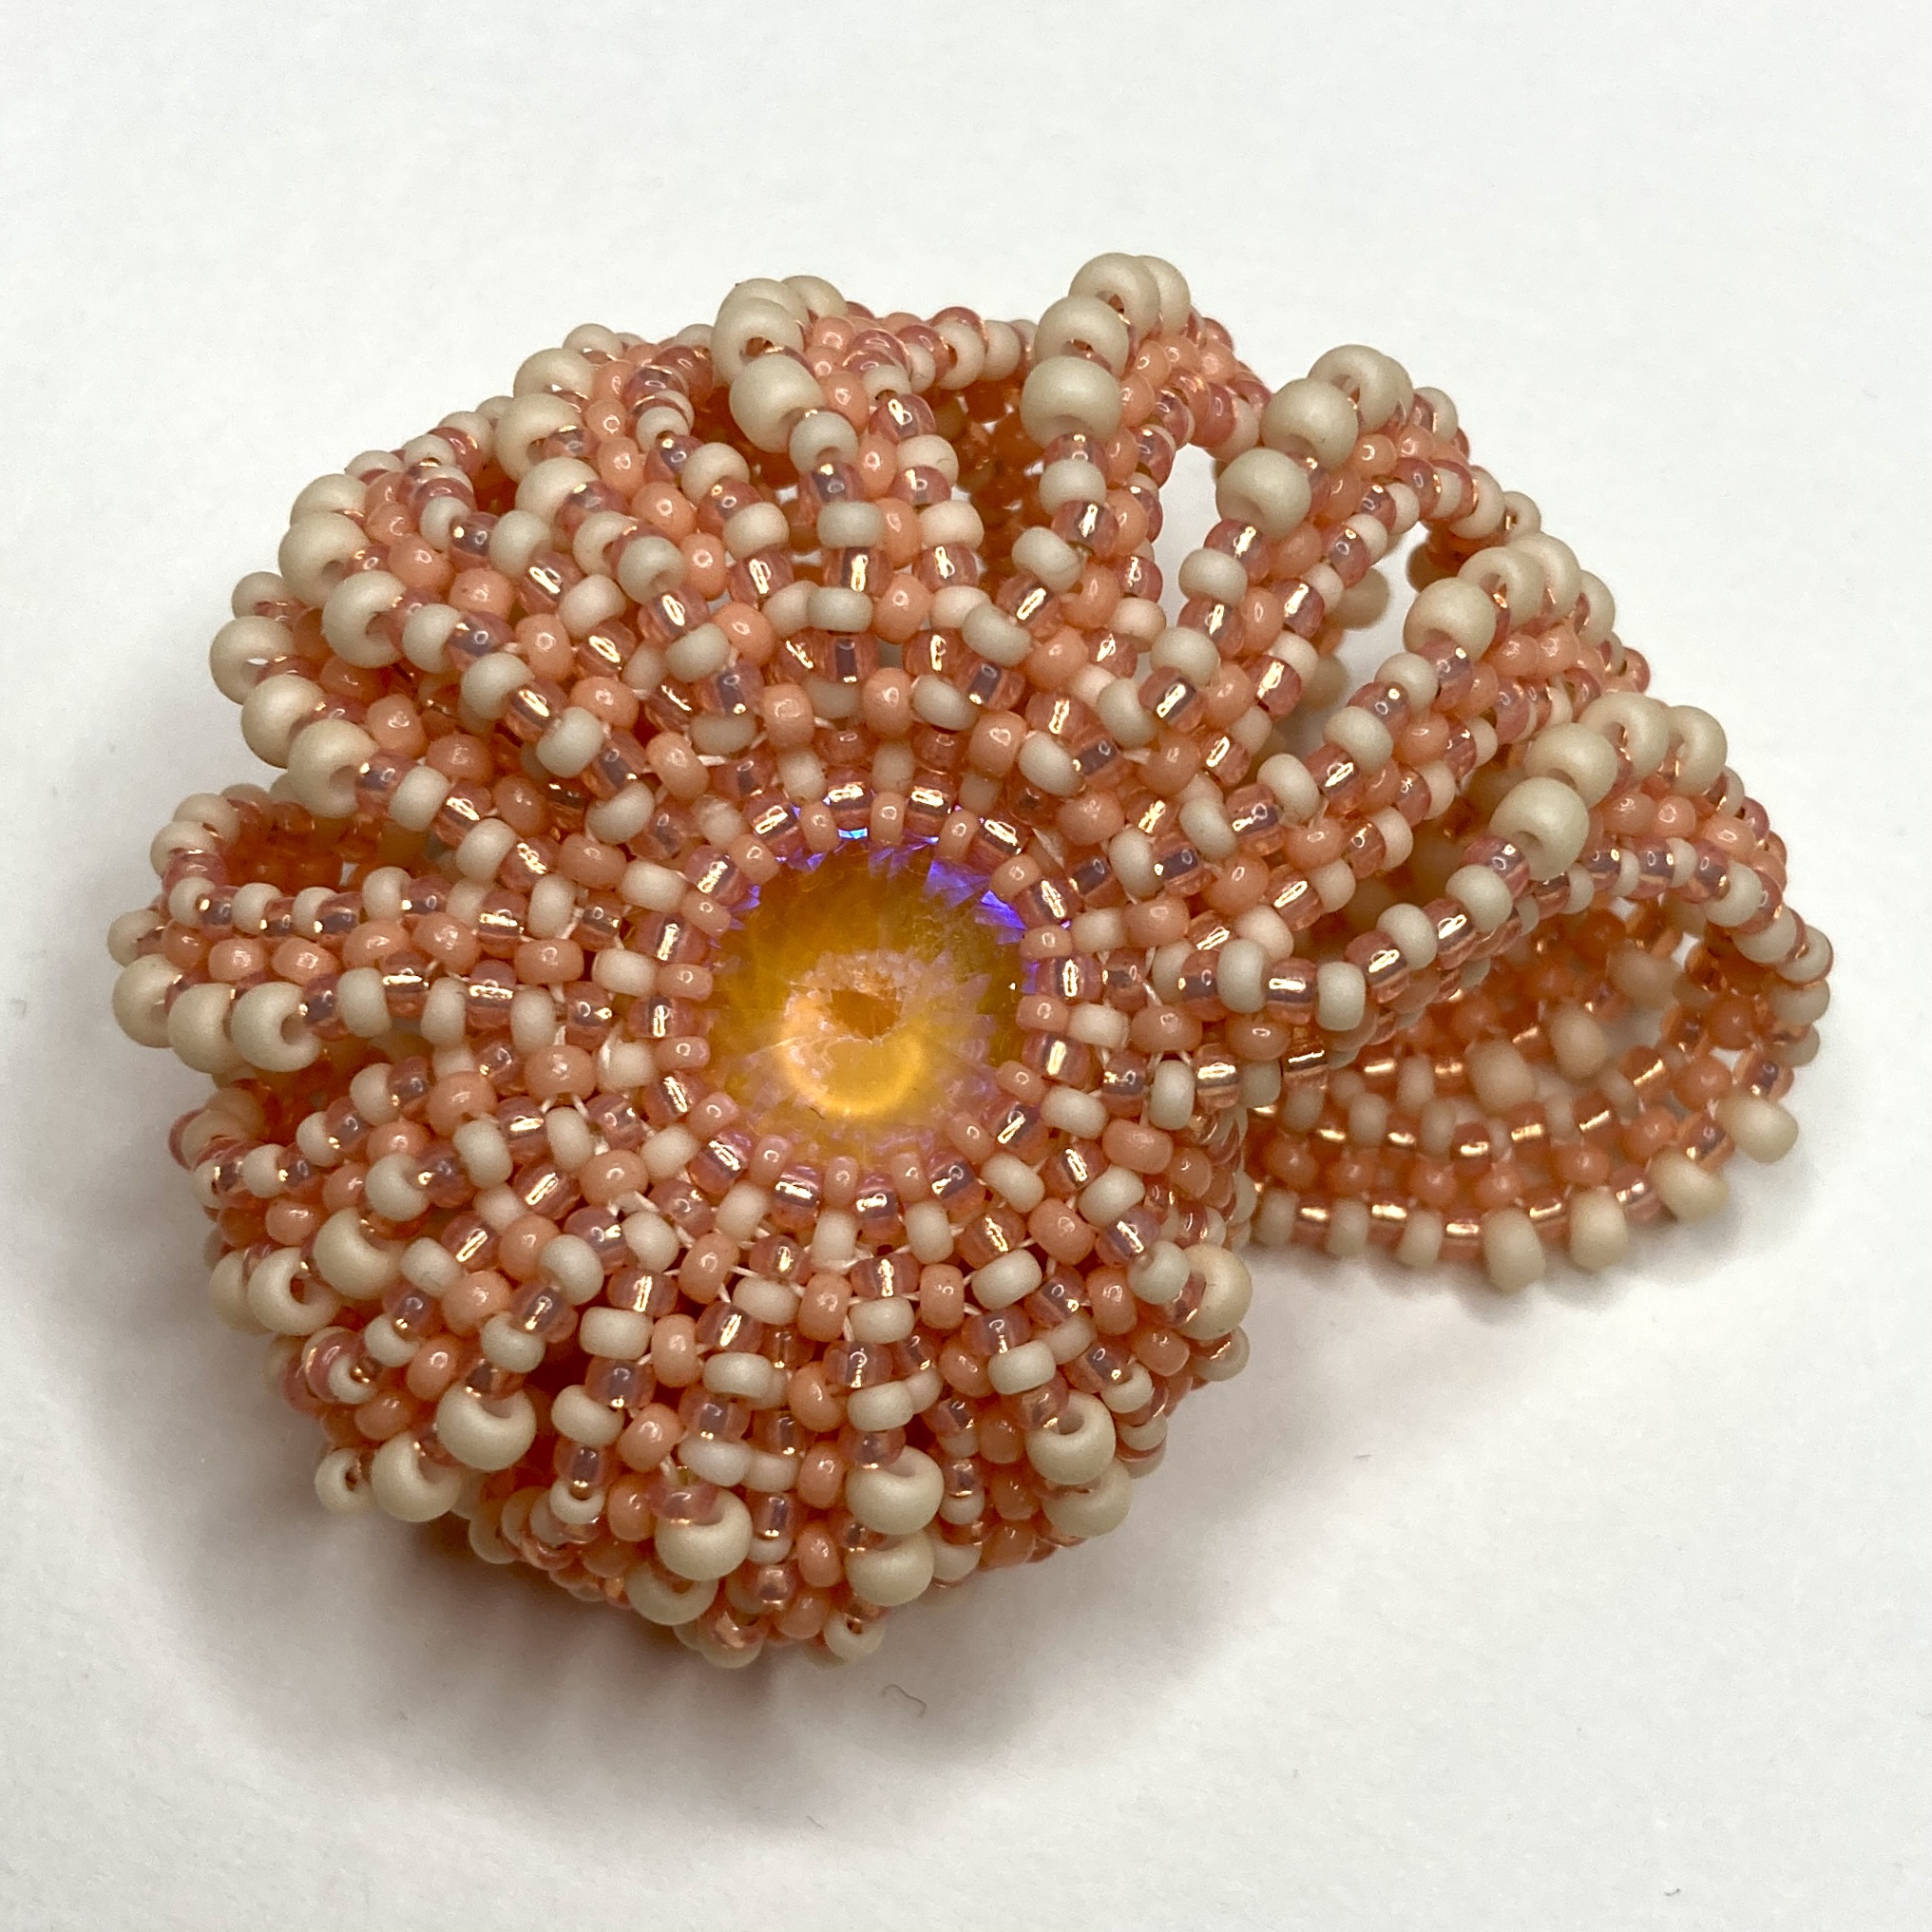
This piece was started last year as an attempt to create a shell shape in beads.
The original idea was to work with CRAW, and whilst that came out as I’d planned, it wasn’t really shelly enough (you definitely had to be told what it was supposed to be!!). CRAW is also not a universally popular stitch – some beaders love it and some completely hate it, so I moved on…….
The idea of increasing strips seemed sensible, but there needed to be more of them to give a clearer shape, and they needed to not be CRAW – so I had a go with RAW, using twice as many strips and something altogether more shell like emerged.
There were a few mis-steps along the way – early versions had a terrible wobble in the middle until I changed the central join to make it more rigid, and I had a lot of trouble getting the spines rigid enough without busting needles weaving through (and getting bored as well as annoyed in the process). A offset version was hopeless but did give me some ideas. Overall the set up was a little plain – still not shelly enough, and the metallic beads weren’t helping either.
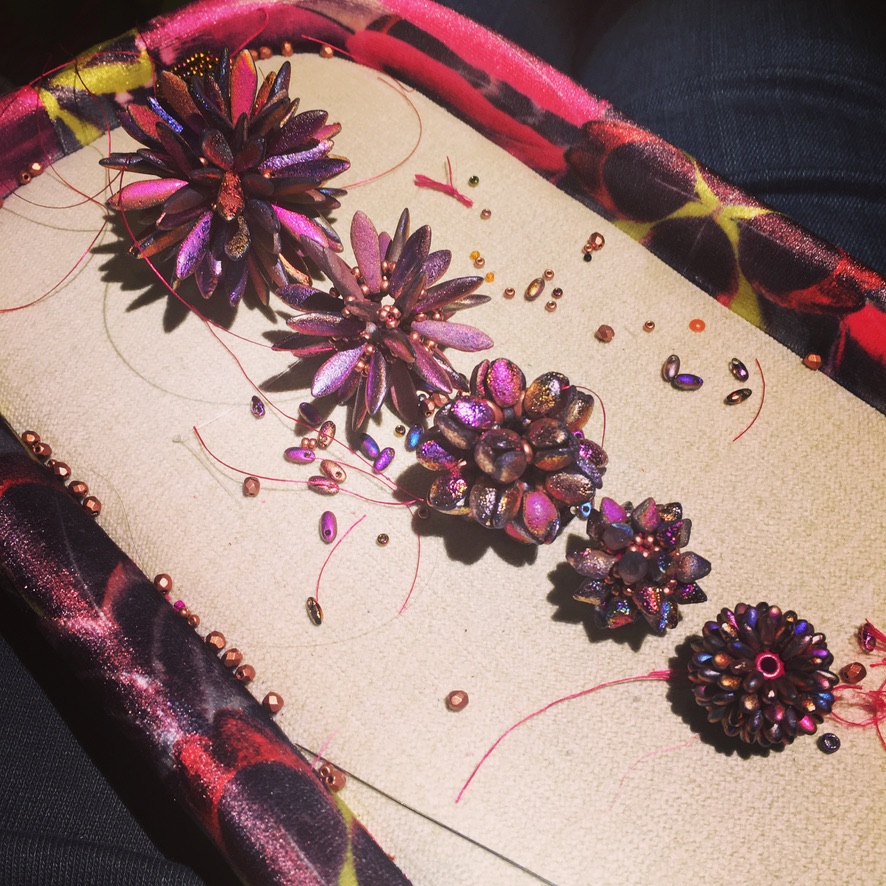
Then I had the idea to add Cellini to the spine edges – that immediately gave a beautiful S shaped curve and an instantly rigid shape, but I was still having issues with getting through some of the beads to get the spines in place and to make them rigid enough. That meant lots of new versions, trying different bead sizes, thread paths, even altering the bezels. Colours became less metallic, sometimes a little bright (for clarity) but mainly staying in a ‘shell’ palette.
After all that fiddling and frogging I had a breakthrough, managing to come up with a cunning trick to improve the thread path at a critical point to save needles, remove the need to weave through to strengthen and best of all, preventing bad language! Ironically the diversions were all red herrings – the final piece is very close to the two first Cellini versions, just with that slight critical adjustment. Brighter colours to help with picture taking at this stage……
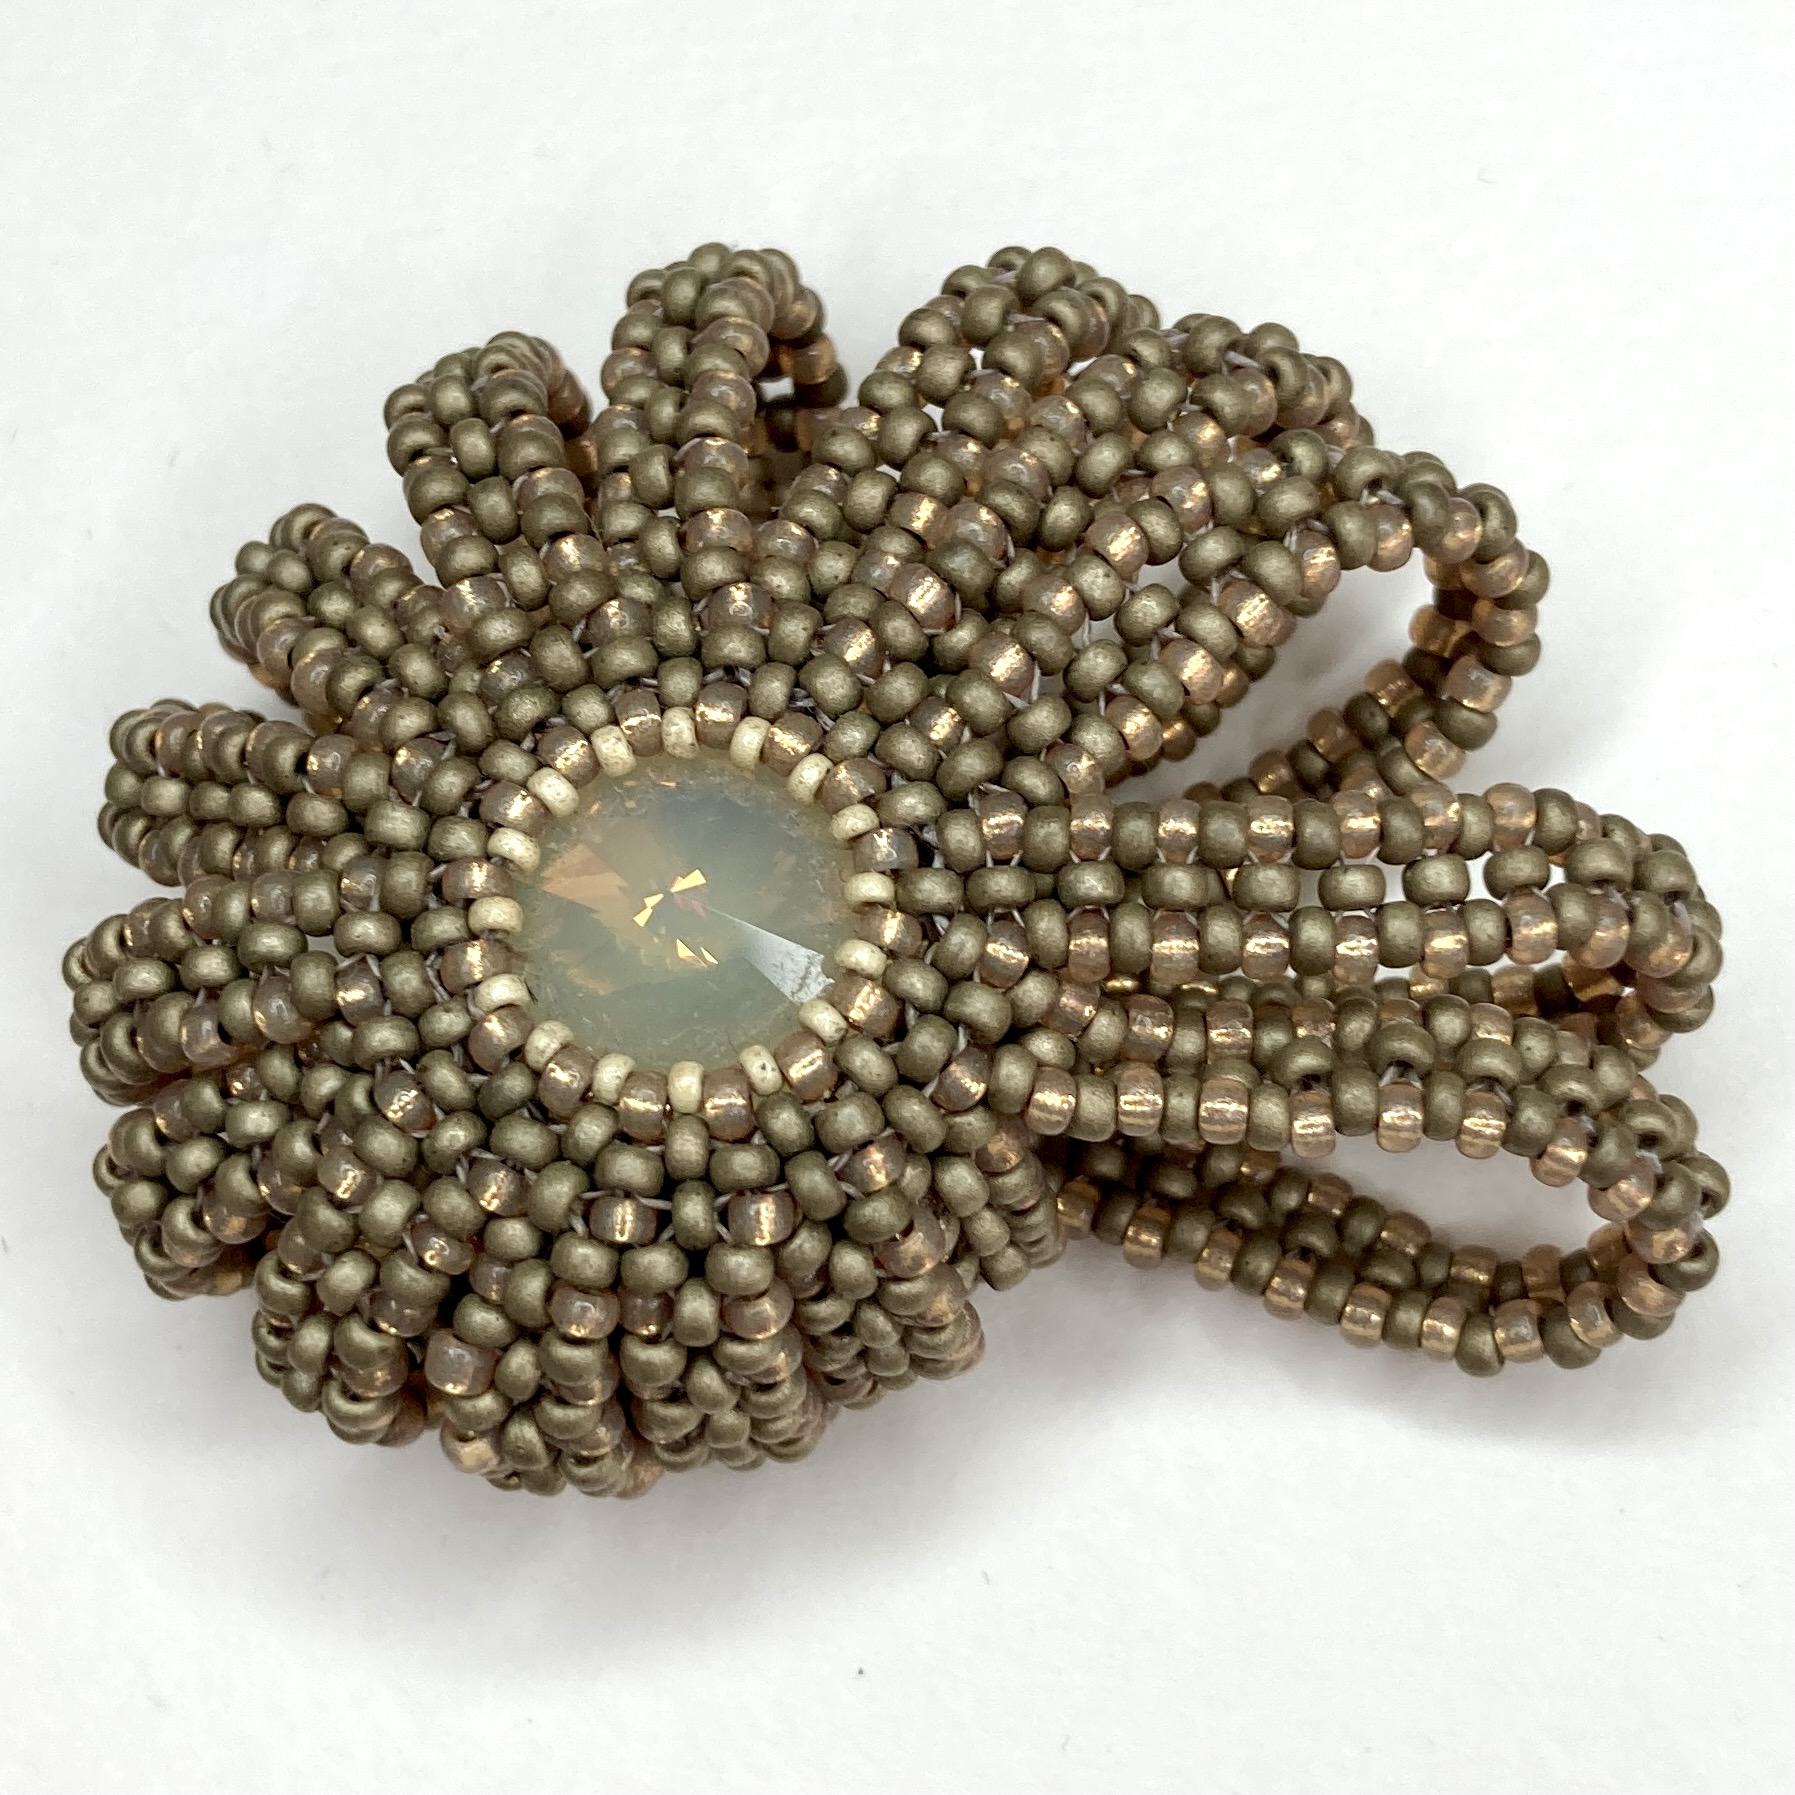
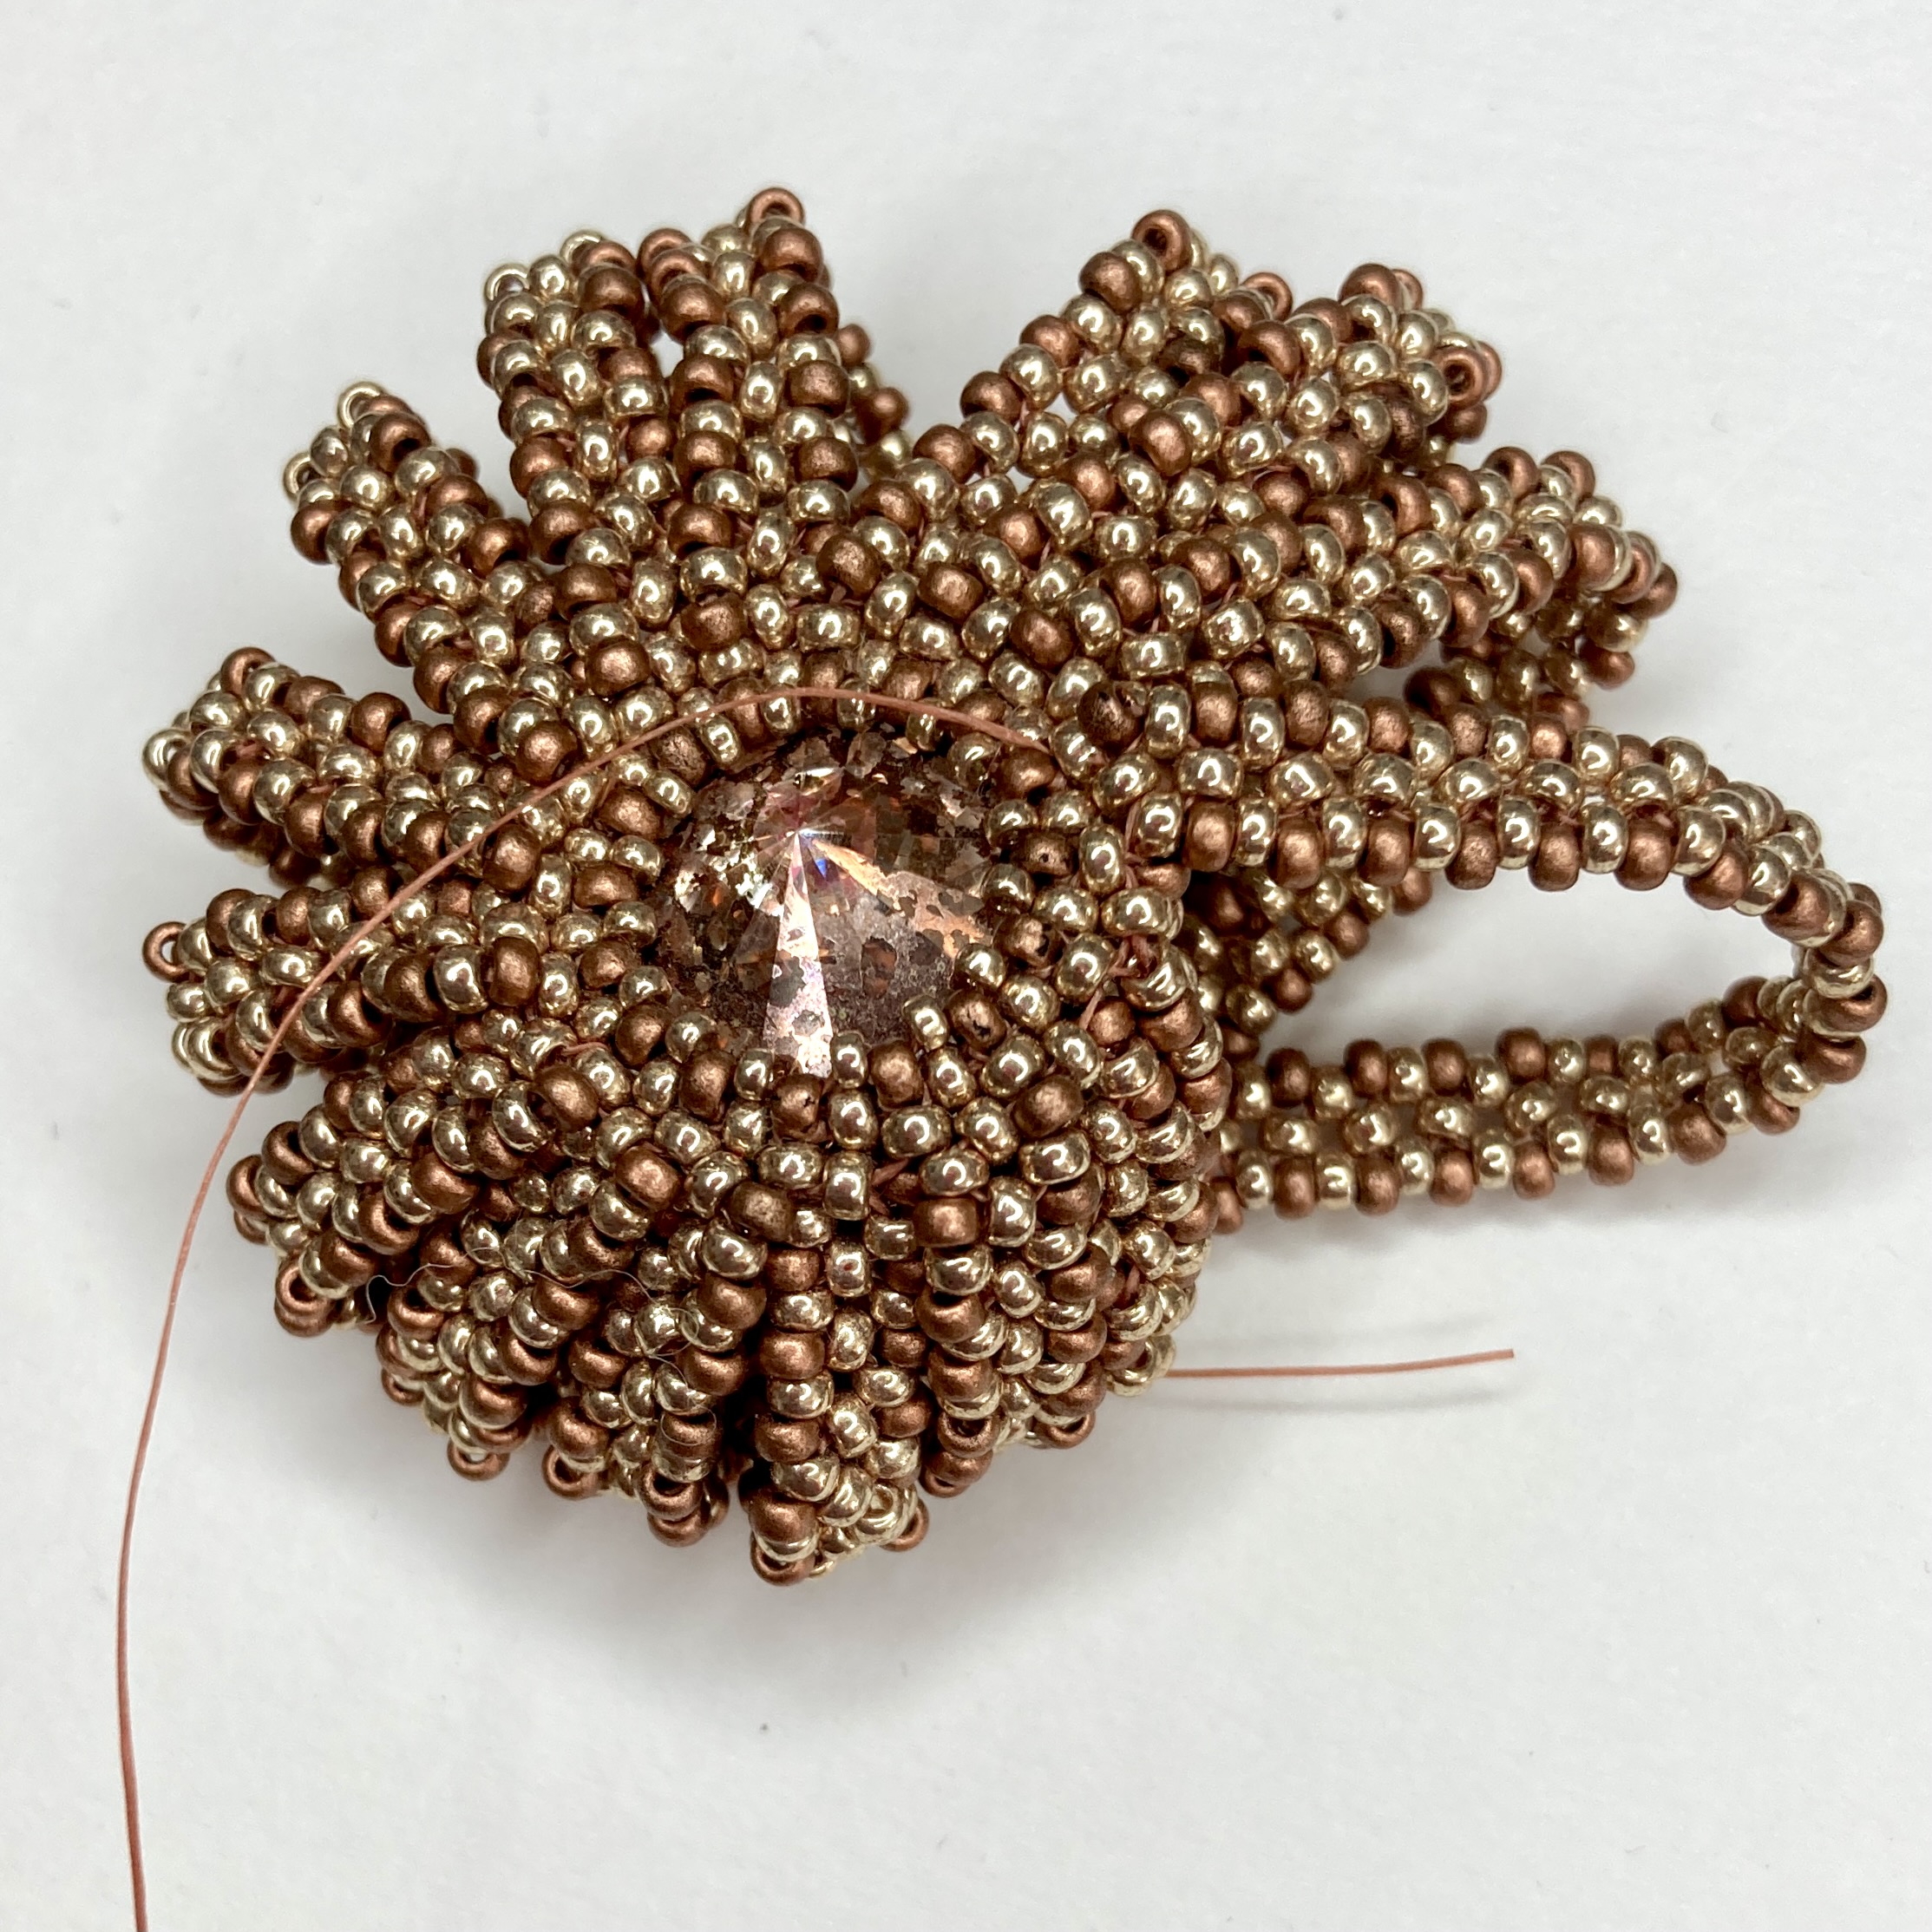
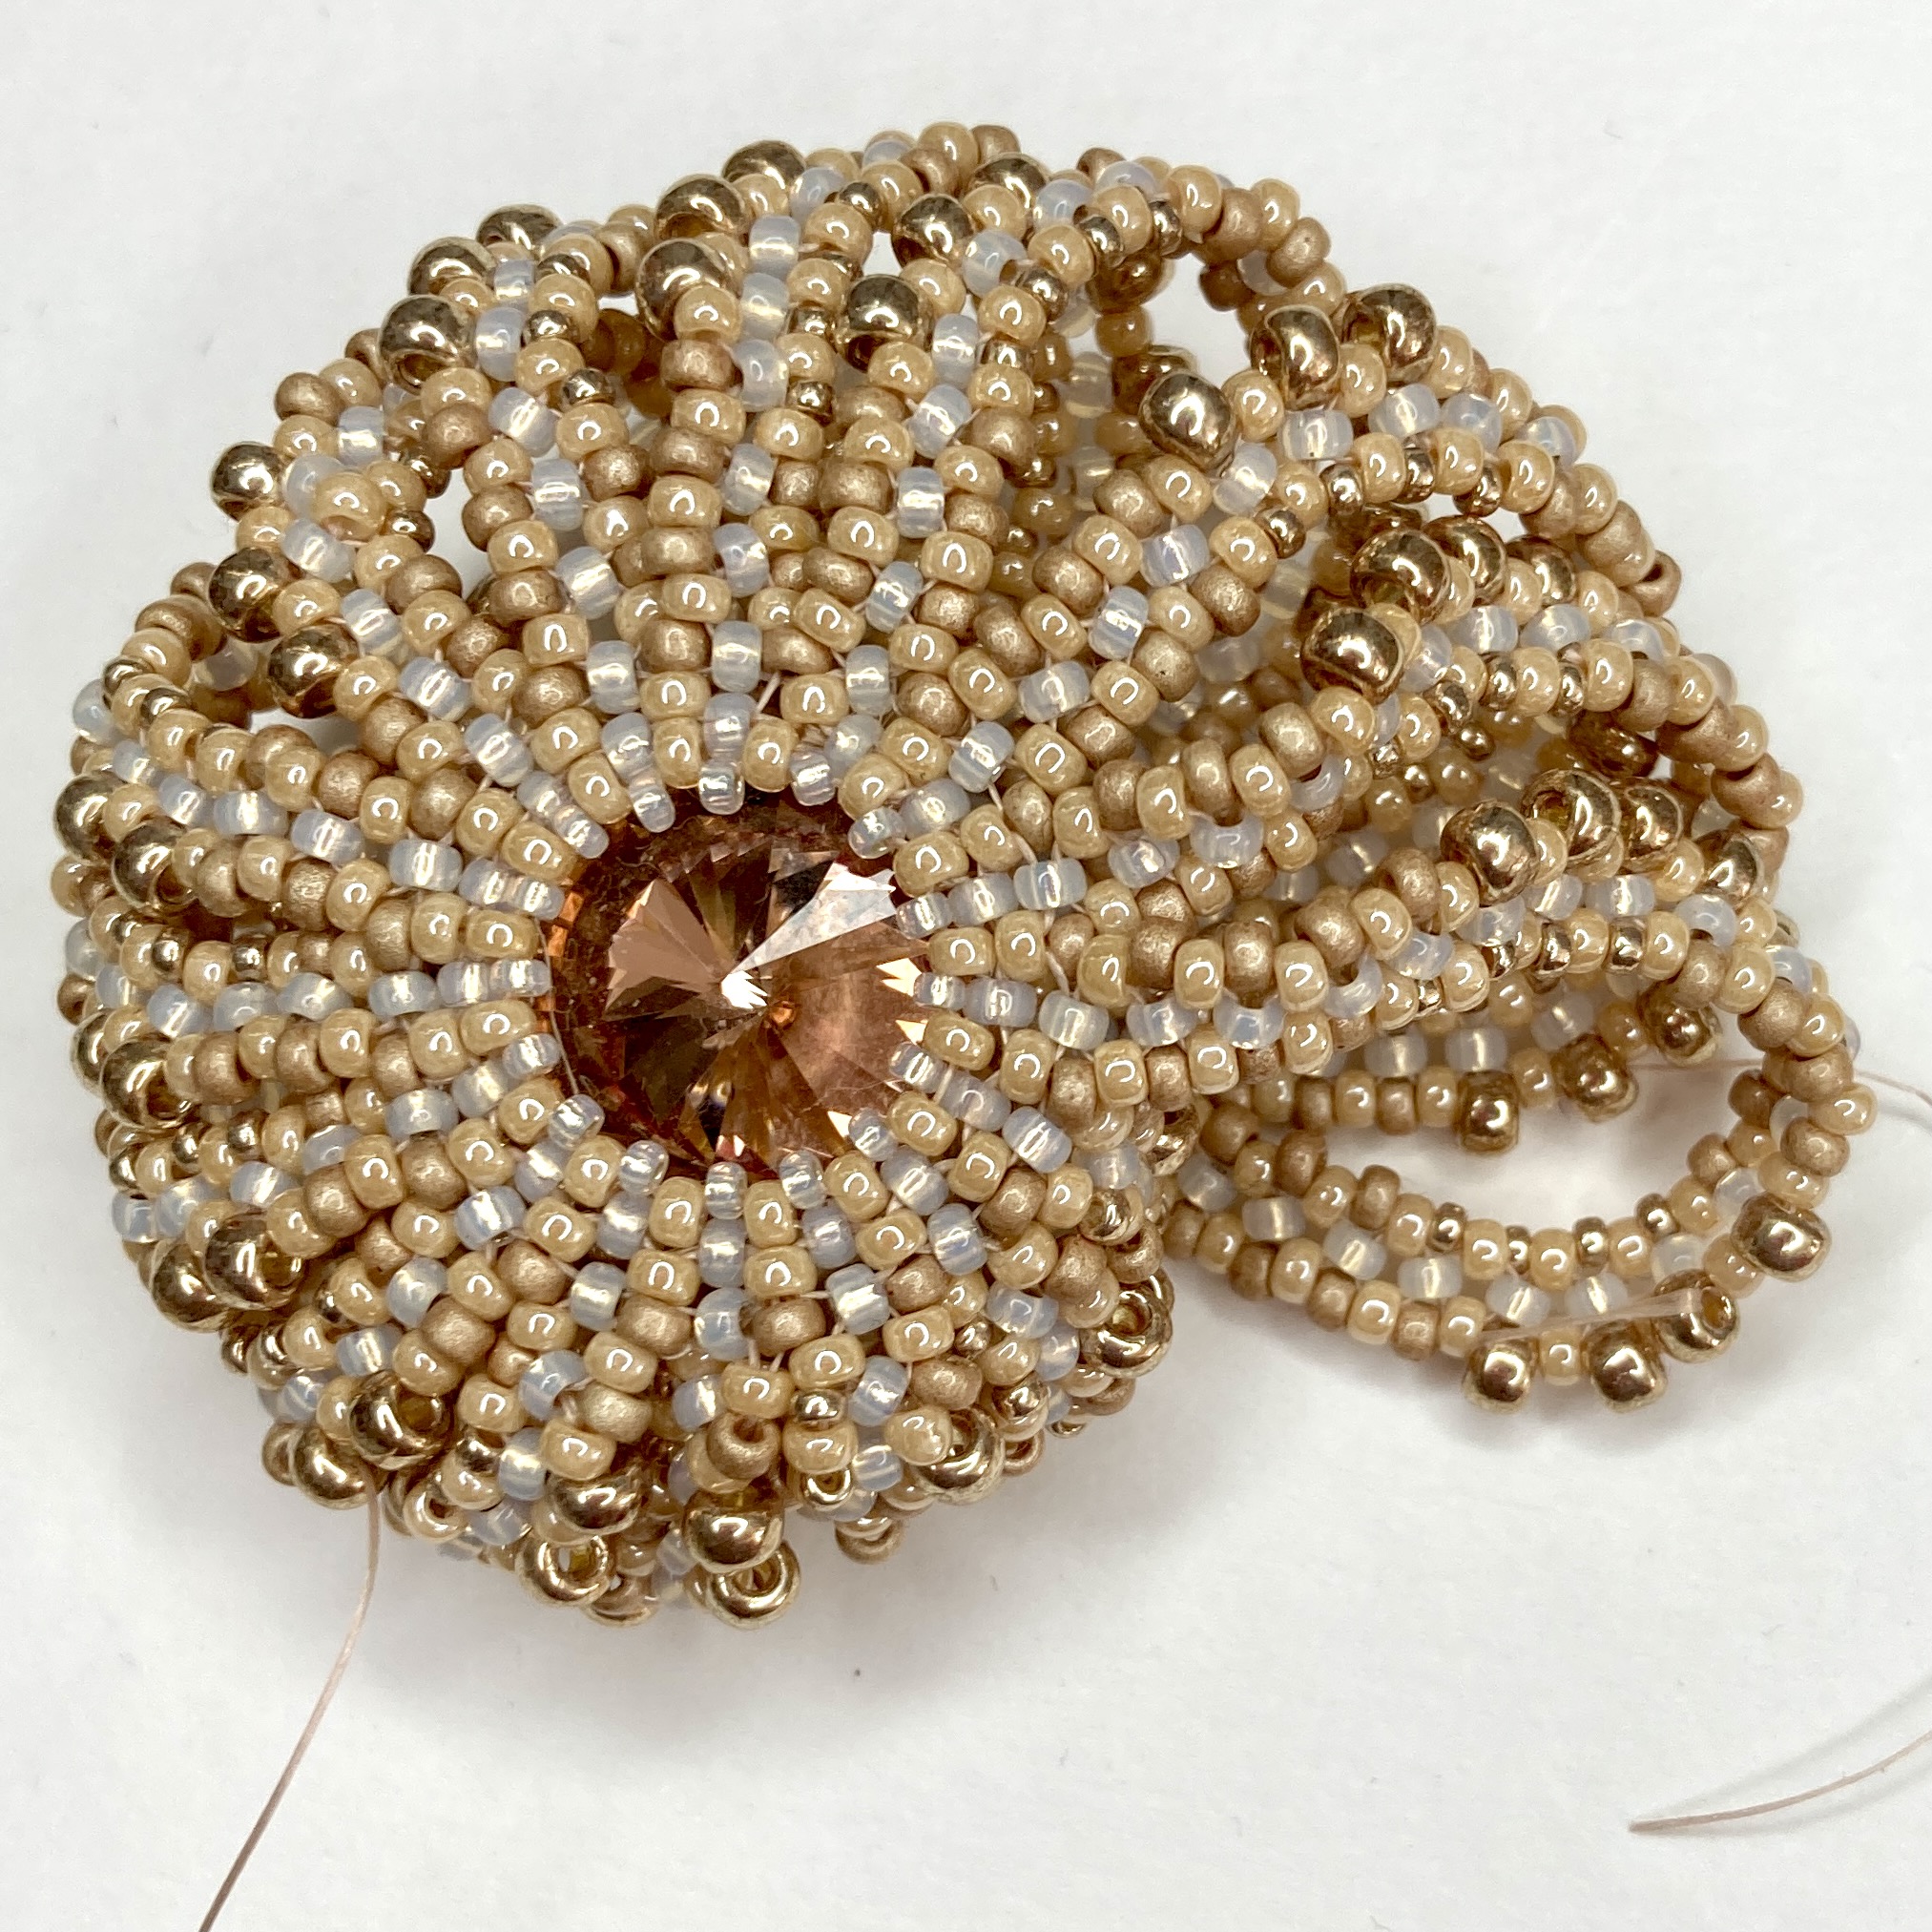
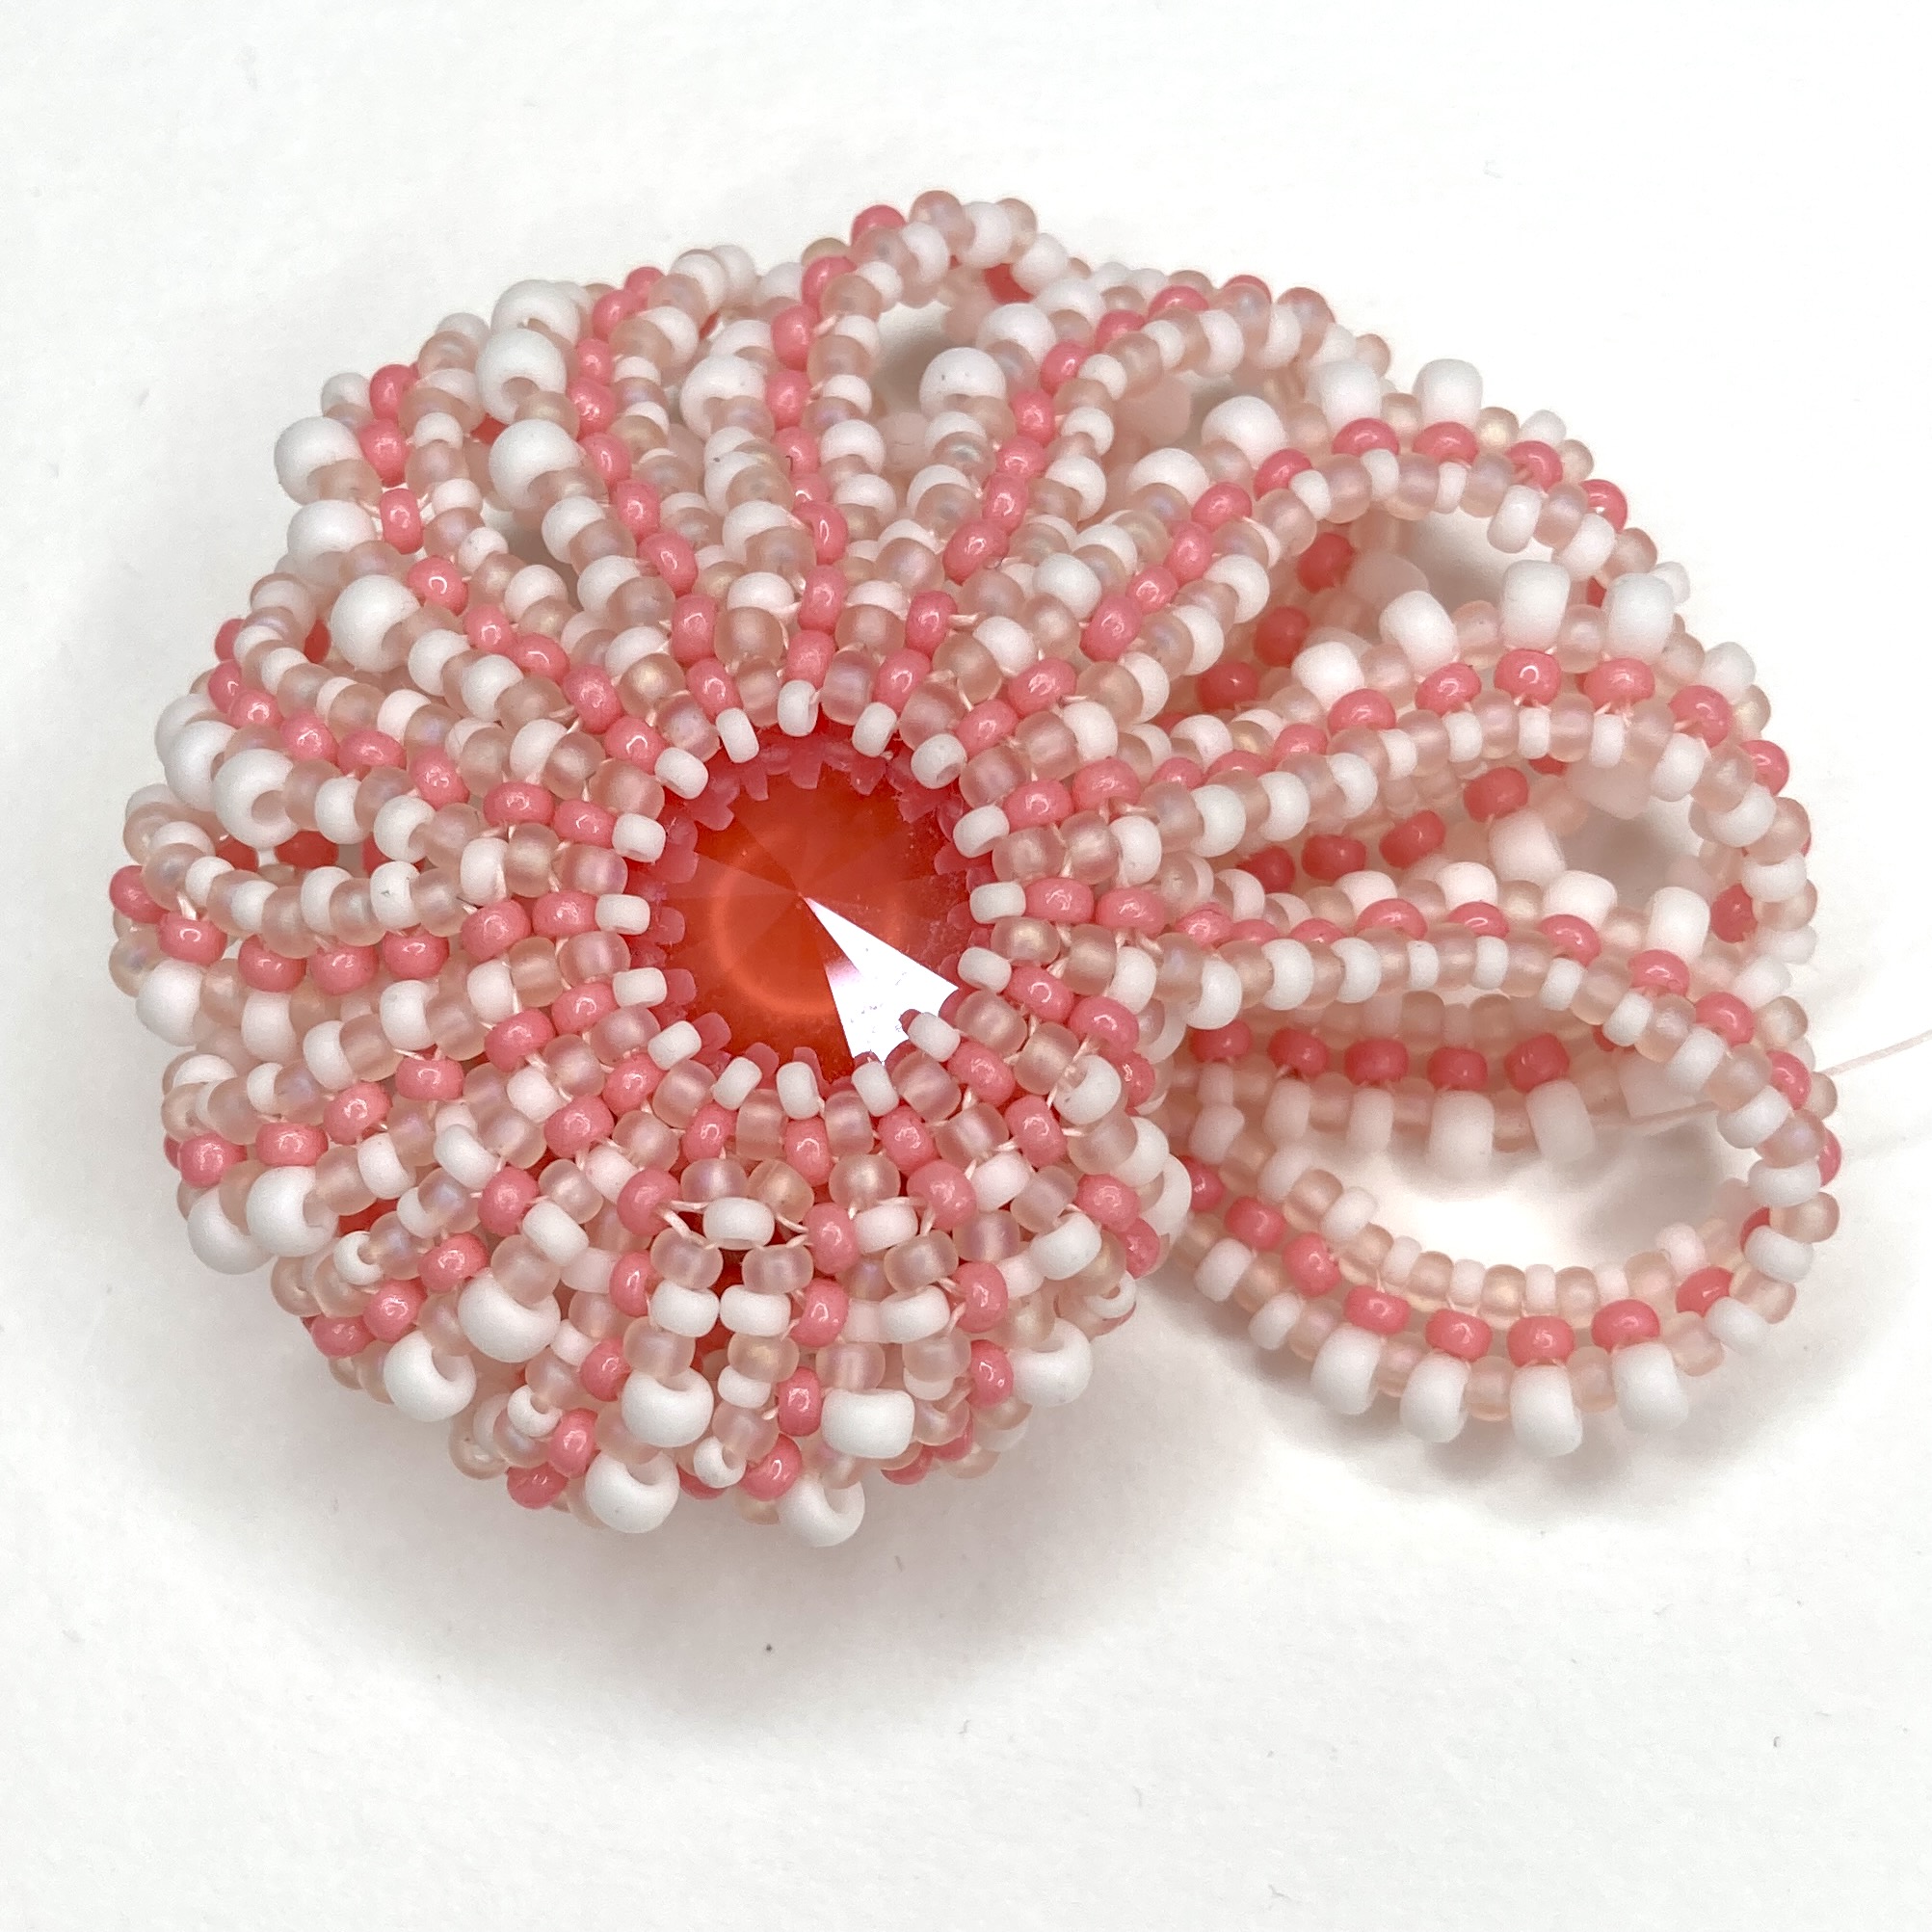
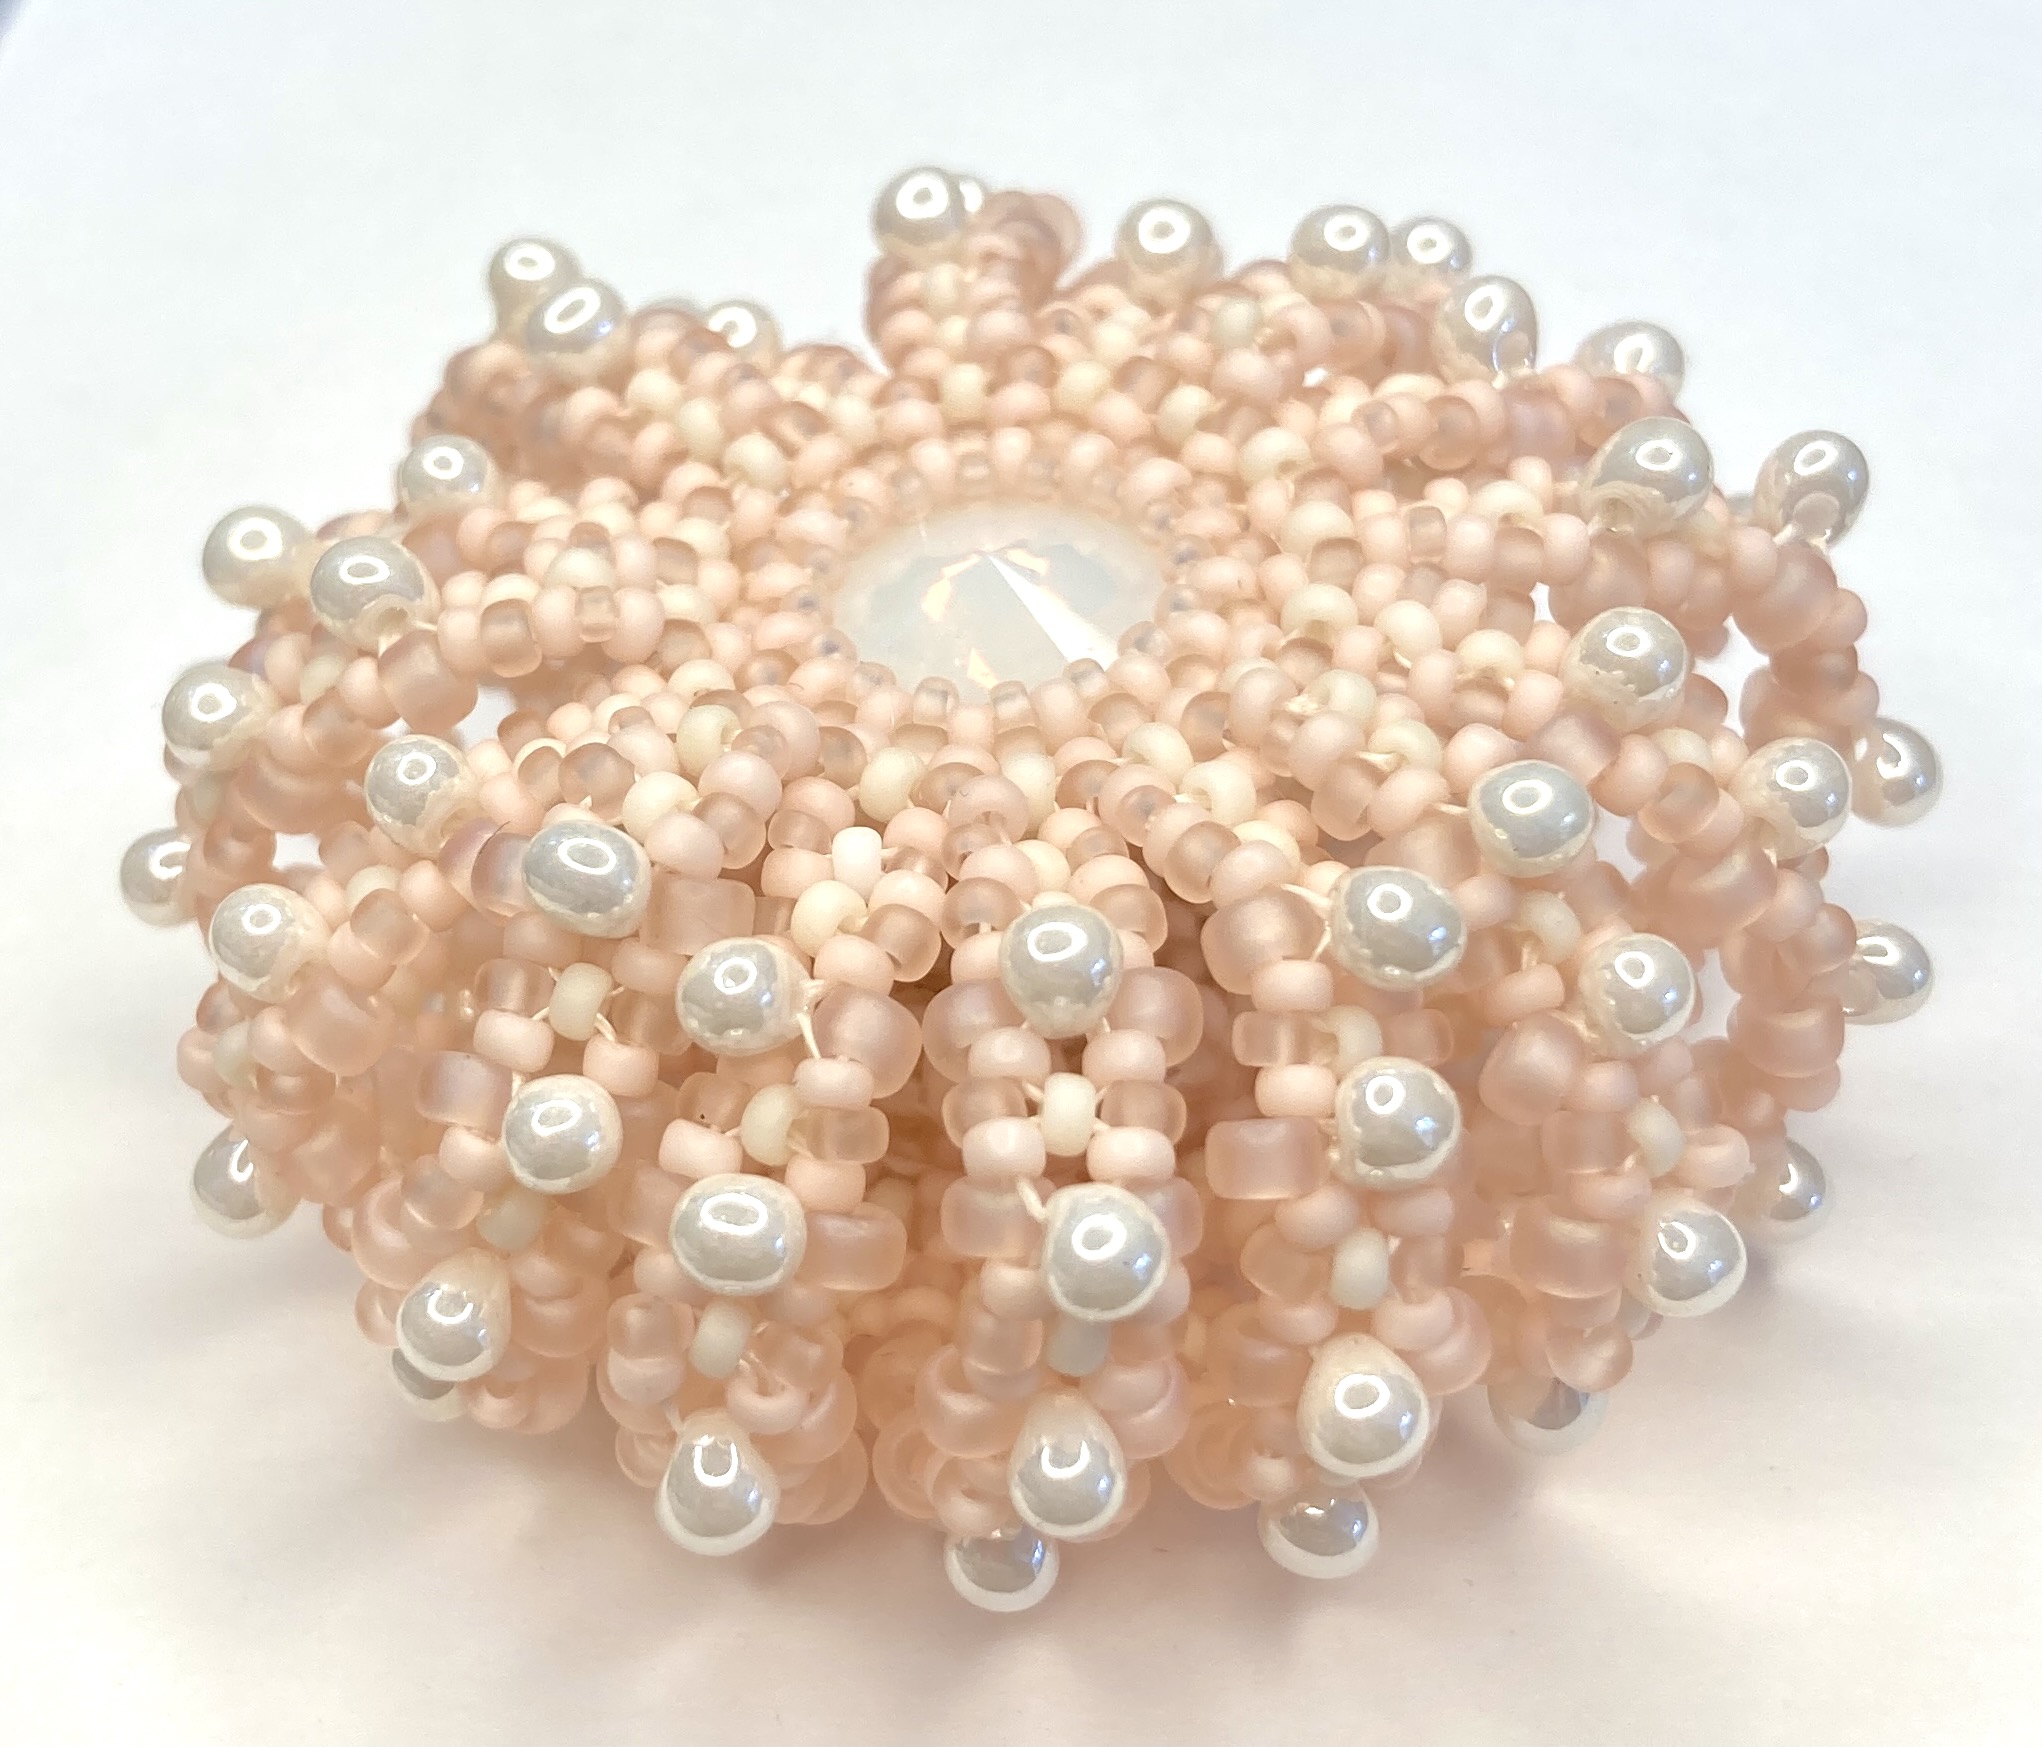
Along the way I made another plain version (no Cellini, but refined from the earlier plain versions), and after some useful comments on Instagram when I showed some in progress pieces, I added a baby variation using an 8mm chaton, and a Sea Urchin variation using the 14mm and some 3.4mm drops. These are in my favourite colour palettes for this piece – warm palest peachy pinks and soft creams or whites (very pretty and an indulgence after having to work with more distinctive colours for tutorial images).
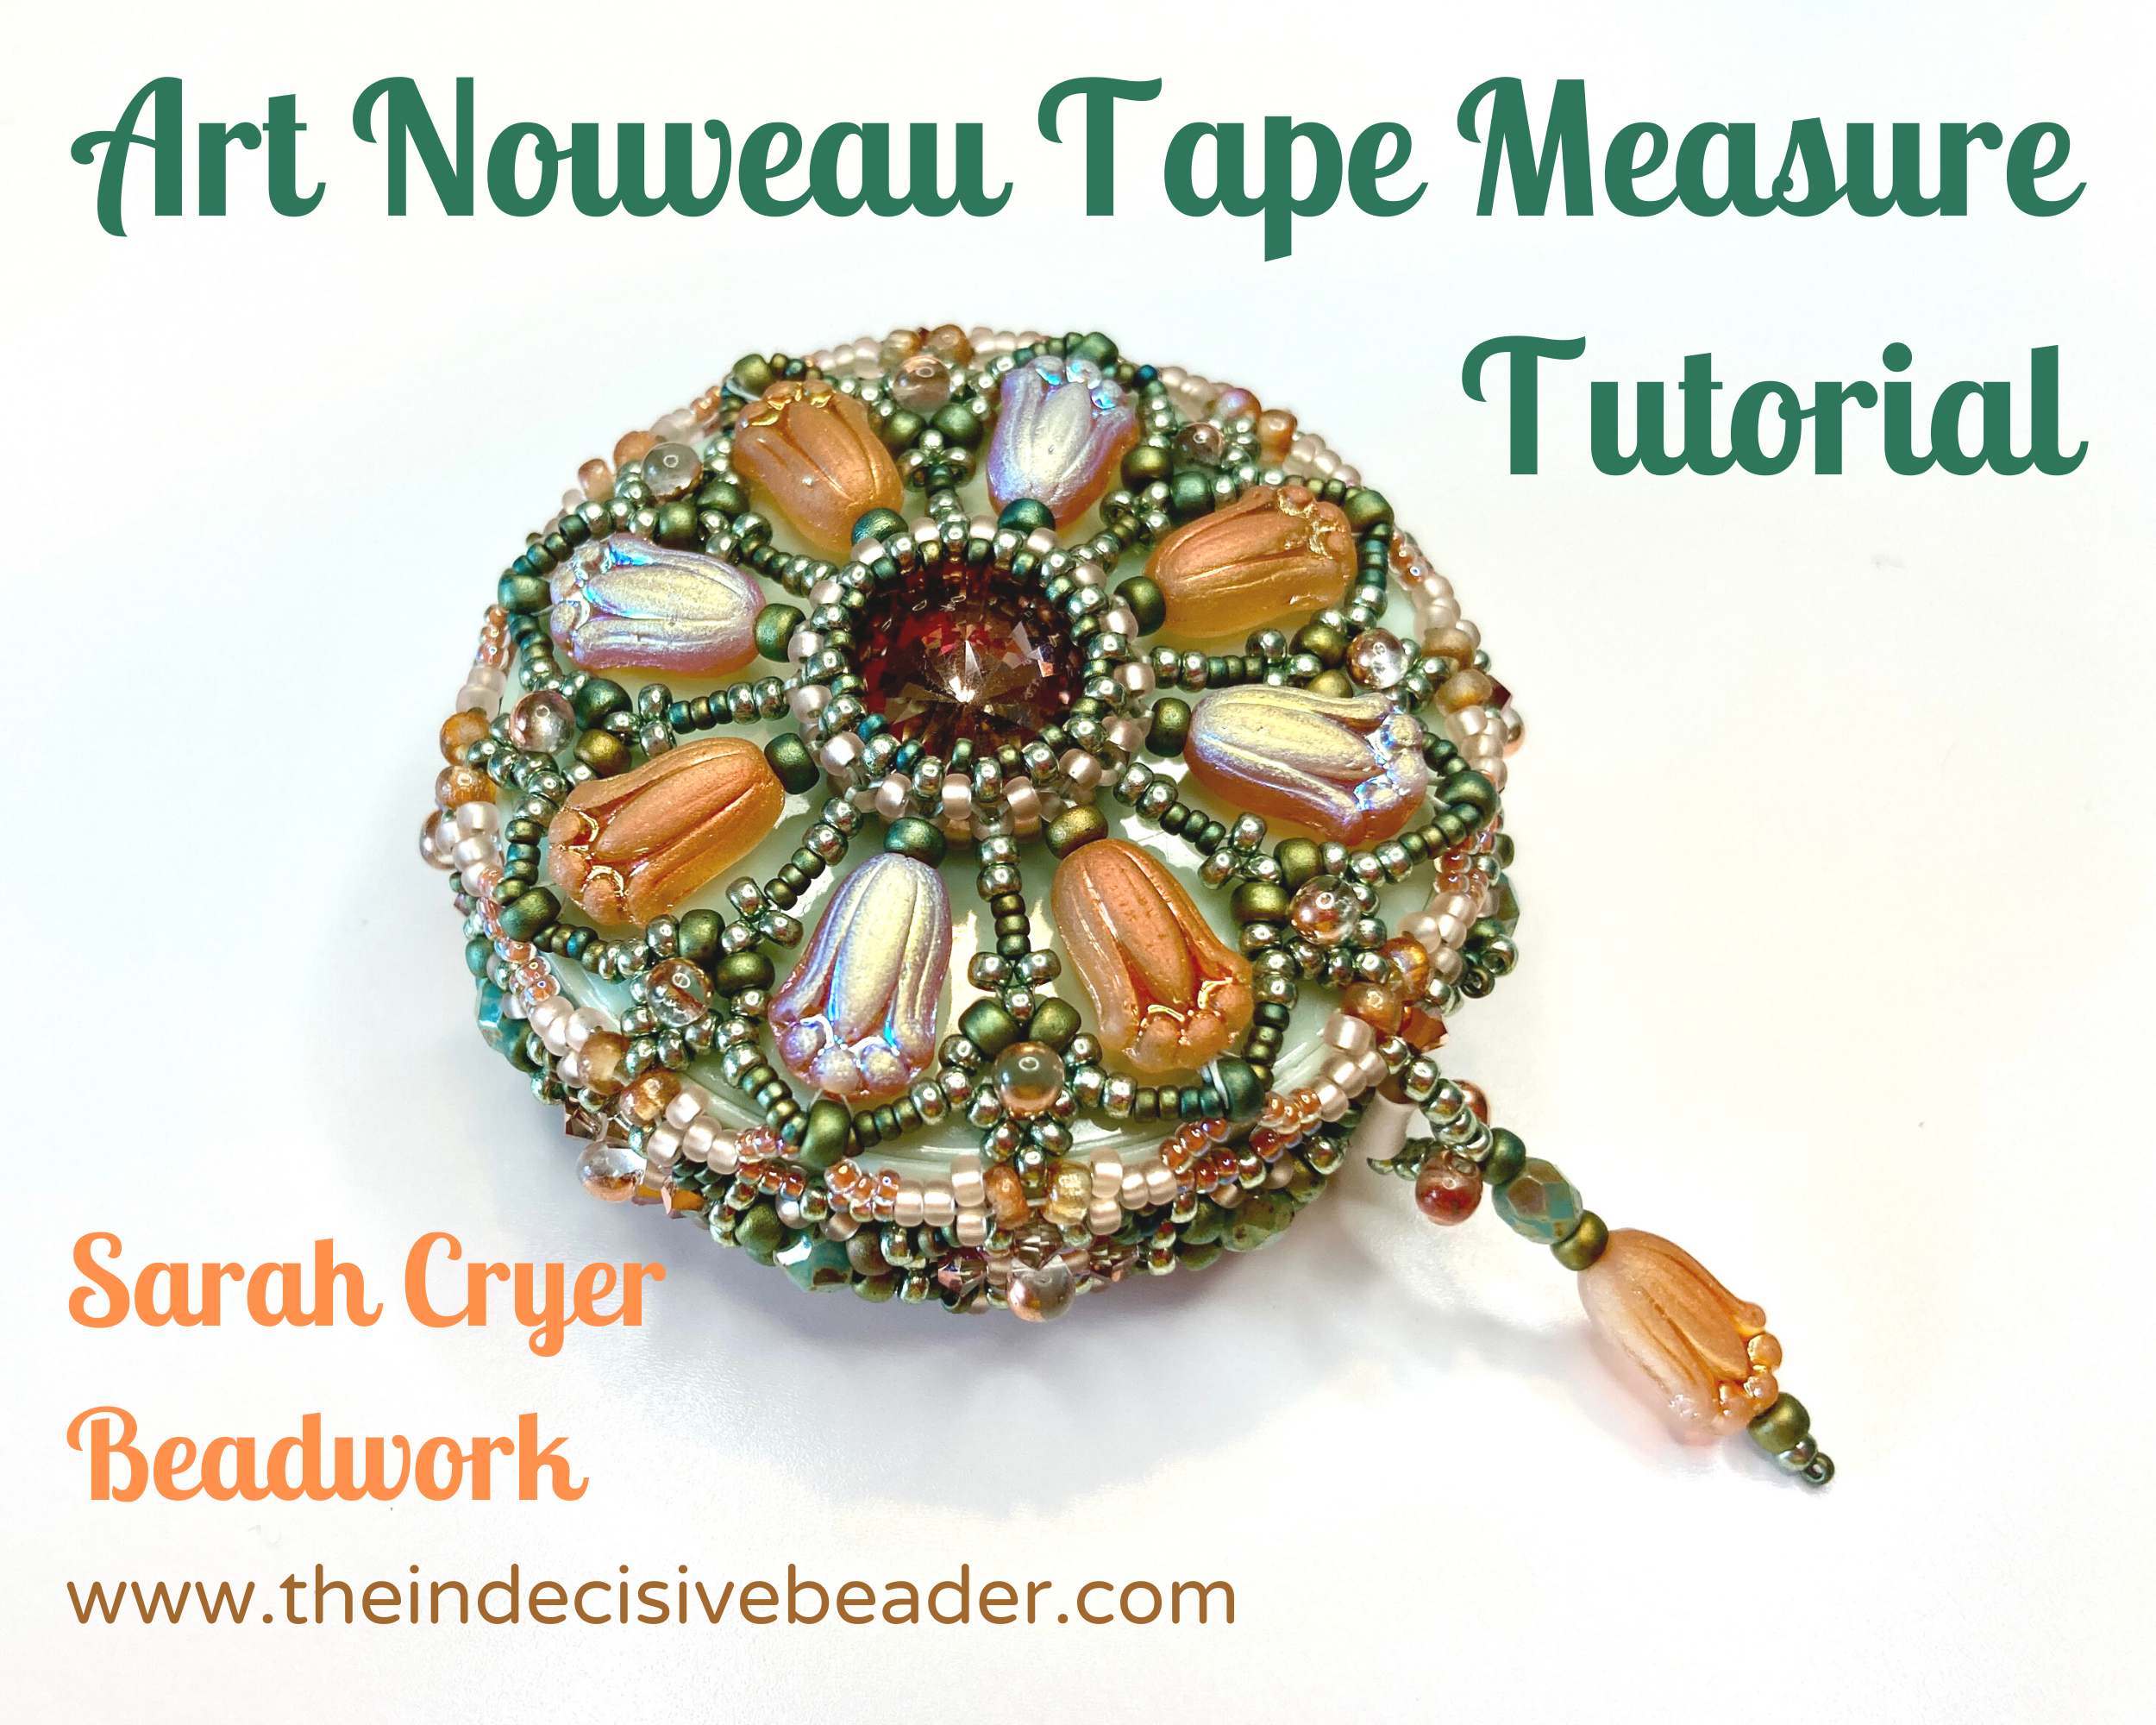
So here it is – Nautilus, made with just Miyuki seed beads and 2 14mm Rivolis or Chatons (any brand will do), using RAW, MRAW and Peyote stitches.
Intermediate level, suitable for anyone who is confident with RAW strips in particular (there are 16!), and fully illustrated with both diagrams and photos, written out steps and even some listed out colourways (with bead numbers) or your own colouring in sheets if you’d like to plan your own colours. A full detailed list of bead requirements is available on the usual page here.
Available in my Etsy or PayHip shops as a PDF download. Etsy don’t like my decent quality illustrations or photos so force me to turn it into 3 PDFs to meet their teeny file limit- if that annoys you as much as it does me, the PayHip version is a single PDF and exactly the same price.
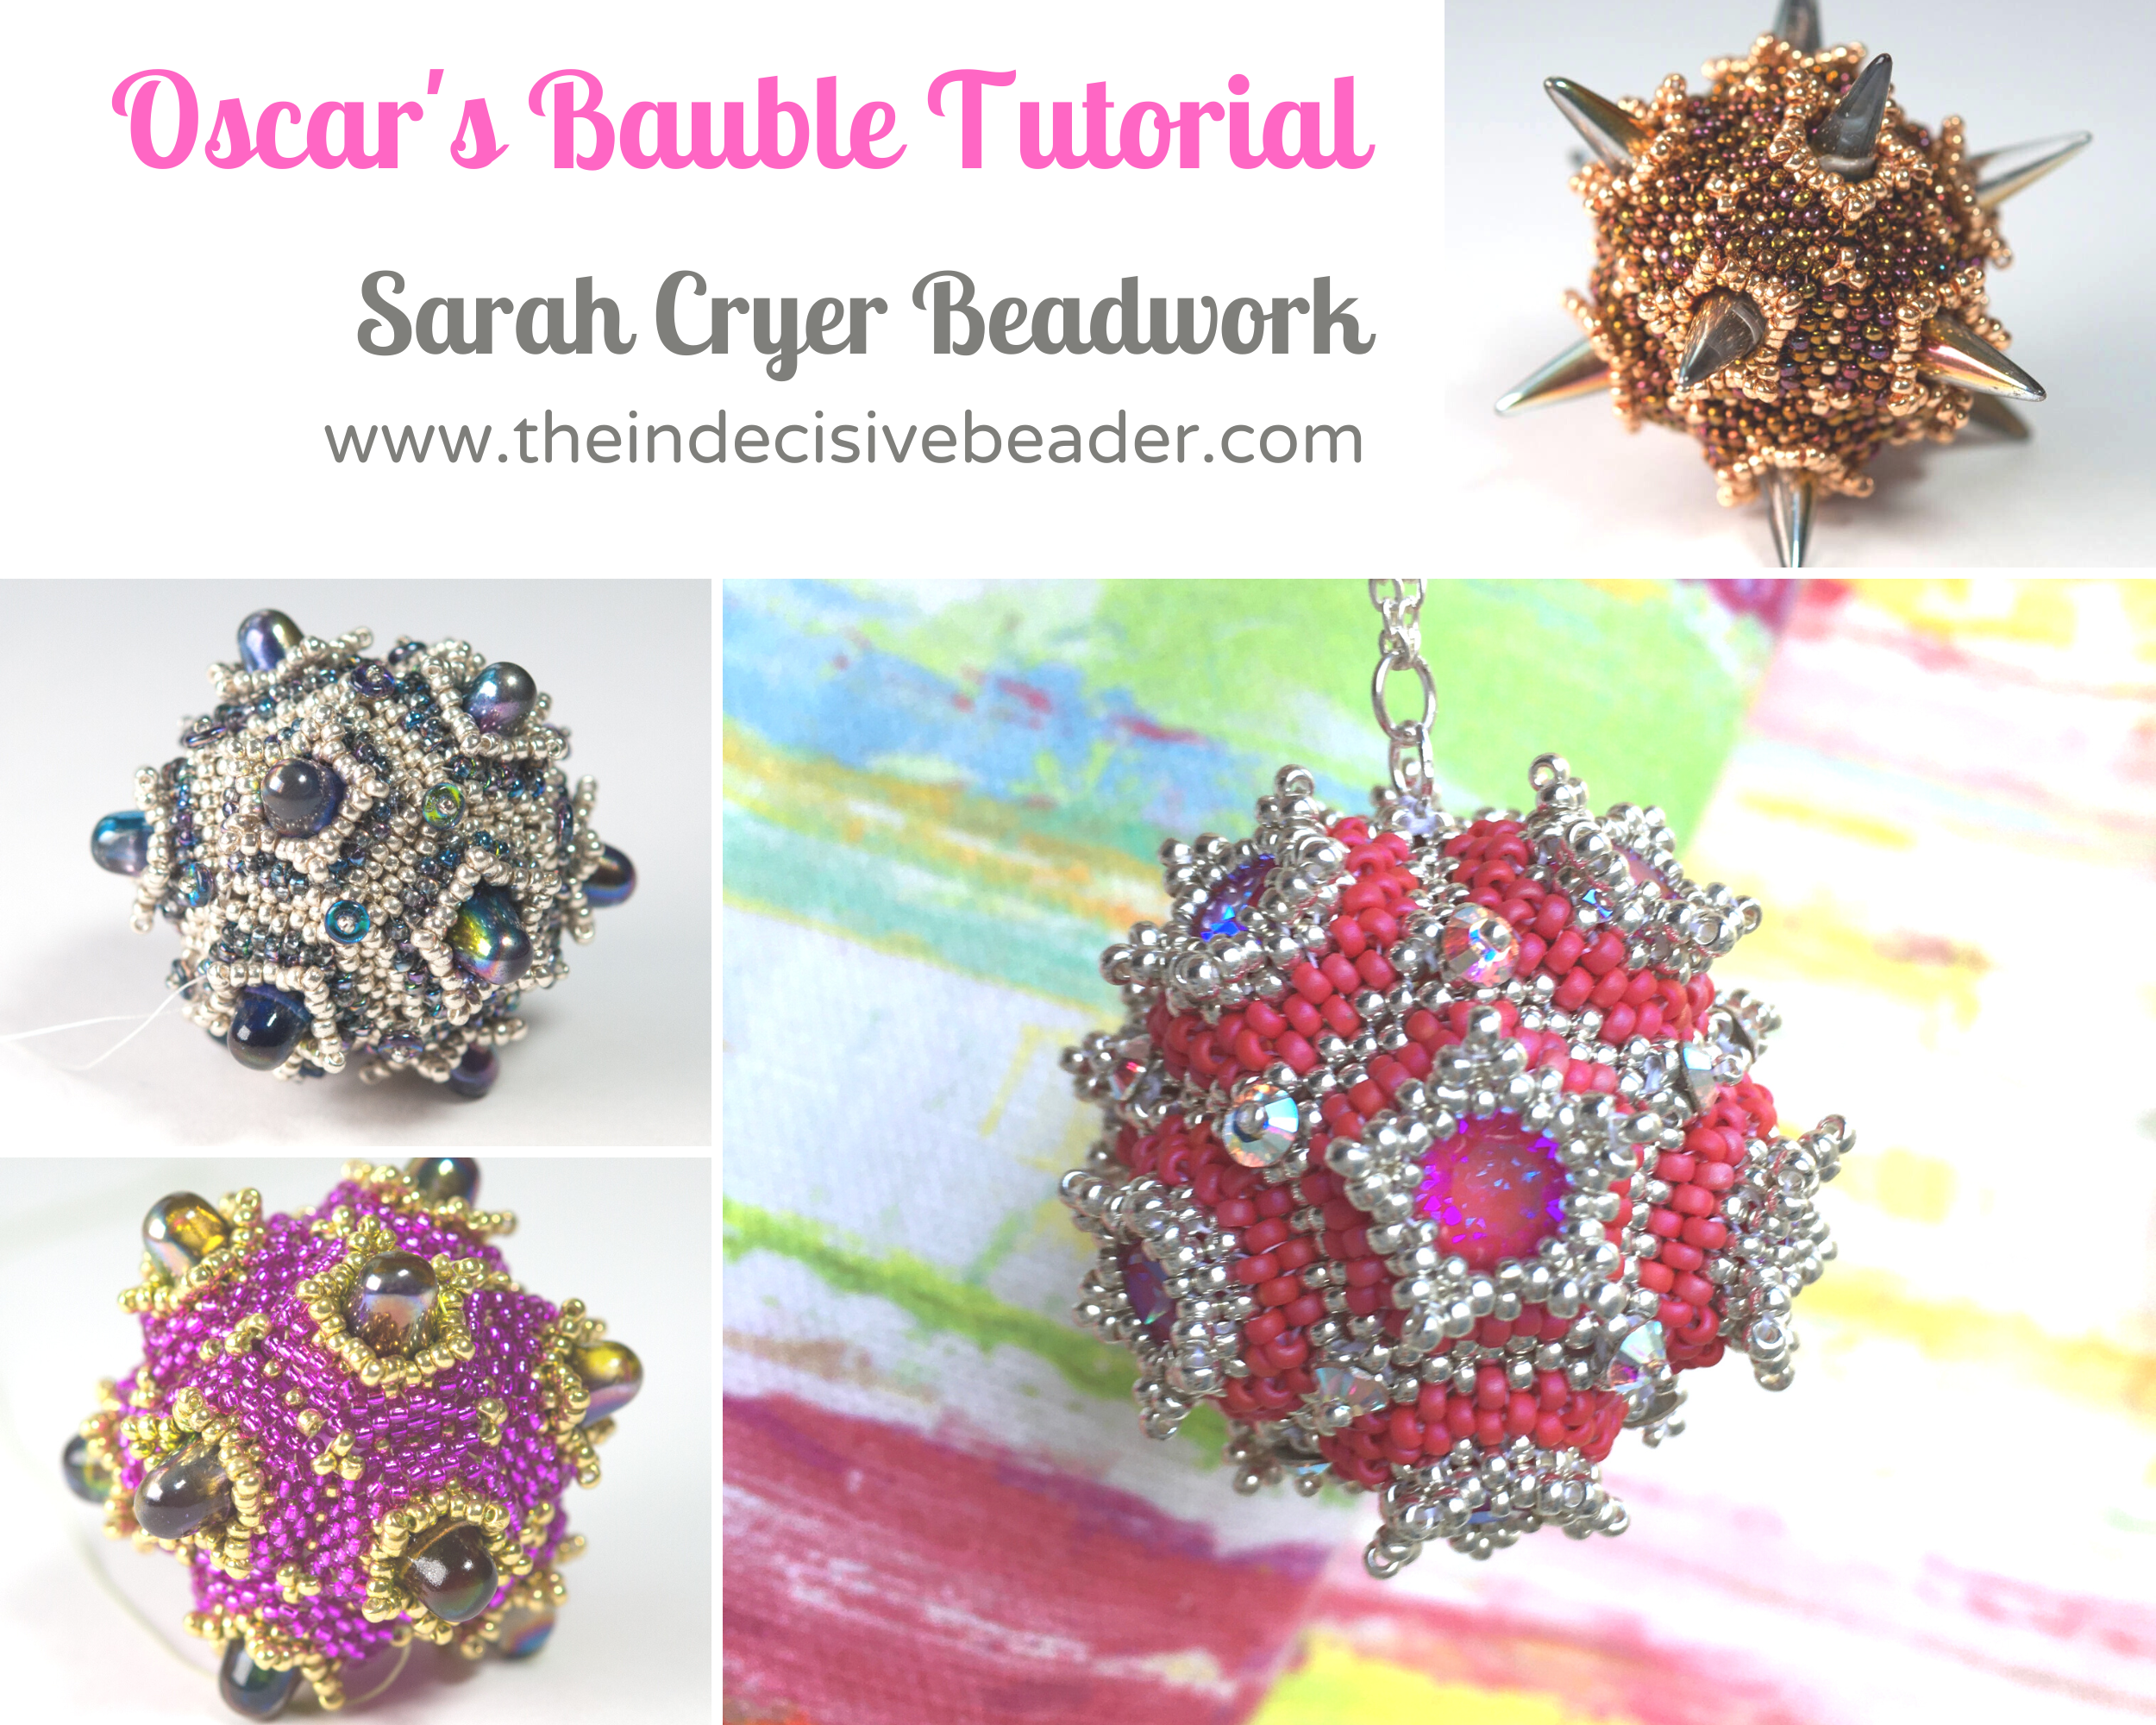
Earlier this year I started making a set of beaded beads. I love beaded beads, they’re something I come back to time and time again when I need a beaded piece for an outfit, when I’m stuck creatively, or when I want to really dig into some new 3D techniques and ideas. I went back to geometric solids and started playing with some methods and ideas I’ve been back and forth with over many years. I was trying to put together ’99 Red Balloons’ for a competition (Bead a Song) – that didn’t work out (I’ll tell you what did another day) but returning to such a versatile method made me realise I needed to get this one published and out of my system.
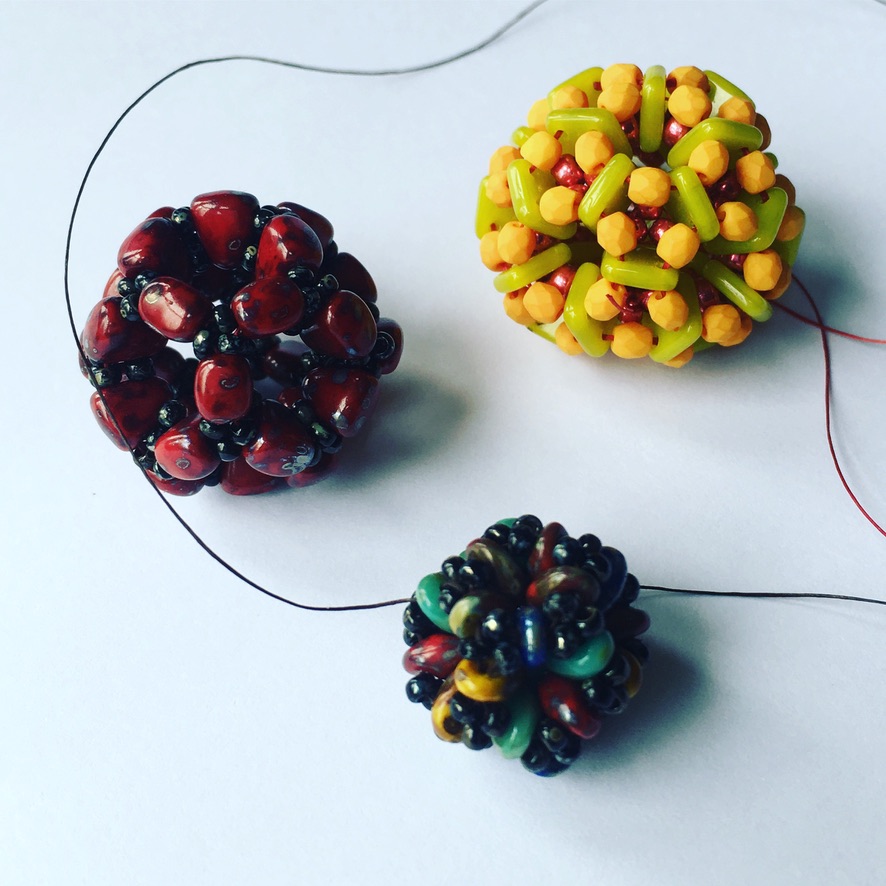
About 10 years ago I started making dodecahedra a lot, first using well known methods to do single layered versions alongside icosahedra. Those can be self supporting if you weave through enough (and you’ve picked the right bead size), and I loved that. A self-supporting beaded bead is hollow, often see through, and you don’t have to faff around finding exactly the right size and colour of inner support bead. 2 holed beads were starting to become mainstream, so I made double layered versions using Twins and SuperDuos and found that if I used the right combinations of beads I could make rigid 2 layered beaded beads, and also use (if I wanted) feature beads to the outside layer. The first of these were made with Twins and Pips and I used them a few years later to enter a Preciosa competition in 2017. The Pip versions were pretty good but at this stage the naked Twins were still a little wobbly.
So far fine, but nothing revolutionary. I played around a bit and worked out that other 2 holed beads worked, made a few pretty solid sets with Nib Bits, and even started playing with 4 holed beads with limited success (I need to go back to that one day). Other beaders were doing way better things with multi-holed beads and geometric builds and my efforts were cute but not really clever enough on their own compared to work being done by others, so I put them away.
Then I started working with etched beads more, and at the same time, buying wholesale for my Materials Packs. I treated myself to packs of all sorts of Etched Slipperit beads in different shapes as this was my favourite finish at the time, and suddenly found myself with big enough bags to really delve and experiment. I tried different feature beads such as the Tulip Petals, and even 2 holed daggers (sometimes with single holed ones too for extra daftness) and at last something more interesting seemed to be coming.
I was still as you can see above also pursuing the supported bead options – the right hand two have wooden centres, and they were nice but the hollow beads were really starting to be an obsession. I worked with whatever shaped beads I could get in that colour/finish in wholesale packs, and I even started adding Bucky Balls (Truncated Icosahedra) to the Dodecahedra.
The result of that obsessive period was this necklace (along with some pretty awesome Christmas Baubles).
But the trouble was, I couldn’t work out how to write this up. I hate writing up 3d beadwork – it’s just really really difficult, and I know from making these pieces that it’s really easy to get lost as you bead, which means not only do you have to deal with multiple layers as you draw, you have to help your beader know where she is. Even something like CRAW is hard for many beaders to follow, so how on earth could I extend that to this and not make them feel defeated? So I looked at the lovely necklace, felt proud, and put it away. Every so often I’d make some more, ponder the write up and give up again.
Fast forward to this year and the 99 Red Balloons. I made about 44, decided I would go mad if I made 99, and also that the song itself, being about accidental nuclear war probably wasn’t best represented in a long string of jolly red beaded beads (however much I tried to play up the ‘atomic’ structure). I made my competition piece about a completely different song, using completely different techniques and colours, and then once that was posted looked at the huge pile of red, pink and orange beaded beads and thought ‘hmmmmm….I love these so much, I’m so proud of them that I want to show them off, and I have all these extra combinations now – is now the time to make myself work this through?’
In the bead world if you do show off your work but don’t tutorialise some ignorant beaders think it’s then OK to reverse engineer. It’s really not OK, your work is yours whether you commercialise it yourself or not, but more and more I’m seeing discussions where the good guys are having to work very hard to stamp this kind of practice out, and also where the ‘no tutorial’ argument seems to be trotted out more and more often even by the helpful, respectful beaders. If I want to show these off, I run the risk of copying if I don’t also publish as a tutorial. I’ve been bitten before, bullied by other beaders who’ve ostensibly asked for ‘permission’ to reverse engineer a piece I’ve chosen not to publish for valid and important reasons (too close to the work of other beaders I wanted to protect) and then even when I’ve begged them not to have big fat done it anyway, and then against my wishes shared their methods (just because you don’t charge doesn’t make that OK – you know who you are). So I’ll be honest, me forcing myself to work out how to teach this is as much about protecting my own ideas and techniques as it is about wanting to share them. I absolutely do want to share them – these are completely addictive and a joy to make once you’ve properly learnt how, and I want other beaders to be able to knock up these super beaded beads too, and to start to play with their possibilities. So anyway, sorry for the digression, but this is pretty much why I had to get over myself and work out how to write these up once and for all, and here at last we arrive at the finished tutorial:
Difficulty Level – Advanced. Experience with RAW and CRAW/PRAW, good tension control (consistently able to vary from soft to medium to tight as instructed), and experience with following complex instructions for 3D layered beadwork.
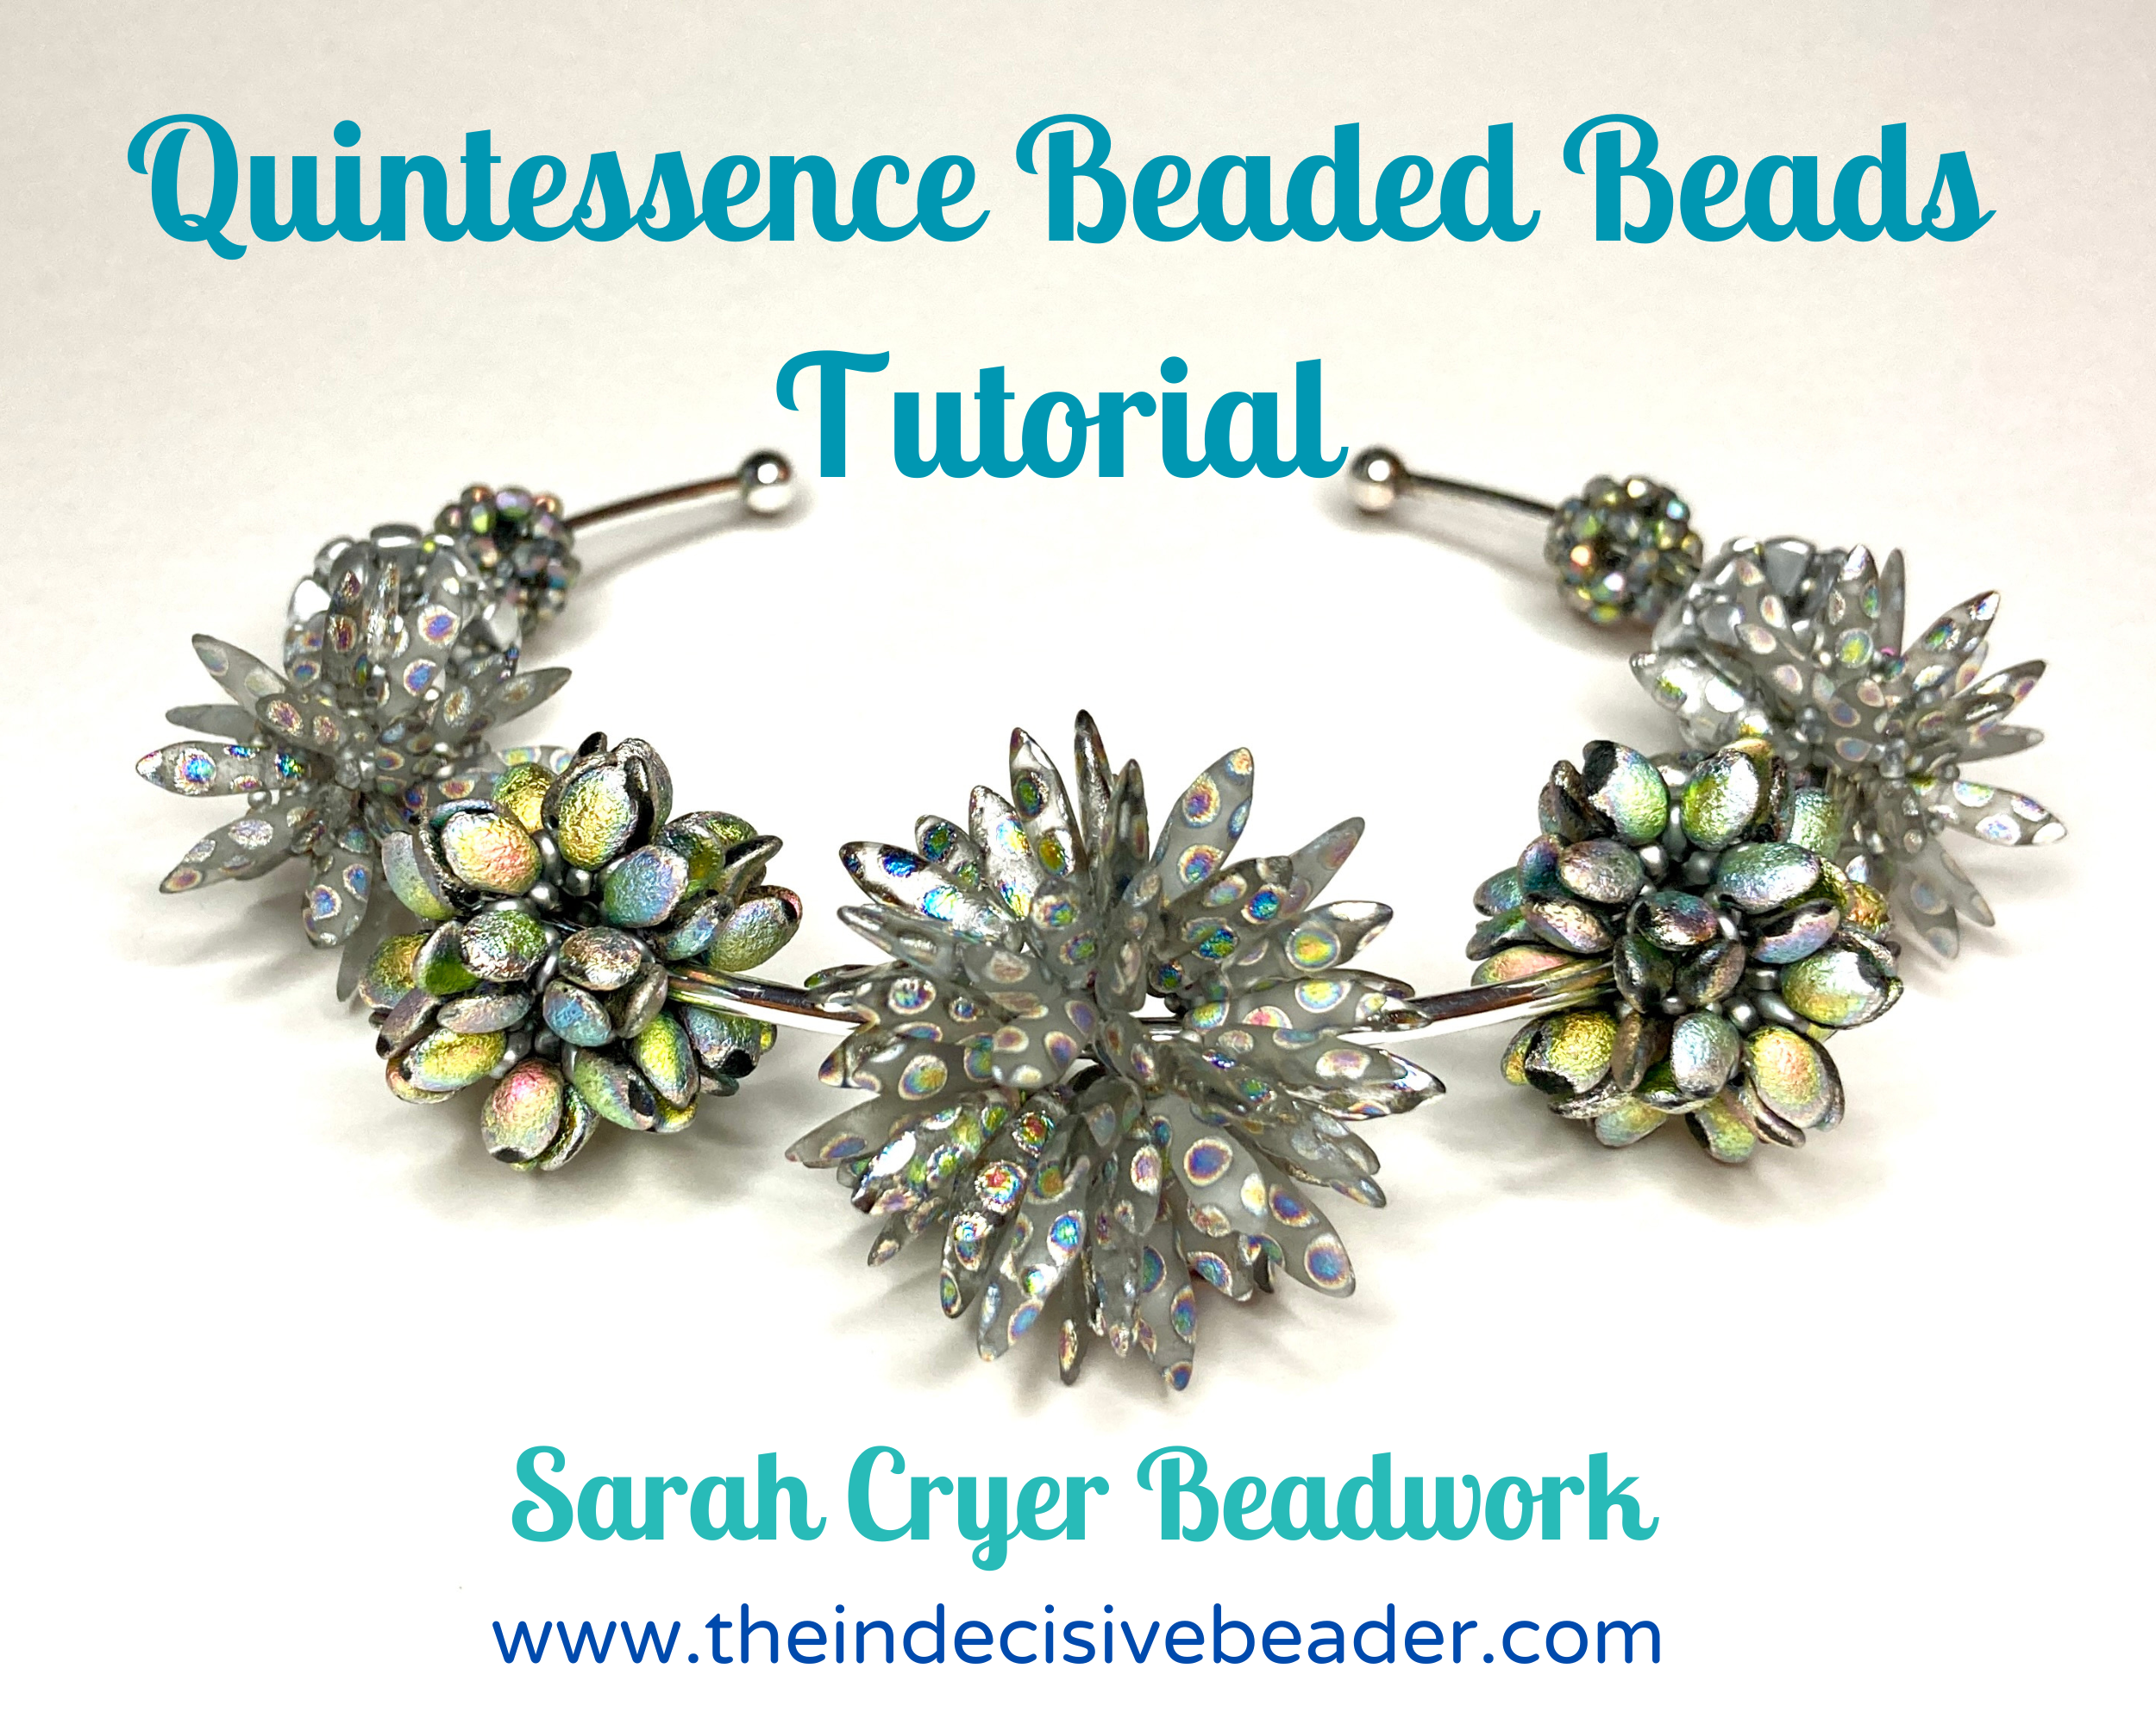
This is a set of instructions to teach a method for building self supporting hollow dodecahedra (the fifth platonic solid or ‘quintessence’), using a variety of layouts or models, each of which can be used with a variety of bead recipes to give endless beaded bead combinations.
The 6 lessons will teach you each model step by step, and focus on learning the techniques, thread paths and understanding the layouts. They need to be done in order to learn the different variations logically. At the end of each lesson you can either try some alternative bead combos, or move onto the next lesson. The masterclass includes lists of the different bead combos you can use in an Appendix, as well as hints and tips for designing new combinations using the 6 methods, and for moving beyond dodecahedra into other geometric solids.
Because I’m planning to continue pushing through the multi-holed bead options, and feature bead options, I’ll inevitably have more recipes to add to Appendix 2 of this tutorial, so I’ve developed a secret formula which is explained there, which you can then use when you look at that page (linked in the tutorial) to decipher which beads and which techniques from the tutorial to use. I’ll also publish a notification when I update the page to my Facebook and Instagram pages. I know it sounds a bit mysterious but again, I want to share as much as possible whilst also protecting my work – if you buy the tutorial it will all make sense (and you can always contact me if it doesn’t!!).
The tutorial is now available in my Etsy and PayHip shops, and I will have ‘orientation bead packs’ available too in my Etsy shop in the next couple of days. If the tutorial sells well I’ll follow that up with some curated bead packs to make sets of Quintessence Beads.
I’ve loved spending more time on this series, although to be fair the write up has been a long slog (51 pages and countless diagrams and photos). The beading has been a delight – at the last count this morning I’d made over 70 this year alone (and that’s not including the ones I frogged because I needed to re-do photos etc) – I took a photo a few days ago but the eagle eyed among you will see I forgot the Lesson 6 samples (among quite a few others!):
I may not do Black Friday or Cyber Monday but I do like to try to offer a discount on my Tutorials in December as a seasonal gift to my lovely customers around the world.
Please note that this only applies to Tutorials, but hopefully that will still keep most of you happy. So, 10% off all Tutorials in my Etsy & PayHip shops throughout December, links below, discount automatically applied at checkout.
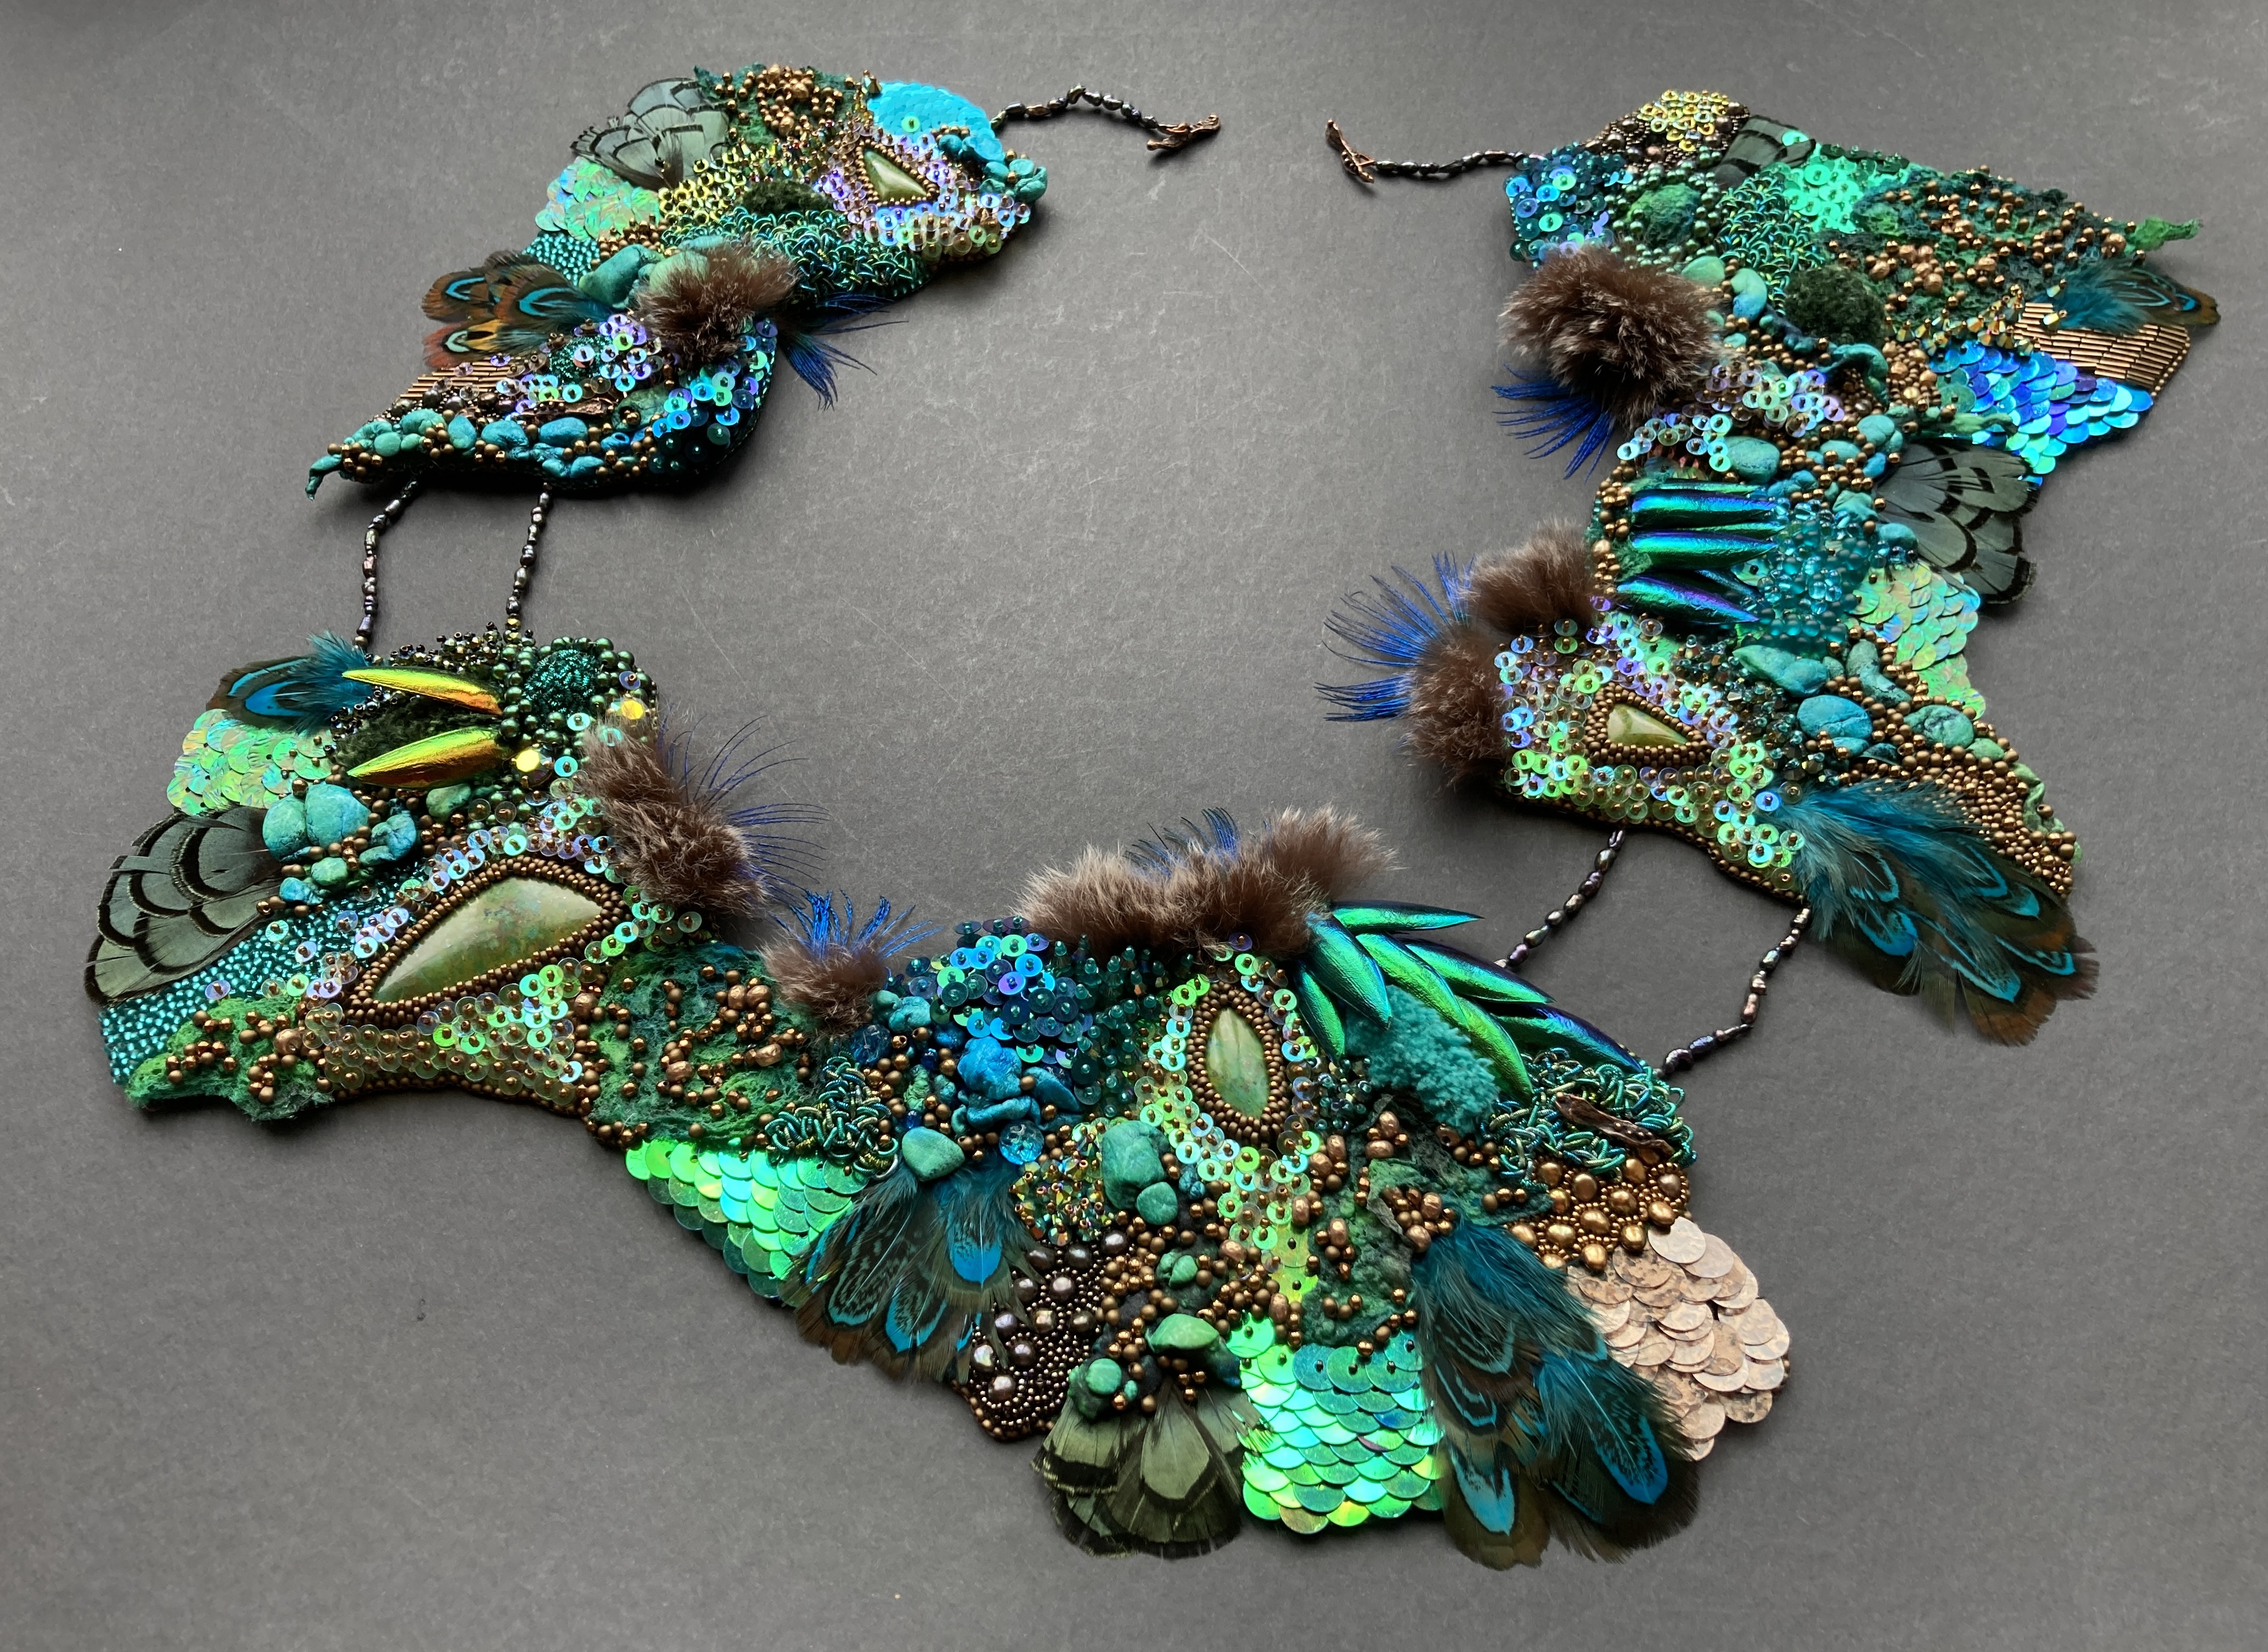
I really loved making this piece – every year I try to challenge myself creatively during the winter months, usually working on something big and using new techniques or materials. Often it’s a Guild Challenge provided that the theme is one which chimes with me.
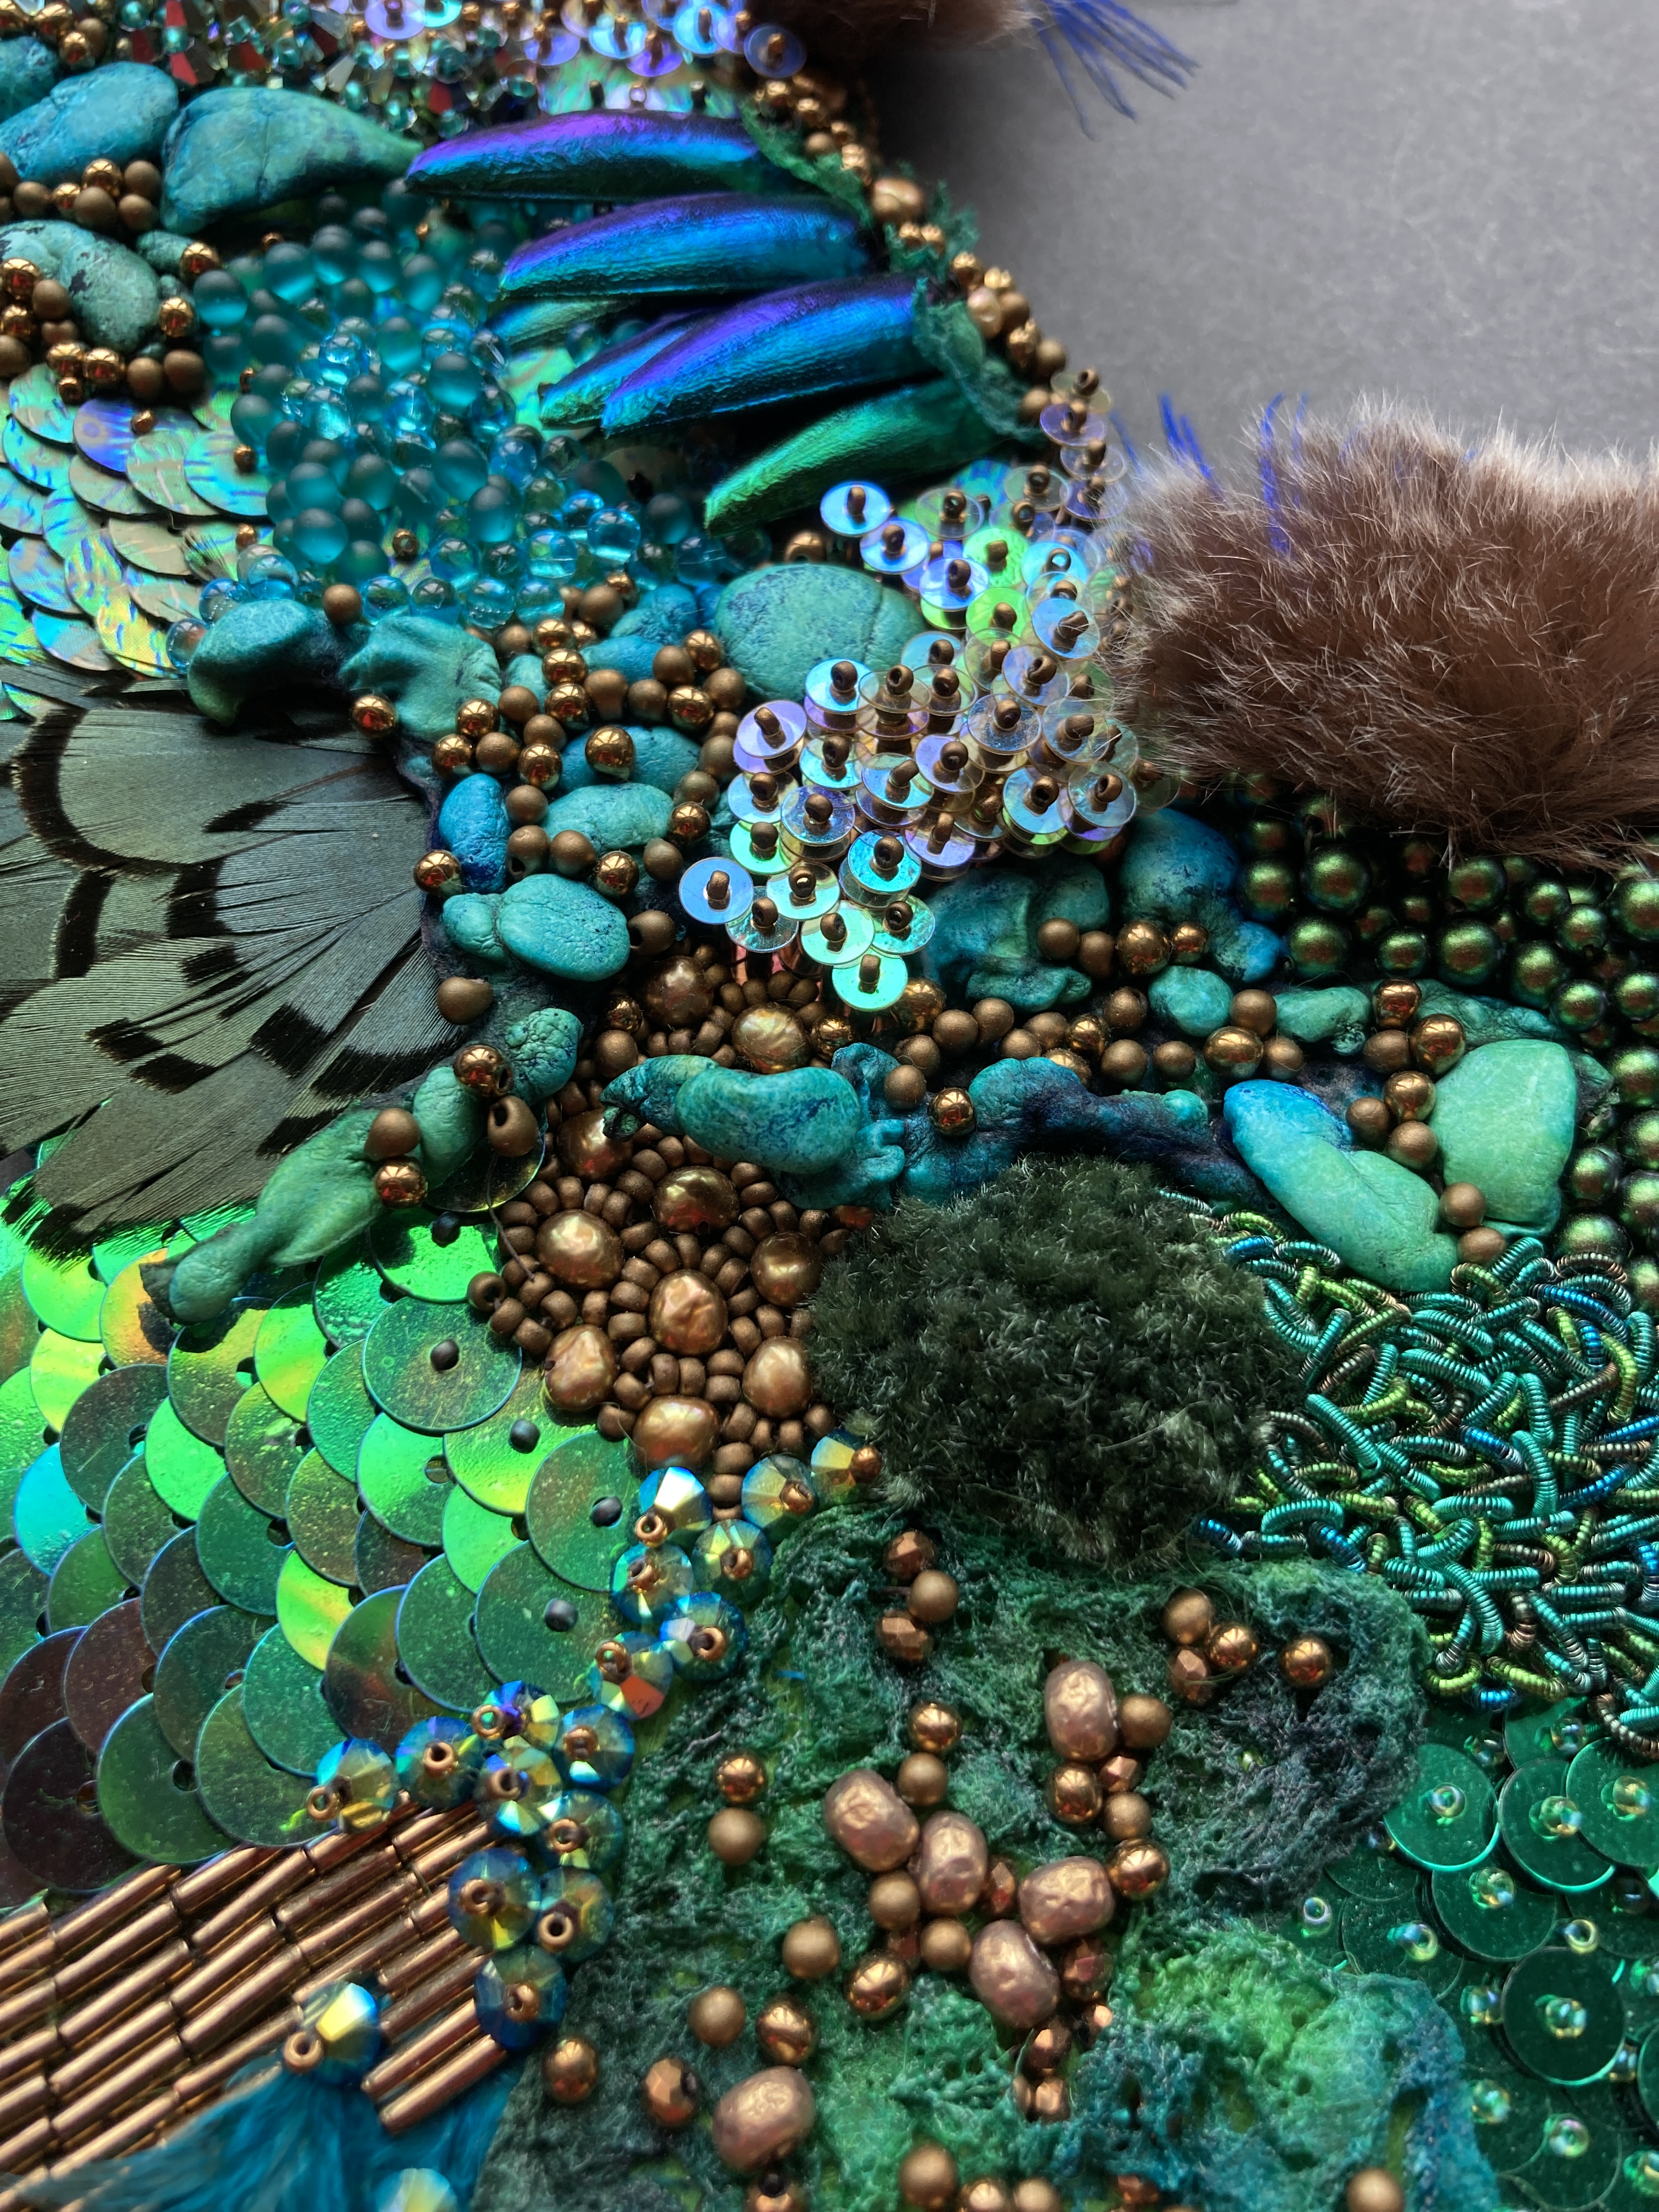
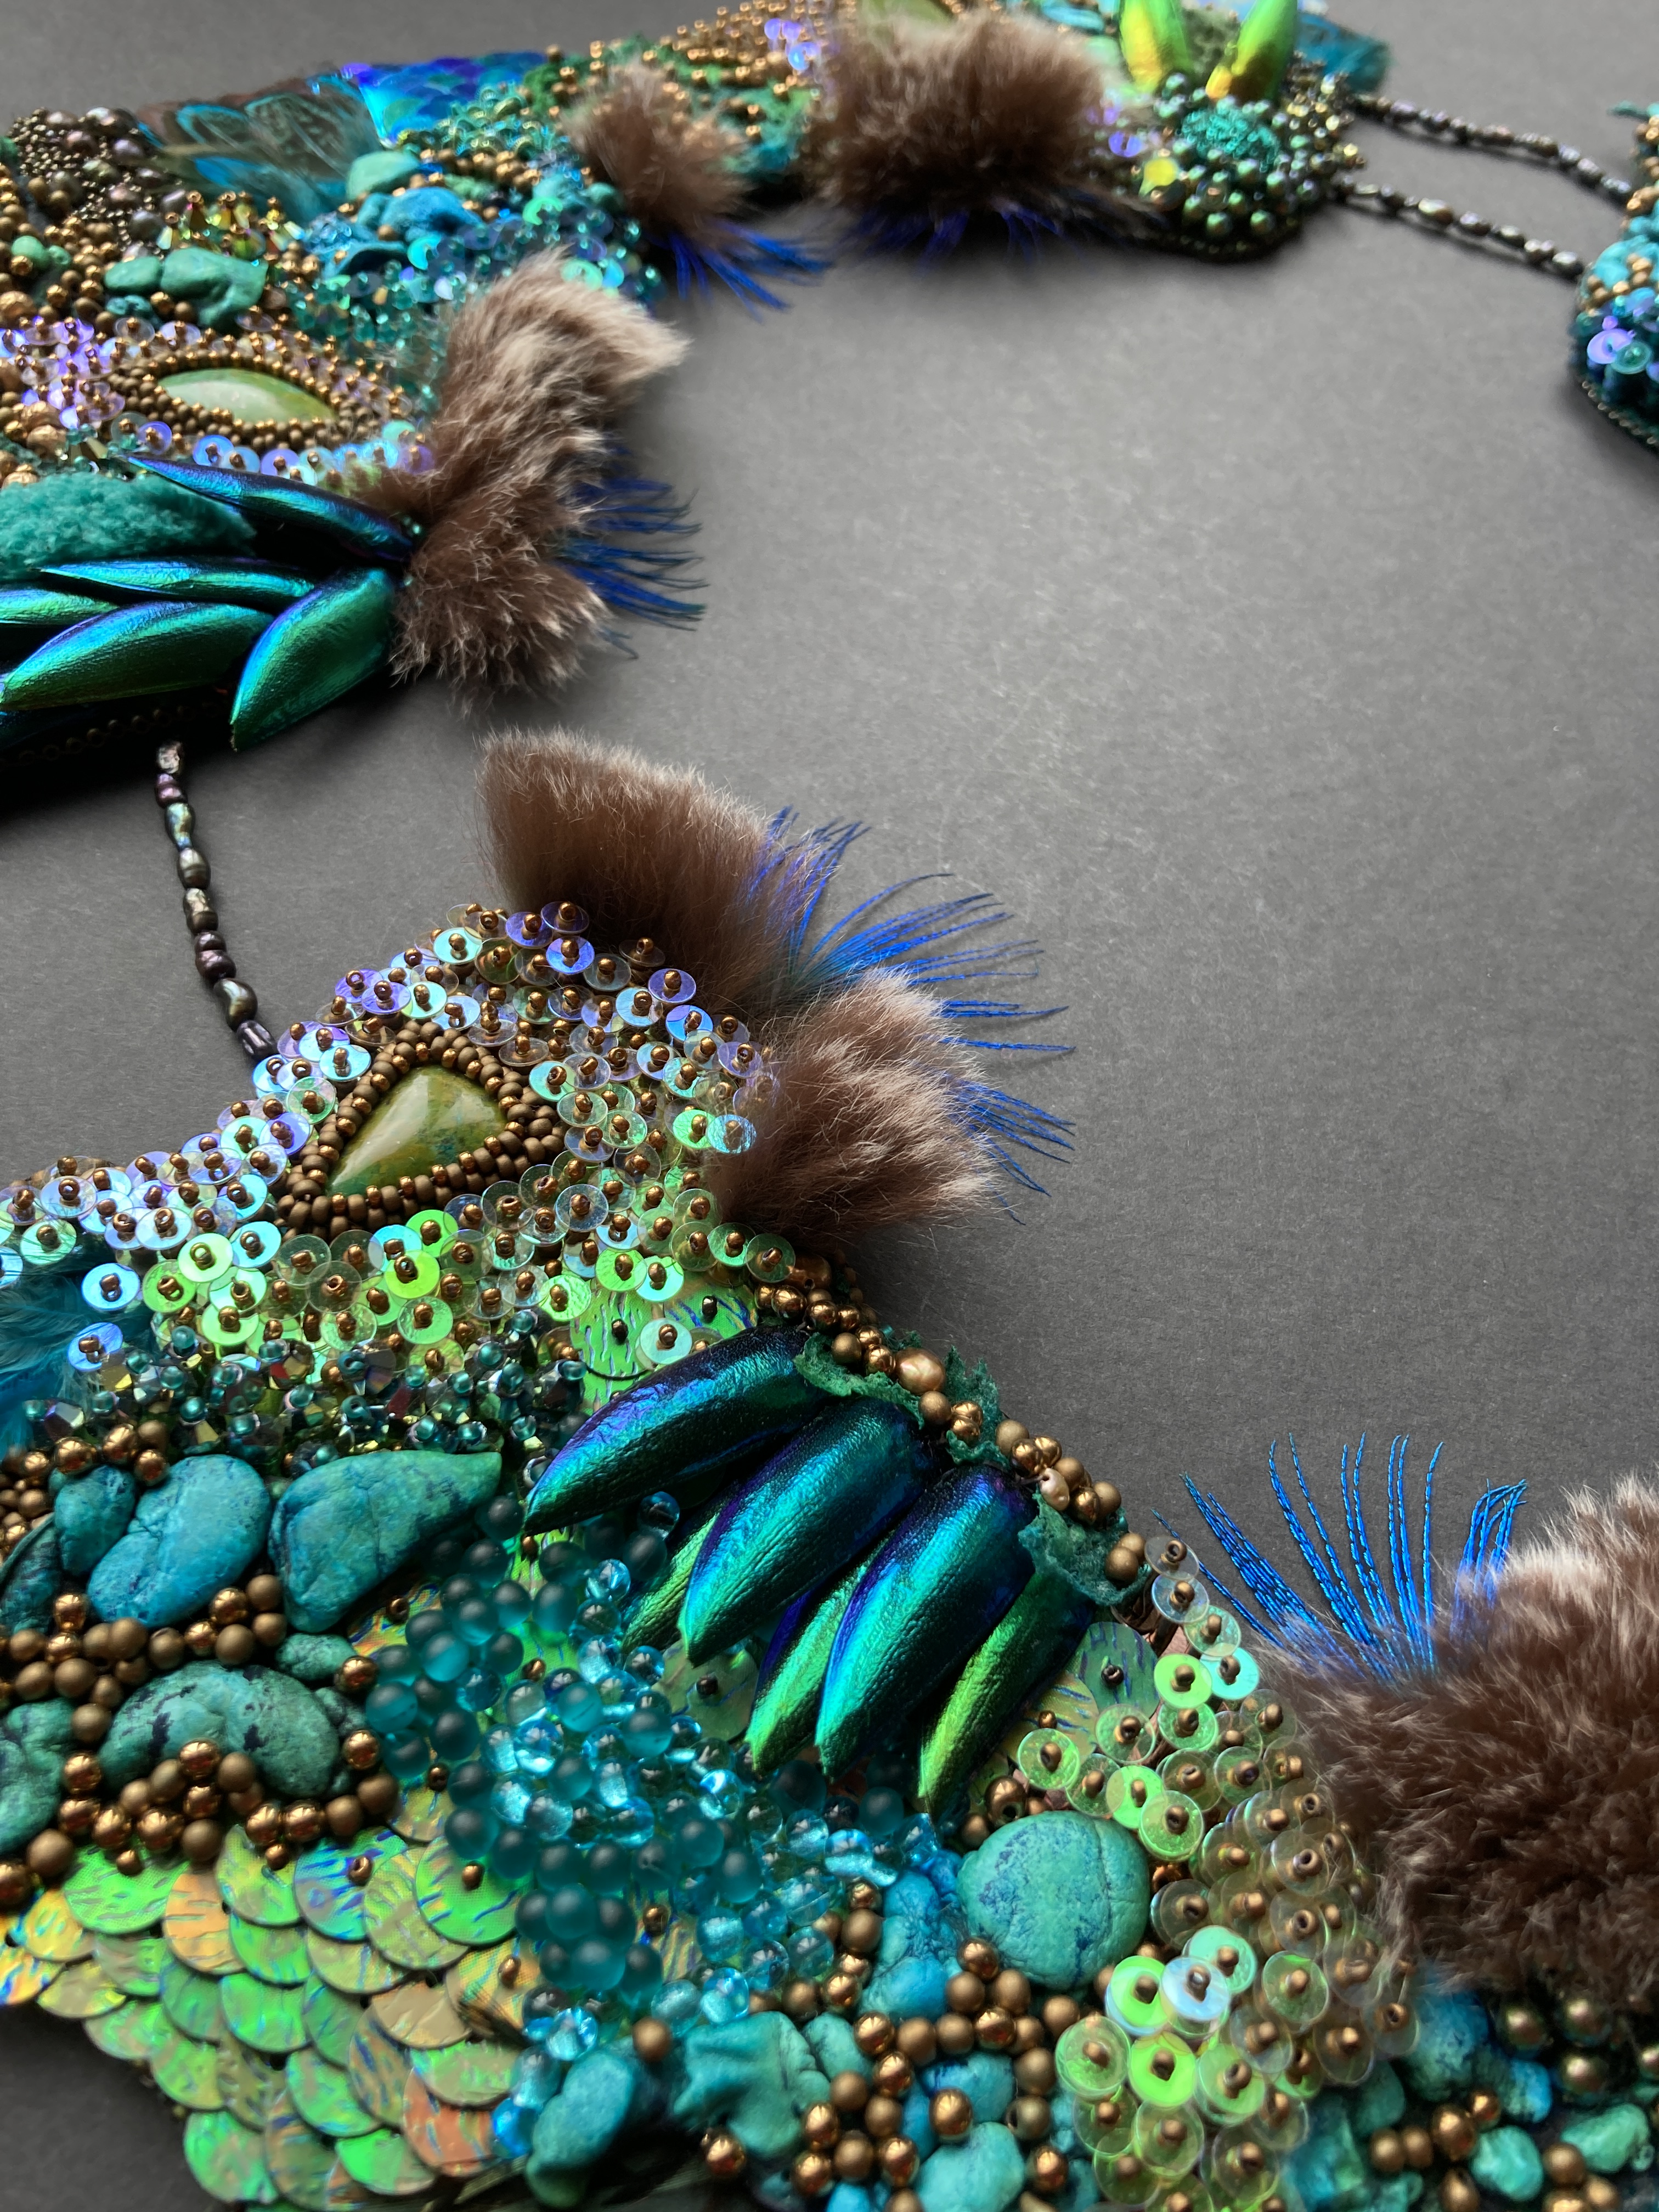
I’ve worked in most of my usual beadwork techniques into this piece – peyote bezels, a wide variety of bead embroidery stitches, goldwork smooth purl loops, scale like sequinned areas, but the ‘fur and feathers’ theme meant I also added some new to me materials, and perhaps new to the Challenge techniques – not too many though, as it does have to be beadwork based after all.
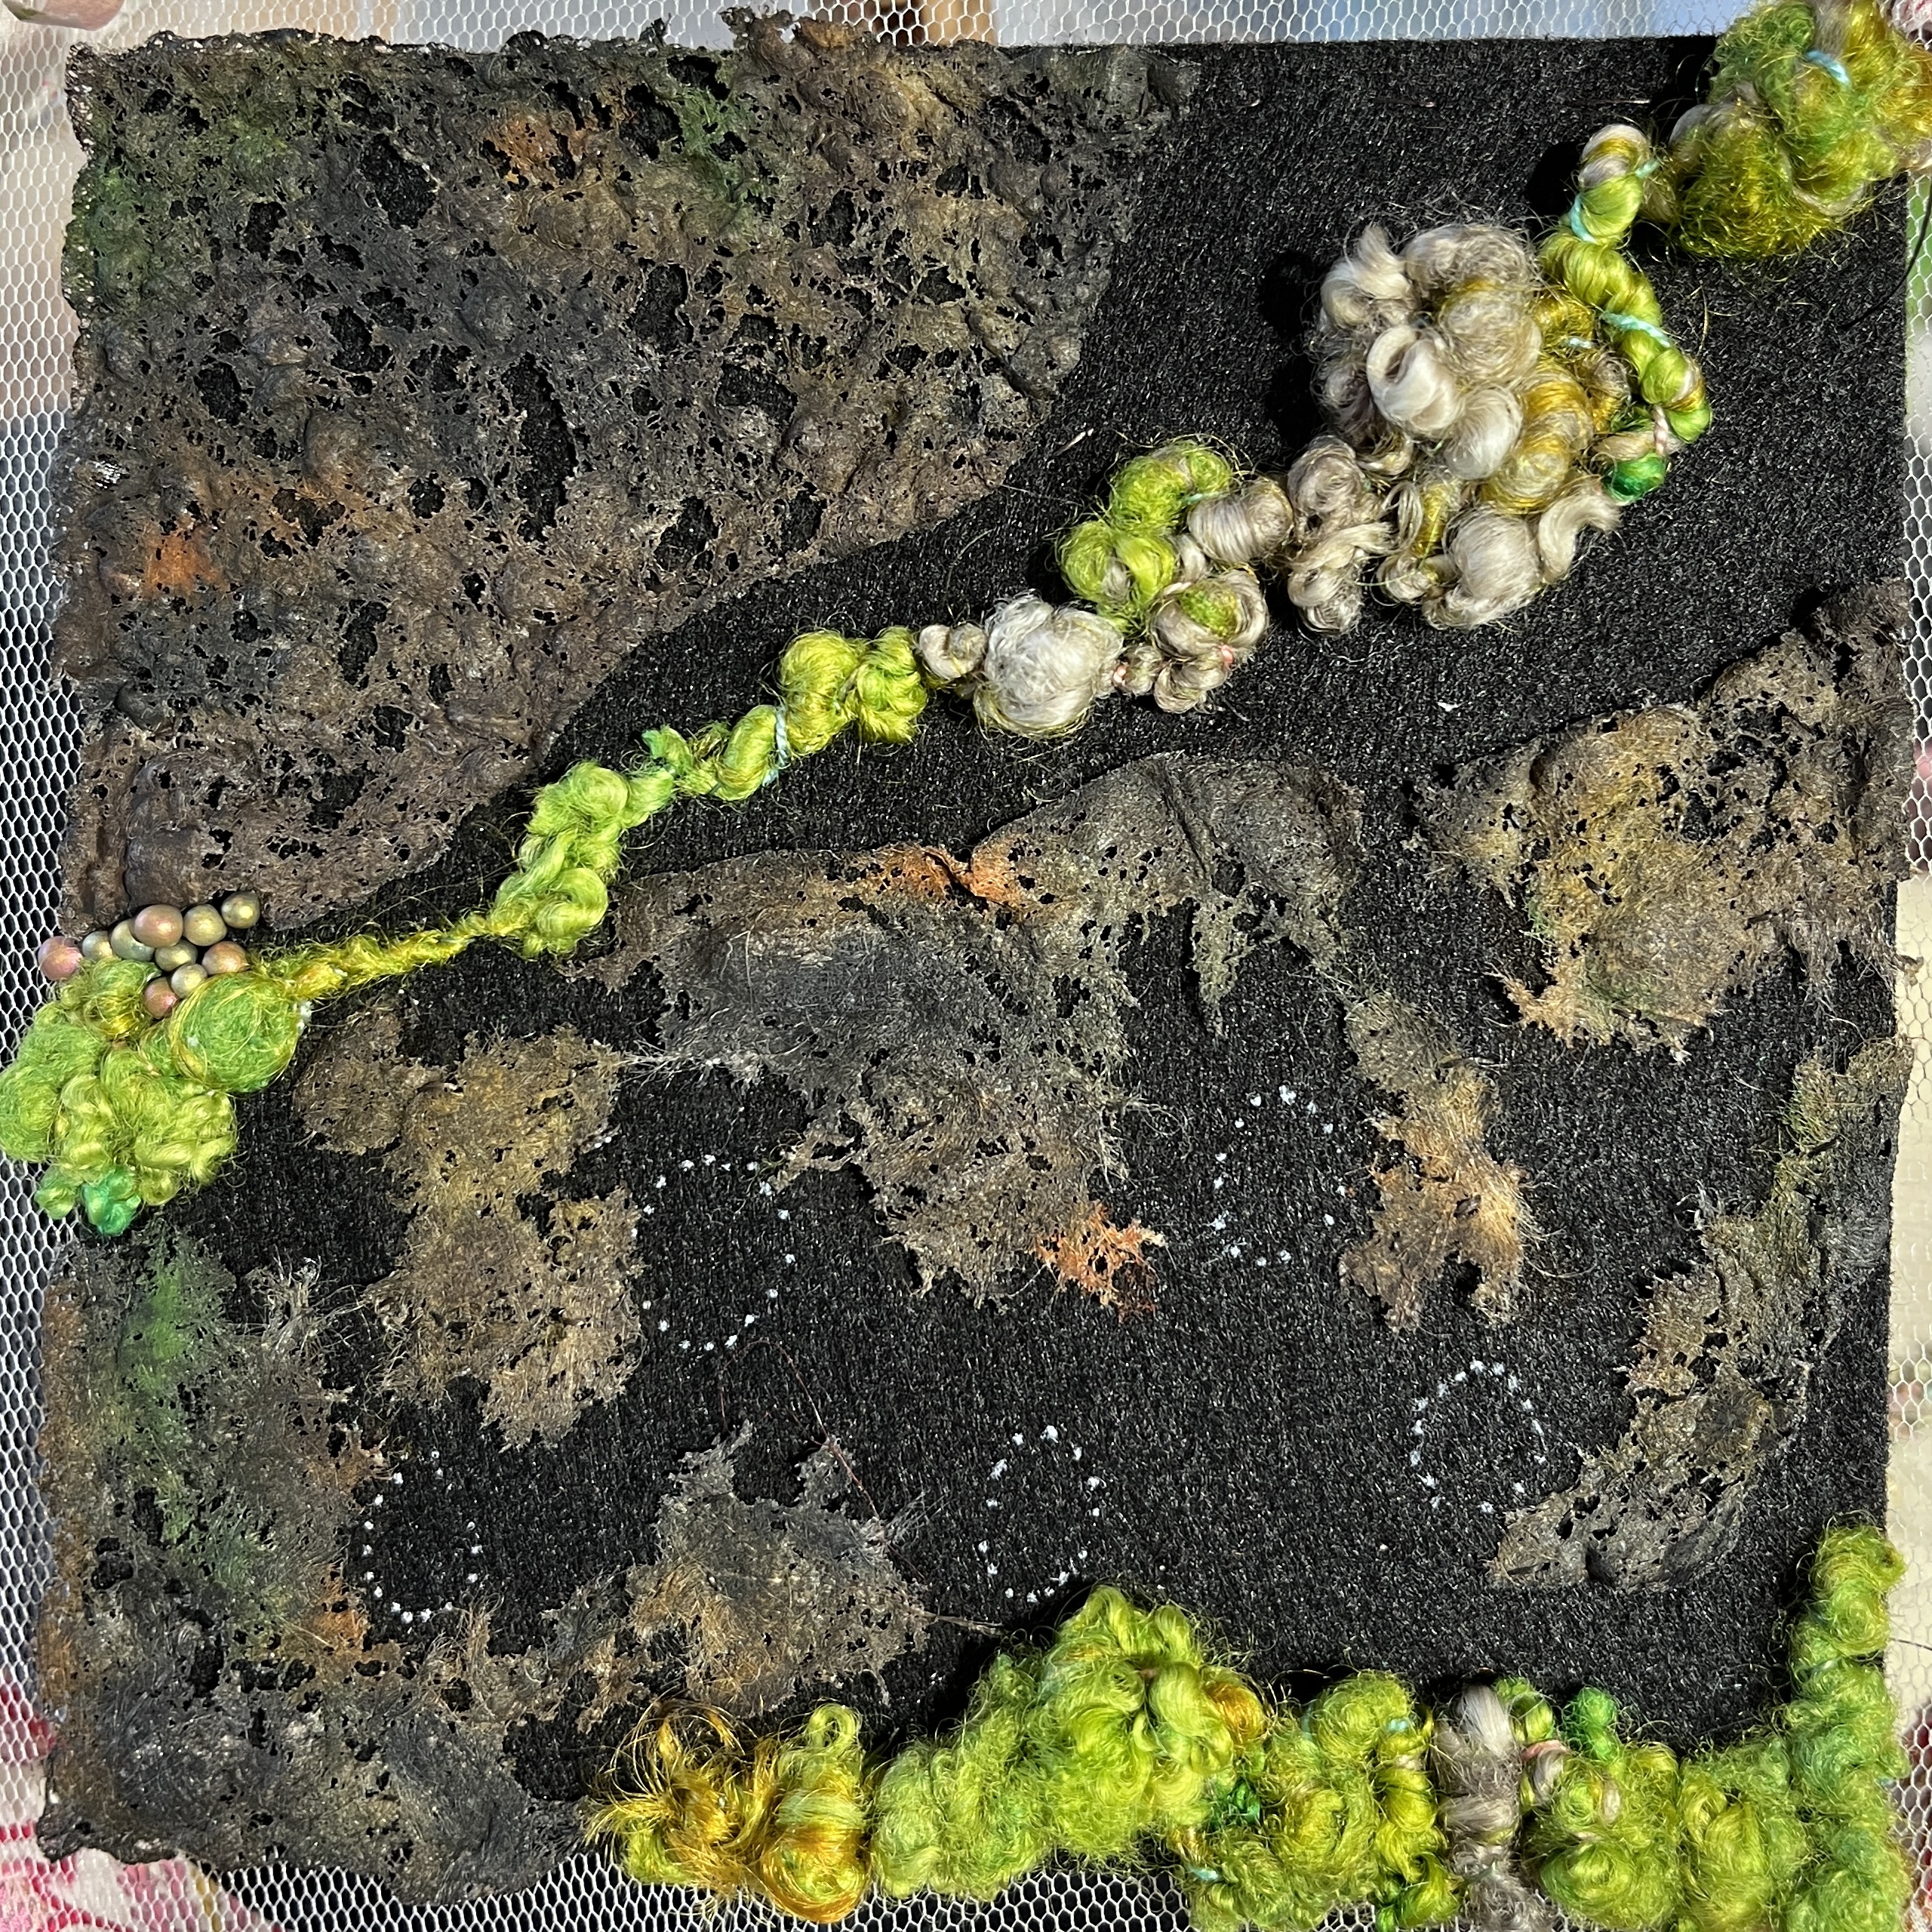
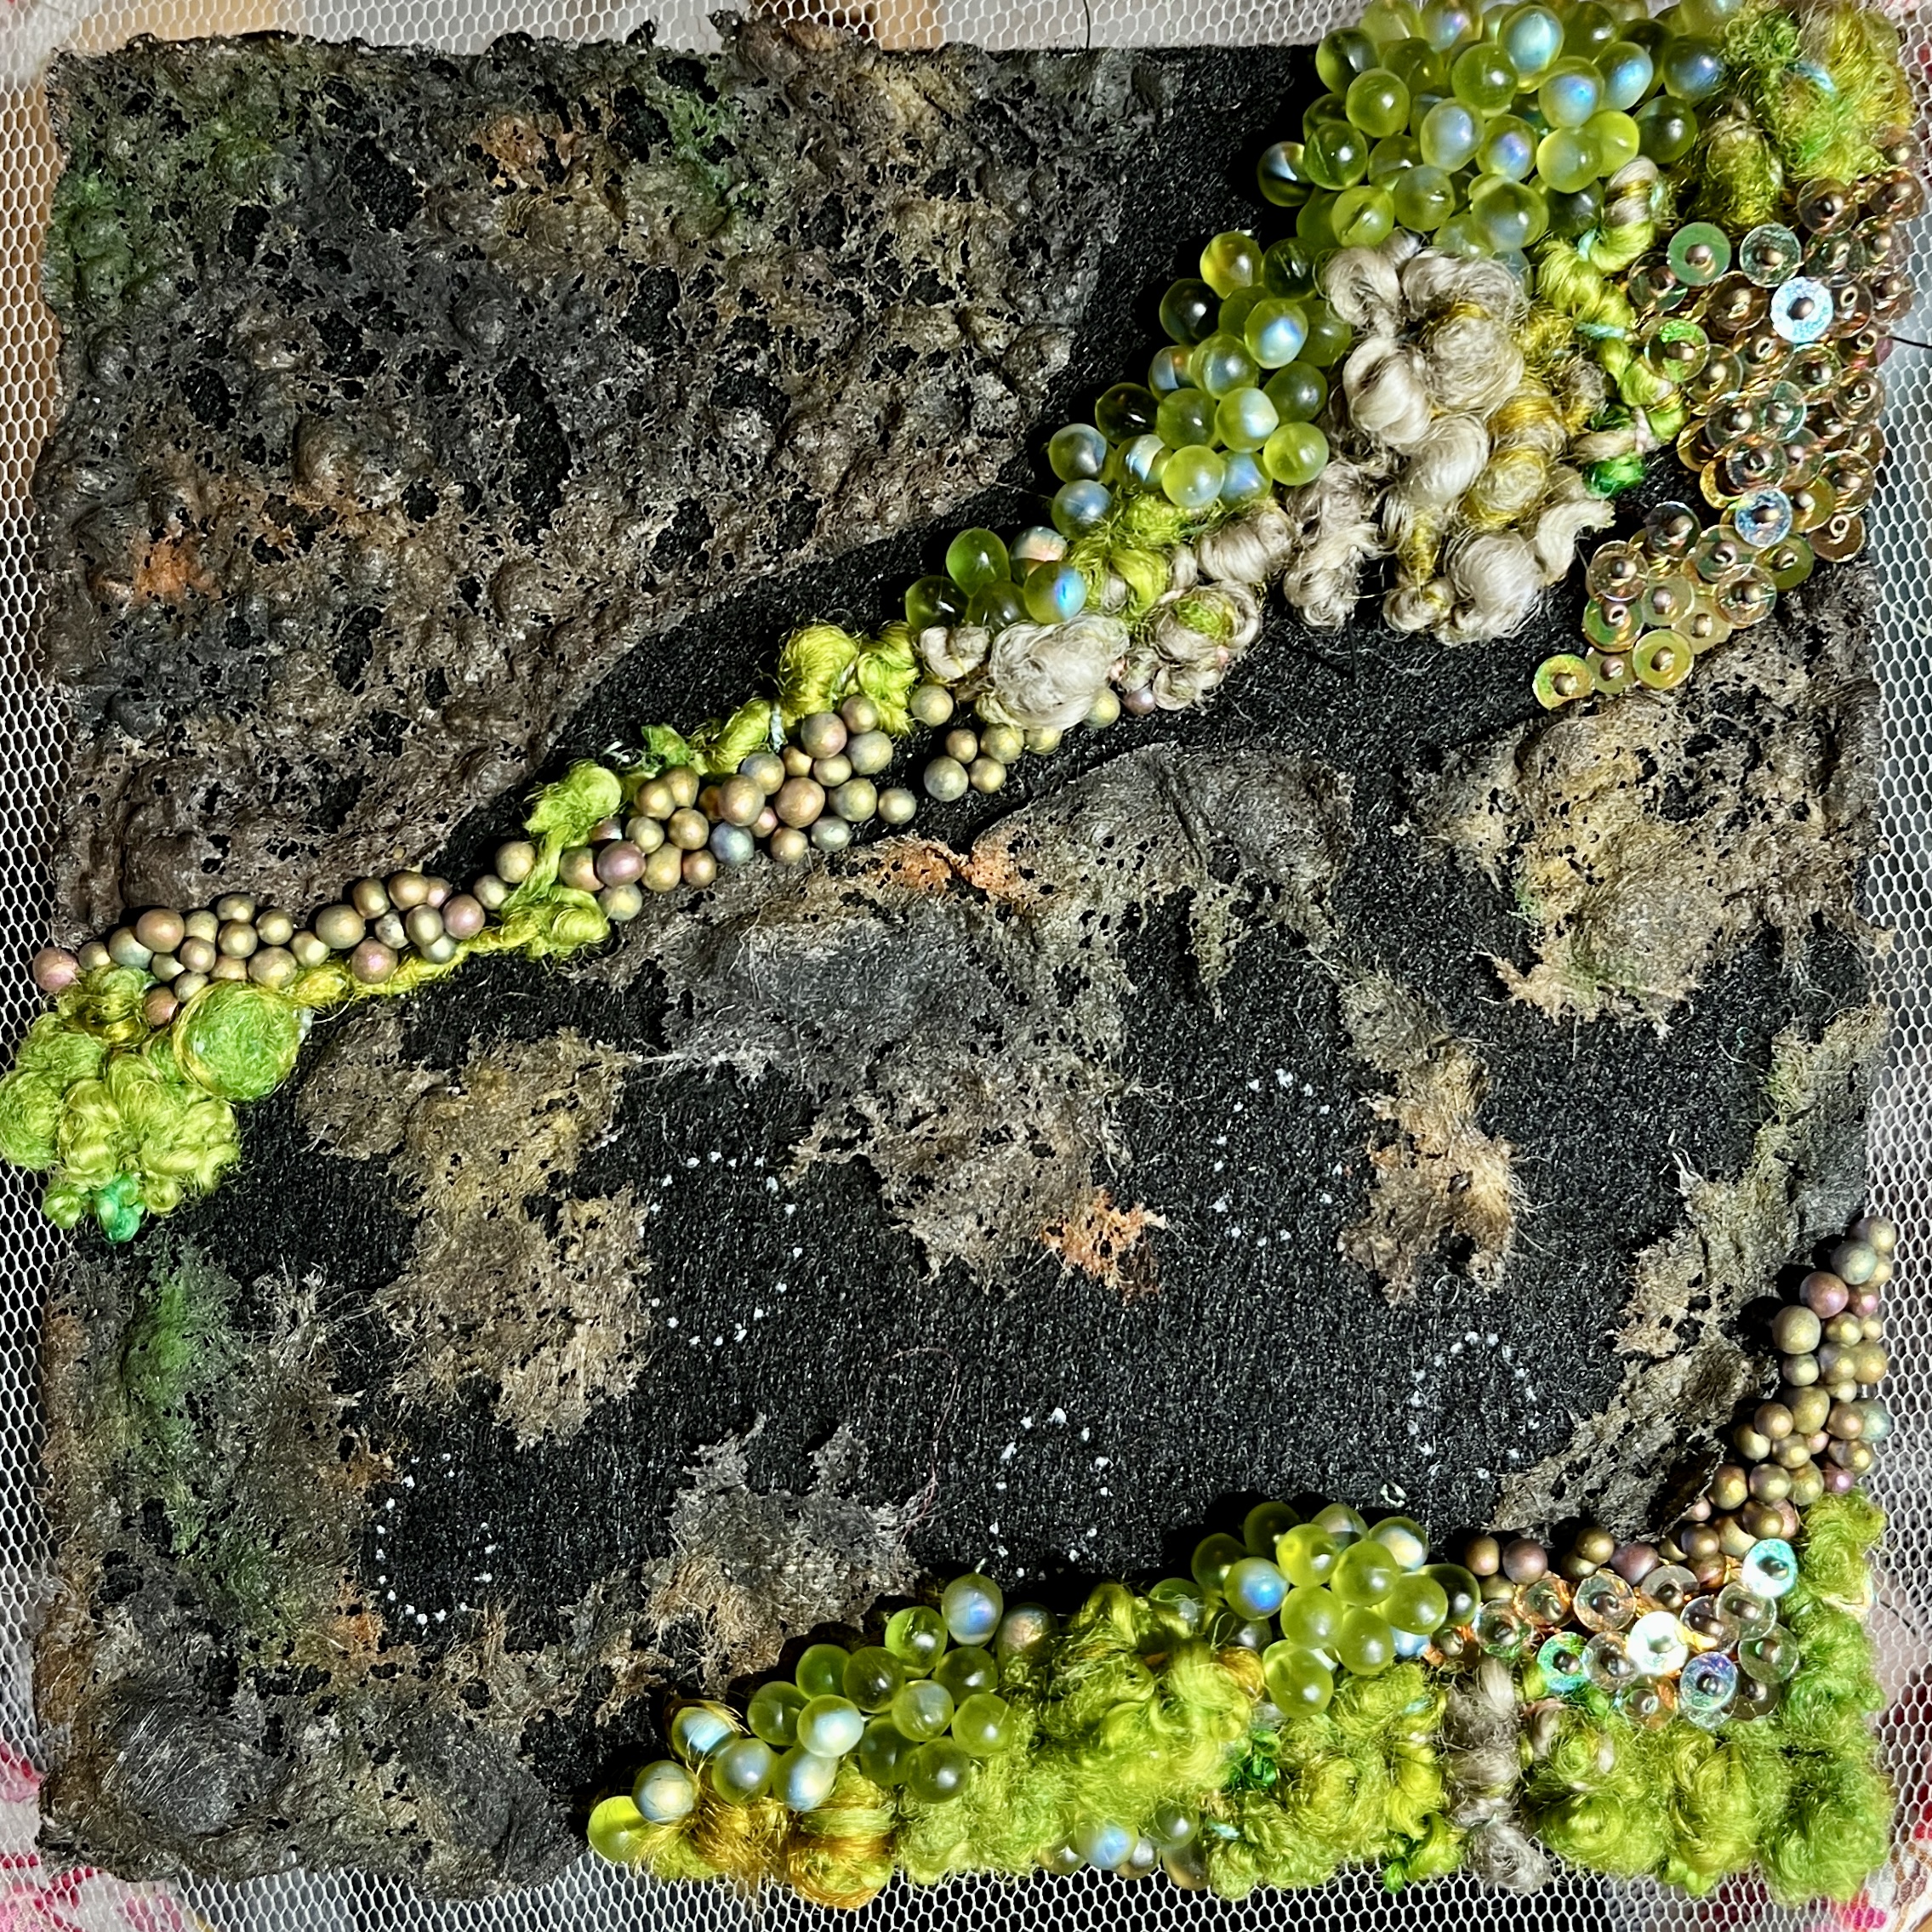
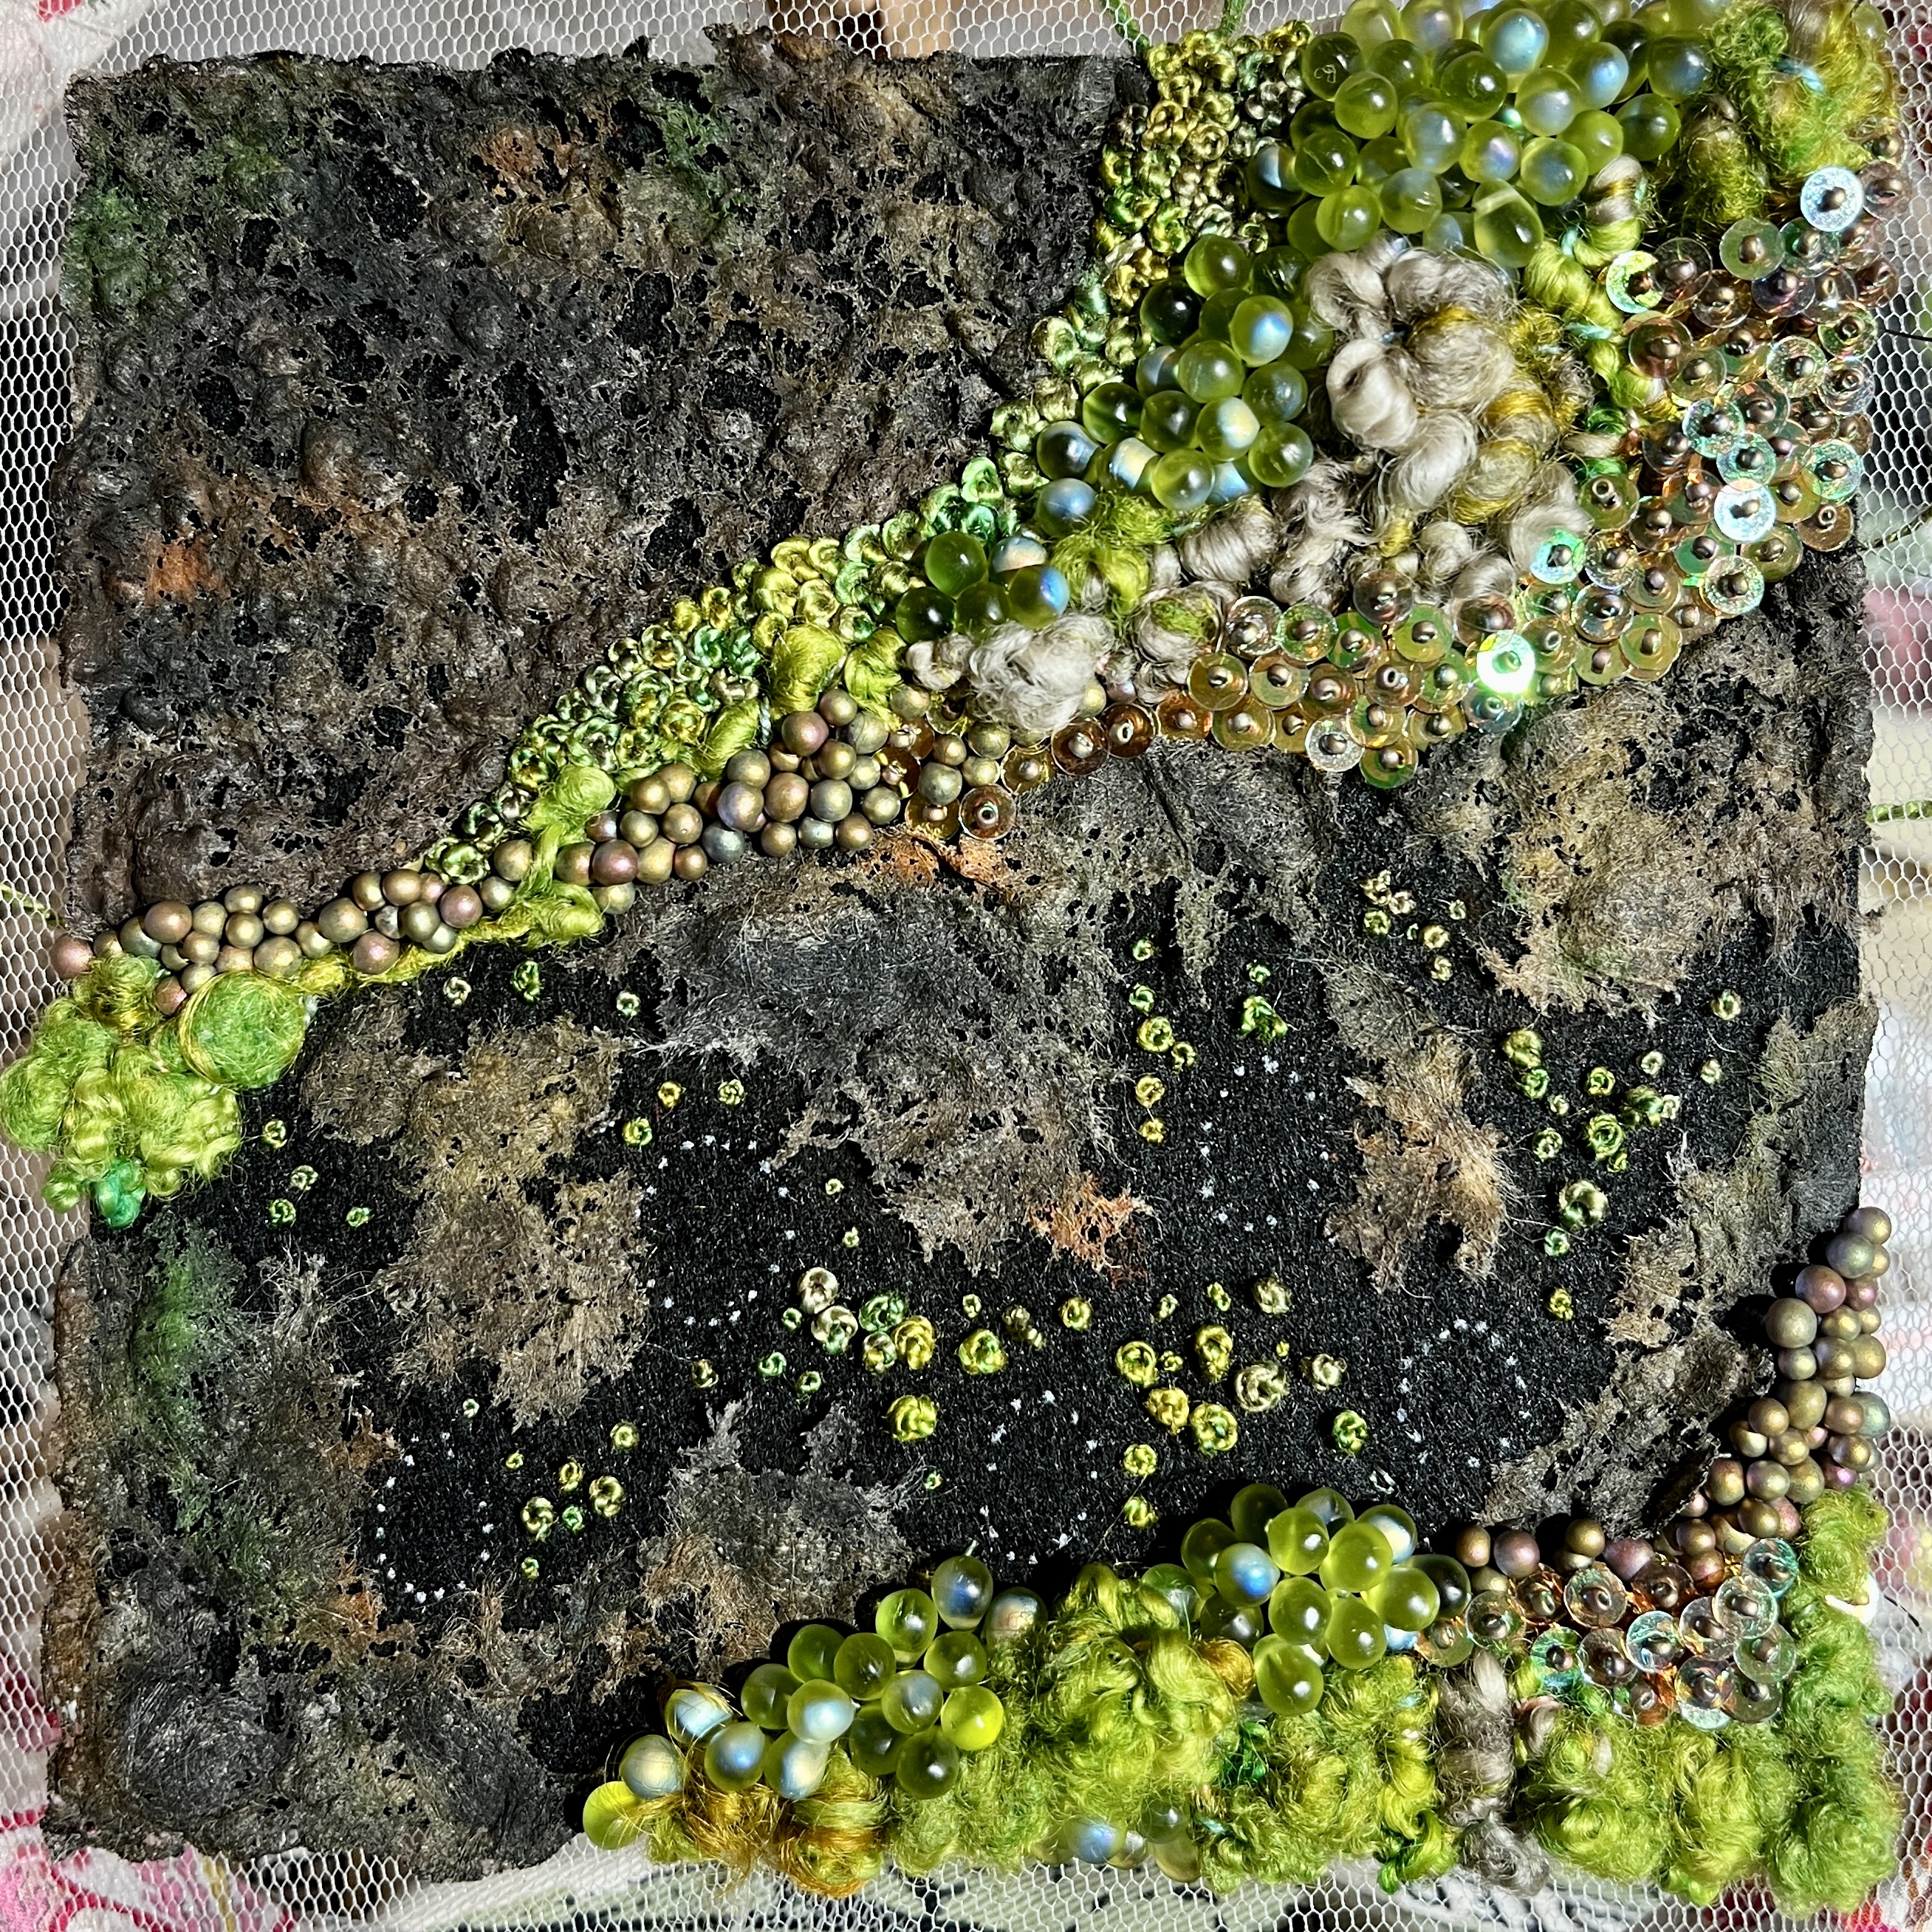
Tiny tufts of fur and a variety of feathers were taken from trimmings and individually cut down and stitched in place. I used punch needling on a separate fabric using hand dyed threads and fibres to make additional mossy fur patches, which were then stitched onto the main base, and also used needle felting and felt balls cut in half to add height under some sections, which were then bead embroidered.
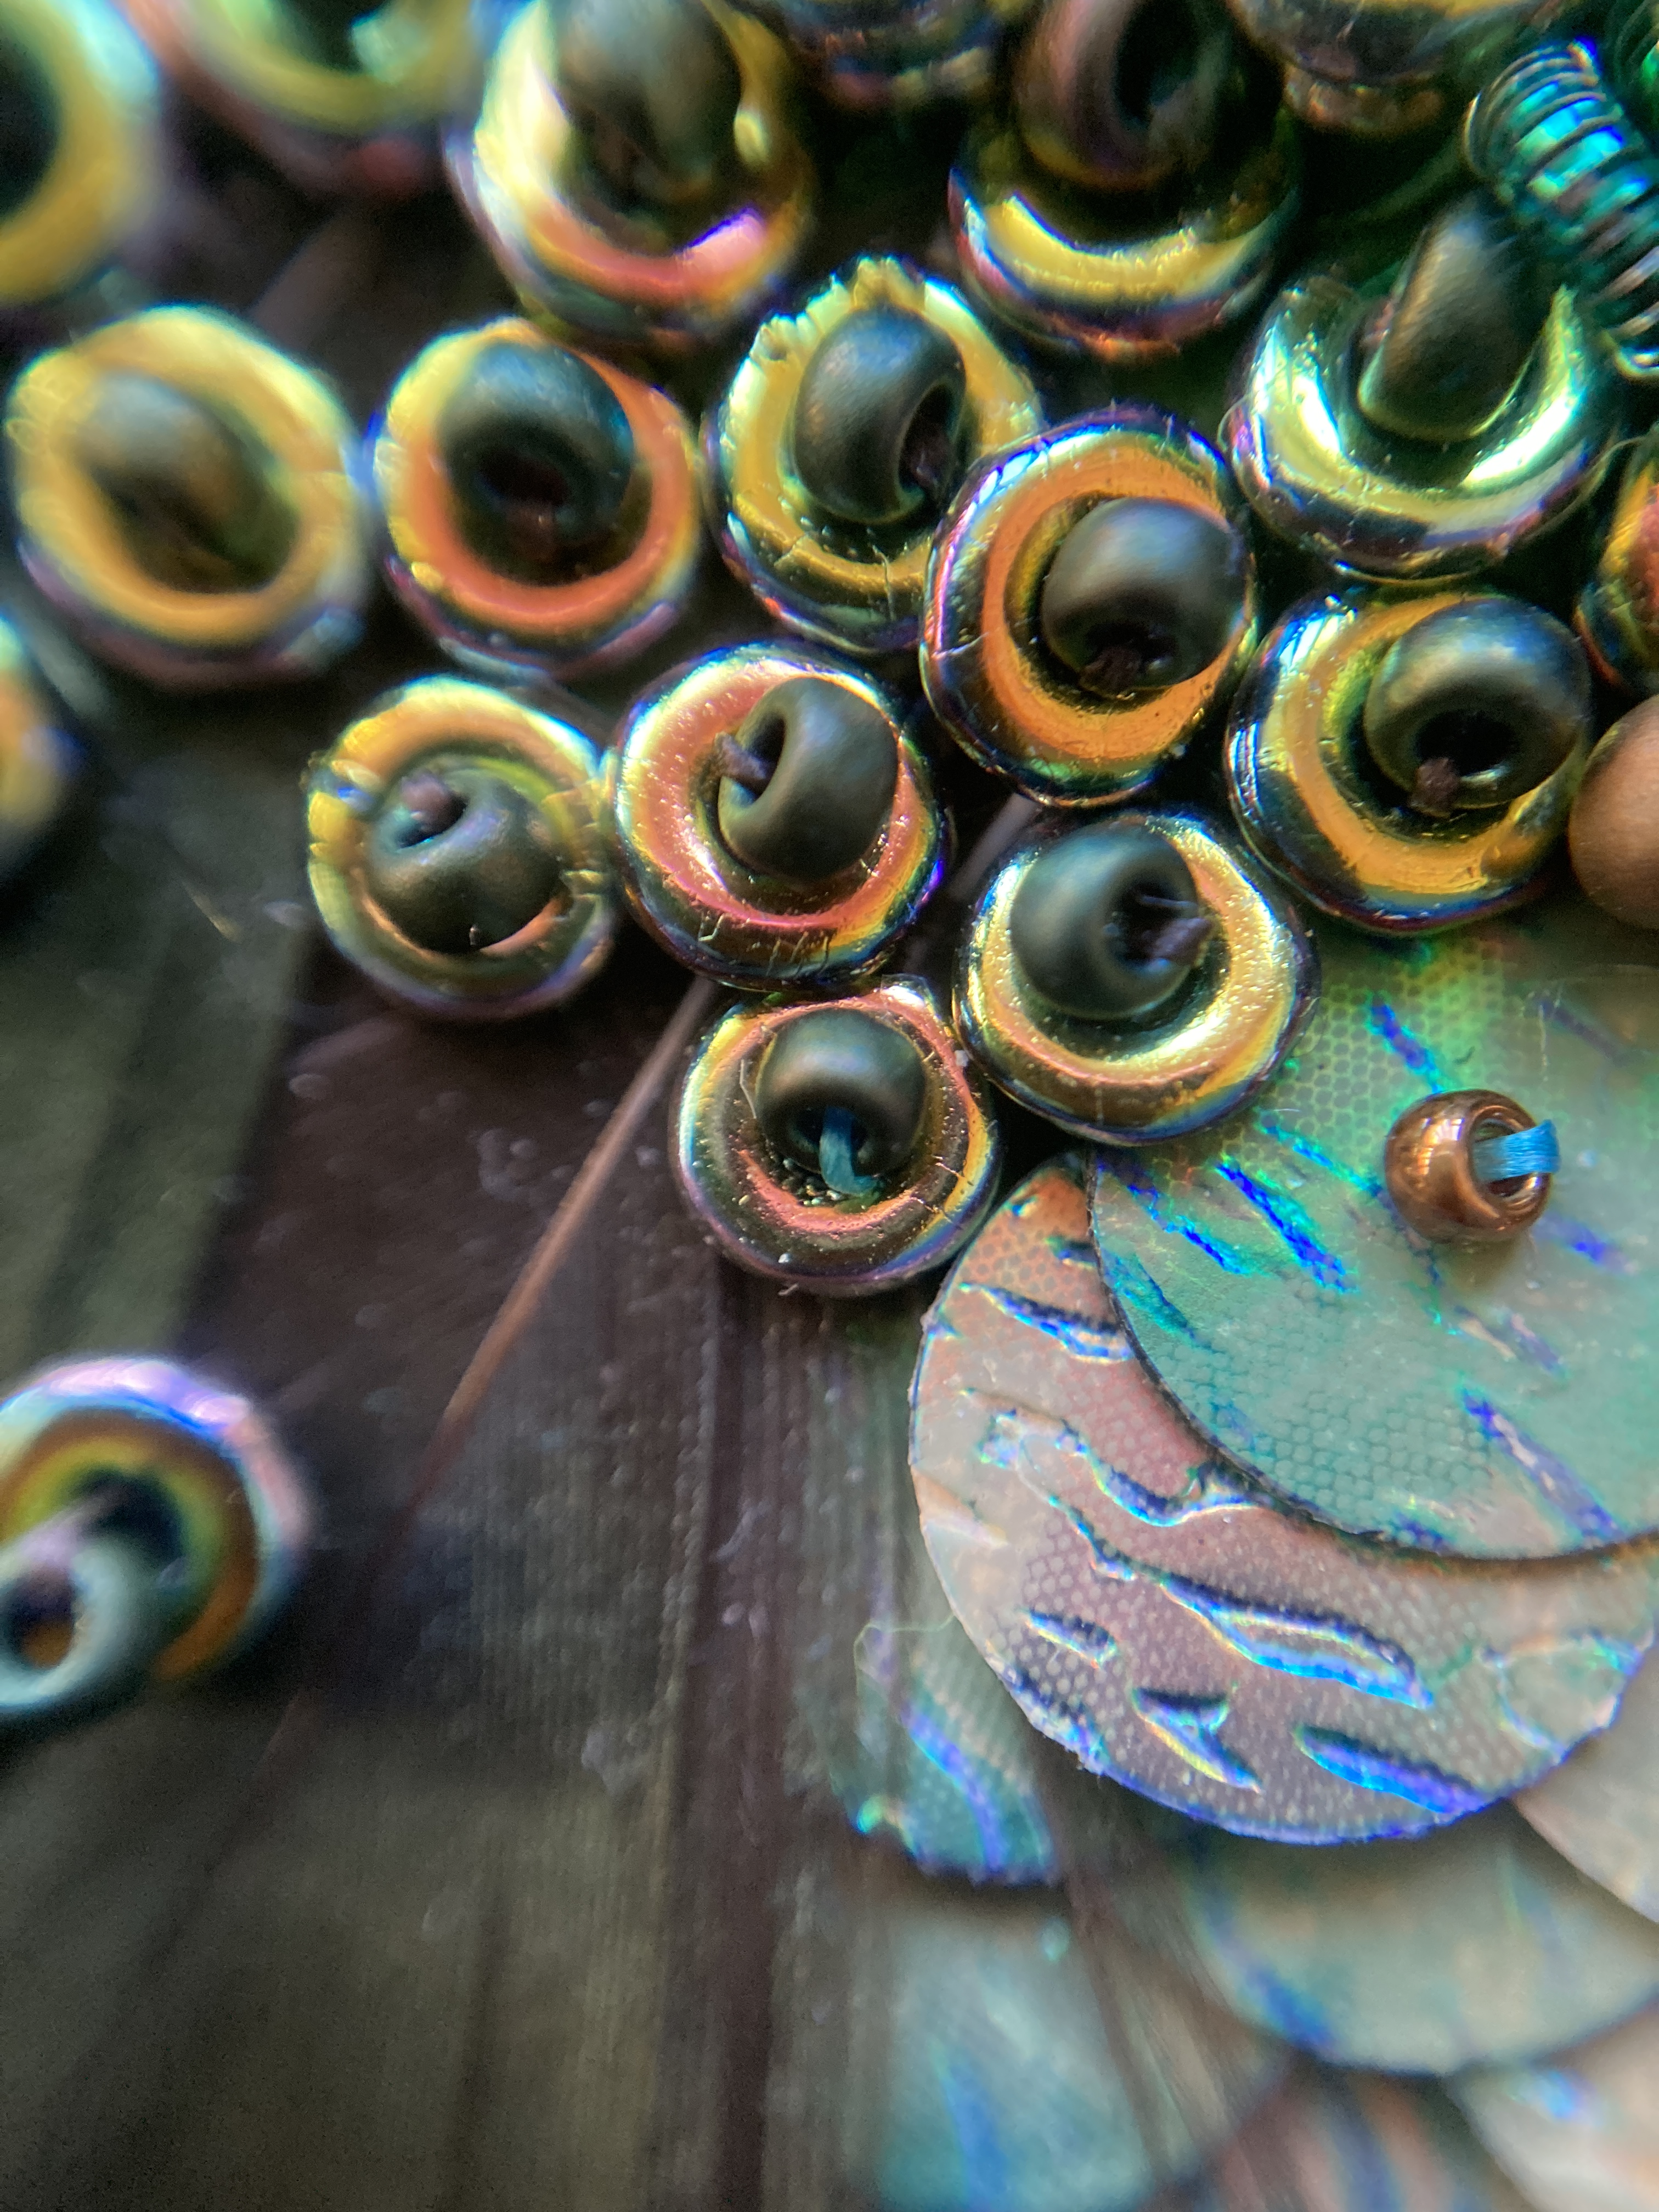
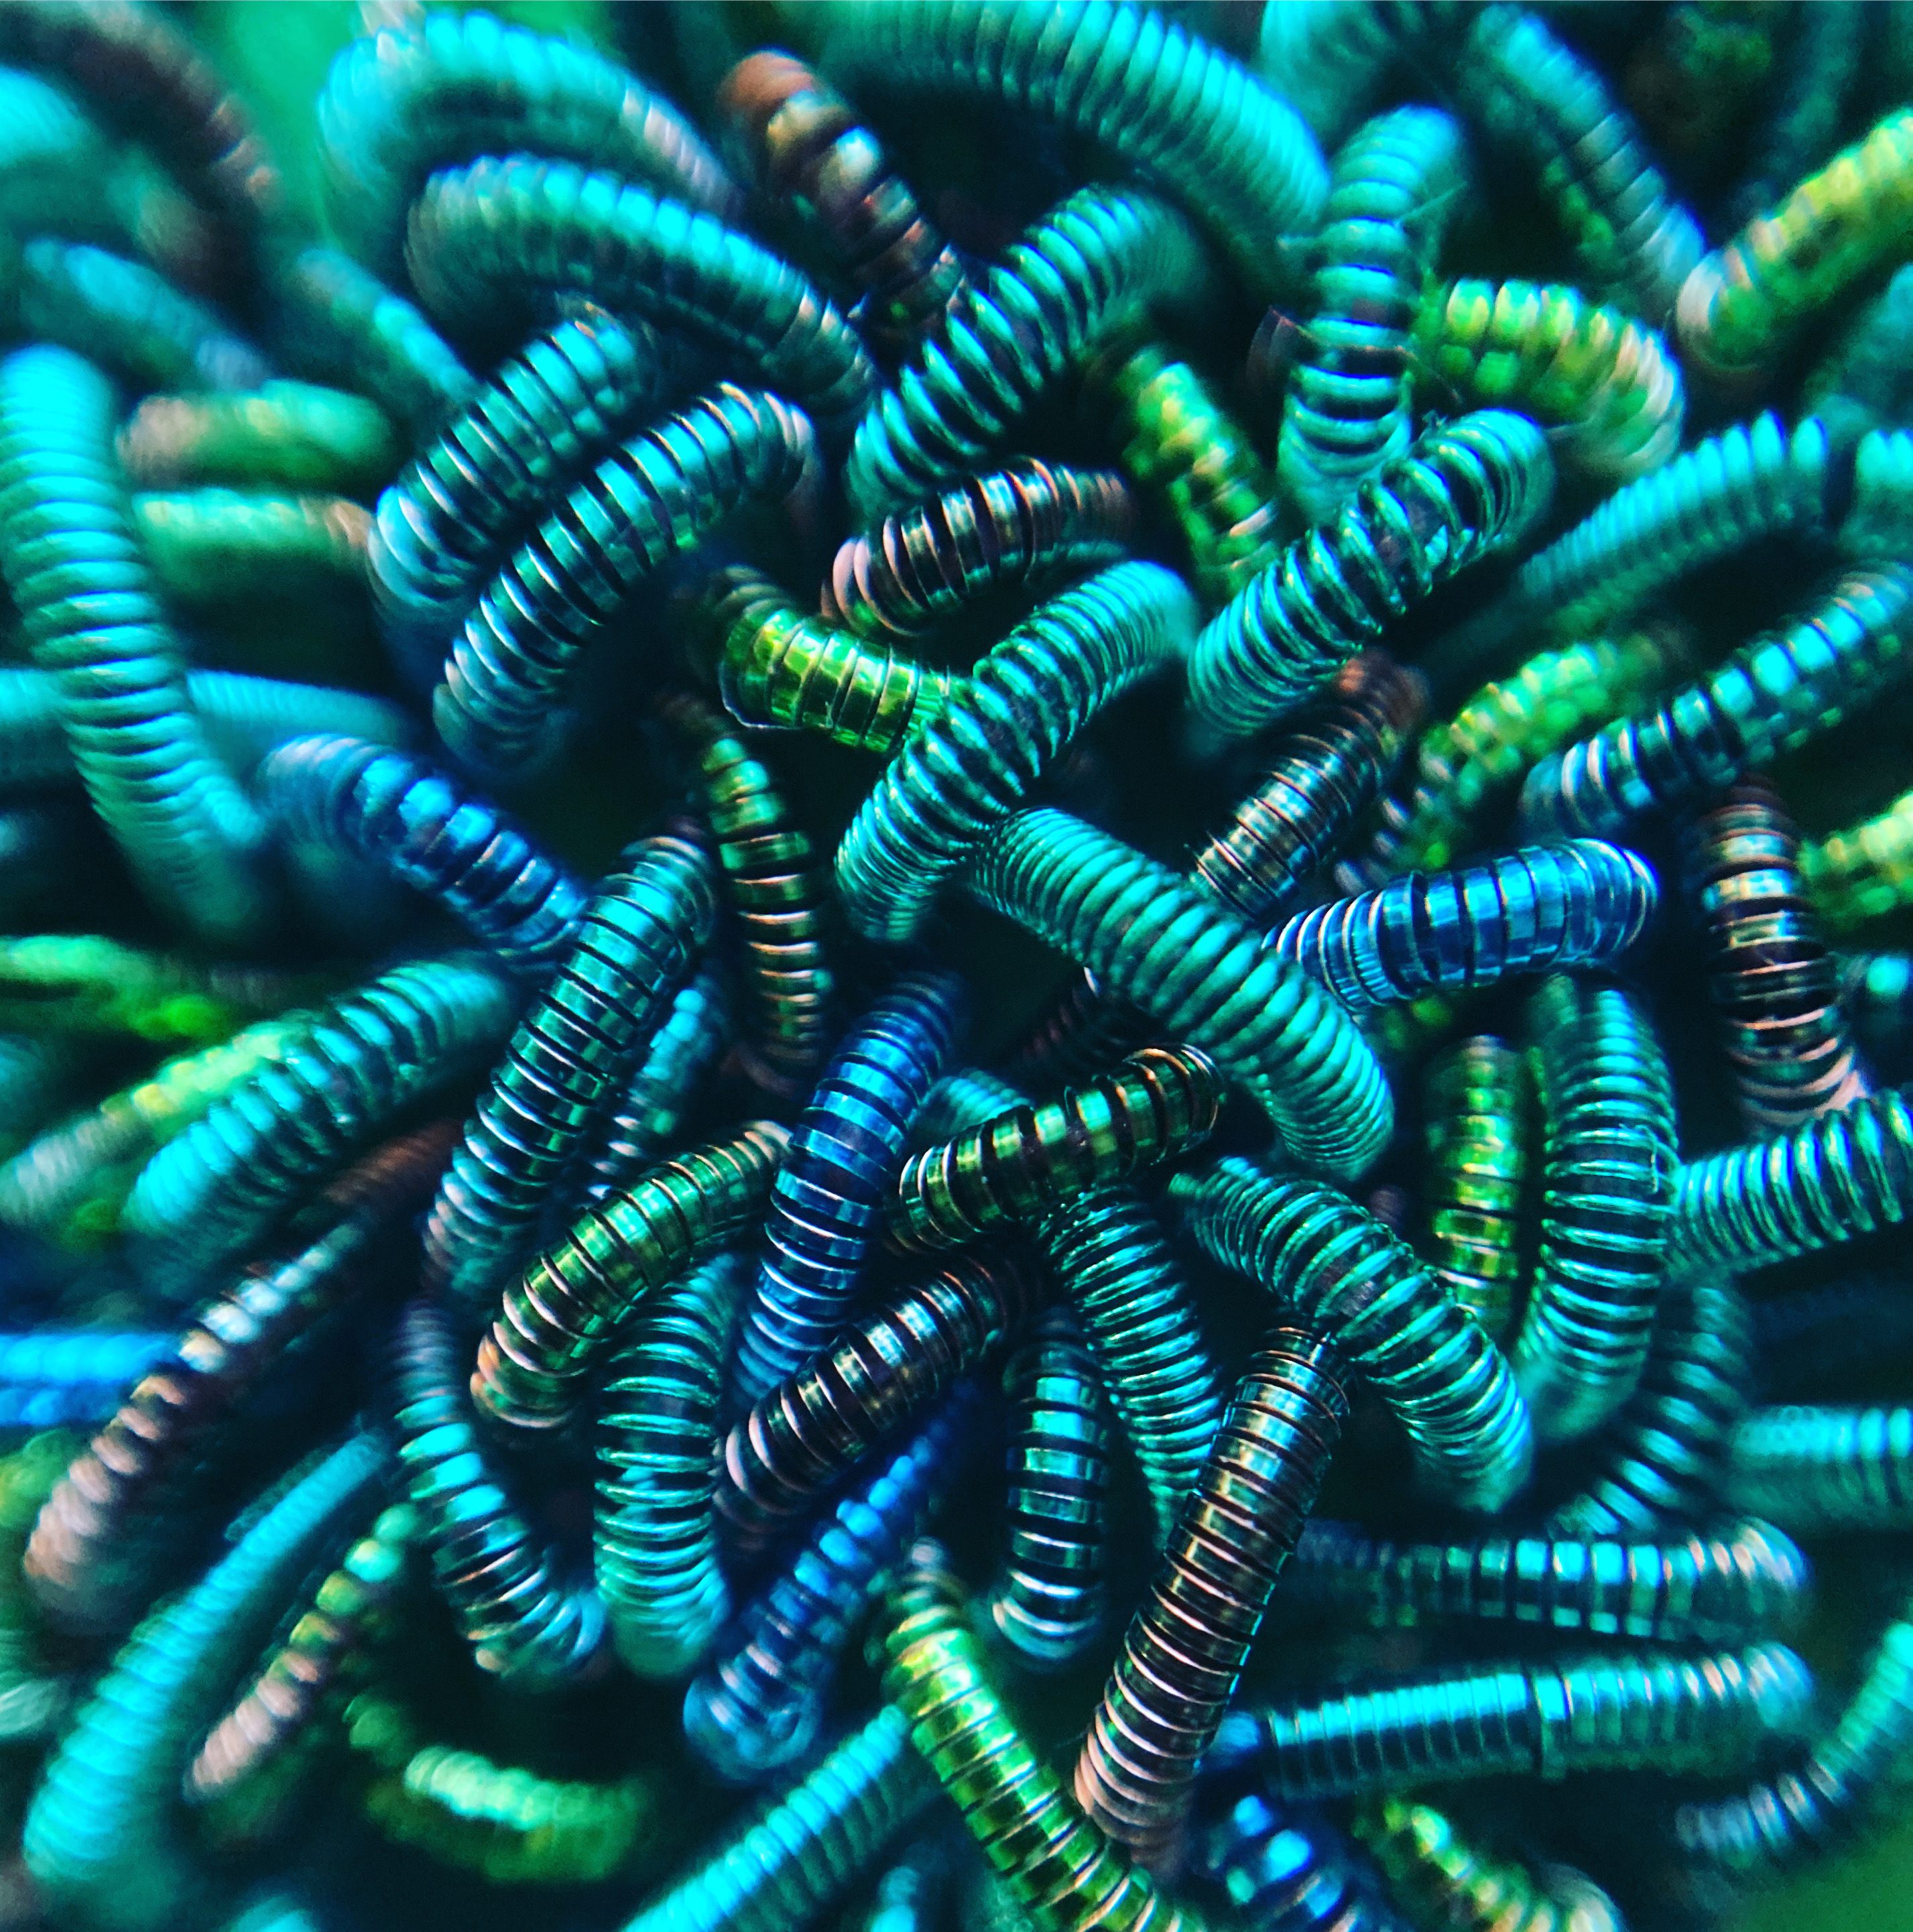
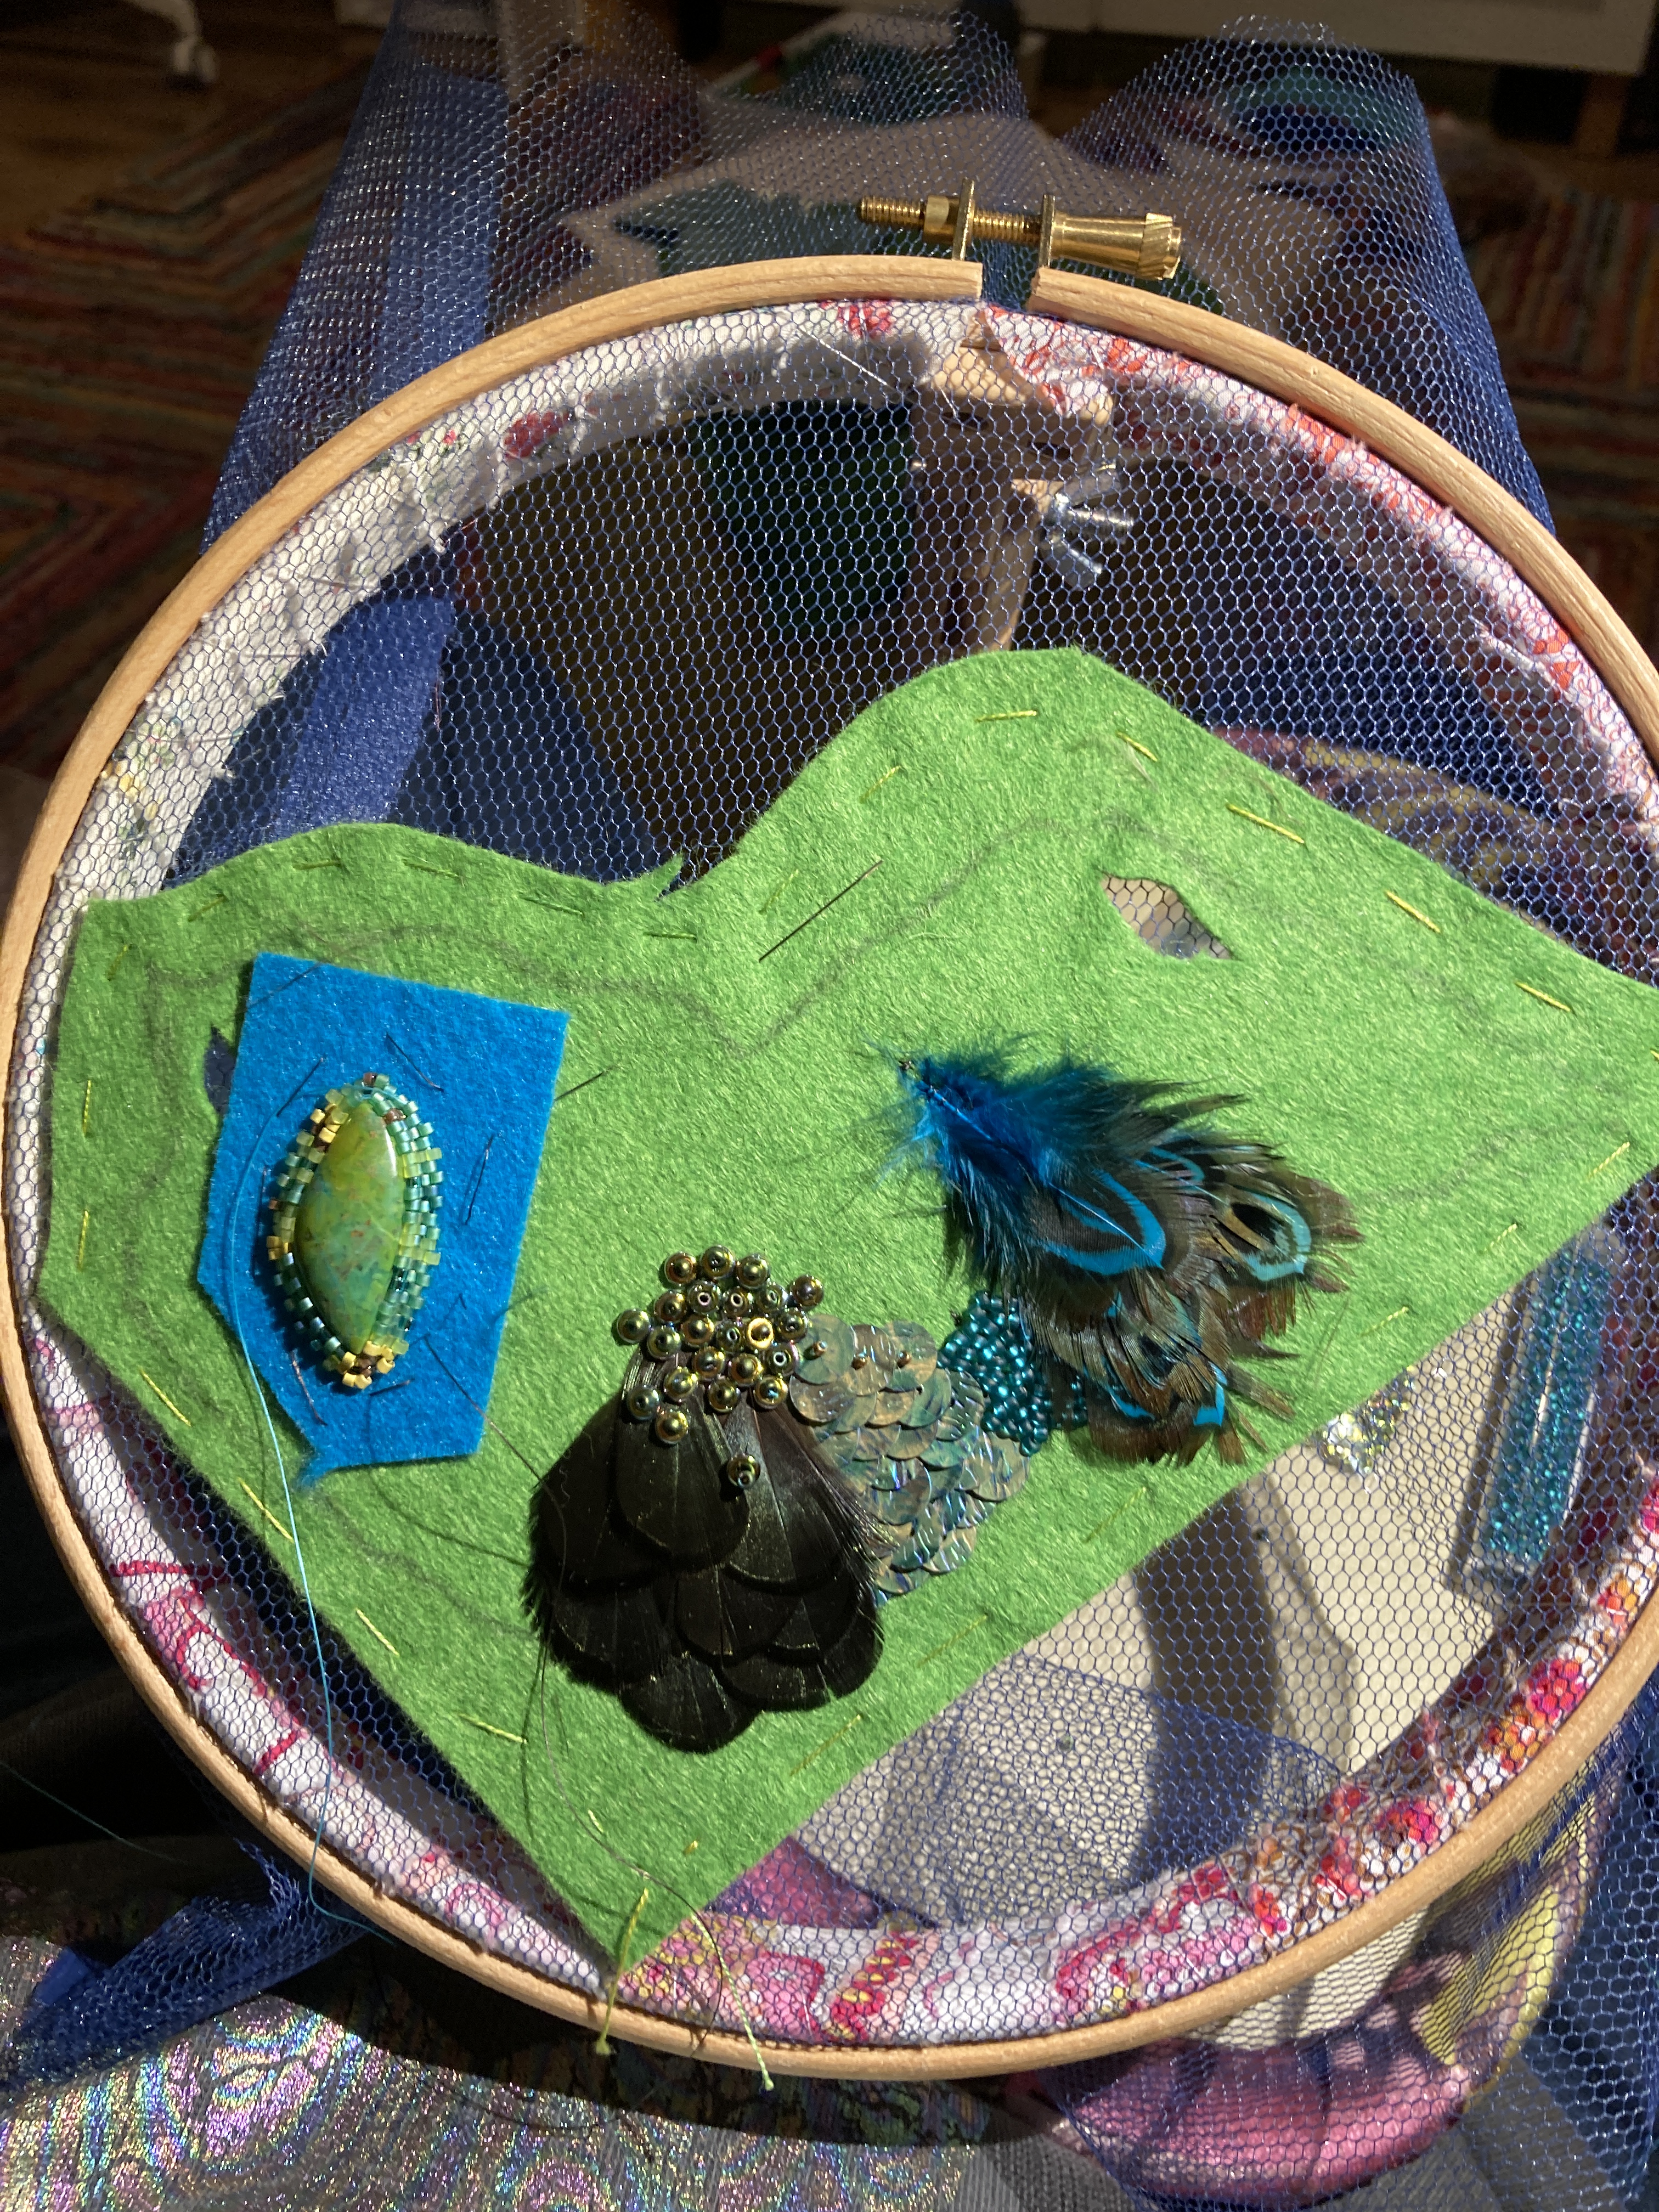
Early on as a key part of the piece I created the lutrador and tyvek sections – hand painted then carefully heat shrunk, the tyvek gives the bubbles, and the lutrador the mossy textures. Both were tacked in place and then bead embroidered using simple stab stitches and a variety of bronze Miyuki beads. The tyvek had to be pre-pierced with a beader’s awl so I could attach it and add the beads, and with the lutrador the objective was to fill in all of the lacey holes.
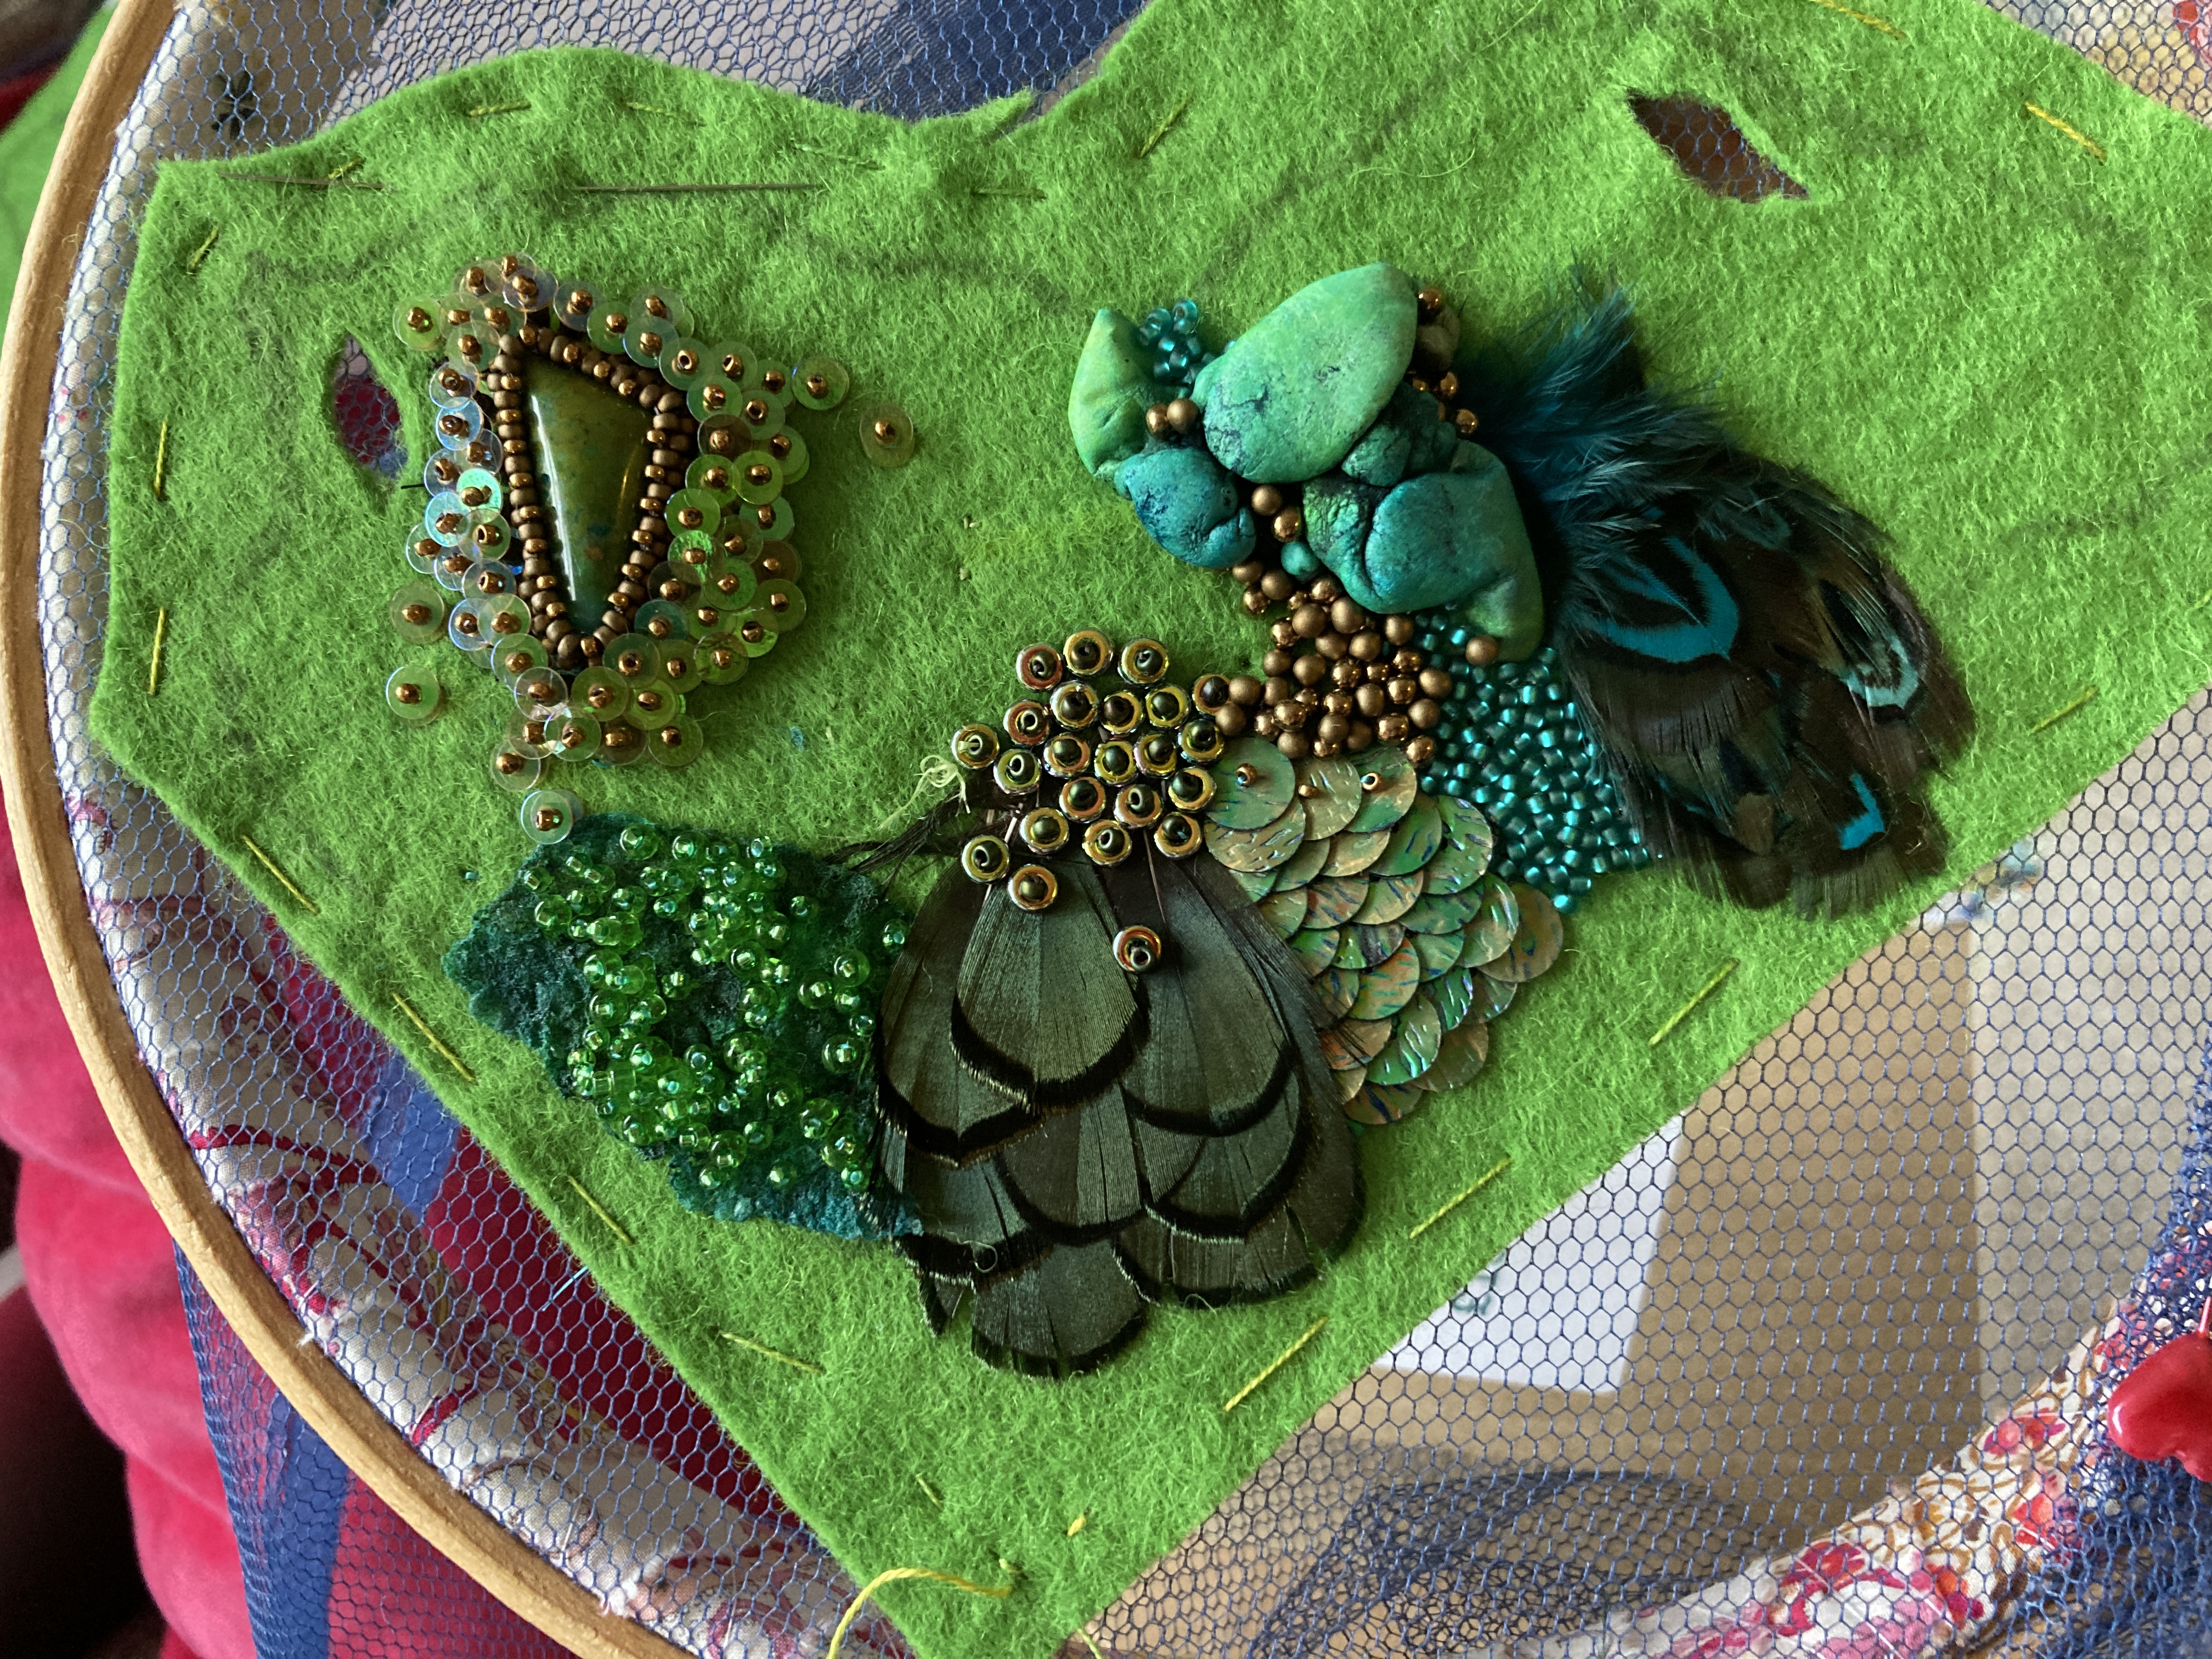
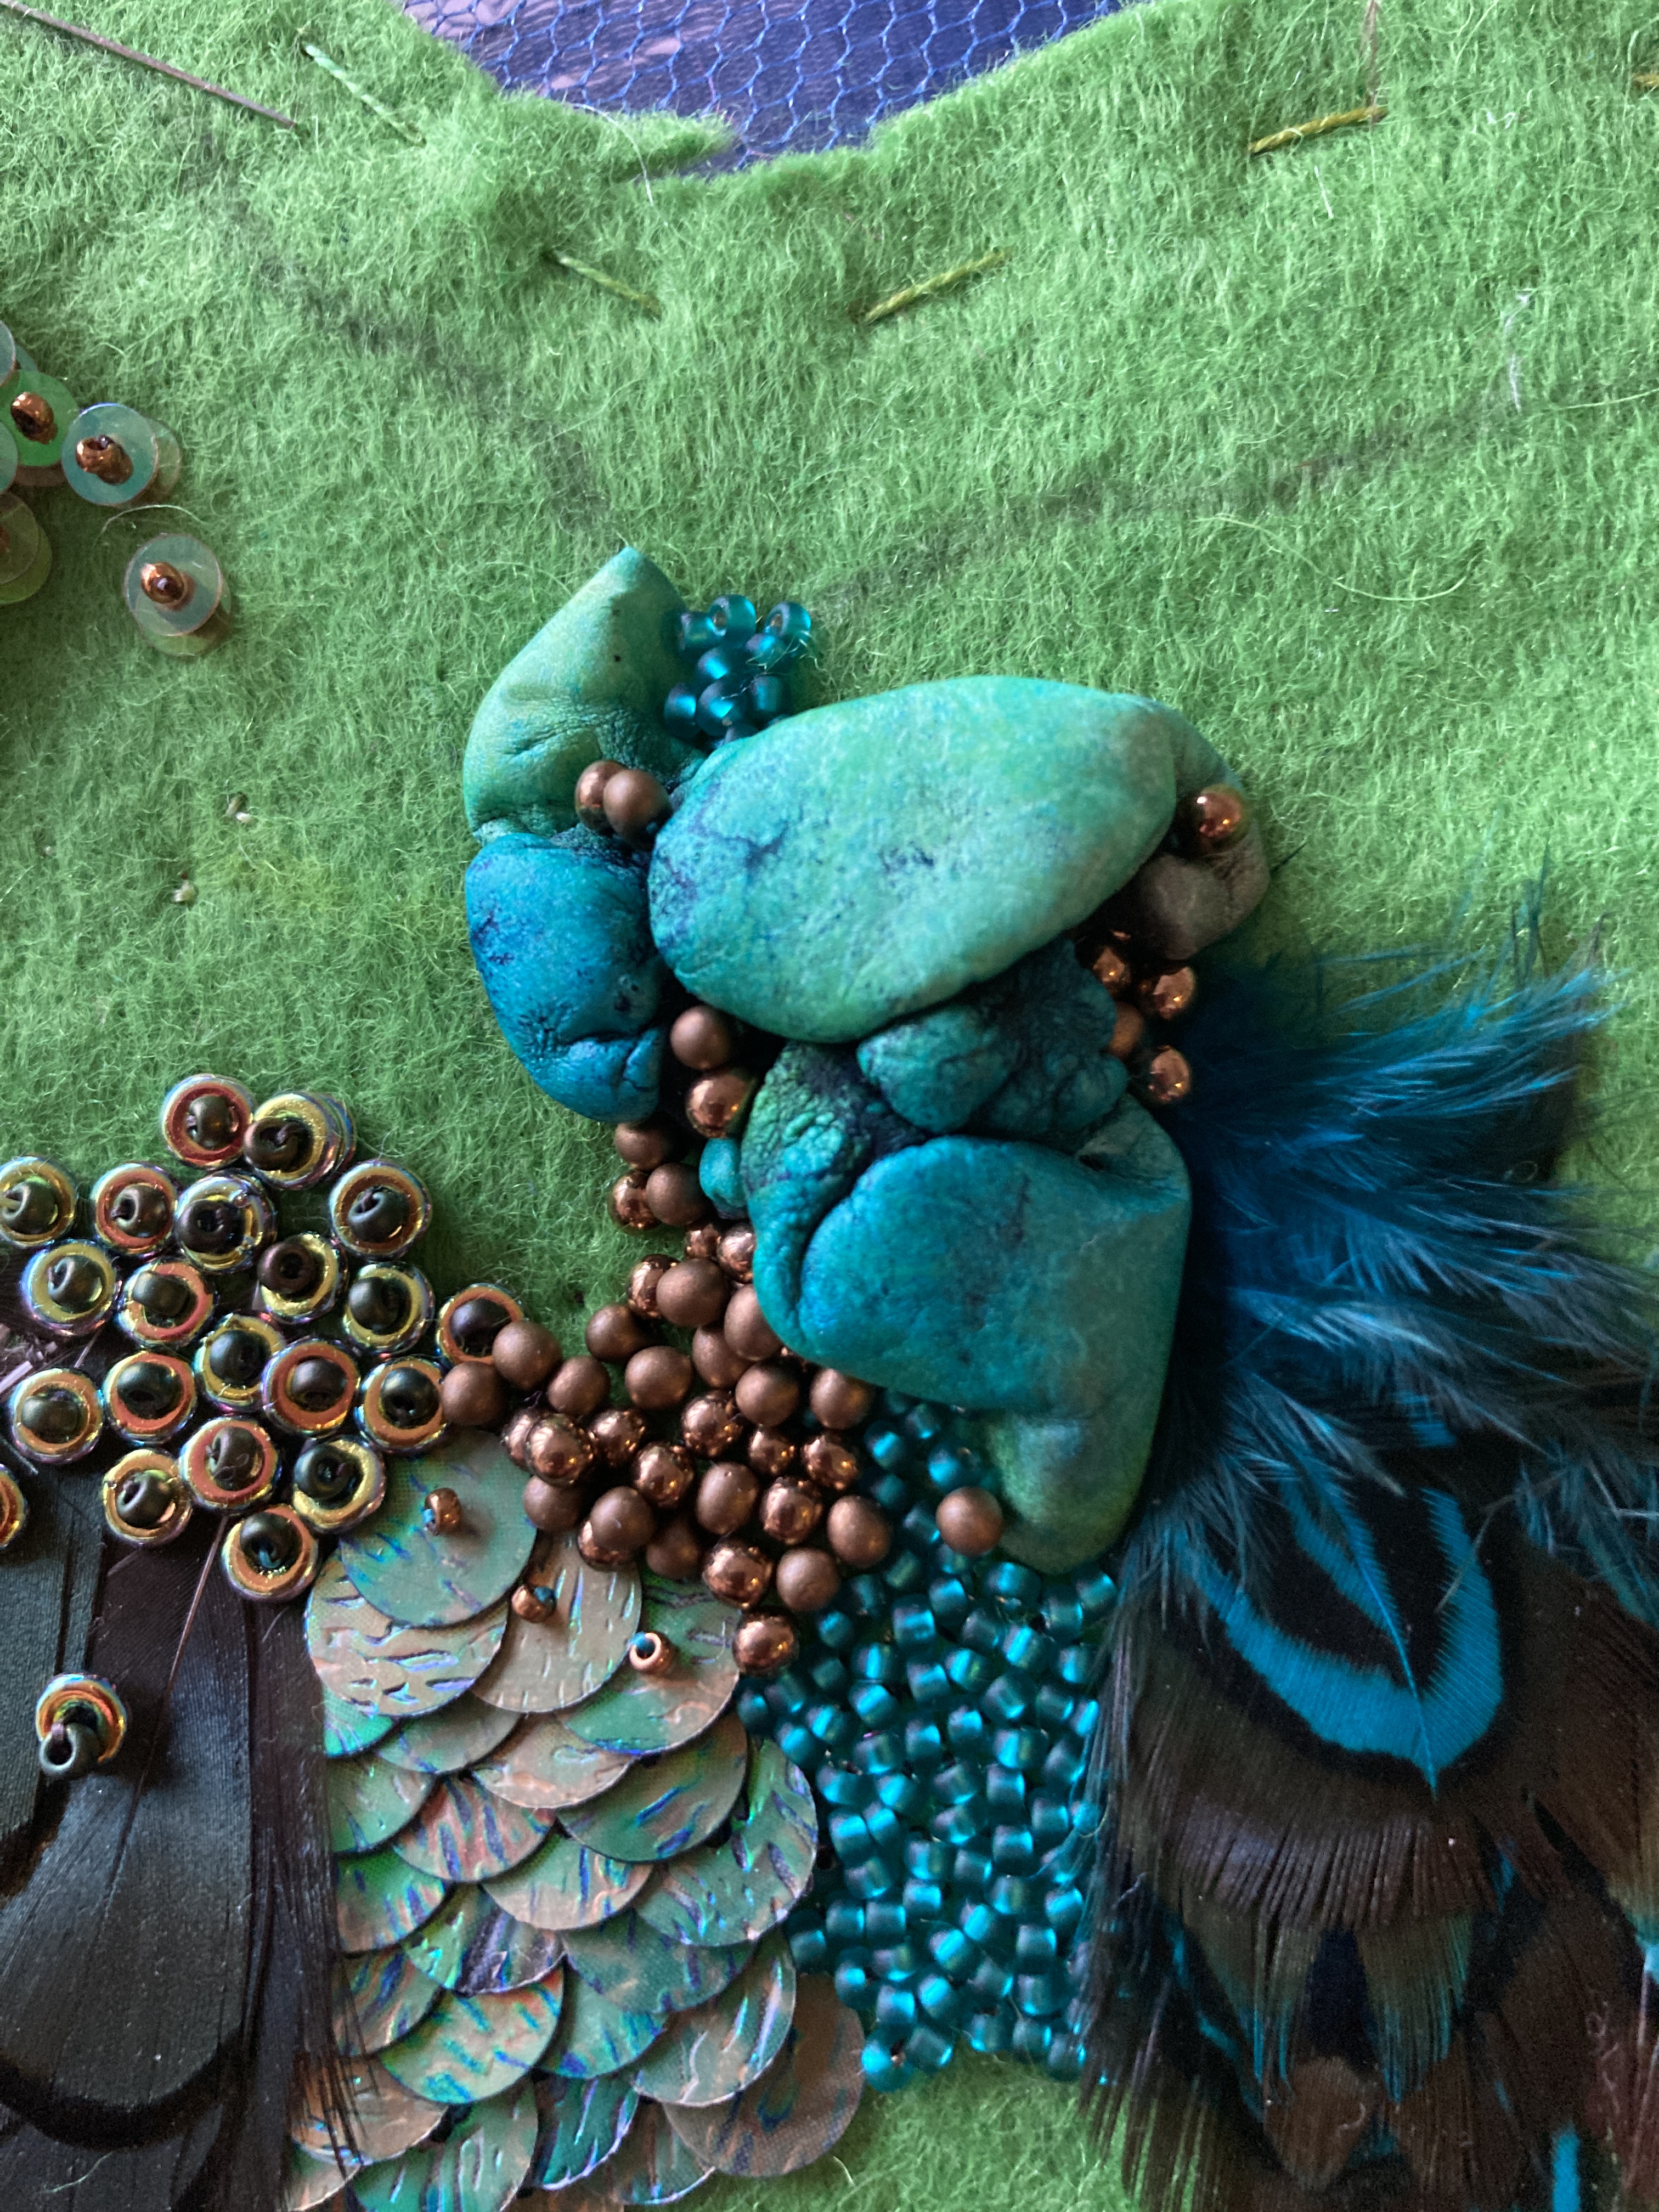
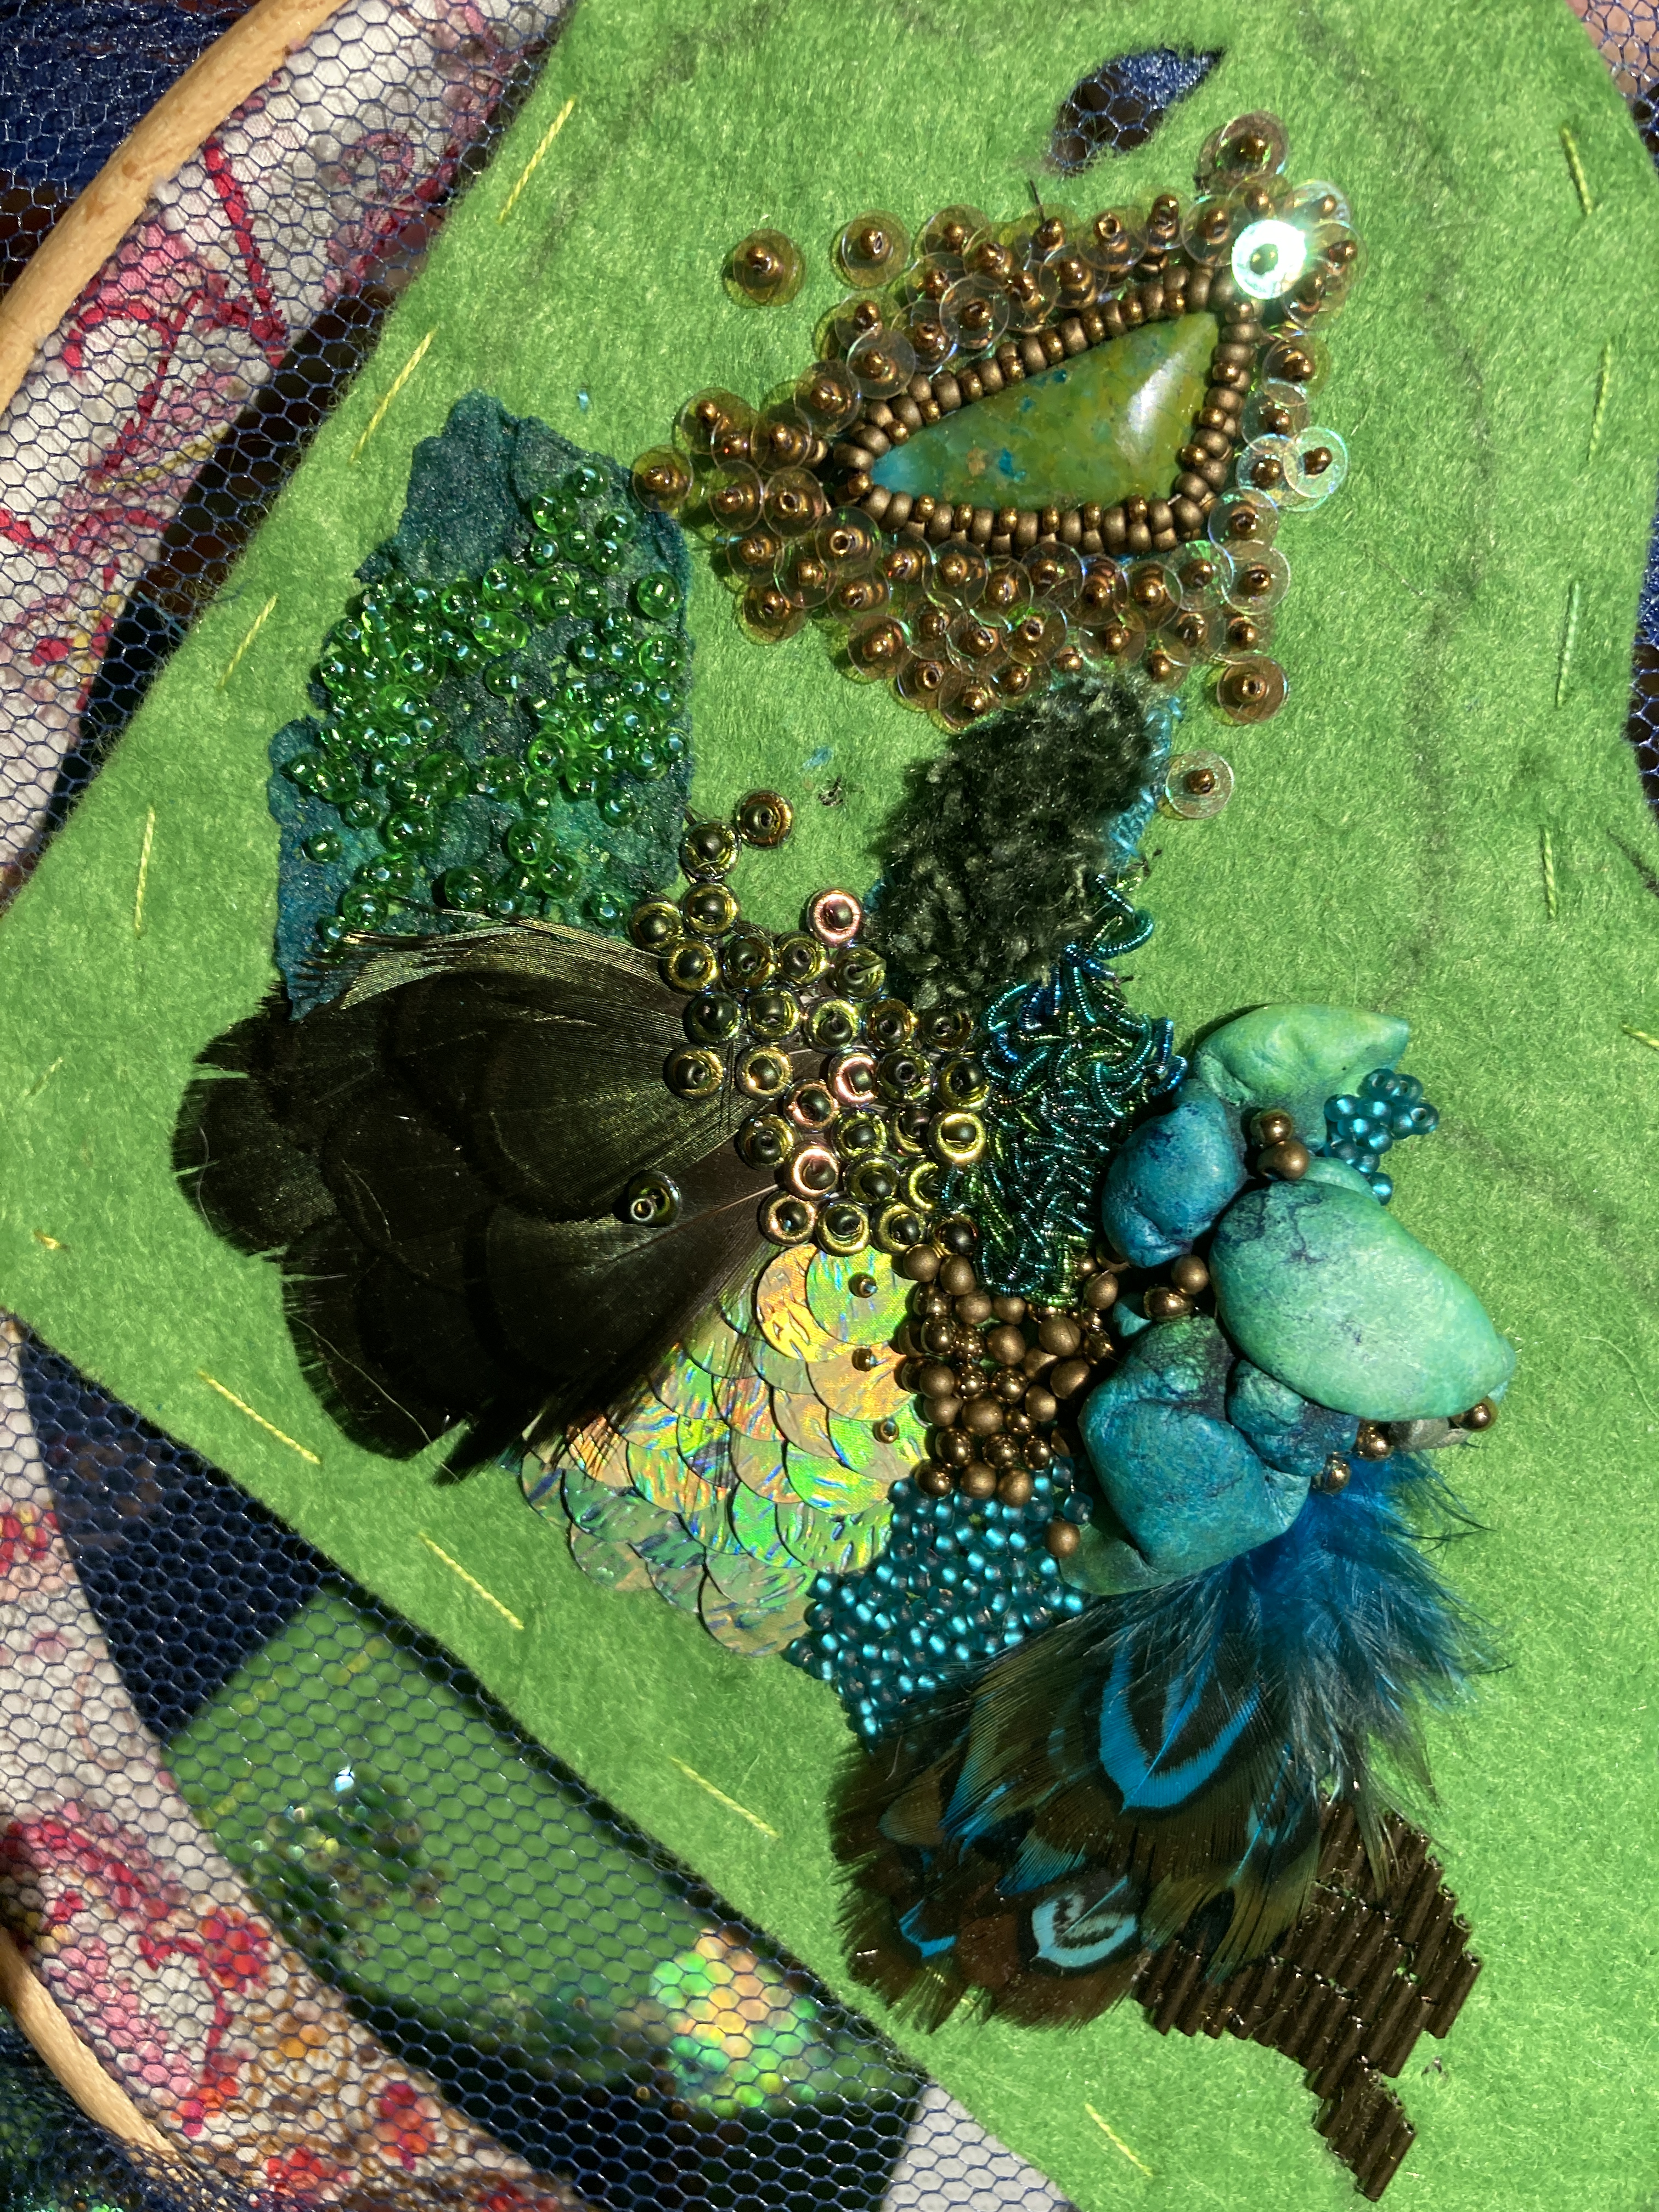
I’d already bezelled the cabs onto hard felt, and stitched those in place at roughly the same time as the manipulated synthetics, starting to build the layout. The hard felt edges were then masked with stacked seed beads and sequins. Below you can see one section as it built over time – bear in mind I was building all three sections in parrallel to ensure I had the same look and feel on each, so I was constantly swapping as I then went on to build up the beadwork sections.
As you can see above, all the sections were worked onto soft felt which was mounted onto tough dress net – I needed to use soft rather than hard felt so the collar sections would drape on the body and move, but it wouldn’t have been strong enough then to support such heavy beading, so I added two layers of net beneath. The net was easy to work through, and as well as strengthening the felt once the stitching started, it of course provided the tensioned base to get the felt pieces onto an embroidery hoop (or in the case of the largest section, a quilting hoop as I had no embroidery hoops big enough!). More often I work bead embroidery on hard felt, which doesn’t require a frame, but with the soft felt you have to work under tension or it puckers (as well as flopping everywhere) – slower and bulkier but worth the extra effort.
Some parts of the base felt were also hand painted – bright green felt was the right colour at the beginning of the project but then the teal and bronze colours took over from the lime greens as I progressed, so I needed to use watered down acrylic inks to tone it down into the background – silly error but a useful new technique for me to perfect.
The beetle wings have been in my stash for about 15 years, and this was finally the perfect project for them – they’re carefully attached through tiny holes with give in the threads to allow them to move with the wearer, and had to go on just before backing.
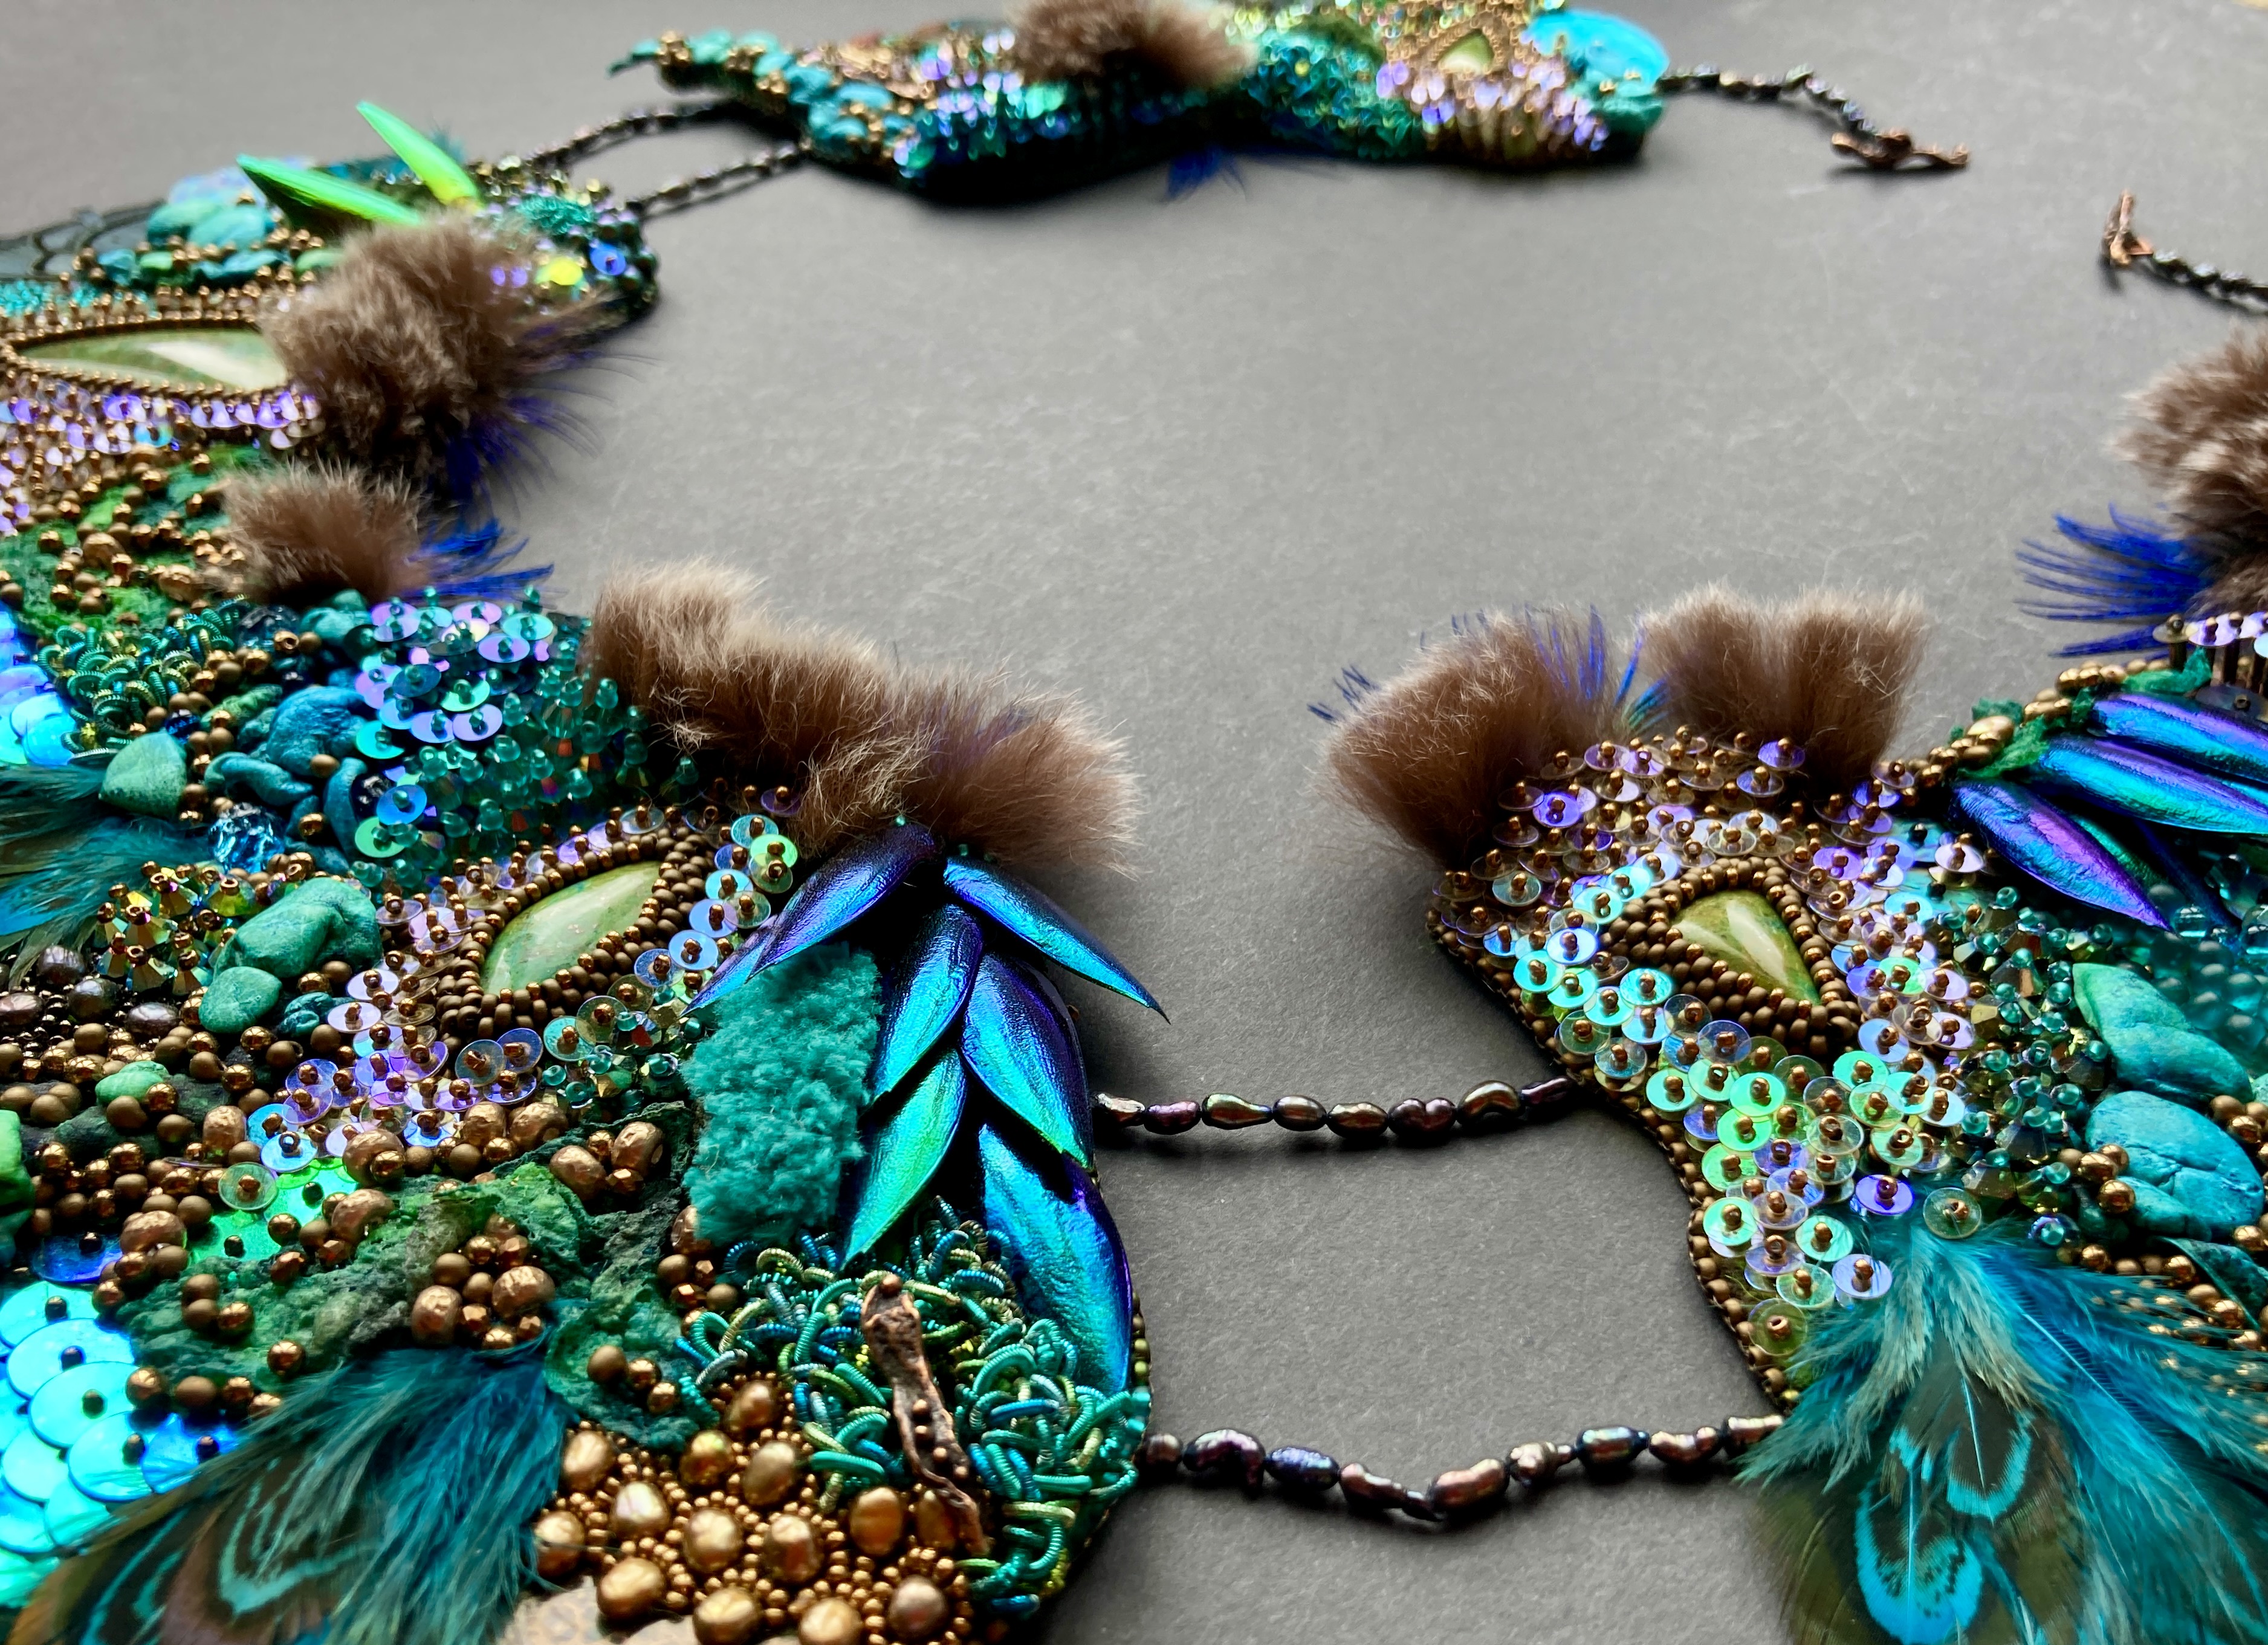
And finally, each section has small ‘button holes’ for the toggles – the sections need to move independently in wear so each have just two joining points, and the Anna Bronze toggles can sometimes just be seen sitting snugly in the textures. Each of those button holes plus all of the edges have been finished using the standard bead embroidery ‘sunshine edge’ – fiddly (particularly round the peacock feathers on the neck edge) but an important strengthening step to marry together the strong ultrasuede with the softer felt (which I’d already reinforced with dress net either side) .
I’ve probably missed some techniques or materials in this list – this was a very long project (started in November ’22, finished in March ’23) but I will try to share more ‘in progress’ shots on my social media accounts so we can all see it grow and I can describe some more of the process – just follow me on Instagram or Facebook to see those.
With so many materials in one piece a definitive supplier list is tough, particularly as so much came from my stash, but here are some key suppliers:
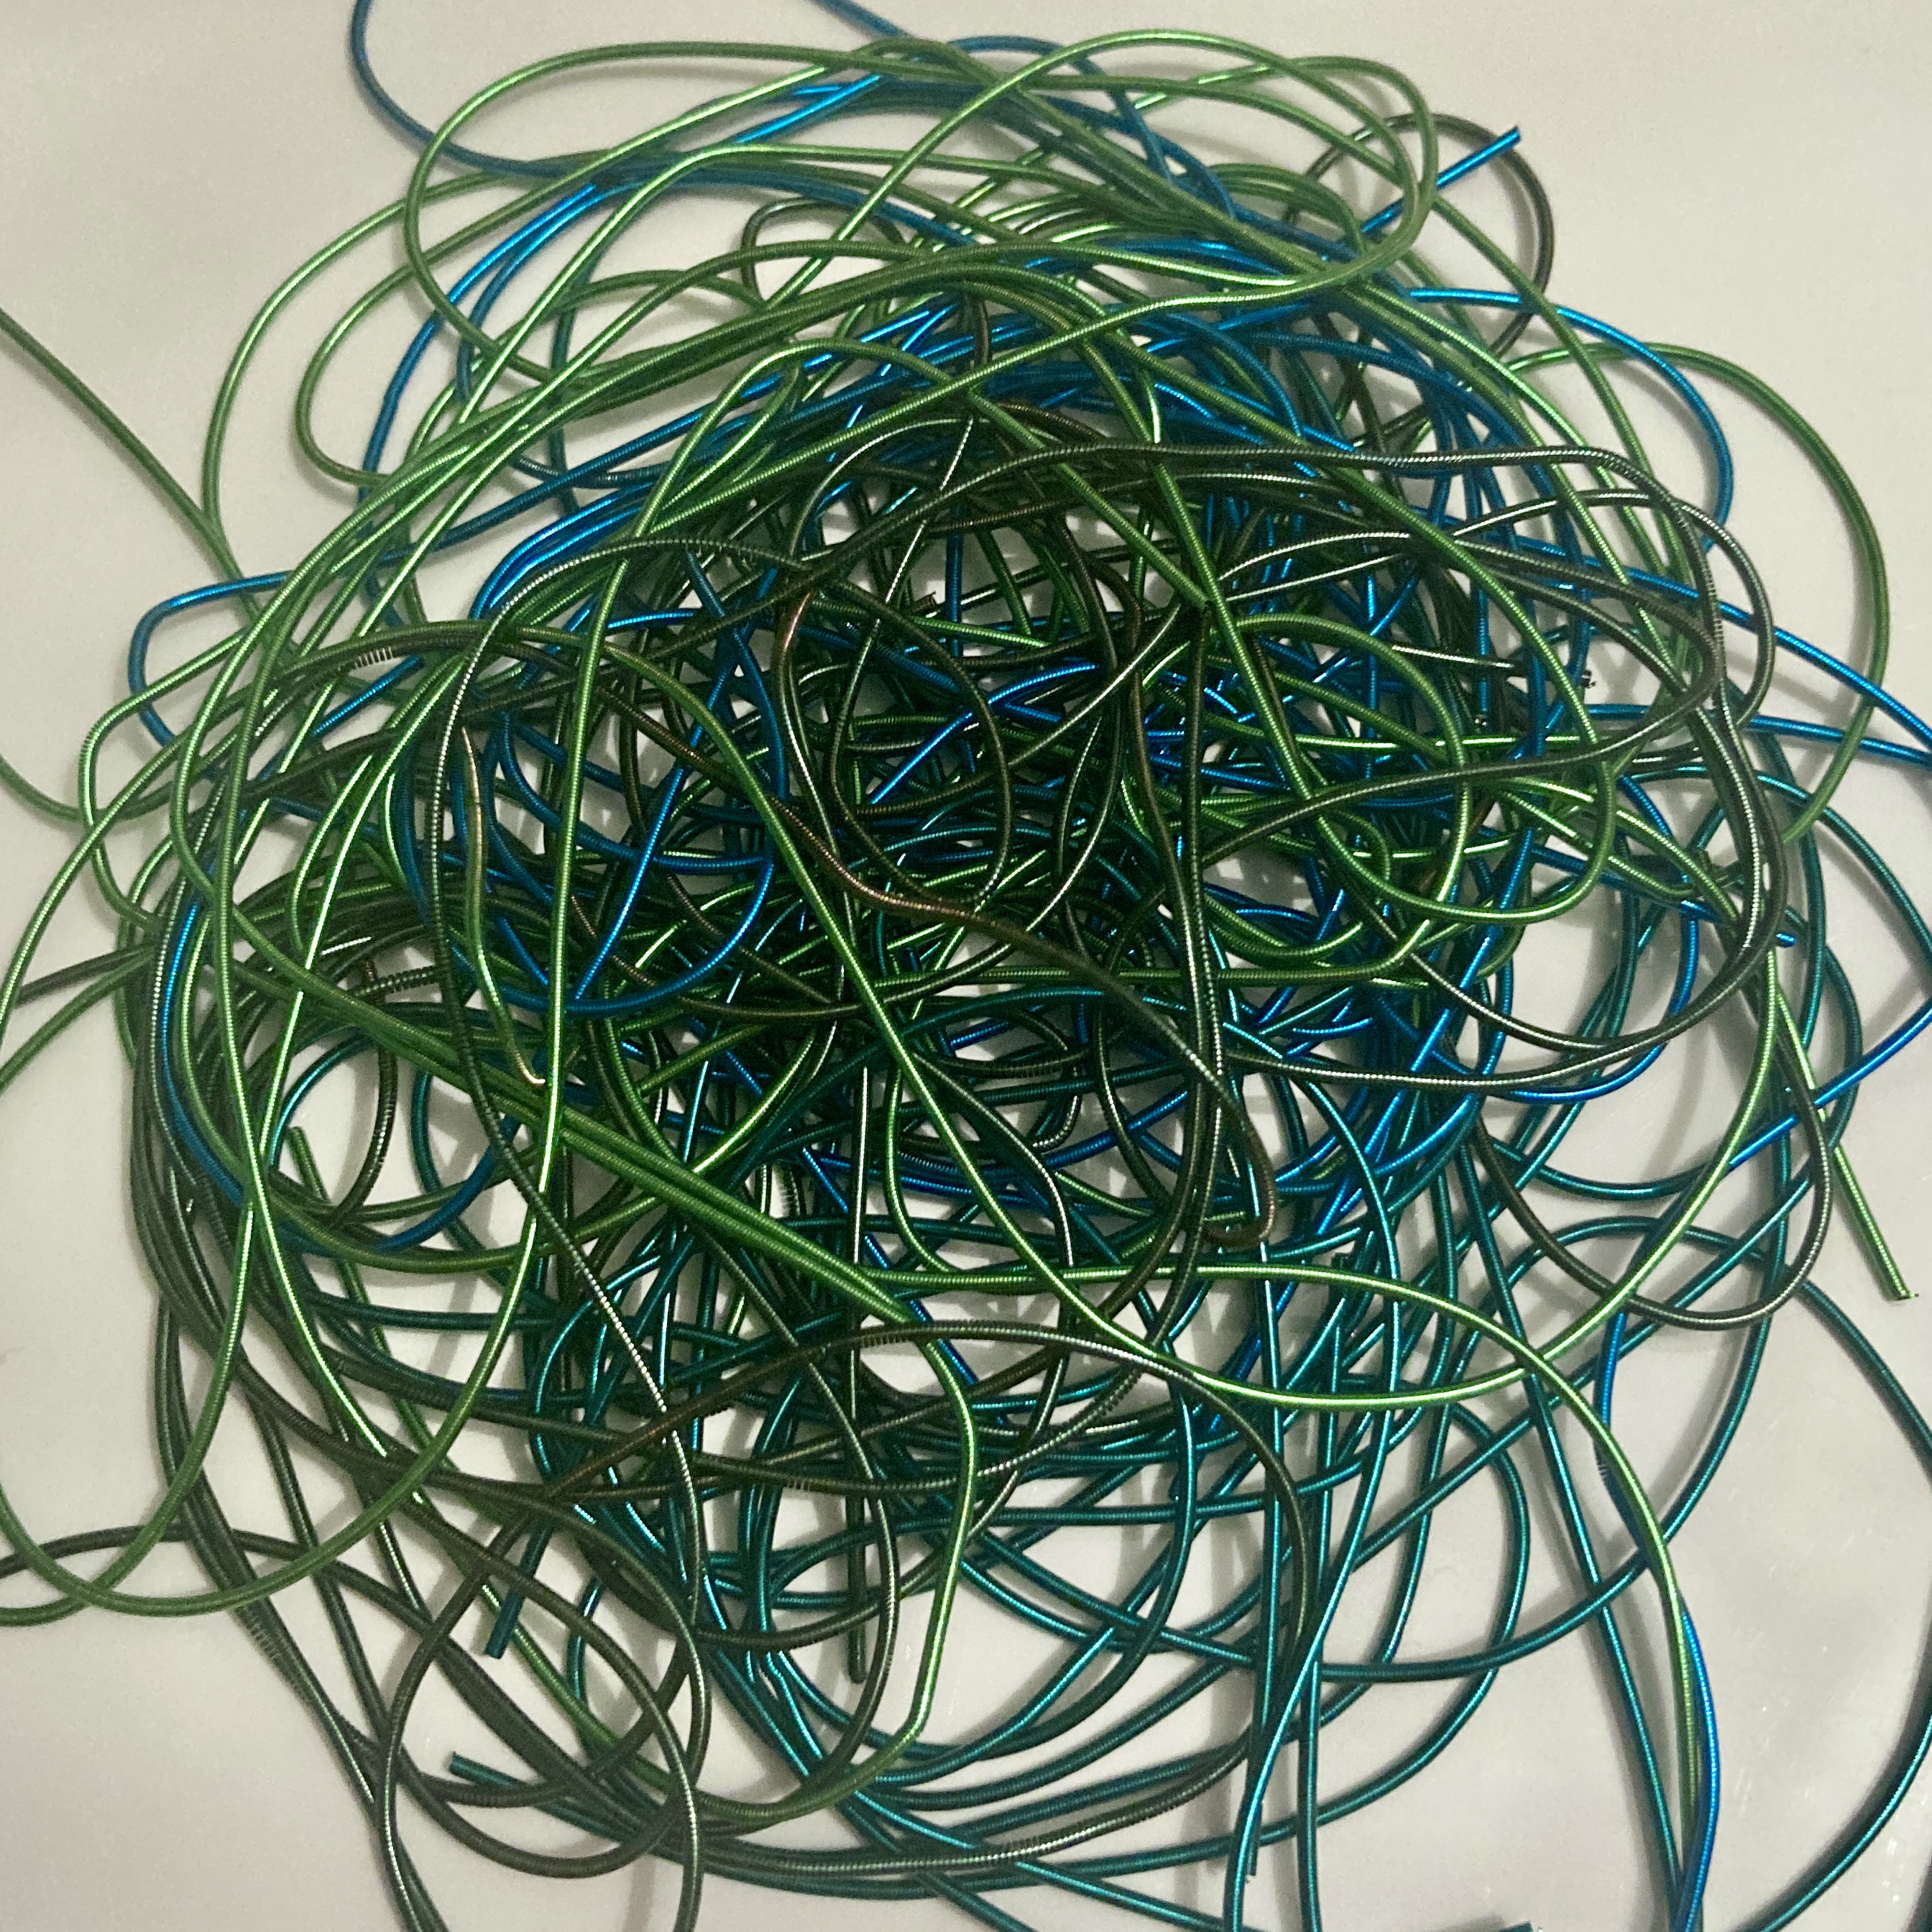
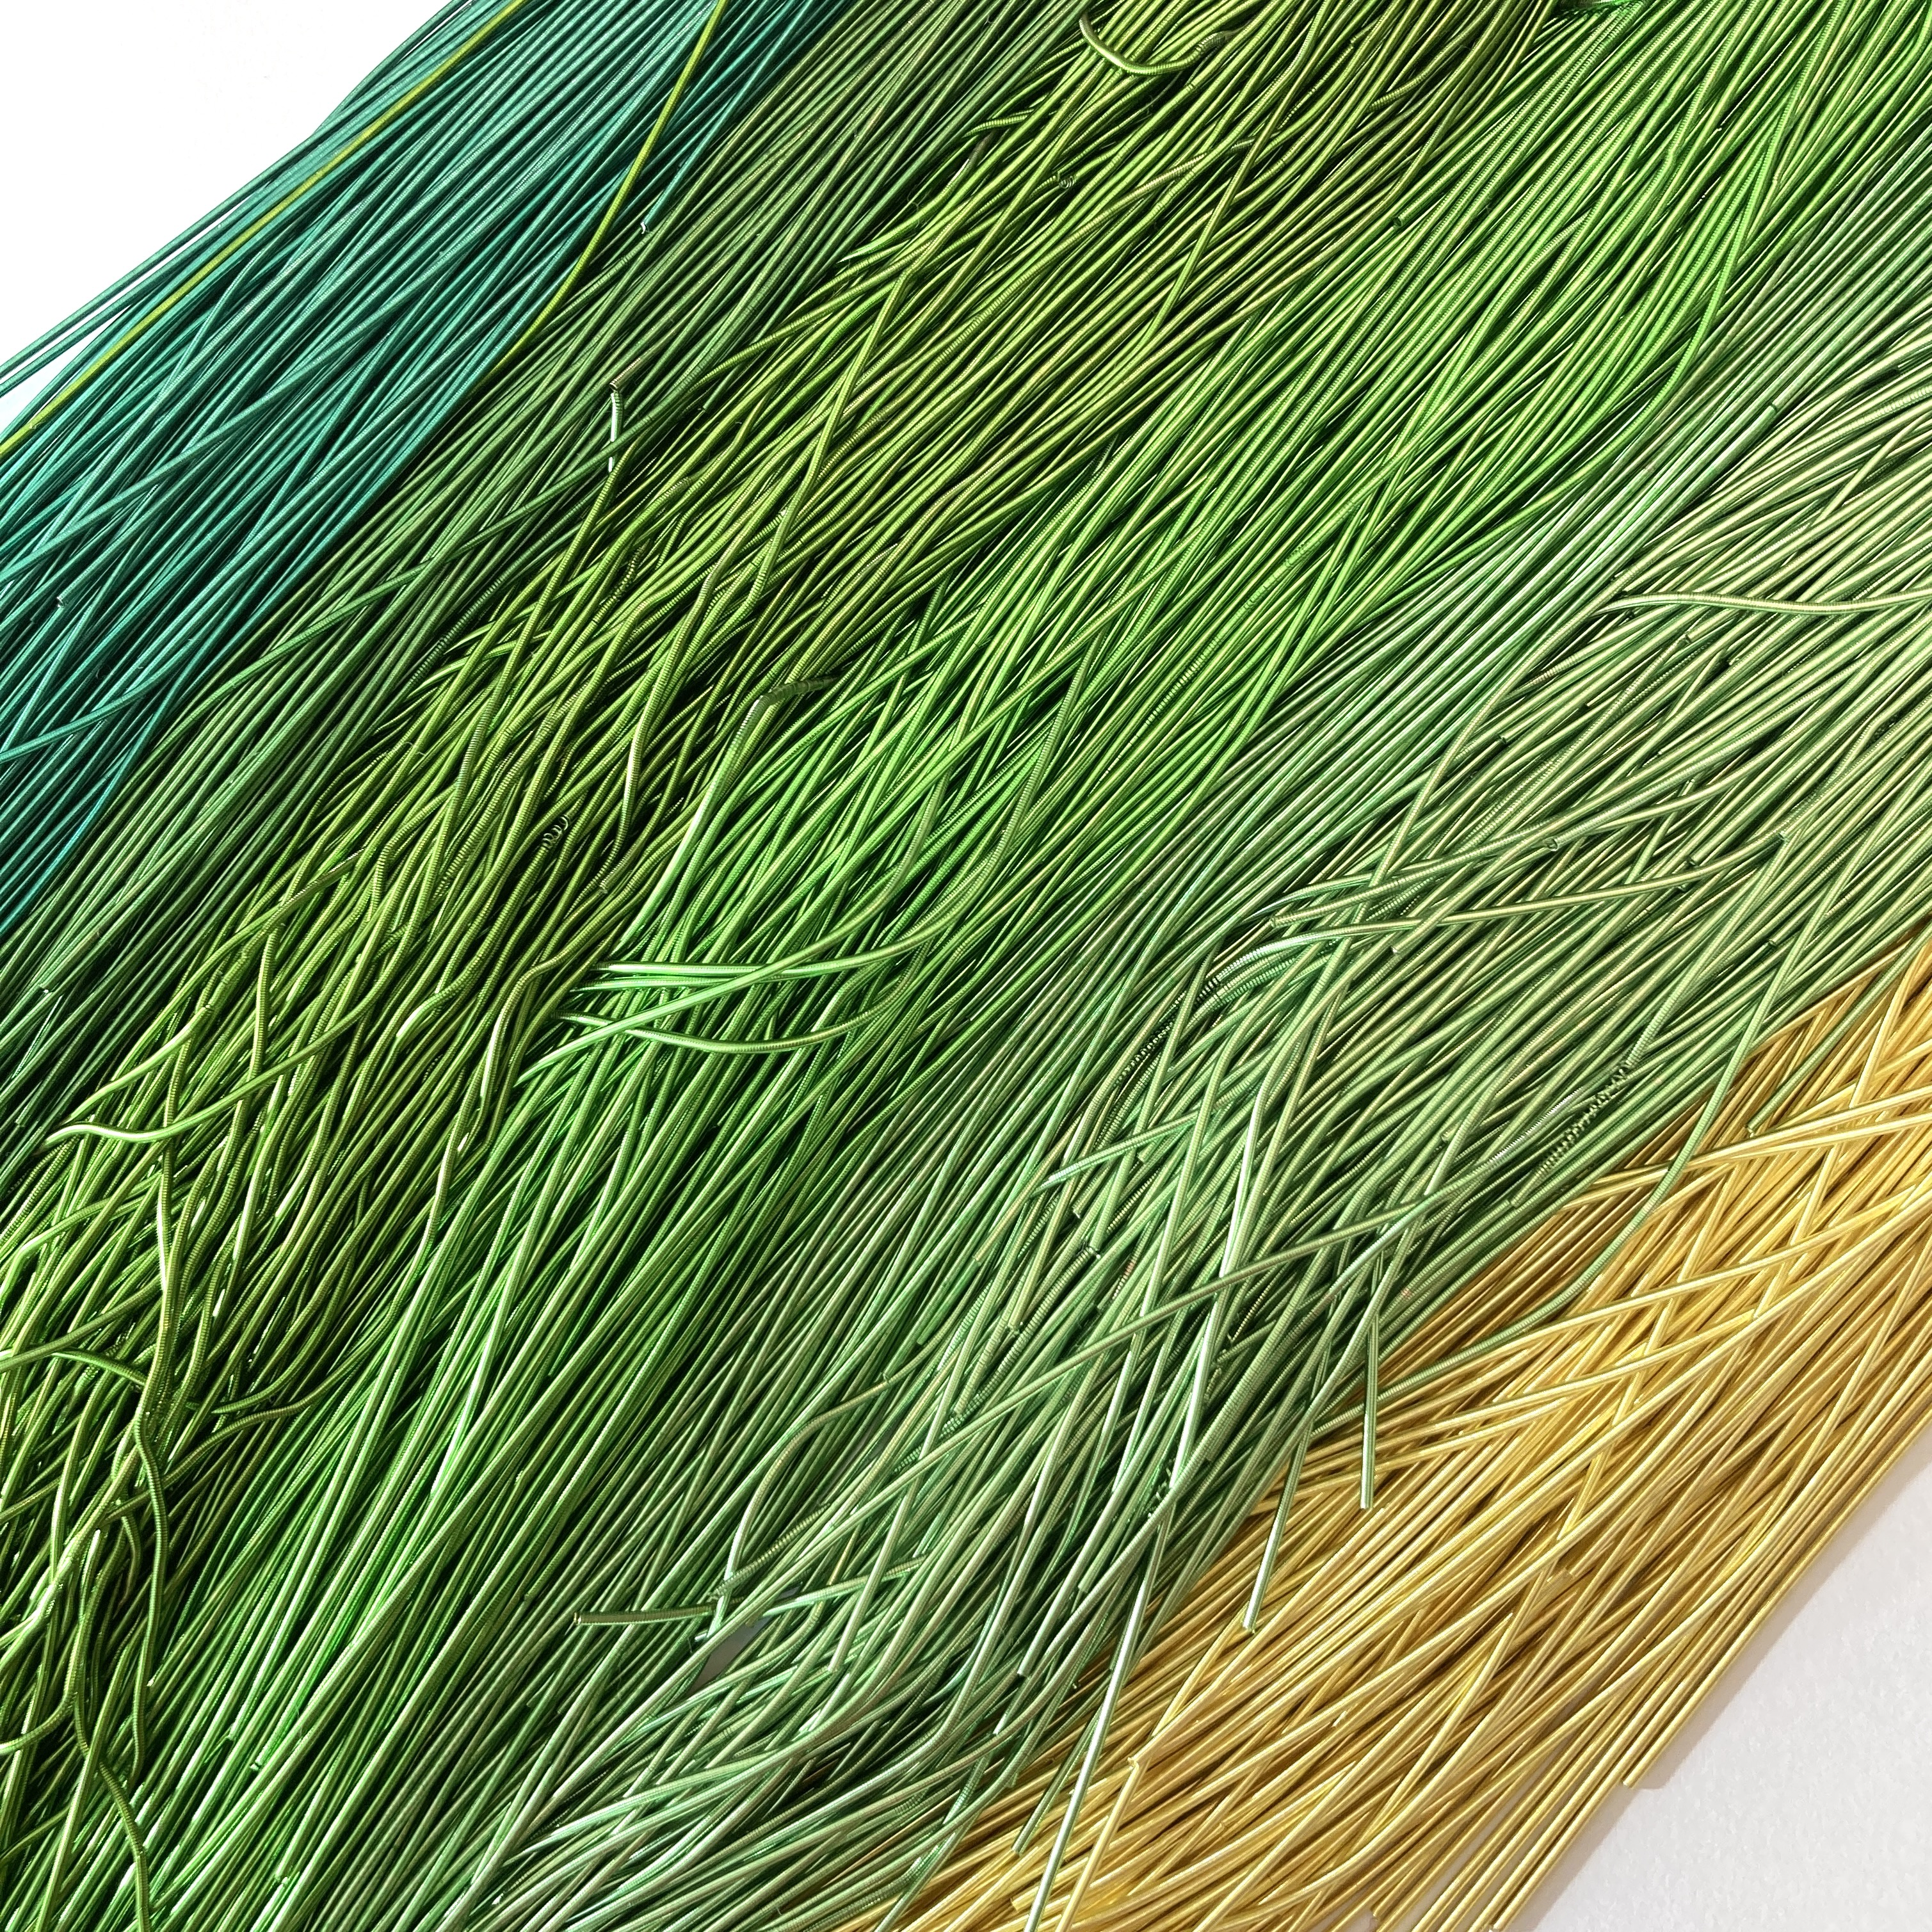
The majority of the beads are Miyuki and from my stash, but I did need to bulk out some colours from a variety of bead sellers including Old Bicycle Shop, local to me Peppy Beads and the sadly now gone Stitch and Craft, and NataschaKralen rescued me when I needed lots more frosted silver lined teal in seeds and drops, as well as being the only place I could find the dark green Ultrasuede used to back it in a big enough quantity.
There are also Swarovski pearls and bicone crystals from my stash, plus other crystals from Peppy Beads, who also supplied the long uneven rice pearl used in the reinforced linking strings. The chatons are Aurora from Old Bicycle Shop.
The cabochons are Parrot’s Wing Chrysocolla from Designer Cabochons, actually partially purchased using a gift certificate from a previous Guild win – these were a great find and were the starting point for the whole piece and it was lovely to cycle the prize money back into the contest like this.
The other pearls were all from my stash and had been there for many years, as had the beetle wings, and the Anna Bronze toggles have been languishing for a while waiting for a special enough project.
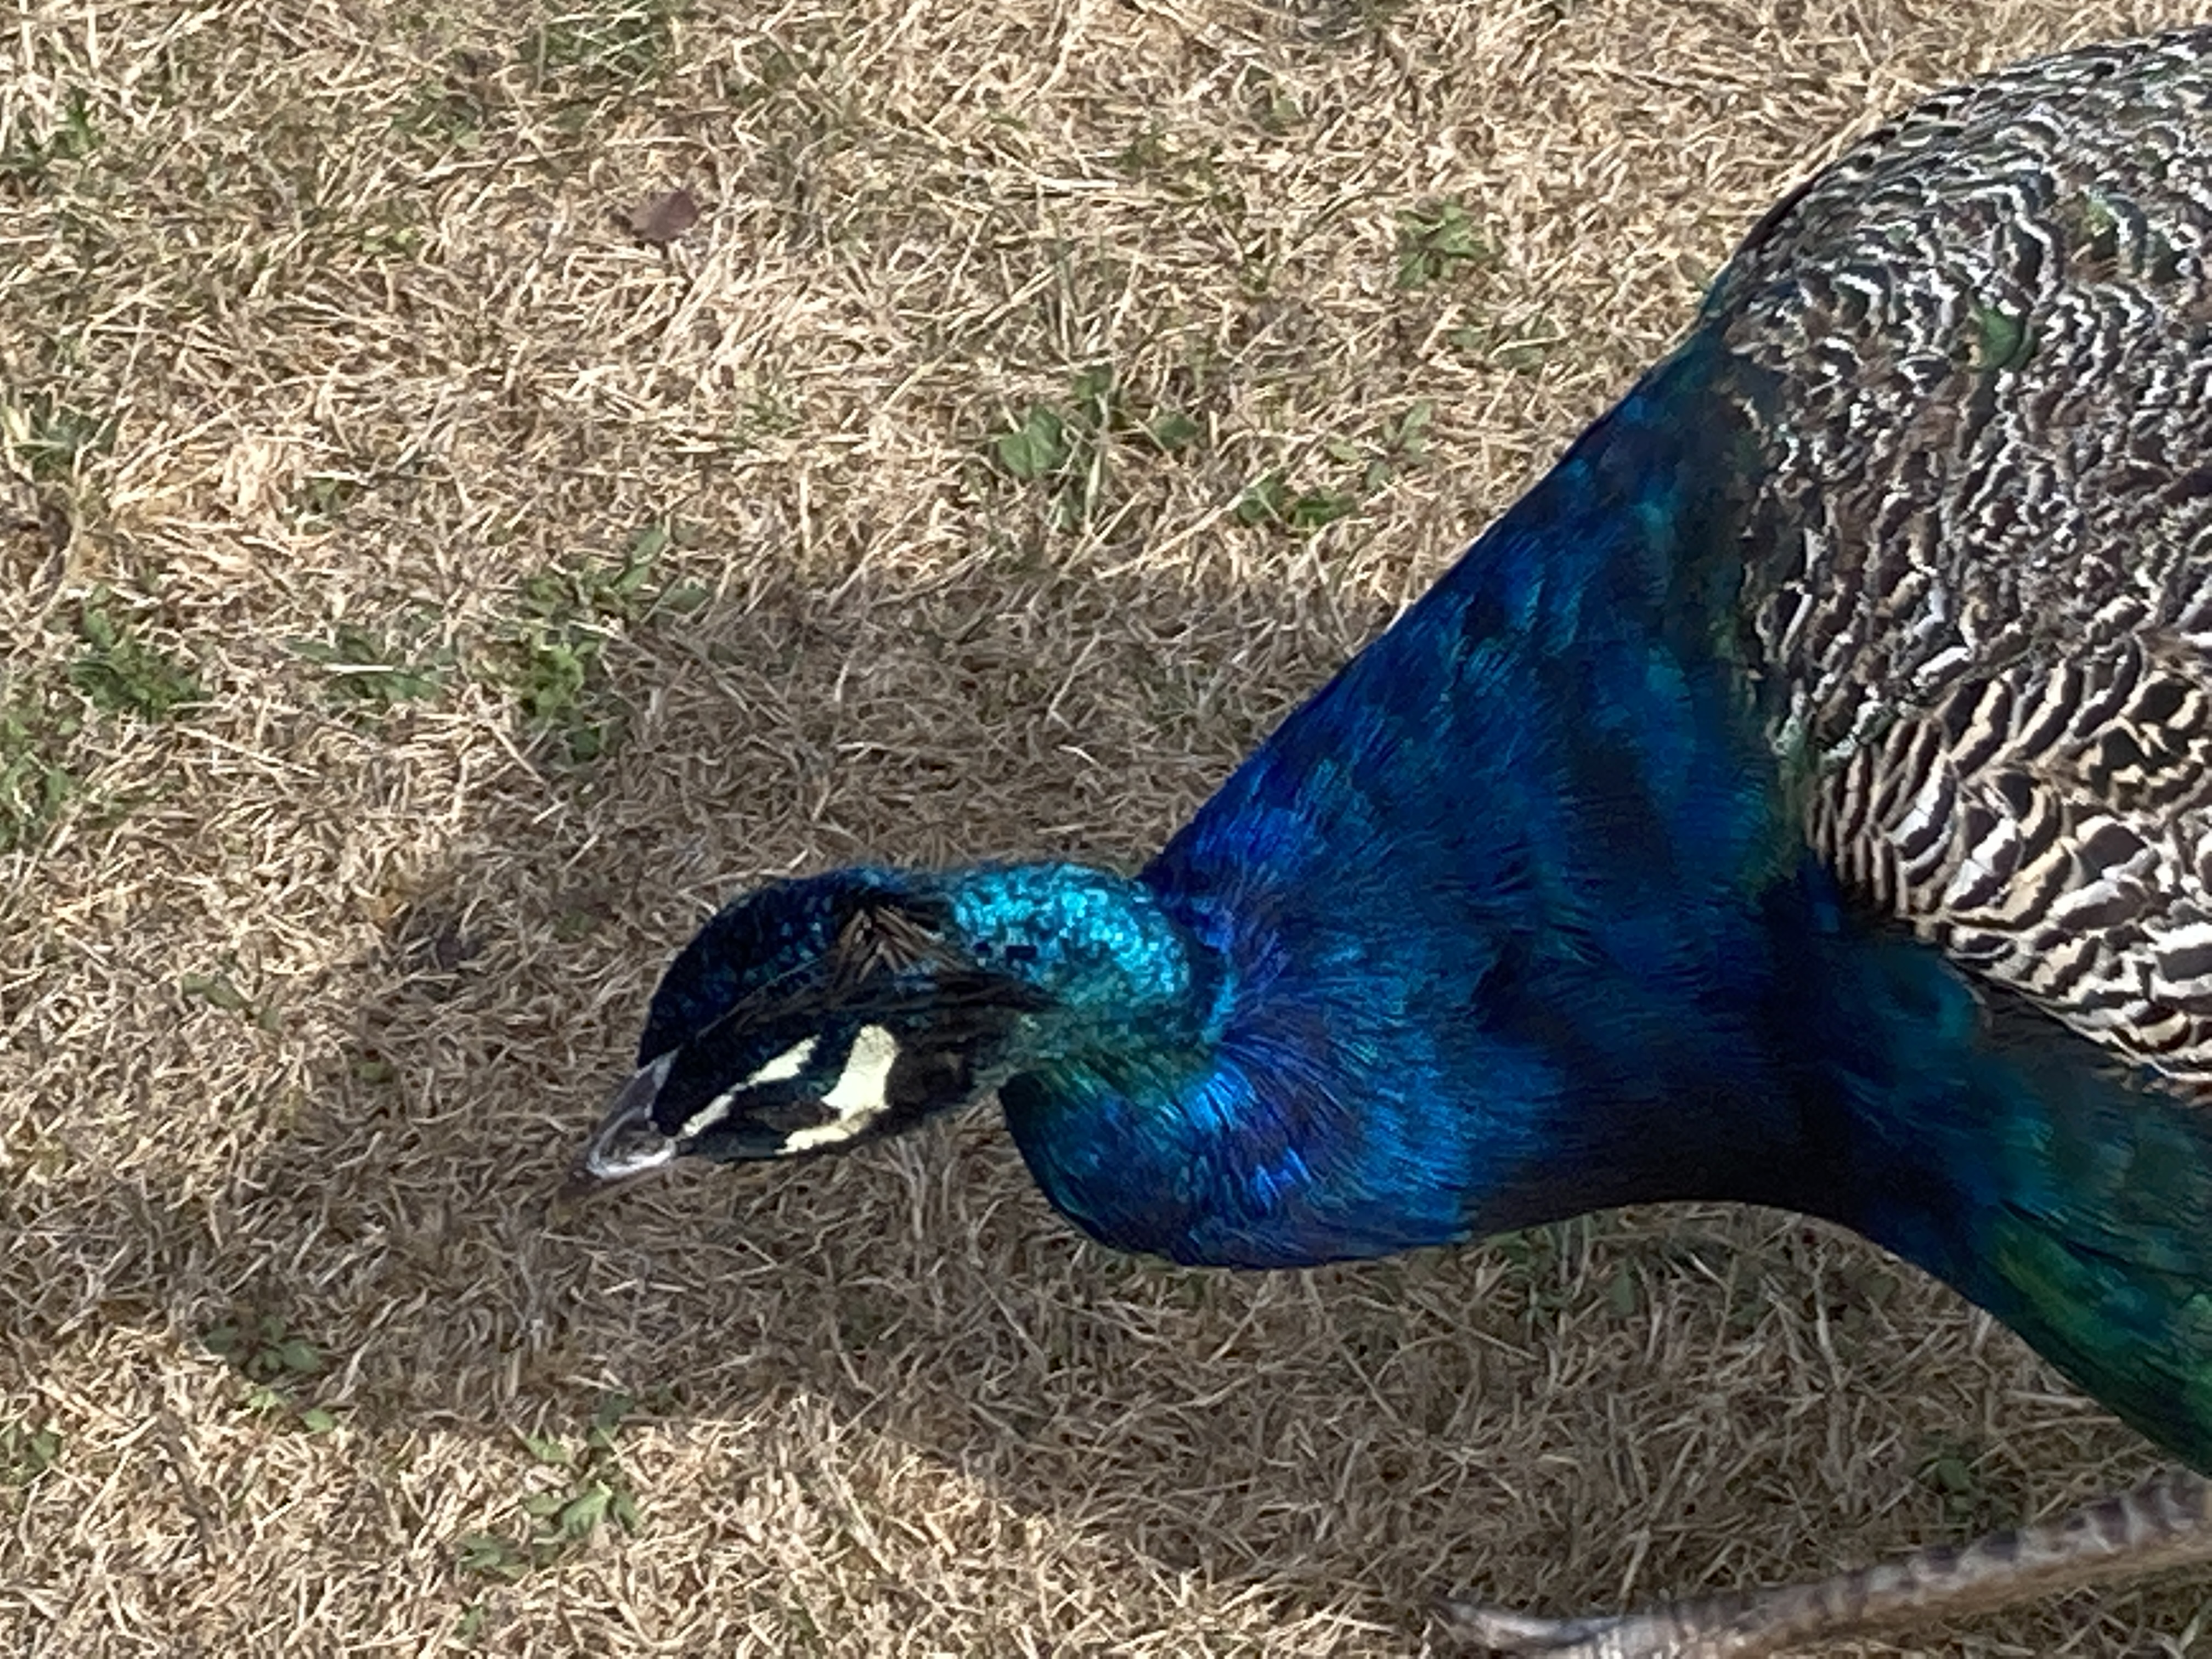
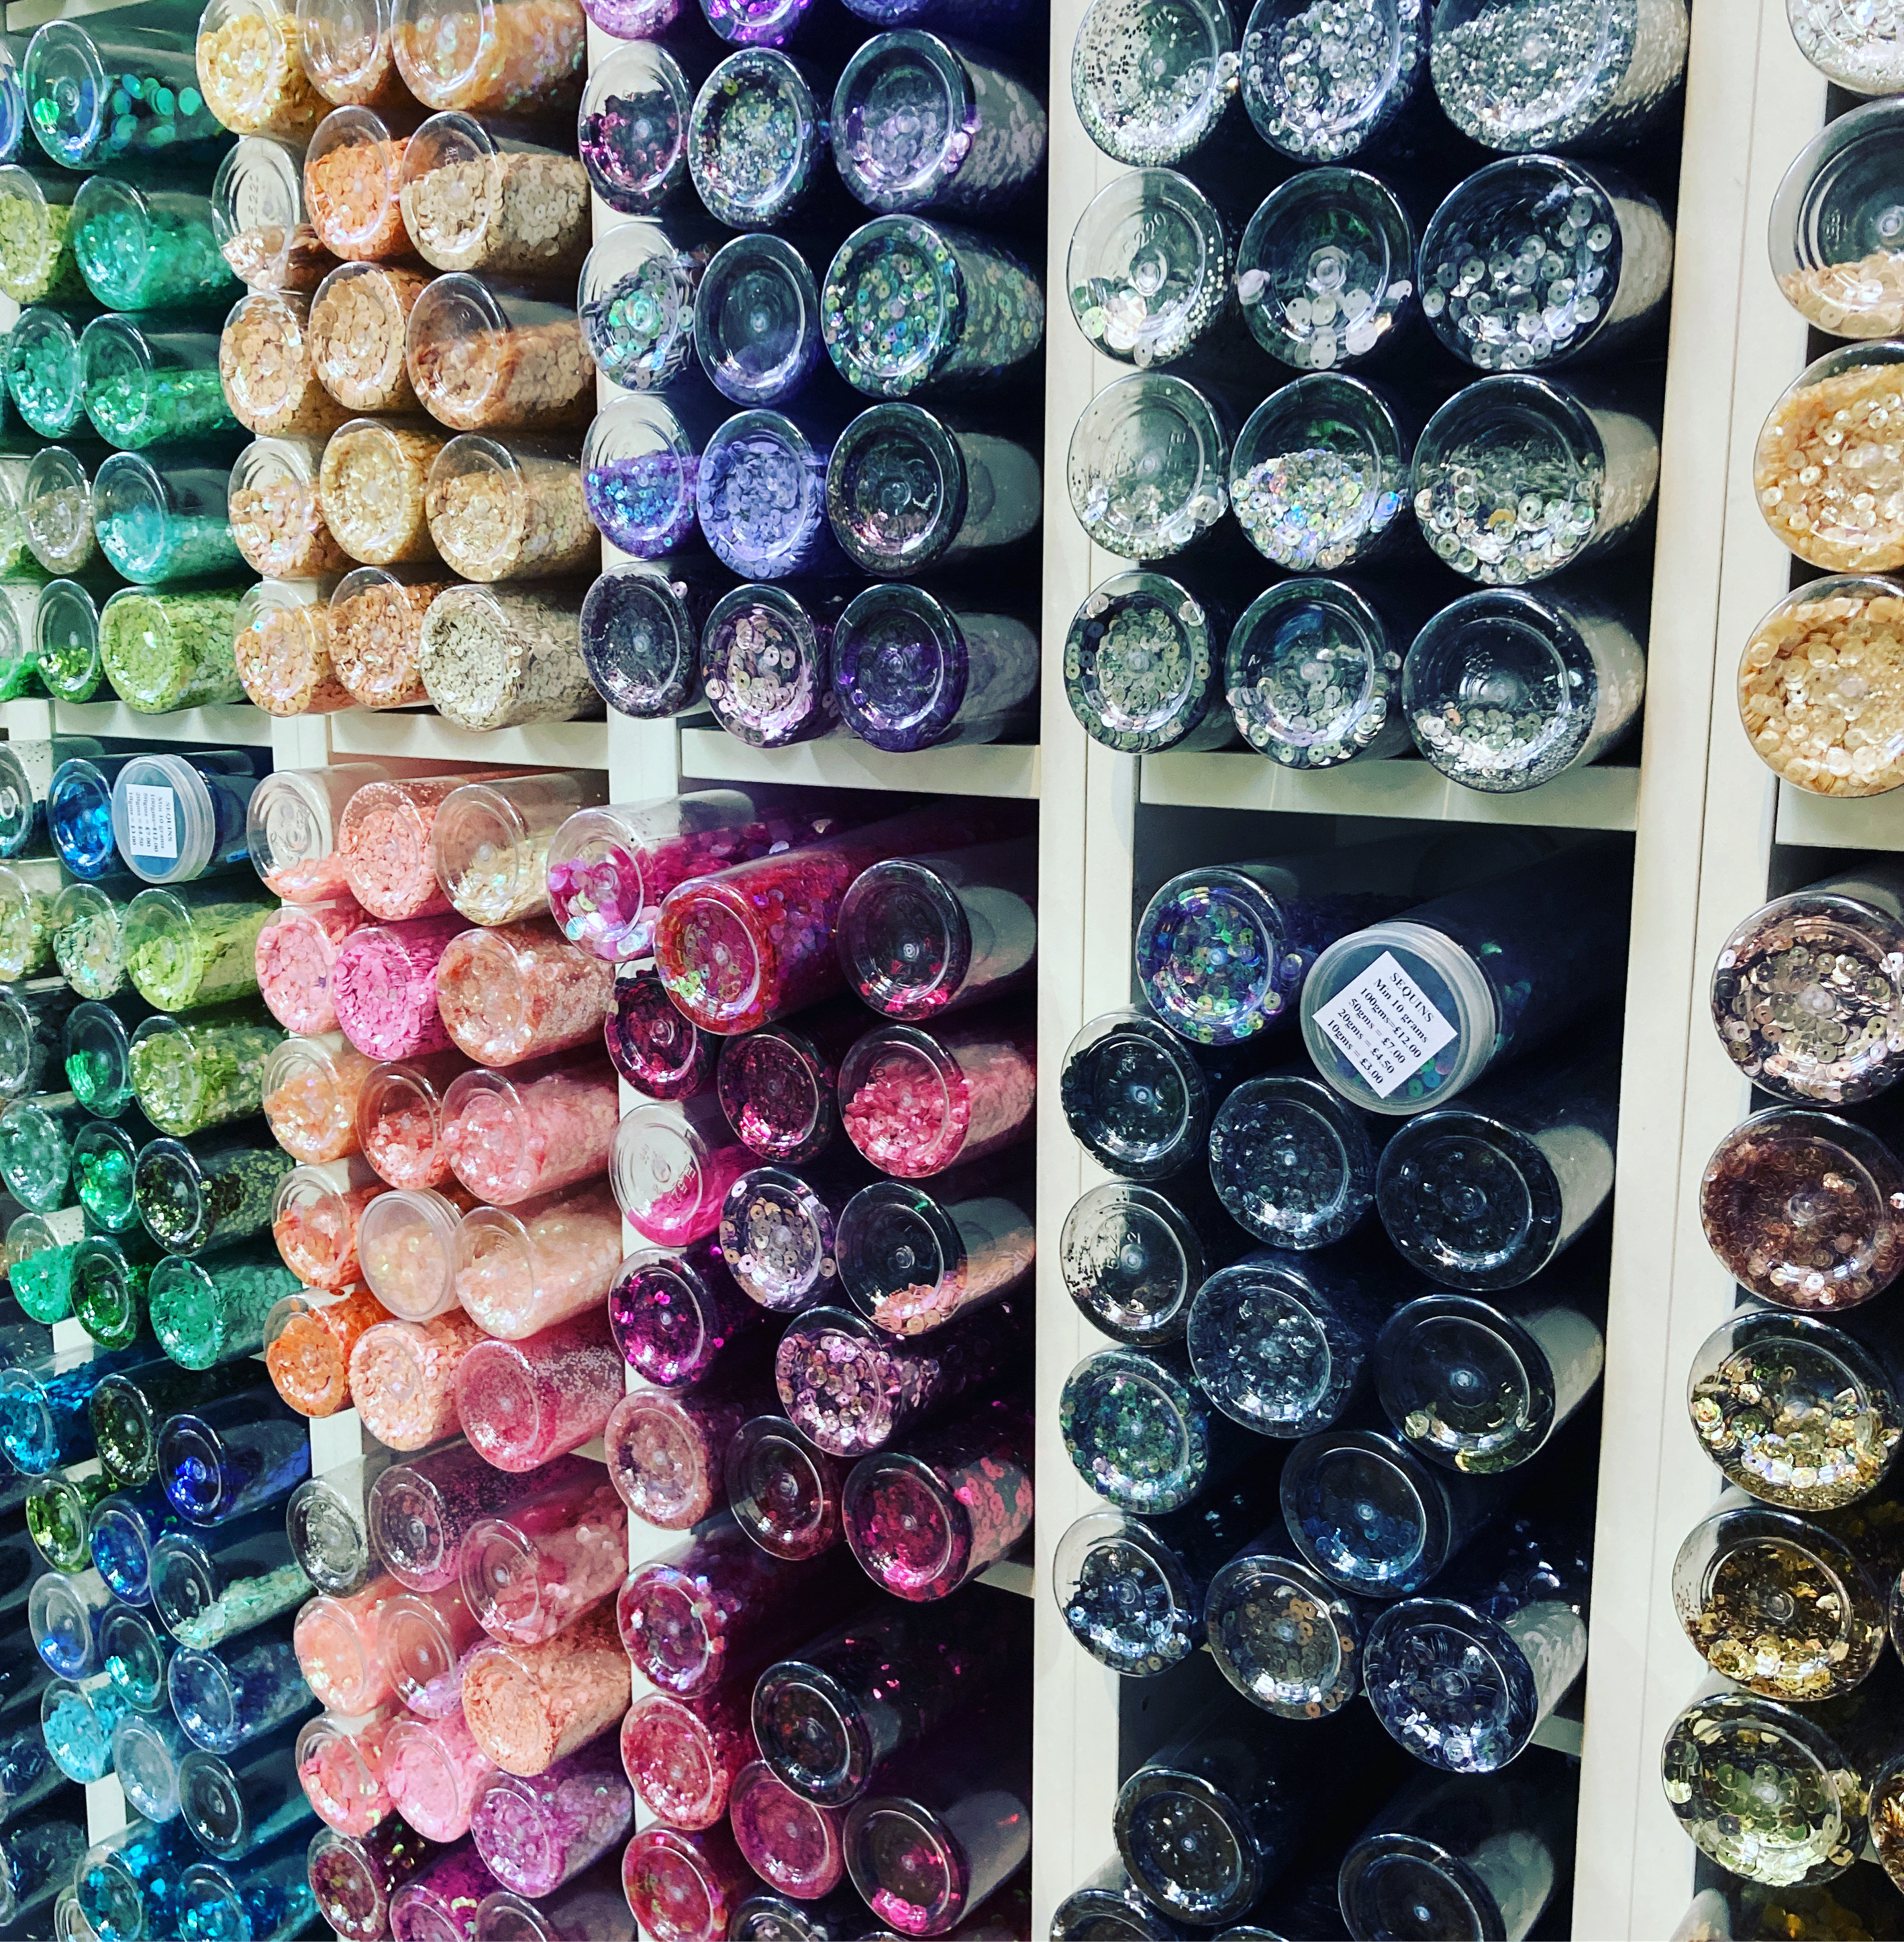
Sequins again from my stash but also quite a few new ones from Fan New Trimmings in Soho’s Berwick Street (who sell them loose by weight – wow – pictures below), and they also provided the amazing feathers (plus a few of the peacock feathers had been collected on our annual trips to Brownsea Island, where the peacocks roam wild).
Hand dyed threads for the mossy furry punch needled sections came from my stash, and were originally from Hope Jacare as usual.
The tyvek and Lutrador came in a mixed pack from Molten Designs on Etsy- really useful for trying this out. I you want to have a go you’ll need a heat gun to melt and I used acrylic inks to colour them – you can use alcohol inks but they’re not as colour fast.
And the smooth purls used on the loops are (obviously) from my stock for my own Etsy shop – where else!?
Anyway, overall I did enjoy making this piece, and after 5 months of work still actually like it (not always the case with some pieces). I feel very happy and proud that it won it’s class in such an important competition. Thank you to the Guild for continuing to run the Challenge and for setting such an interesting theme (and for liking my work yet again!). A particular thank you has to go to all those who enter – whether you’re like me and have entered several times or it’s your first try we’re all contributing to stretching and promoting our wonderful art form and I’m jolly proud to be part of that.