Beaded Bead 4

And so to my stash of patterns.  I sat down just after I started this project and looked through my various beading books, bookmarking all of the beaded beads I thought would fit in.  And my, there are a lot.  And then I turned to my digital library of beading magazines, and remembered that Beadwork had done a series of Beaded Beads a couple of years back.  I tried some of them at the time, but didn’t have quite the right beads in my stash, and have had more success this time.  I’m not going to do the whole set of 5 (as this is a stash only project and I don’t think I’ve got all of the larger beads needed for some of them), but here’s the first one anyway.

Cluster Beaded Bead - Gwen Fisher - Beaded by Sarah Cryer Beadwork
Cluster Beaded Bead – Gwen Fisher – Beaded by Sarah Cryer Beadwork

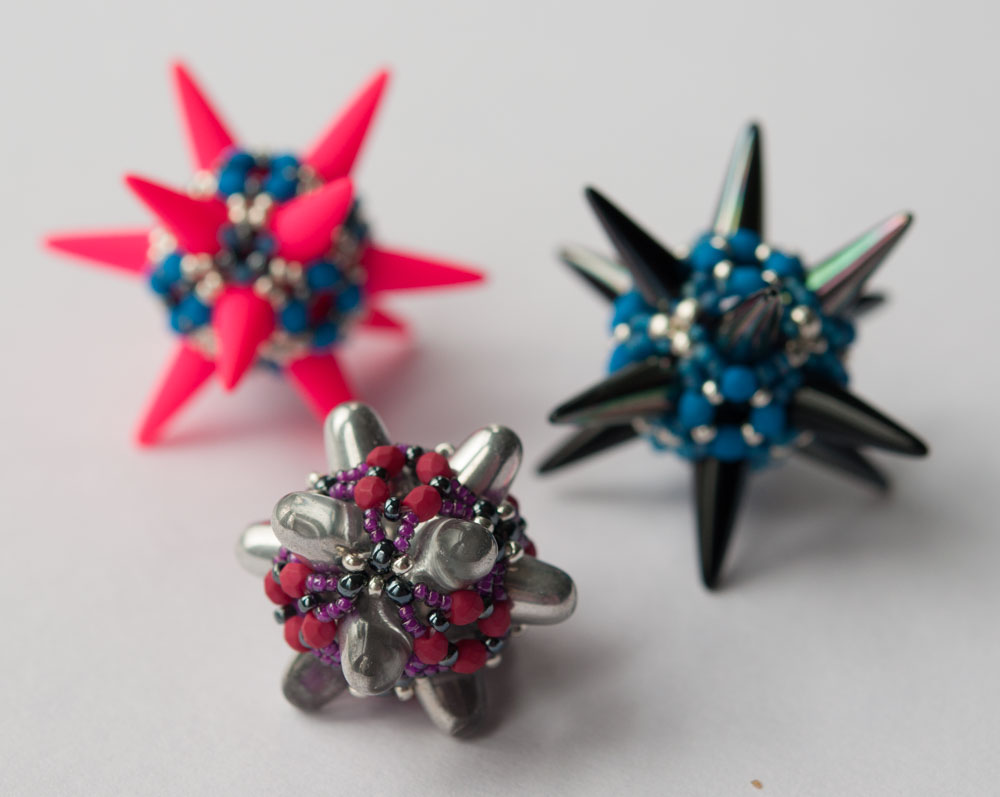
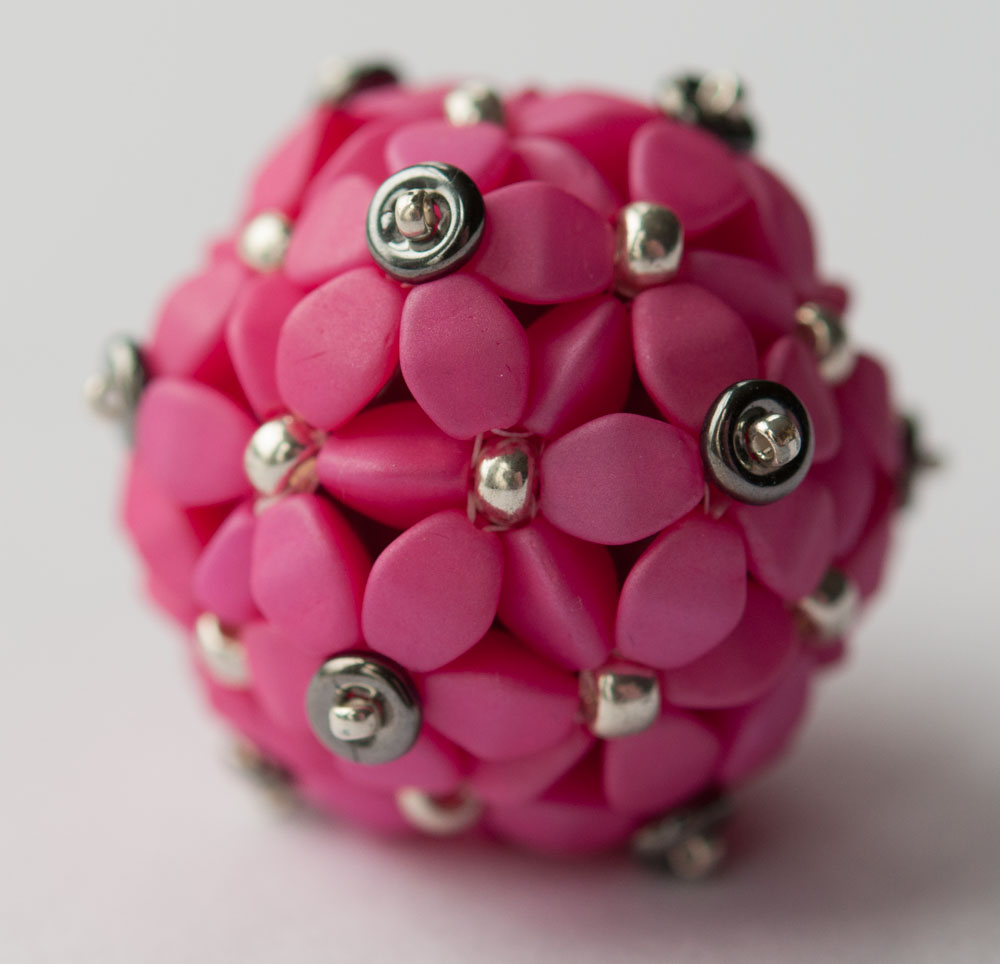
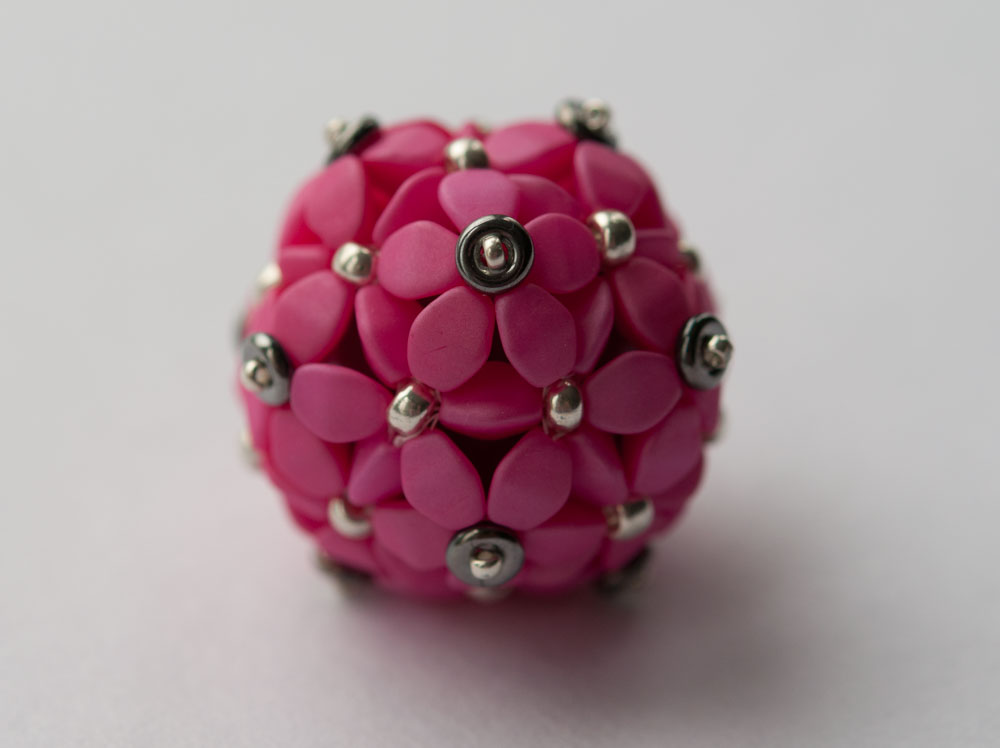
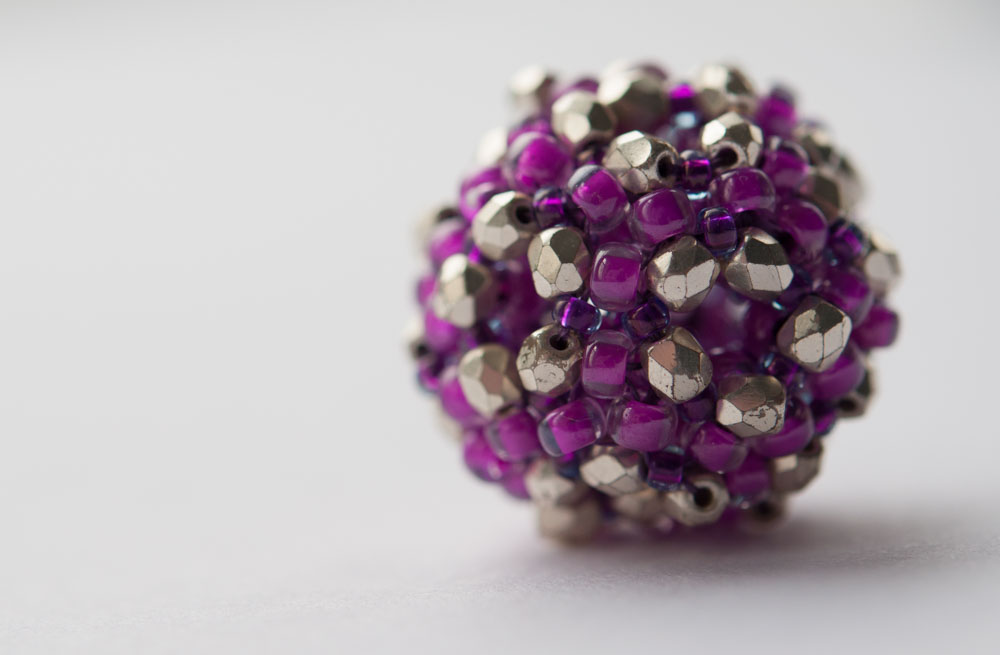
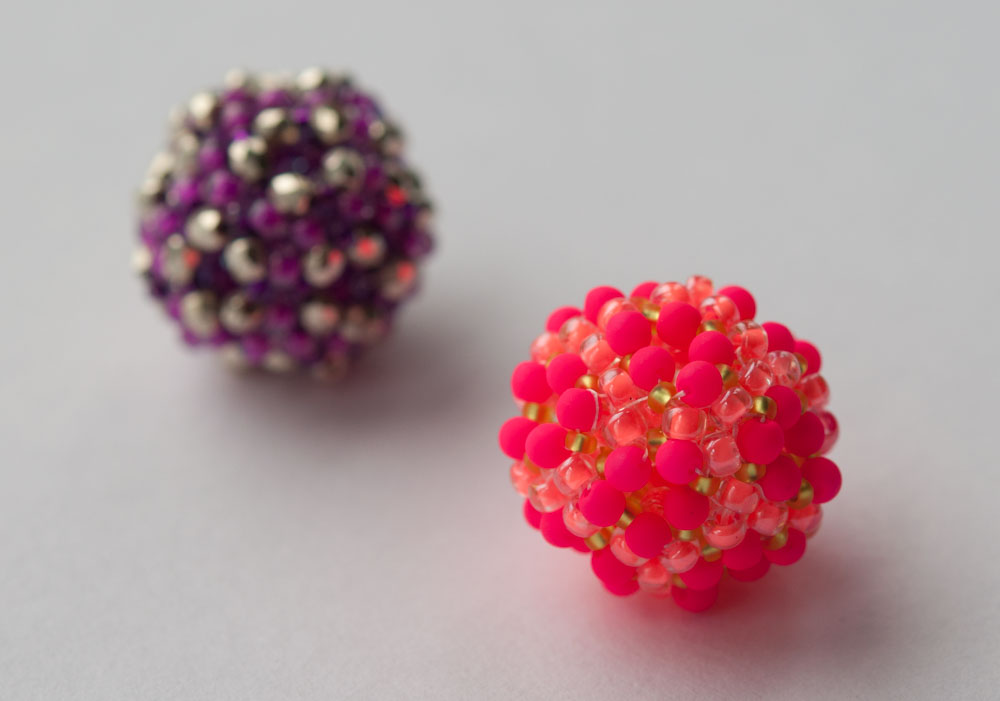
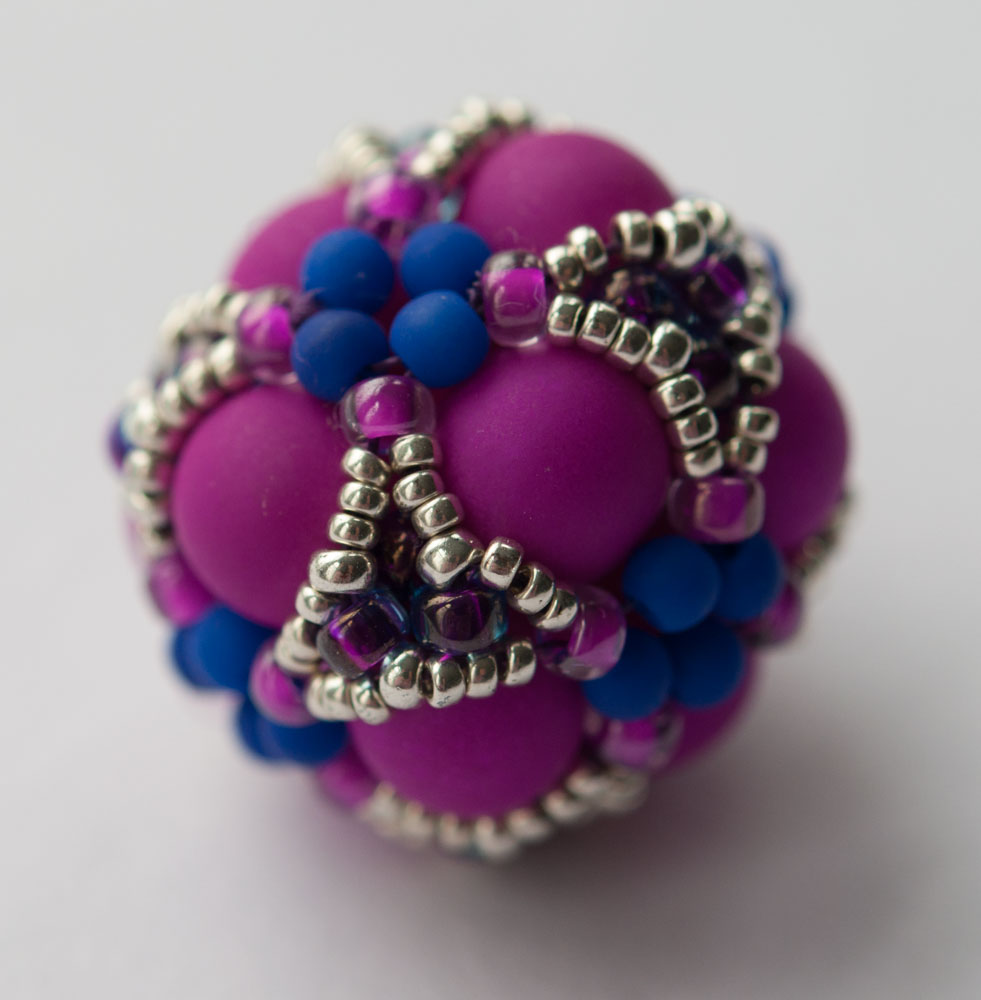
It’s from the April/May 2012 Beadwork Magazine, and is by Gwen Fisher – Cluster Beaded Bead.  It’s a super one, goes together really nicely and quickly.  I don’t tend to have many 8mm rounds knocking around though, so I will need to order some more if I want to repeat this one.

Recipe

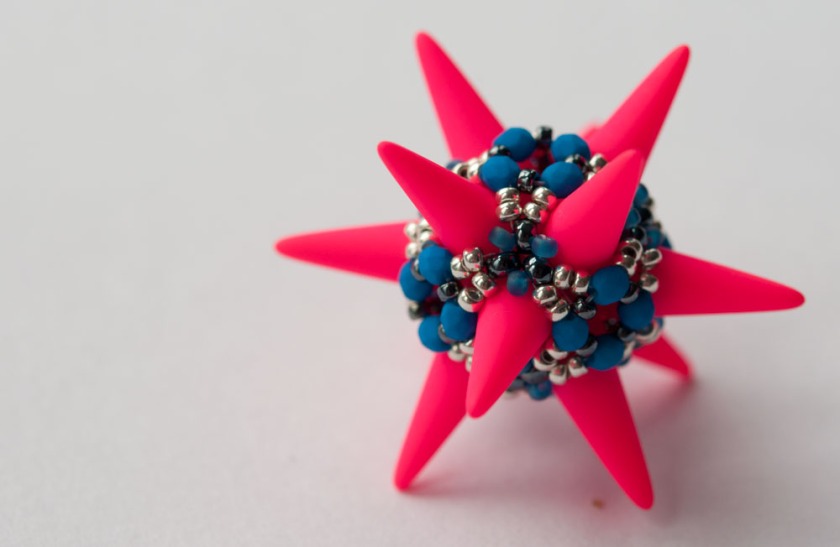
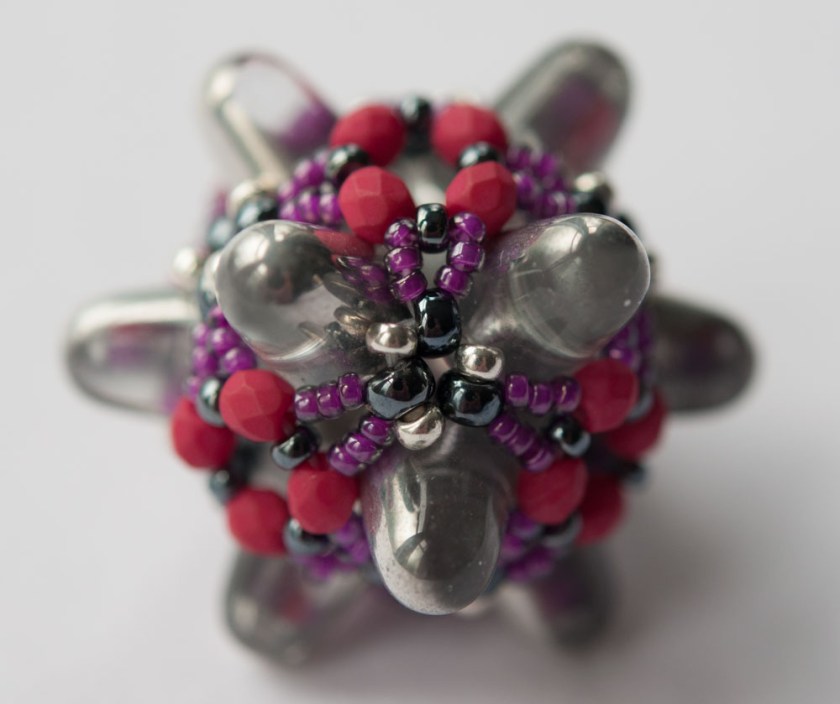
8mm rounds – Neon Purple (BeadsofBohemia)

3mm Fire polished – I substituted 3mm rounds, Neon Ocean Blue Matt (Robin’s Beads)

15 & 11 seeds – Miyuki 1051 Galvanised Silver

8 seeds – Miyuki 356 Purple lined Amethyst AB

Tips

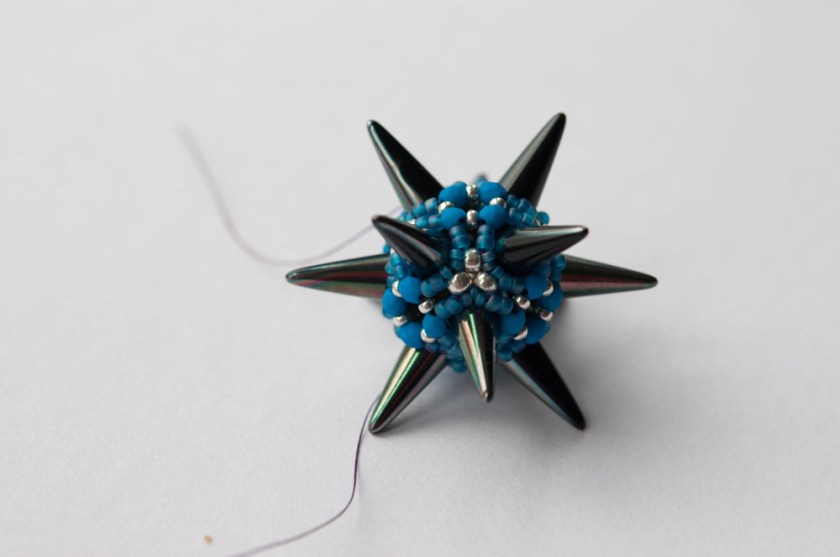
None really, nice pattern, clear instructions.  I mainly worked off the illustrations rather than the written out steps, which is normal for me, but the steps seem clear if you’re more comfortable with those.

This has inspired and helped me with Beaded Bead 6, although I see now looking at the diagrams again that I used a significantly different thread path and set of steps for Bead 6, even though I thought I was doing something similar………..

Beaded Bead 6

The eagle eyed among you will have noticed that this isn’t exactly running in order – that’s because some of the beaded beads are easier to blog about than others.  For example beads 4&5 are photographed, but I need to pull out the references and links needed to give the designers proper credit.  Bead 6 is one of mine so less digging needed.

Bead 6 is actually a set of samples which will hopefully evolve into a new tutorial – not quite there yet, as in samples 1 & 2 there’s a size 11 placement which annoys me, and the spikes in sample 3 are rather wobbly.  But I will persevere.

DSC_0439
Sample 1 was born of beading lots of different beaded beads, and getting one of the possible structures so stuck into my brain that I had to try it in spikes.  It uses 12 spikes, woven into a kind of a cube with trios at the corners.  At least I think it is – looking at the finished ones I’m no longer sure (best take some step by step photos of sample 4).

DSC_0433
Sample 2 uses gumdrops (they are often interchangeable with standard size spikes as they have the same size base – 7mm).  It switches to 11s from 15s in some places, but as you can see above still has 11s in the trios and they don’t sit right.

DSC_0425
And sample 3 is back to spikes to try and iron out some flaws in 1&2 by just using 15s.  Still not right though, the spikes are more wobbly than 1.  One more combination left to try I think……..

Anyway, no recipe yet or tips since you can’t try this one at home, but bear with me and it will emerge eventually as a tutorial.

Beaded Bead 3

I think this is actually my favourite so far – simple, striking and a great way to understand the geometry of beaded beads.  I used a free tutorial from Spirala Beading called Zuzana, and will be making more just as soon as I can get my grubby hands on some more pinch beads.

Recipe

90 pinch beads – Matte Watermelon (from Spoilt Rotten Beads)

1g size 8 seeds – 1052 Galvanized Silver (Stitch N Craft)

12 size 15 seeds – 1052 Galvanized Silver (Stitch N Craft)

12 O beads – Haematite (Robins Beads)

A wooden core bead, I’d guess at 20mm but unfortunately didn’t measure it……sorry.

Zuzana by Spirala Beading - beaded by Sarah Cryer Beadwork
Zuzana by Spirala Beading – beaded by Sarah Cryer Beadwork

Tips

  • If you have two colours, use them.  If you don’t have two colours, wait until you do.  Whilst it is possible to do this in one colour (I did), it is infinitely simpler if you can see the five beads which surround each 5 pointed star clearly.  By all means switch to a single colour once you’ve had some practice – these are nice & quick to do so it won’t take you long to progress.
  • Hold your nerve – it’s a bit of a floppy mess even with the core bead in, but the simple embellishment suggested pulled everything together perfectly.
  • You may need to try a couple of different sizes of core bead.
  • Once you’re done beading, roll the bead around between your hands a few times.  This will make the trios of pinch beads which need to sit with a flat side against the core bead turn and lock into place, and is much easier than trying to force them round with a needle!

Now I just need an excuse to order some more pinch beads – and guess what, Ivona, who runs Spirala Beading also has a lovely Etsy shop selling lots of fantastic beads, including a huge range of pinch beads – Beads of Bohemia.  What luck!

Baroque Tape Measure – new Materials Packs at last…..

So at last I have had time to photograph and list the Baroque Tape Measure Materials Packs which I worked so hard to put together a few weeks back.  There are six new colourways, and I’ve re-shot the two I already had in stock as well.  Altogether I have now made over twenty different colourways for the packs, and another five have been beaded into the original and my working samples.  Perhaps not what I expected when I made the original piece for my Chatelaine two years ago.

Baroque Tape Measure Surround

These are my last few tape measures, so I will probably not be listing any more for a while (although if they sell well I may change my mind!), and I’ve been a bit bolder with some of the bead choices because of that.  There are two sets – bright fun colours, including one which uses one of my favourite Miyuki colours – red opaque AB (which gives a fab weird salmon pink), and some really dark metallics, including matte black with the new Swarovski Patina rivolis.  As usual they are available on Etsy and Folksy – links below:

Folksy links

Ruby & Old Gold
Ruby & Old Gold
Aluminium & Scarlet
Aluminium & Scarlet
Dark Metals
Dark Metals
Deep Purple
Deep Purple
Caribbean Sea
Caribbean Sea
Tequila Sunrise
Tequila Sunrise
Lemon & Lime
Lemon & Lime
Dark Plum Iris
Dark Plum Iris

Etsy Links

Metals
Metals
Brights
Brights


Secret Beadalong – days 6&7

So, I finished my rope a little late (a couple of days), but then realised the catch I’d planned to use was too fat, and the components wouldn’t have slid on or off the rope over it.  Given the way it was designed, I assume Jean means this to be an adaptable piece – wear one, three, all none of the bezelled rivolis as you please.  For that to work the catch either has to be removable (which a simple s clasp with loops would b), or small enough that the components can slide.

So, not the right clasp then.  As we were away I had to wait until we returned to my stash to dig out a tiny magnetic clasp that will allow the components to slide on and off, and hey presto we’re done.

National Beading Week 2015 Secret Beadalong - designed by Jean Power, beaded by Sarah Cryer Beadwork
National Beading Week 2015 Secret Beadalong – designed by Jean Power, beaded by Sarah Cryer Beadwork

Many thanks to Jean for a lovely project and for the phenomenal amount of admin she’s had to put in as a victim of her own success.  And to all the beaders worldwide, it’s been fab – let’s hope someone is brave enough to do this next year!

Beaded Bead 1

So I had another go at beaded bead pattern number 1 – Conway Beaded Bead by GwenBeads.  And then a few more goes, and finally I’ve got one finished.  Actually I’ve finished two, but the first one is not good so will be fragged………..Interestingly I found this pattern quite challenging, possibly because conceptually it is actually quite simple, and as I was tired I struggled to maintain the absolute accuracy it demands.  An single extra thread pass in the wrong place can mean this one doesn’t work, and as the internal structure is all seeds, rather than building on base of larger beads, it is a bit of a nightmare to unpick if you make an error and don’t discover it for a while.  Looking on the bright side, my sister Susie Hoad (BeadingBySusie) churns these out in a couple of hours, seemingly without any effort, so I think once I’ve made as many as she has (which is quite a few) I should get the hang of it.

Conway Beaded Bead - Gwen Fisher, beaded by the Indecisive Beader
Conway Beaded Bead – Gwen Fisher, beaded by the Indecisive Beader

Anyhow, the pattern is by Gwen Fisher of Bead Infinitum fame, and was my first introduction to prismatic RAW (PRAW).  On reflection this was quite a tricky one to start with – I might have been better with something like her fun looking Tentacle bangle or the Daisy Chain bangle rather than the full on 3D experience.


Conway Beaded Bead - Gwen Fisher, beaded by the Indecisive Beader
Conway Beaded Bead – Gwen Fisher, beaded by the Indecisive Beader

Tips

  • It says ‘advanced’ on the blurb, it means it!
  • And you definitely need to understand the structure of a dodecahedron (and constantly check you’re doing 5 sided units, it’s very easy to loose count).
  • And don’t use colour lined crystal beads for your first go as they seem to confuse the eye – I’d go for something matte (to help you manage the tension), for a good contrast between the 8s and 11s in the structure colourwise to help you see what you are up to, and nothing too dark as you will be working inside the structure a bit.
  • Like any embellished RAW, CRAW or PRAW you should maintain a medium tension for the base – too loose and you’ll get an uneven finish, too firm and you won’t be able to add the embellishment.  My first version, as well as containing a couple of mistakes, was as usual too firm and I’ve struggled to get an even outer finish.  It will be unpicked and redone soon………..

Susie says that this works well in 6s and 8s, and whilst I wouldn’t recommend them for a first go (as maintaining any kind of tension in RAW or netting with 6s is impossible), I’m definitely going to try them next.  She also builds out on the embellishment step using twin holed beads of various types, which helps alleviate my slight reservation about the small size of the finished bead (for all that work I’d like something about half as big again – the 11 and 15 version is under an inch in diameter). And Susie has already tried out lots of colours and embellishments, so have a look at her Facebook piccies of them here for inspiration.  Very kindly Gwen allows limited commercial use, so I may even be able to sell a few as pendants when I finally get the hang of it and get the completion time down.  Overall a very interesting advanced pattern.

Conway Beaded Bead - Gwen Fisher, beaded by the Indecisive Beader
Conway Beaded Bead – Gwen Fisher, beaded by the Indecisive Beader