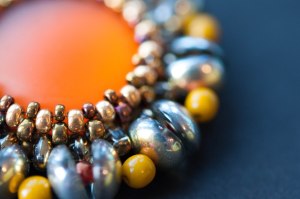
Materials Packs for Sunstar

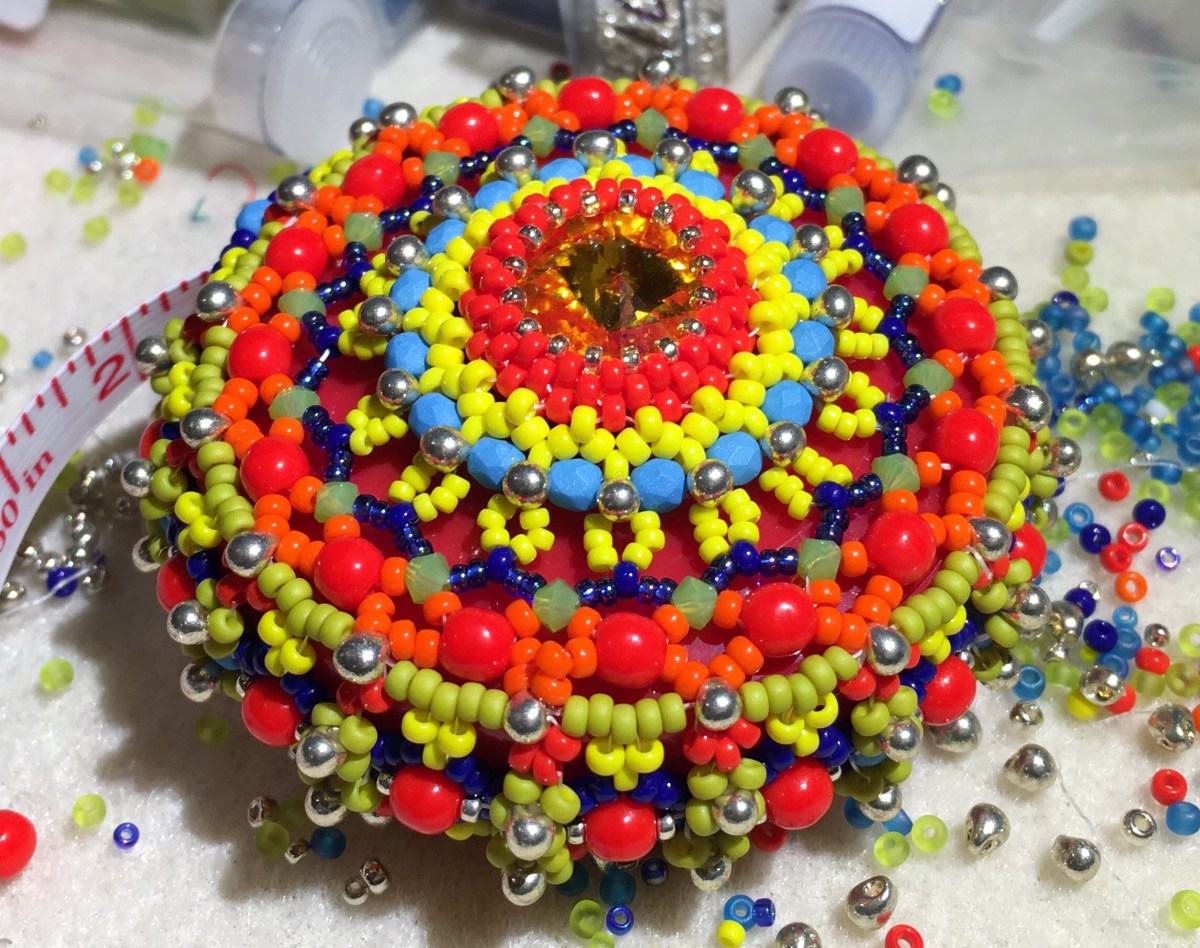
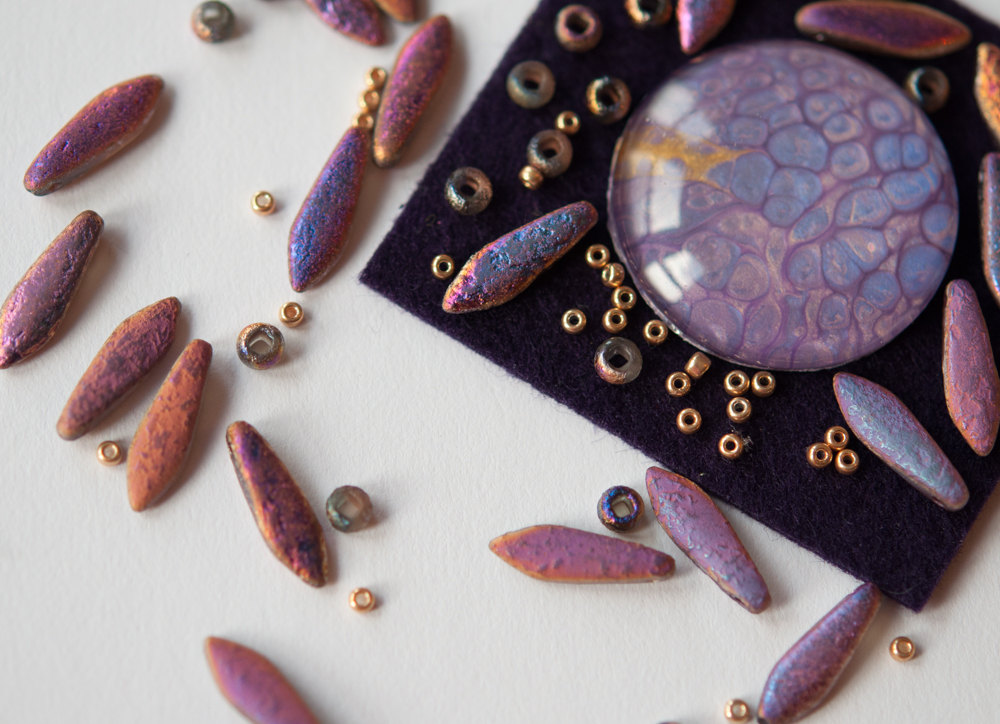
So I finally had time to put together some materials packs for my Sunstar brooch tutorial.  The tutorial uses basic bead embroidery to bezel a 30mm domed cabochon, and then add some amazing dagger beads to make a striking giant flower.  The finished piece was designed as a brooch, but also makes a stunning pendant, and the cunning brooch pin in these packs already has a bezel on so you can wear your finished piece as either a brooch or a pendant without any adjustments.

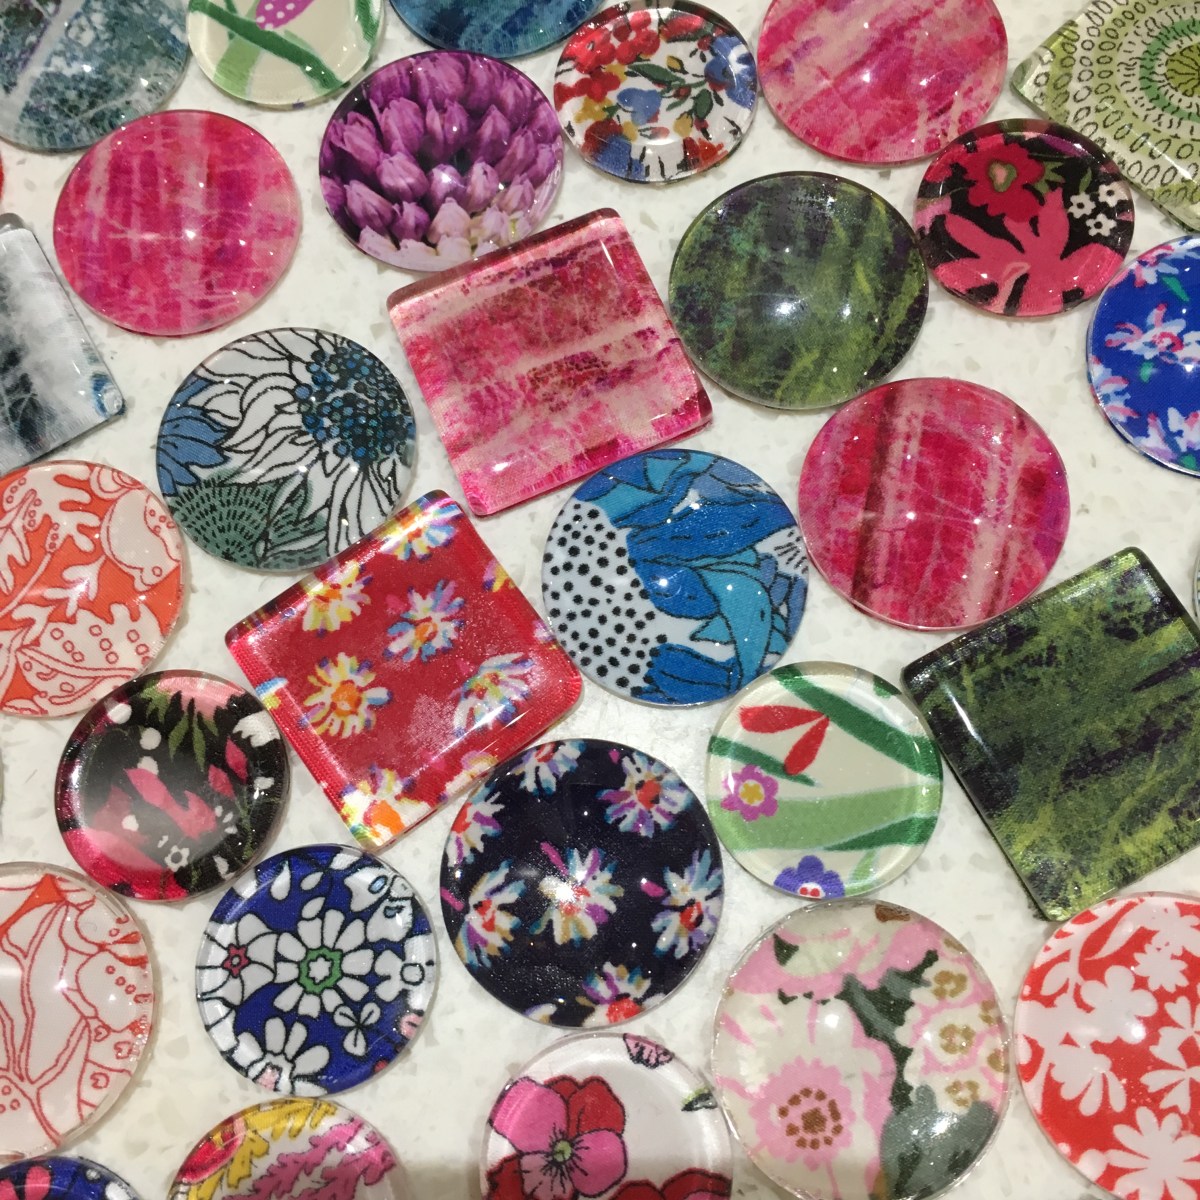
Three of the packs are based around my own hand painted cabochons, and also include amazing Czech etched beads – both seeds and daggers.  The etched daggers were the original inspiration for this design, so it’s been great picking the right colours for these packs, and it’s been even nicer getting to play with my Pebeo paints and custom make cabochons to compliment the daggers exactly.

Colourways are Vitrail dots (I mean how amazing are those dotty etched daggers, and though I say it myself the cabs are exquisite); Sliperit (etched Sliperit is my absolute favourite of these finishes, and I use it constantly so it seemed right to share), and Magic Apple (a partially transparent red and green finish, with metallics which was the first colourway I made this brooch in).

The fourth pack is based around some amazing matte canary yellow daggers, and my own hand made Liberty print cabochons, with this colourway guaranteed to bring sunshine into even the darkest day.  So you don’t feel left out of the etched bead side though, some of the seed beads in this set are etched too.

As well as the beads and cabochon, each materials pack contains Nicole’s Bead Backing as the embroidery foundation, Ultrasuede for the brooch backing, and the dual purpose brooch pin and pendant bail.  As with all of my packs, the tutorial needs to be purchased separately, and you will need to dig out your own beading needles, thread and some strong glue.  The tutorial and packs are available in my Etsy shop here.

Materials Packs – Yay!

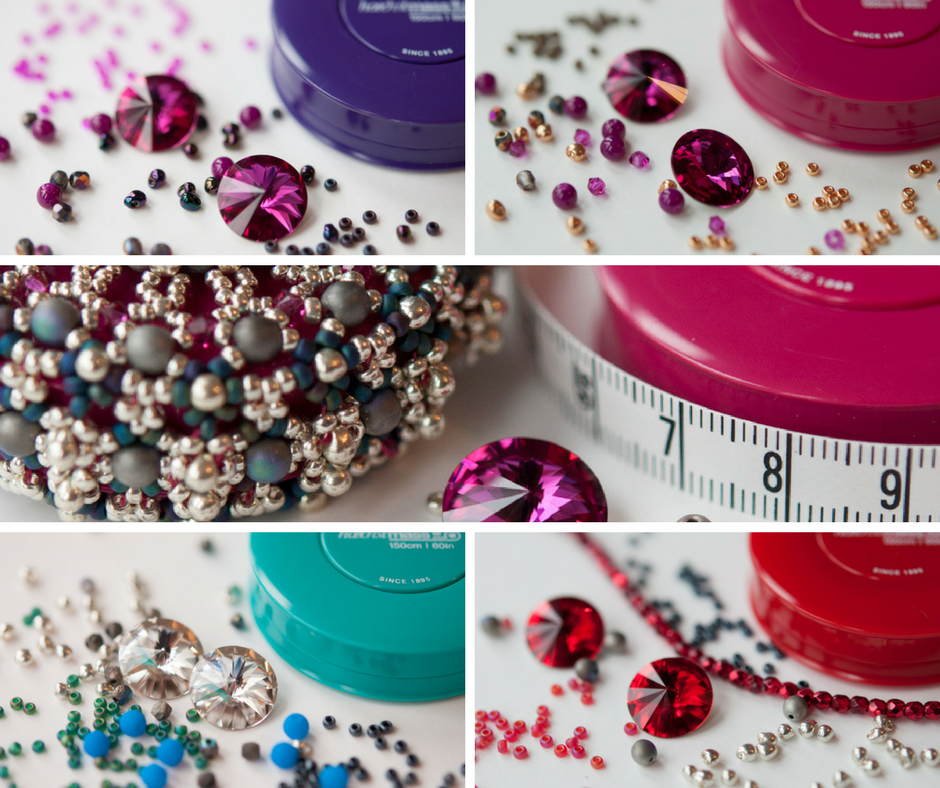
So I finally got my act together and made some Materials Packs using the lovely Hoechtmass Tape Measures that arrived about a month ago. They are very well made, and should last well, and their slightly recessed outer edge means the beads sit really nicely. The colours are absolutely stunning too – I got lots in the fantastic deep fuchsia (obviously) and then two each in some of the other colours. I’ve used the fuchsia in two of the new packs, and the red, jade & purple, but I’ve still got some pink, yellow & orange left to come up with some more combinations.  They are available here in my Etsy shop.

I’ve also been able to get hold of some fantastic Czech beads, including matte glittery, neon or ‘happy’ finish rounds, etched glittery, matte slipperit (my complete favourite) or metallic ice fire polisheds.

I should say though at this point that because the Hoechtmass Tape Measures are so very well made, they cost me several times as much as my usual tapes.  I’ve tried to absorb some of this, but I do need to charge slightly more for these packs – £22 instead of £20. I do still have packs using standard tape measures too in some lovely colourways here if you prefer.  Additionally the Hoechtmass Tapes have a smart metal end, rather than a plastic removable tab, so there is no need/option to add a beaded bead or tassel, so I don’t include additional beads for this.

So at the moment I have in stock the new Baroque Tape Measure Materials Packs ‘Plus’ with Hoechtmass Tape Measures  here in:

Silver & Fuchsia – this colourway goes with the Navy & Fuchsia Space Needle Materials Pack (currently out of stock in Long, but in stock in Short). It includes Etched fire polished and Matte Glittery beads plus all the usual Swarovski, Preciosa and Miyuki beads. I’ve made one of these as you can see from the picture to check that the etched beads don’t cause any fit problems, and to check the sizing on the new tape measures and it looks fantastic!


Crimson & Silver – this colourway goes with the Crimson & Silver Space Needle Materials Pack ((currently in stock in Long, and Short). It includes Metallic Ice fire polished and Matte Glittery beads plus all the usual Swarovski, Preciosa and Miyuki beads.


Fuchsia & Dark Golds – this colourway adds gold to my original Fuchsia & Bronze version for added sparkle. It includes my current favourite matte Slipperit fire polished and some completely stunning ‘Happy’ finish round beads. plus all the usual Swarovski, Preciosa and Miyuki beads.

Blackberry – Fuchsia, purple & plum combine for a bruised blackberry treat. Again this uses the matte Slipperit fire polished and ‘Happy’ finish round beads. plus all the usual Swarovski, Preciosa and Miyuki beads.


Jade & Silver – Emerald, silver, crystal & vivid blue for an oceanic mermaid like zinger.  This one uses blue neon rounds for added ‘glow in the dark’ fun, the etched fire polisheds again and the usual Swarovski, Preciosa and Miyuki beads.  And for once, unusually for me, no red or fuchsia…..


And finally, an update on my shops.  I’m starting to separate out my Etsy and Folksy shops, to make it easier to manage stocks on the packs and supplies side.  As previously my Etsy shop will have a limited range of my finished pieces, plus all of my Materials Packs, Cabochons and Tutorials for download.  My Folksy shop will have all of my available finished beadwork pieces, but nothing else, and I’ll continue to offer an alternative source for Tutorials through PayHip via the Tutorials page here on my blog.

Un-Started Objects

Early last year I wrote a post about my beady UFOs. None of the pieces in that post have really progressed (I have put a couple more humps on the Ootheca cuff, but that’s it).  Then I wrote a piece about the tutorials I was planning to publish – one (my Space Needle Case) is now out in the world, but the others haven’t really moved.  I’ve managed to recreate the CRAW ring, but I’m still not quite happy with how to write up the corner joins….  All in all my beady planning is looking like the opposite of Mastermind – no ‘I’ve started so I’ll finish’ here.  On the other hand, I did get some work finished last year, published a new tutorial, and won a competition, so I won’t berate myself too much.

This year, rather than a series of pictures of lonely, unloved UFOs, a glance through my PDFs on my iPad has prompted a different kind of list – rather than UFOs I thought I’d share some USOs (Un-started objects).  As well as a huge stash of beads I’m afraid I have a large collection of tutorials lurking – I buy them because there is a discount offer, because I simply cannot fathom how something’s been done and I need to know now, because I want to support the artist, or just because I really want to make them.  Because I’m trying hard to focus on original work at the moment the unused ones are starting to accumulate, so I thought it might be interesting to give you a flavour of what has caught my eye (since it may be a while before they appear here as finished or even started beadwork).

So first (and I’ve had these for a while) a set of three from Barbara Briggs bought while I was very into Contemporary Geometric Beadwork.  How I ever thought I would have the time for such substantial pieces made almost entirely of delicas I can’t say, but they are quite amazing:

Fantasy Floral Cuff by Barbara Briggs (image by Barbara Briggs)

Fantasy Flora Cuff

Mermaid Cuff by Barbara Briggs (image by Barbara Briggs)

Mermaid Cuff

Barbara Briggs Dragon WrapFire Dragon Wrap

I’ve been a huge fan of Sabine Lippert for many years, and have completed lots of her pieces, which gives me an excuse for accumulating so many patterns (plus two books) – although I have to say until I wrote this list I didn’t realise quite how many.  Sabine has a sale on at the moment for some of these patterns, and even with the ridiculously low pound they are super value:

Sabine Lippert Tchacka Boom BangleTchacka Boom Bangles – a free pattern using her spiky button beads.

Sabine Lippert Wanna be a ButterflyWanna be a Butterfly – another freebie, this time using her Rizos.

Sabine Lippert TweedTweed – I’ve already beaded the related Baroque Dimensional which has a similar basis – I just need to get organised and pick fire-polished colours for this as I’ll need to do a bulk order as it needs 460 4mms!

Sabine Lippert TurbulenceTurbulence – looks like a lovely, smallish project.

Sabine Lippert - BoomerangBoomerang Bling – another one which needs some planning/shopping, and a fair amount of work, but looks like it will be amazing when finished.

Sabine Lippert Squaricals and PenticalsSquaricals & Penticals – I tried to start this on holiday last year but was a few beads short.  I should do this soon – it looks lovely to bead.

Sabine Lippert Go-Dimensional


Go Dimensional
– a classic Sabine blingy beaded bead – my Rivoli stash is much more substantial now so I should be able to do this without shopping!

From Cindy Holsclaw at Bead Origami (my sister is a big fan, and I love the way Cindy works) courtesy of a small special offer:

Bead Origami Teardrop BubblesTeardrop Bubble Beaded Bead – I love beaded beads and I love Czech teardrops, easy choice.

Bead Origami Supercoiled RopeSupercoiled Beaded Rope – how completely cool is this – I need to know how it is done, and hopefully a bit of a stash buster.

None of you will be surprised to discover some of the fabulous Jean Power’s work lurking in my collection.  As well as lots of tutorials and book projects from her which I’ve already beaded and some inevitable UFOs, I have two still to do:

Jean Power Star FlowerStar Flowers – this is quite new so I don’t feel too guilty about this one.  I have some of the giant acrylic stones already, so this should happen soon!

Jean Power Interlocking CrystalsInterlocking Crystals – this is a Jean classic which I’ve had for years.  I tried it with some cheap rivolis a while back, and it didn’t work because they were a different shape to Swarovski ones, which is fair enough.  I’ll need to take a deep breath before starting this one as the necklace takes over 40 rivolis.

Actually, apart from the huge glut of Sabine’s patterns, and the fact that I also have a pile of beading books and magazines, this list doesn’t look quite as bad as I had expected.  Hopefully I’ll get onto some of them soon – I have all my new cabochons to work with first though, so don’t hold your breath!

Some more Materials Packs

As well as the new spiky packs I’ve managed to create some new colour-ways for my Baroque Tape Measure, and resurrect some previous ones.

The new ones are:

Medium Vitrail
Medium Vitrail
Bruised
Bruised
Ruby & Gold
Ruby & Gold
Caribbean Sunshine
Caribbean Sunshine

And the resurrections are:

Tequila Sunrise
Tequila Sunrise
Ruby & Old Gold
Ruby & Old Gold
Scarlet, Silver & Gunmetal

As usual they are available in my Folksy shop (click on the pictures) or my Etsy shop (here for the new colours, here for my completely favourite Tequila Sunrise, or here for the Scarlet or Ruby).  And finally, the tutorial itself is available for instant download via Etsy here (VAT will be added if you are in the EU), via PayHip here (no VAT), or if you don’t mind waiting for me to e-mail via Folksy here (no VAT).

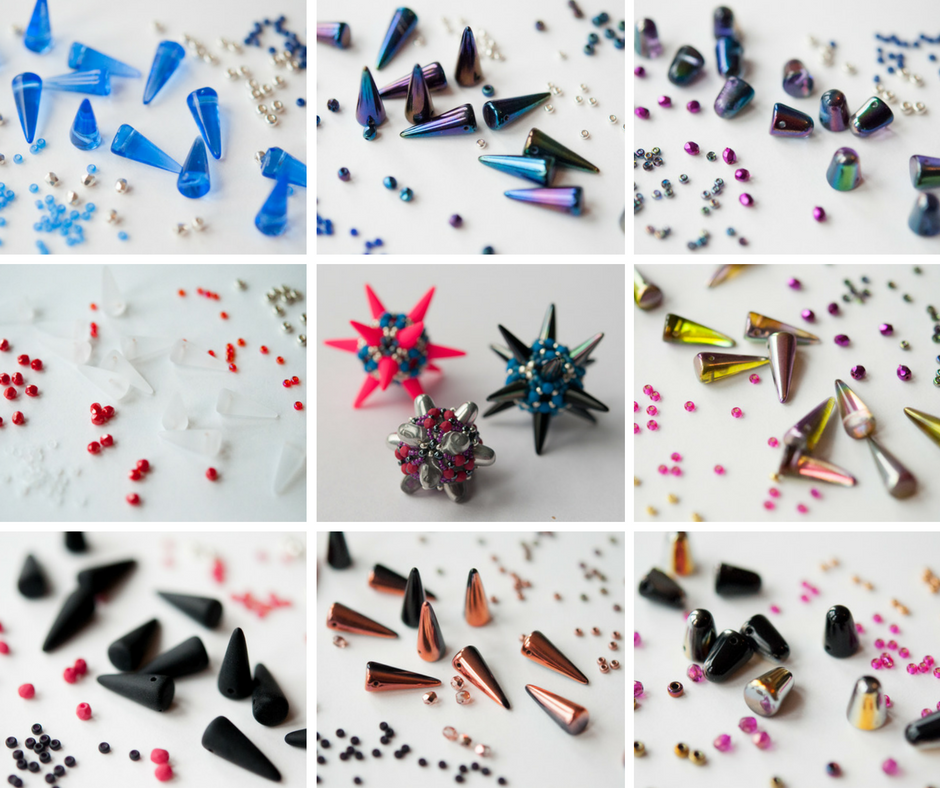
Materials Packs for Great Balls of Spikes

I’ve been meaning to put together some Materials Packs for my Great Balls of Spikes Tutorial for ages, and on Saturday I had the time (well I had the energy to stay up late to make the time).  So here they are – I hadn’t realised quite how many Spikes & Gumdrops I’ve managed to collect whilst ‘meaning to do this’, so there is a nice variety of colours and finishes to suit all tastes.  I’ve really dug around in my stash to find some interesting finishes for the seeds and fire-polished beads, and am parting with some really nice ones which I’ve been hoarding.  My favourite is the Magic Orchid Spike colourway, because the spikes are gorgeous and really sing with the Zest, Fuchsia and Magic Orchid seeds and Magenta Metallic fire-polisheds, and quite frankly if someone doesn’t buy it soon it may mysteriously disappear.

Anyway, here they all are – if you click on each photo it should take you through to the correct listing in my Folksy shop.  If you’d rather use Etsy, then the brights (Magic Orchid, Cornflower, Frosted Crystal) are here, the darks (Matte Black, Jet Copper, Blue Iris) here, and the Gumdrops (Magic Blueberry, Jet Slipperit) here.

Magic Orchid Spikes
Magic Orchid Spikes
Magic Blueberry Gumdrops
Cornflower Spikes
Cornflower Spikes
Dark Blue Iris Spikes
Jet Slipperit Gumdrops
Matte Black & Crimson Spikes
Jet & Copper Spikes
Jet & Copper Spikes
Matte Crystal, Scarlet & Silver Spikes

And finally, the tutorial itself is available for instant download via Etsy here (VAT will be added if you are in the EU), via PayHip here (no VAT), or if you don’t mind waiting for me to e-mail via Folksy here (no VAT).

The Sting

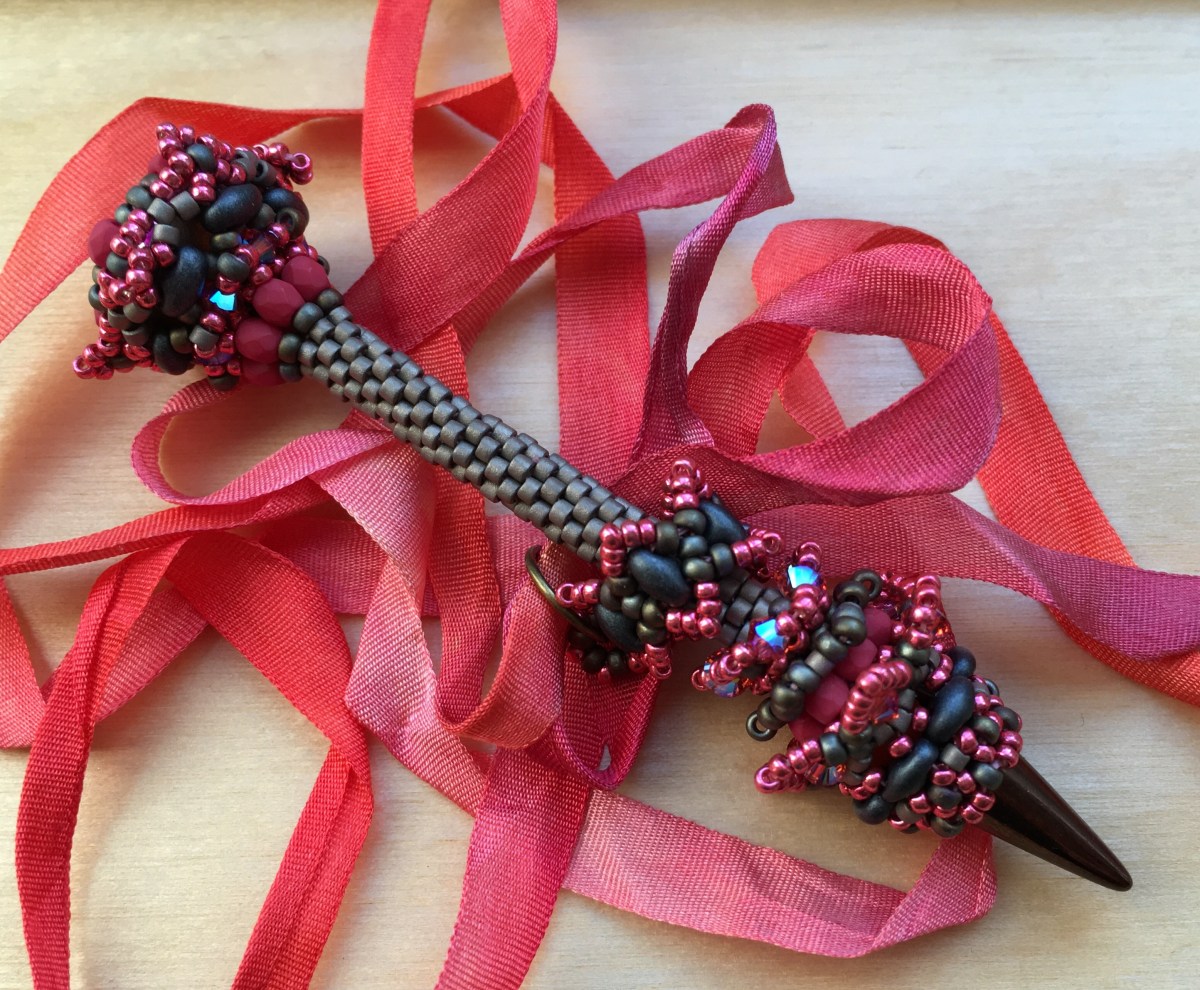
I’ve been working really hard on a competition piece recently, and after a month’s solid discipline I fell of the wagon last week and wandered off into other beading.  I’m sure the break will be good for me, but none of the other beading really worked and that made me rather antsy.  When this happens, there are two options – have a night off beading, or do something which can’t fail.  I didn’t want a night off, so I turned to my stash of digital patterns to find something by a designer who never lets me down – Sabine Lippert.  Just before Christmas she had a pattern sale, so I had a little splurge on a few patterns, including her pendant ‘Sting’.  This looked like something which would be achievable in an evening or two, so I pulled some beads and got going.

image

It was a good decision – as always with Sabine’s designs this piece went together very nicely.  It took around 3.5 hours – I’m used to Sabine’s designs so can usually work them up quite quickly, and I found this one pretty easy, with everything just slotting together perfectly for a contented evening’s beading.  It’s given me my beading mojo back, and with some child free time off the day job coming up, I feel refreshed and ready to get some of those long awaited tutorials finished and launched soon.

Recipe

image

  • 15 seed – Miyuki Duracoat Cranberry 4211
  • 11 seed – Miyuki Matte Silver Grey 2012
  • SuperDuo – Jet Gunmetal Pearl
  • Delica – Miyuki Matte Pewter 321
  • 3mm Crystals – Swarovski Paparadscha AB2 (slightly hard to find colour in 3mm – I got mine at a show from Gemstone Boutique)
  • Spikes – Dark Bronze.  I have no idea where they came from!
  • 3mm Round – I didn’t have any in the right colour, so I used some Saturated Fuchsia firepolisheds from Robin’s Beads, which worked well.
  • 6mm Round – I used an orange FP, this can’t really be seen so you just need something that tones in.
  • 14mm Rivoli – Chinese (not as fine a finish as Swarovski or Preciosa, so they don’t work with a tighter bezel, but a fantastic colour which neither of them offer and worked for this project – from the Southampton Bead Shop)

image

The ribbon (I know it needs a press, it’s been lurking in my stash for ages) was hand dyed by Stef Francis, a fantastic space dyer who I came across in my sewing days.

Tips

I usually find my tension too tight for Sabine’s pieces, because of the 3D embellishments and layering.  So I relaxed things a bit, but unfortunately I shouldn’t have done as this is one which requires stiff tension to create a solid rod of peyote, so it came out a bit floppy.  However, I have stuck a head pin down the middle and it’s fine!

Sabine does warn you about this in the blurb on her site, but not in the pattern.  Because I’d bought the pattern a while ago, I’d forgotten what the blurb said, but to be honest a beader of my experience should know that if you want to make a peyote tube rigid you’ve got to do some pretty solid stitching, and use a suitable thread – Sabine recommends Fireline explicitly in the materials list (which should have been another clue) but I’ve gone off it a bit, so I used KO which is clearly not going to give the same rigidity.  So entirely my fault, but a useful learning experience (just when you think you have things sussed…..), and it still looks fine.  If I make this design again, which I probably will, I might perhaps stick a cocktail stick down the middle for extra stiffness anyway (the head pin I used is after all flexible).

Sting - Sabine Lippert - beaded by Sarah Cryer

Colours

One of my resolutions this year is to include more neutral colours in my beadwork – I have a tendency to chuck colour at things, which sometimes gives me an amazing looking piece which is completely unwearable.  I try to avoid beading with black as it’s hard work, and anyway I wear a lot of navy blue rather than black, so I’ve been using a lot of 401FR and similar to give me a navy base.  I’m also getting really into pewter, and other matte, mid greys, as they work well with the etched beads I’m currently obsessed with, so for this piece I chose a selection of those tones for the base beads, and variations on a dark salmon pink for the main colour.  I toyed with a few different spikes (which you can see in the materials picture), but in the end the dark metallic chocolate worked best. This was going against my instincts, which were to pick out the fuschia and orange of the stone, and maybe chuck in some zest, but I think it’s worked well and given me a striking but wearable piece, proving that this is a good resolution!

Conclusion

A lovely piece, well worth buying and trying.  Rock hard tension and the correct thread would have helped keep the main shaft rigid, so always read the instructions.  I’m going to get back to my own work for now, but next time I need a break I’ve got Sabine’s Toggle Ring tutorial to try.


How not to succeed in beading……

All this talk of tape measures reminded me that I haven’t actually made one of my Baroque Tape measures since I released the pattern. So rather than finishing some more materials packs so other people could make them, I had a go myself. I’ve been wanting to do a more multicoloured version for ages, something a bit huicholly.  So I pulled some beads, got the pattern up on the iPad, and started beading.  It did not go well.
Changing colours this often just doesn’t work with this design – you loose the shapes formed between beads and by the beads themselves.

IMG_3711

And even worse, I started the netting out of the wrong row of the peyote bezel, meaning the rivoli sticks out way too far, so all in all not good.  Below you can see the ‘wrong’ version next to my later correct version – the rivoli bezel now forms part of the netted surround, rather than the surround looking like it’s been tacked on.

image


So that version was abandoned, I took an evening  off to make those Materials Packs, and then I tried again.  This time I paid more attention to my own instructions, thus avoiding the bezel error, and I changed seed bead colours only every two or three steps, rather than every step as before.  And hopefully you will agree that this looks much better.

image

There were still a few things I’d forgotten since I’d done the original design:

Firstly, back then I didn’t use Fireline.  Now I do, and it does noticeably alter my tension (to the extent that I’m actually thinking of stopping using it).  This was worsened when I lost the reel I’d been using (small people move stuff), and grabbed another reel which turned out to be one of the faulty ones from a while back.  So lesson learned – netting suits a thread with a bit of give, like the lovely Miyuki threads, and in addition, using  a poor quality thread will slow you down and make a good finish all the more difficult.  So use the best you can, all of the time.  Throw the rest away so you won’t use it by mistake.

Secondly, I should have used a coloured thread that matched the tape measure – that way you can relax your tension without worrying about gaps between the beads exposing the thread, and the pattern will still work fine but be much more pleasurable to bead.  Honestly, it’s all basic stuff………………

Thirdly, I ignored my own instructions to stop adding the firepolished beads when you get to the tape hole – I worked around it (just as I did in the early prototypes, before I worked out how to cope with the hole properly), but I’m annoyed with myself as it’s just not as good.  Read the instructions woman!

Finally, I had a go at working with a messier bead tray – all my beads muddled up together instead of carefully kept in separate piles.  This was partly because I’ve read a few articles recently discussing how different headers like to work, so I thought I’d try the mixed up way, and partly because unpicking the failed first side left me with muddled up beads anyway.  This was not a good move – it drive me completely crazy, I hated not being able to just pick up the bead I needed, and as I had multiple sizes of the same colour out it led to mistakes.  I am quite confident that it would have been quicker to re-sort the beads into piles first, as it really slowed me down.  Never again.

image

I still need to add a beaded bead of some sort for the pull tab, so I’ll have a delve around my stash of previous work and interesting beads (I’m sure I have a red tea pot somewhere – not very Mexican but fun anyway).  But it has been a very useful learning experience going back to it, and I have another one planned as a Christmas gift now (which will hopefully be a bit better).

image


Baroque Tape Measure – new Materials Packs at last…..

So at last I have had time to photograph and list the Baroque Tape Measure Materials Packs which I worked so hard to put together a few weeks back.  There are six new colourways, and I’ve re-shot the two I already had in stock as well.  Altogether I have now made over twenty different colourways for the packs, and another five have been beaded into the original and my working samples.  Perhaps not what I expected when I made the original piece for my Chatelaine two years ago.

Baroque Tape Measure Surround

These are my last few tape measures, so I will probably not be listing any more for a while (although if they sell well I may change my mind!), and I’ve been a bit bolder with some of the bead choices because of that.  There are two sets – bright fun colours, including one which uses one of my favourite Miyuki colours – red opaque AB (which gives a fab weird salmon pink), and some really dark metallics, including matte black with the new Swarovski Patina rivolis.  As usual they are available on Etsy and Folksy – links below:

Folksy links

Ruby & Old Gold
Ruby & Old Gold
Aluminium & Scarlet
Aluminium & Scarlet
Dark Metals
Dark Metals
Deep Purple
Deep Purple
Caribbean Sea
Caribbean Sea
Tequila Sunrise
Tequila Sunrise
Lemon & Lime
Lemon & Lime
Dark Plum Iris
Dark Plum Iris

Etsy Links

Metals
Metals
Brights
Brights


Beaded Bead 1

So I had another go at beaded bead pattern number 1 – Conway Beaded Bead by GwenBeads.  And then a few more goes, and finally I’ve got one finished.  Actually I’ve finished two, but the first one is not good so will be fragged………..Interestingly I found this pattern quite challenging, possibly because conceptually it is actually quite simple, and as I was tired I struggled to maintain the absolute accuracy it demands.  An single extra thread pass in the wrong place can mean this one doesn’t work, and as the internal structure is all seeds, rather than building on base of larger beads, it is a bit of a nightmare to unpick if you make an error and don’t discover it for a while.  Looking on the bright side, my sister Susie Hoad (BeadingBySusie) churns these out in a couple of hours, seemingly without any effort, so I think once I’ve made as many as she has (which is quite a few) I should get the hang of it.

Conway Beaded Bead - Gwen Fisher, beaded by the Indecisive Beader
Conway Beaded Bead – Gwen Fisher, beaded by the Indecisive Beader

Anyhow, the pattern is by Gwen Fisher of Bead Infinitum fame, and was my first introduction to prismatic RAW (PRAW).  On reflection this was quite a tricky one to start with – I might have been better with something like her fun looking Tentacle bangle or the Daisy Chain bangle rather than the full on 3D experience.


Conway Beaded Bead - Gwen Fisher, beaded by the Indecisive Beader
Conway Beaded Bead – Gwen Fisher, beaded by the Indecisive Beader

Tips

  • It says ‘advanced’ on the blurb, it means it!
  • And you definitely need to understand the structure of a dodecahedron (and constantly check you’re doing 5 sided units, it’s very easy to loose count).
  • And don’t use colour lined crystal beads for your first go as they seem to confuse the eye – I’d go for something matte (to help you manage the tension), for a good contrast between the 8s and 11s in the structure colourwise to help you see what you are up to, and nothing too dark as you will be working inside the structure a bit.
  • Like any embellished RAW, CRAW or PRAW you should maintain a medium tension for the base – too loose and you’ll get an uneven finish, too firm and you won’t be able to add the embellishment.  My first version, as well as containing a couple of mistakes, was as usual too firm and I’ve struggled to get an even outer finish.  It will be unpicked and redone soon………..

Susie says that this works well in 6s and 8s, and whilst I wouldn’t recommend them for a first go (as maintaining any kind of tension in RAW or netting with 6s is impossible), I’m definitely going to try them next.  She also builds out on the embellishment step using twin holed beads of various types, which helps alleviate my slight reservation about the small size of the finished bead (for all that work I’d like something about half as big again – the 11 and 15 version is under an inch in diameter). And Susie has already tried out lots of colours and embellishments, so have a look at her Facebook piccies of them here for inspiration.  Very kindly Gwen allows limited commercial use, so I may even be able to sell a few as pendants when I finally get the hang of it and get the completion time down.  Overall a very interesting advanced pattern.

Conway Beaded Bead - Gwen Fisher, beaded by the Indecisive Beader
Conway Beaded Bead – Gwen Fisher, beaded by the Indecisive Beader

Kissing Piggies

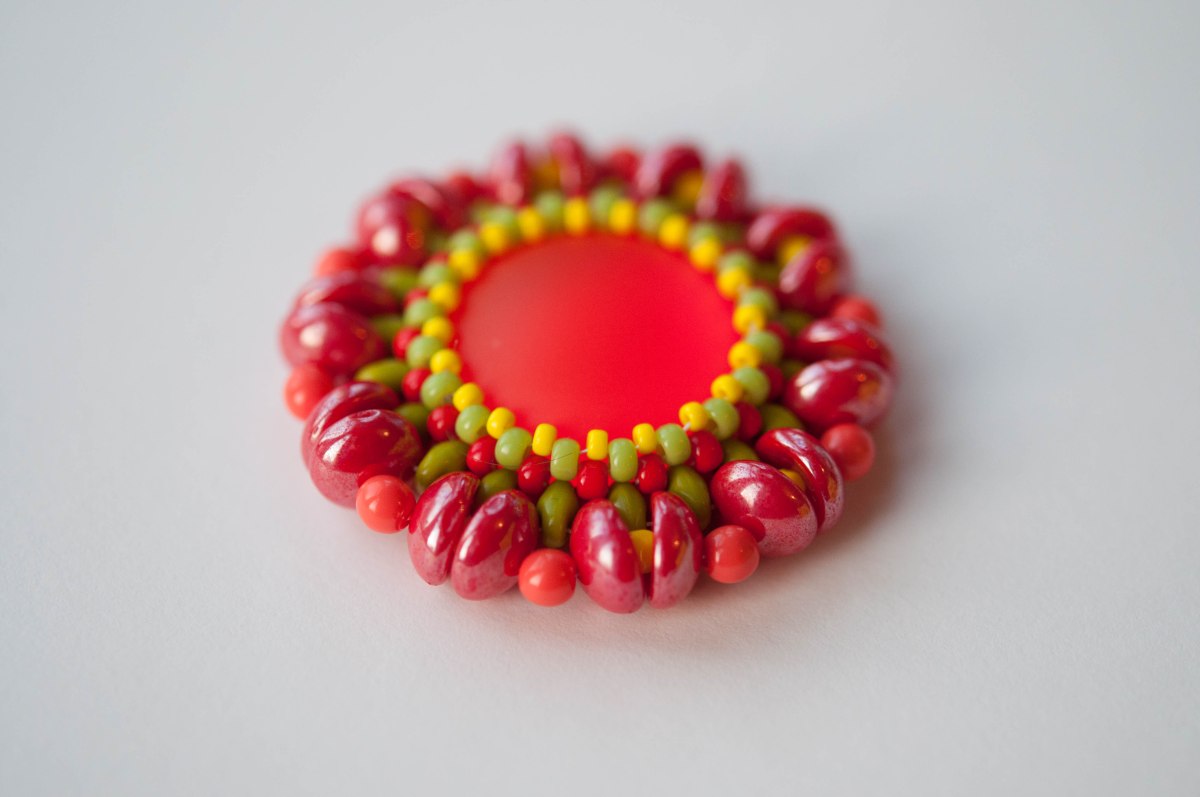
The boys have a picture book filled with photos of pigs.  Piggies sleeping, piggies leaping, piggies guzzling, piggies nuzzling, and piggies kissing.  So when I finished my new bezel, which surrounds a luna soft cabochon with facing pairs of two hole ‘Piggy’ beads, no other name would do.  The bezel came about because at the last Big Bead Show I found myself ambling around with nothing to buy – it’s more of a stringer’s fair than a beadweavers, and although there are some great teeny bead suppliers in between the big bead stands, I wasn’t really seeing anything new.  So I started looking at all of the new bead shapes which I had hitherto resisted – the two holes, the funny dragon scales, rullas & pellets, and I picked up a pack or two of each, (discovering along the way a new supplier, The Old Bicycle Shop, who I can heartily recommend for their interesting selection, £1 postage and quick delivery).  Then they sat in my stash for a few months whilst I dealt with going back to work, Christmas, and sickly children.

Kissing Piggies - Copper - Sarah Cryer Beadwork
Kissing Piggies – Copper – Sarah Cryer Beadwork

Finally a couple of weeks ago I dug out the piggies, some superduos and a lunasoft cab and made myself keep trying until I came up with a decent design.  I’m pleased with the finished design, it’s nice and simple and should be suitable for beginners who’ve tried a bit of RAW and peyote and have tension sorted.  That said, it took a fair few attempts and a good many failures to get to something that would work as a tutorial (or work at all), so banning myself from doing anything else until I had mastered it was definitely necessary!  I had the picture in my mind of the snuggling pairs from the beginning, so started from the outside and worked in – I can safely say that this does not work as a method, it was only once I gave up on that and designed a bezel that would have space for the piggies that things came together (although arguably without trying the outside in approach first I wouldn’t have known how much space to allow…..)

Eventually with the help of an MRAW starter (thank you again Contemporary Geometric Beadwork beaders – Jenny Sangster explains it very nicely on her blog)I mastered it, and it’s finished, written up & checked.  As usual I’ve stuck with diagrams rather than just photos (as I find it’s worth the time to draw the diagrams to ensure that everything is absolutely clear, and it helps me check my placements and thread paths as I draw them), and every step is also written out.

Kissing Piggies - Jet Azurro - Sarah Cryer Beadwork
Kissing Piggies – Jet Azurro – Sarah Cryer Beadwork

So anyhow, it’s available now as a tutorial – instant download from PayHip & Etsy, and e-mailed from Folksy, all at £6.  And in a fit of extraordinary organisation, I even have materials packs ready to rock and roll from Folksy and Etsy at £10 (UK only, sorry but I can’t get to the Post Office for overseas posting at the moment, and I think you’d find it uneconomic for a £10 pack anyway).  It beads up in around an hour, and uses nothing smaller than an 11 (and only three rows of them) so nice and relaxing.  Stick Sewing Bee on the telly and get beading!

Kissing Piggies - Sarah Cryer Beadwork
Kissing Piggies – Sarah Cryer Beadwork