Our family Christmas present to ourselves this year was a 3D printer, and whilst the original intention was that it would mainly be used by the boys, I got quite into it quite quickly and for once actually learnt to use it properly. Working in IT I tend to avoid learning about technology outside work, meaning the rest of the family are usually the technical wizards at home helping when I don’t understand, but this has been one time I’ve made the effort to actually learn about some new tech properly.
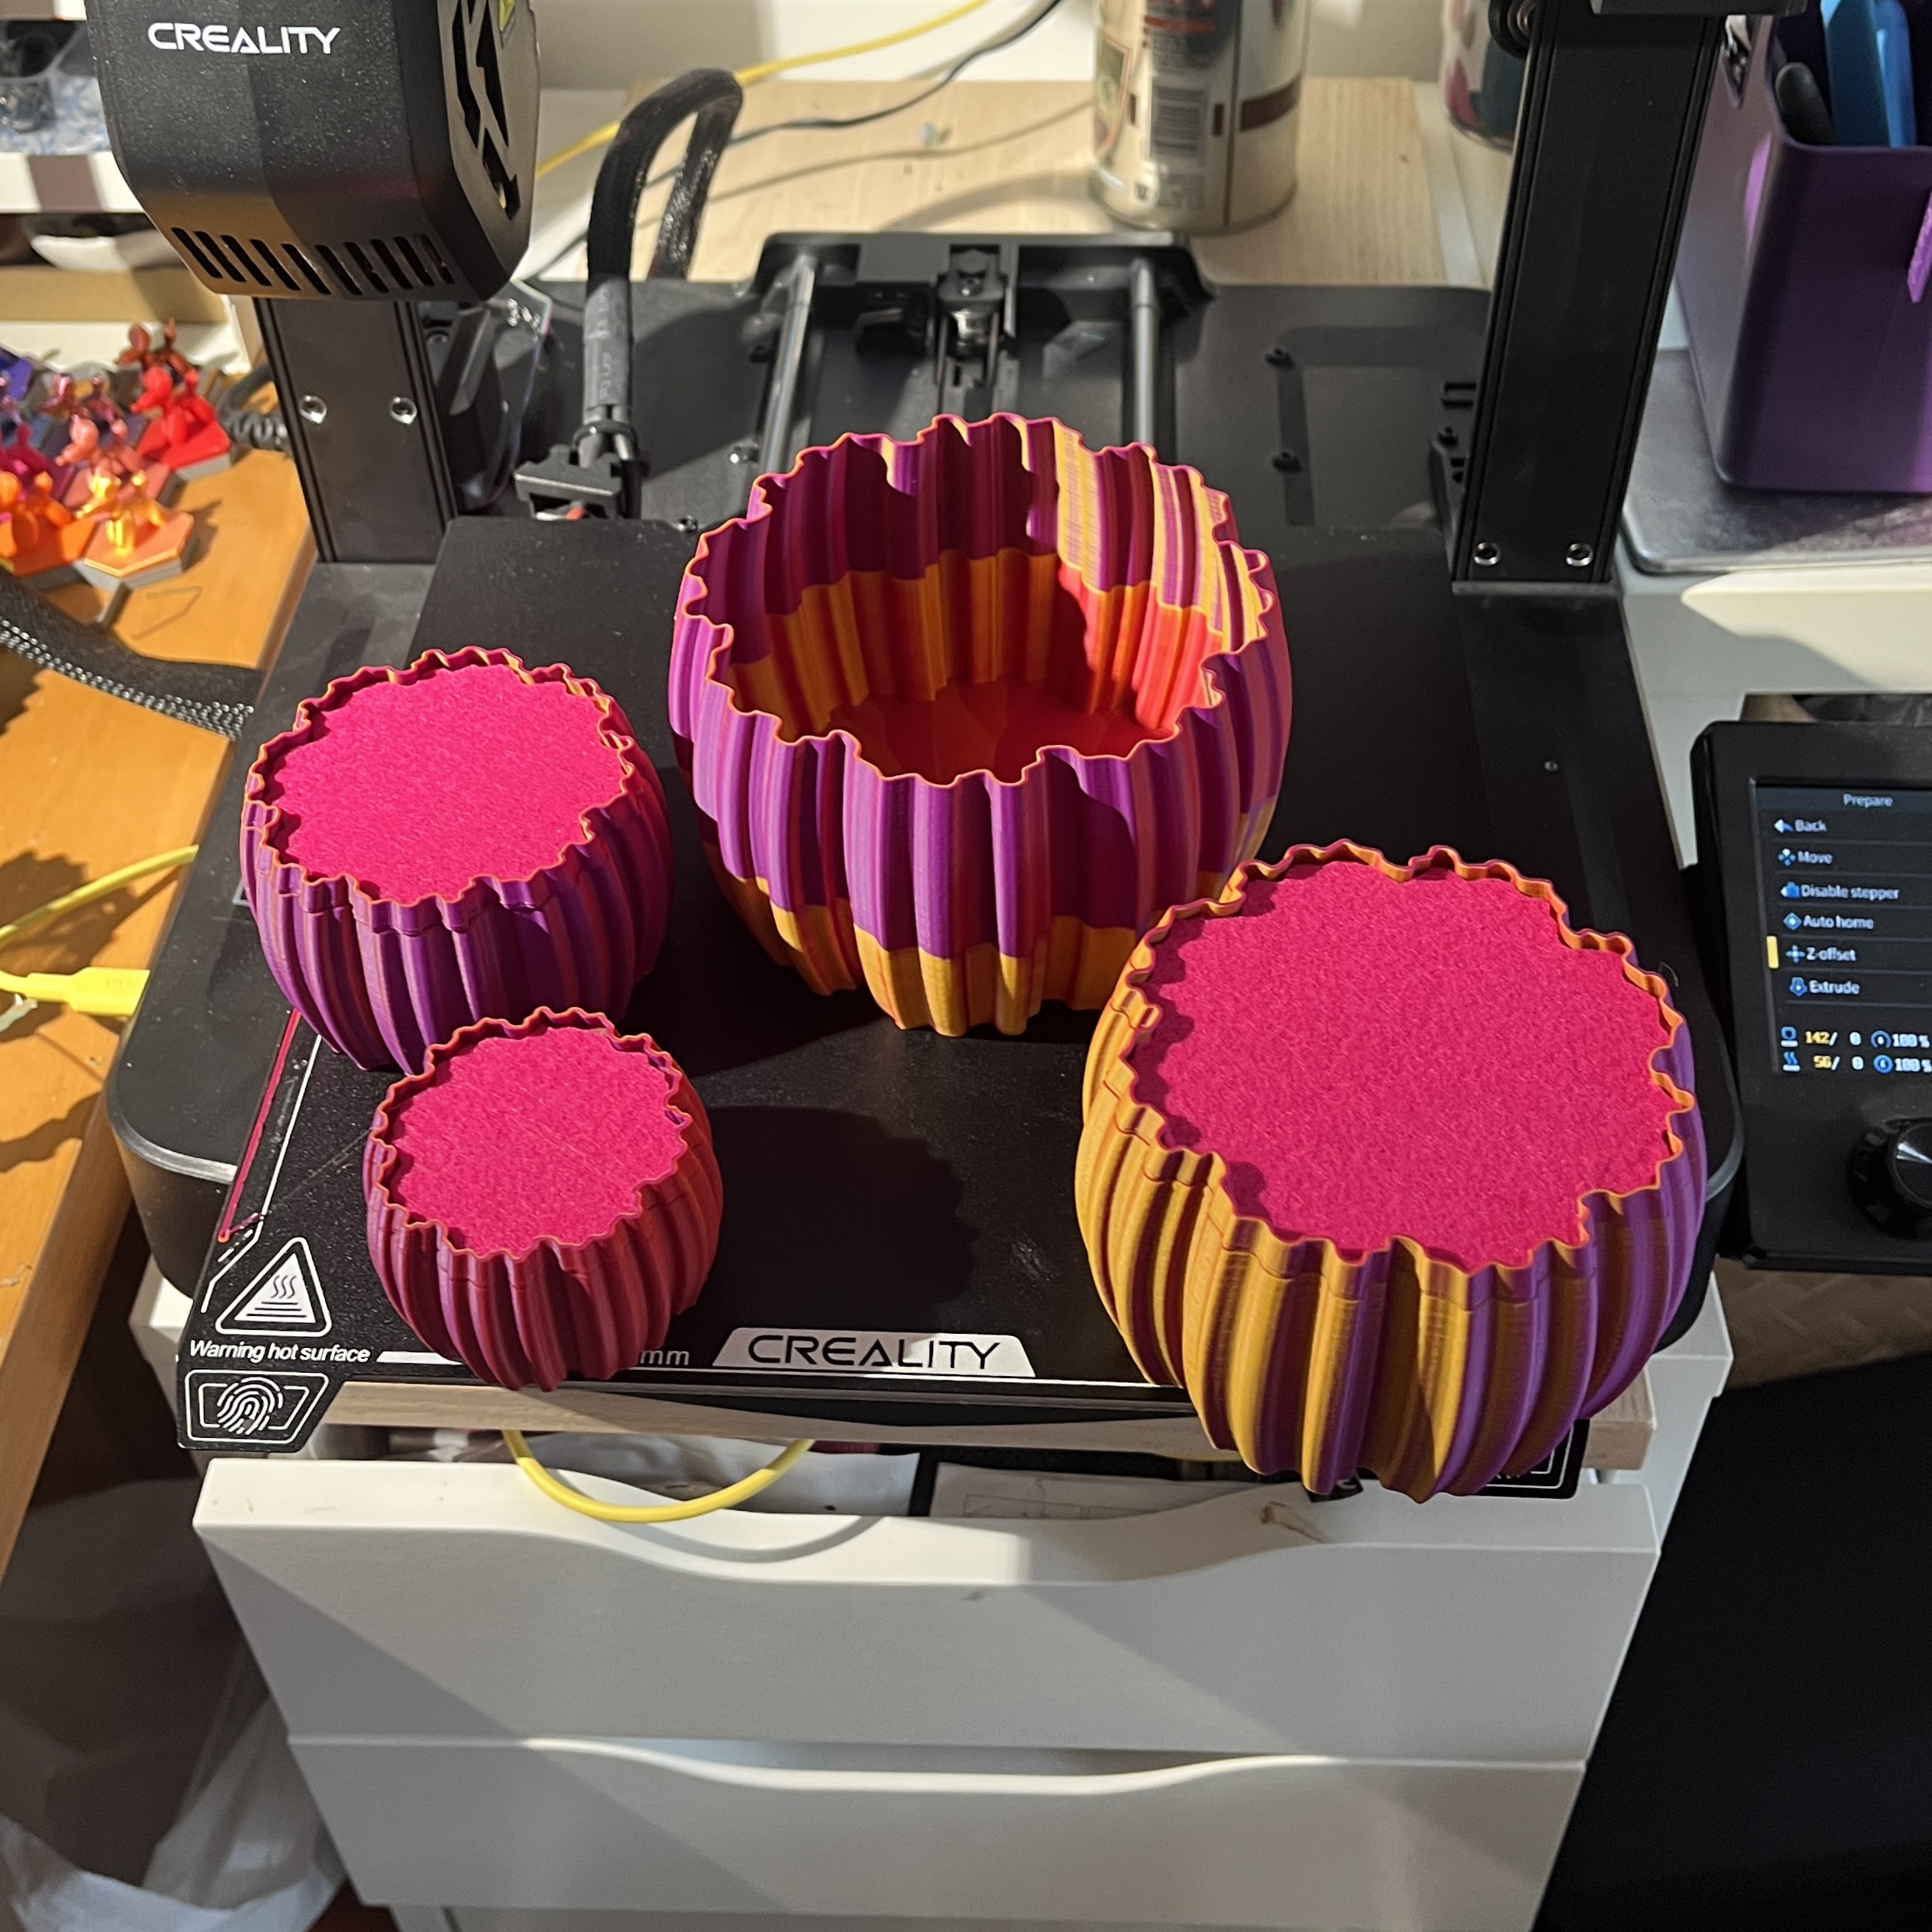
First we printed the usual stuff – a dragon, some pots, hooks, a soap dish for every sink, and a lot of prototypes for number 1 son’s GCSE Design & Technology project. Which was fun, and a learning experience, but then I found vase mode and got very, very interested. Vase mode is a magical concept which uses the really simple principle of a coil pot to spiral round the base and up the sides of vases and pots. No double walls, no infill, no supports, no waste during printing , and much less opportunity to fail which again means less waste. I just had one simple, intuitive process to understand and master. Yes you can only make certain shapes, but within that constraint it’s brilliant – much quicker than other 3D printing methods, lightweight but still (if designed correctly) strong.
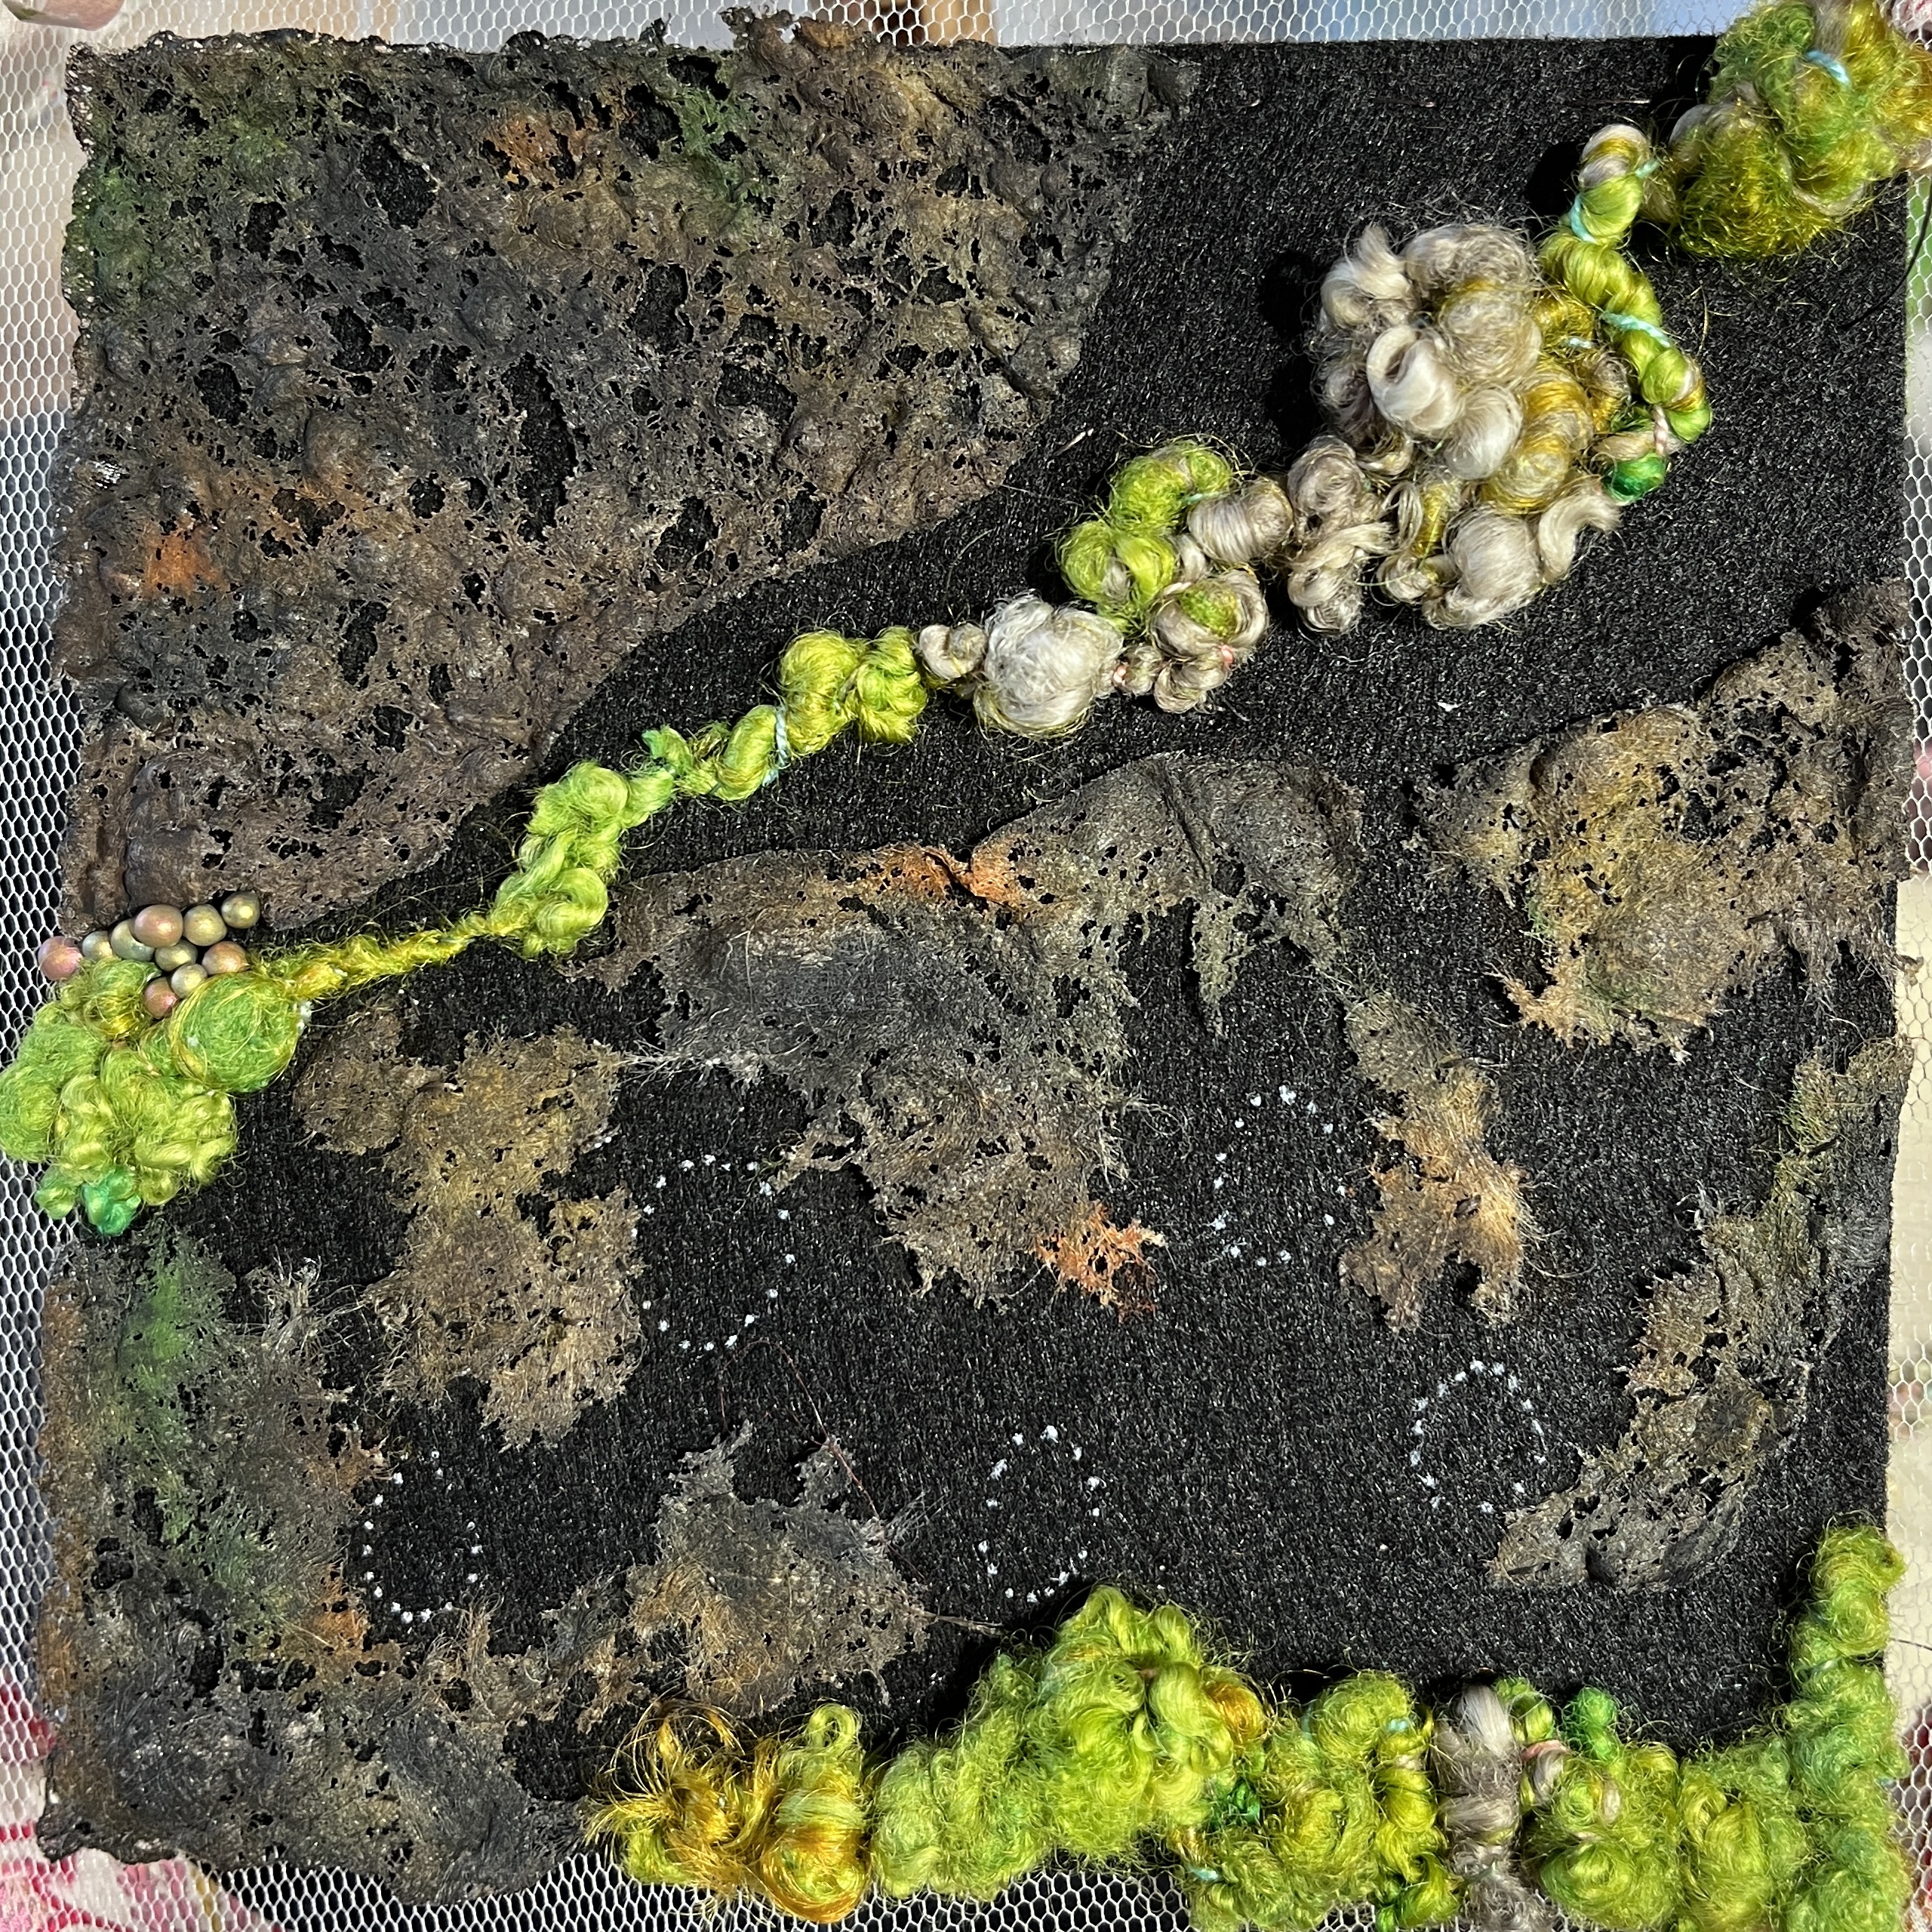
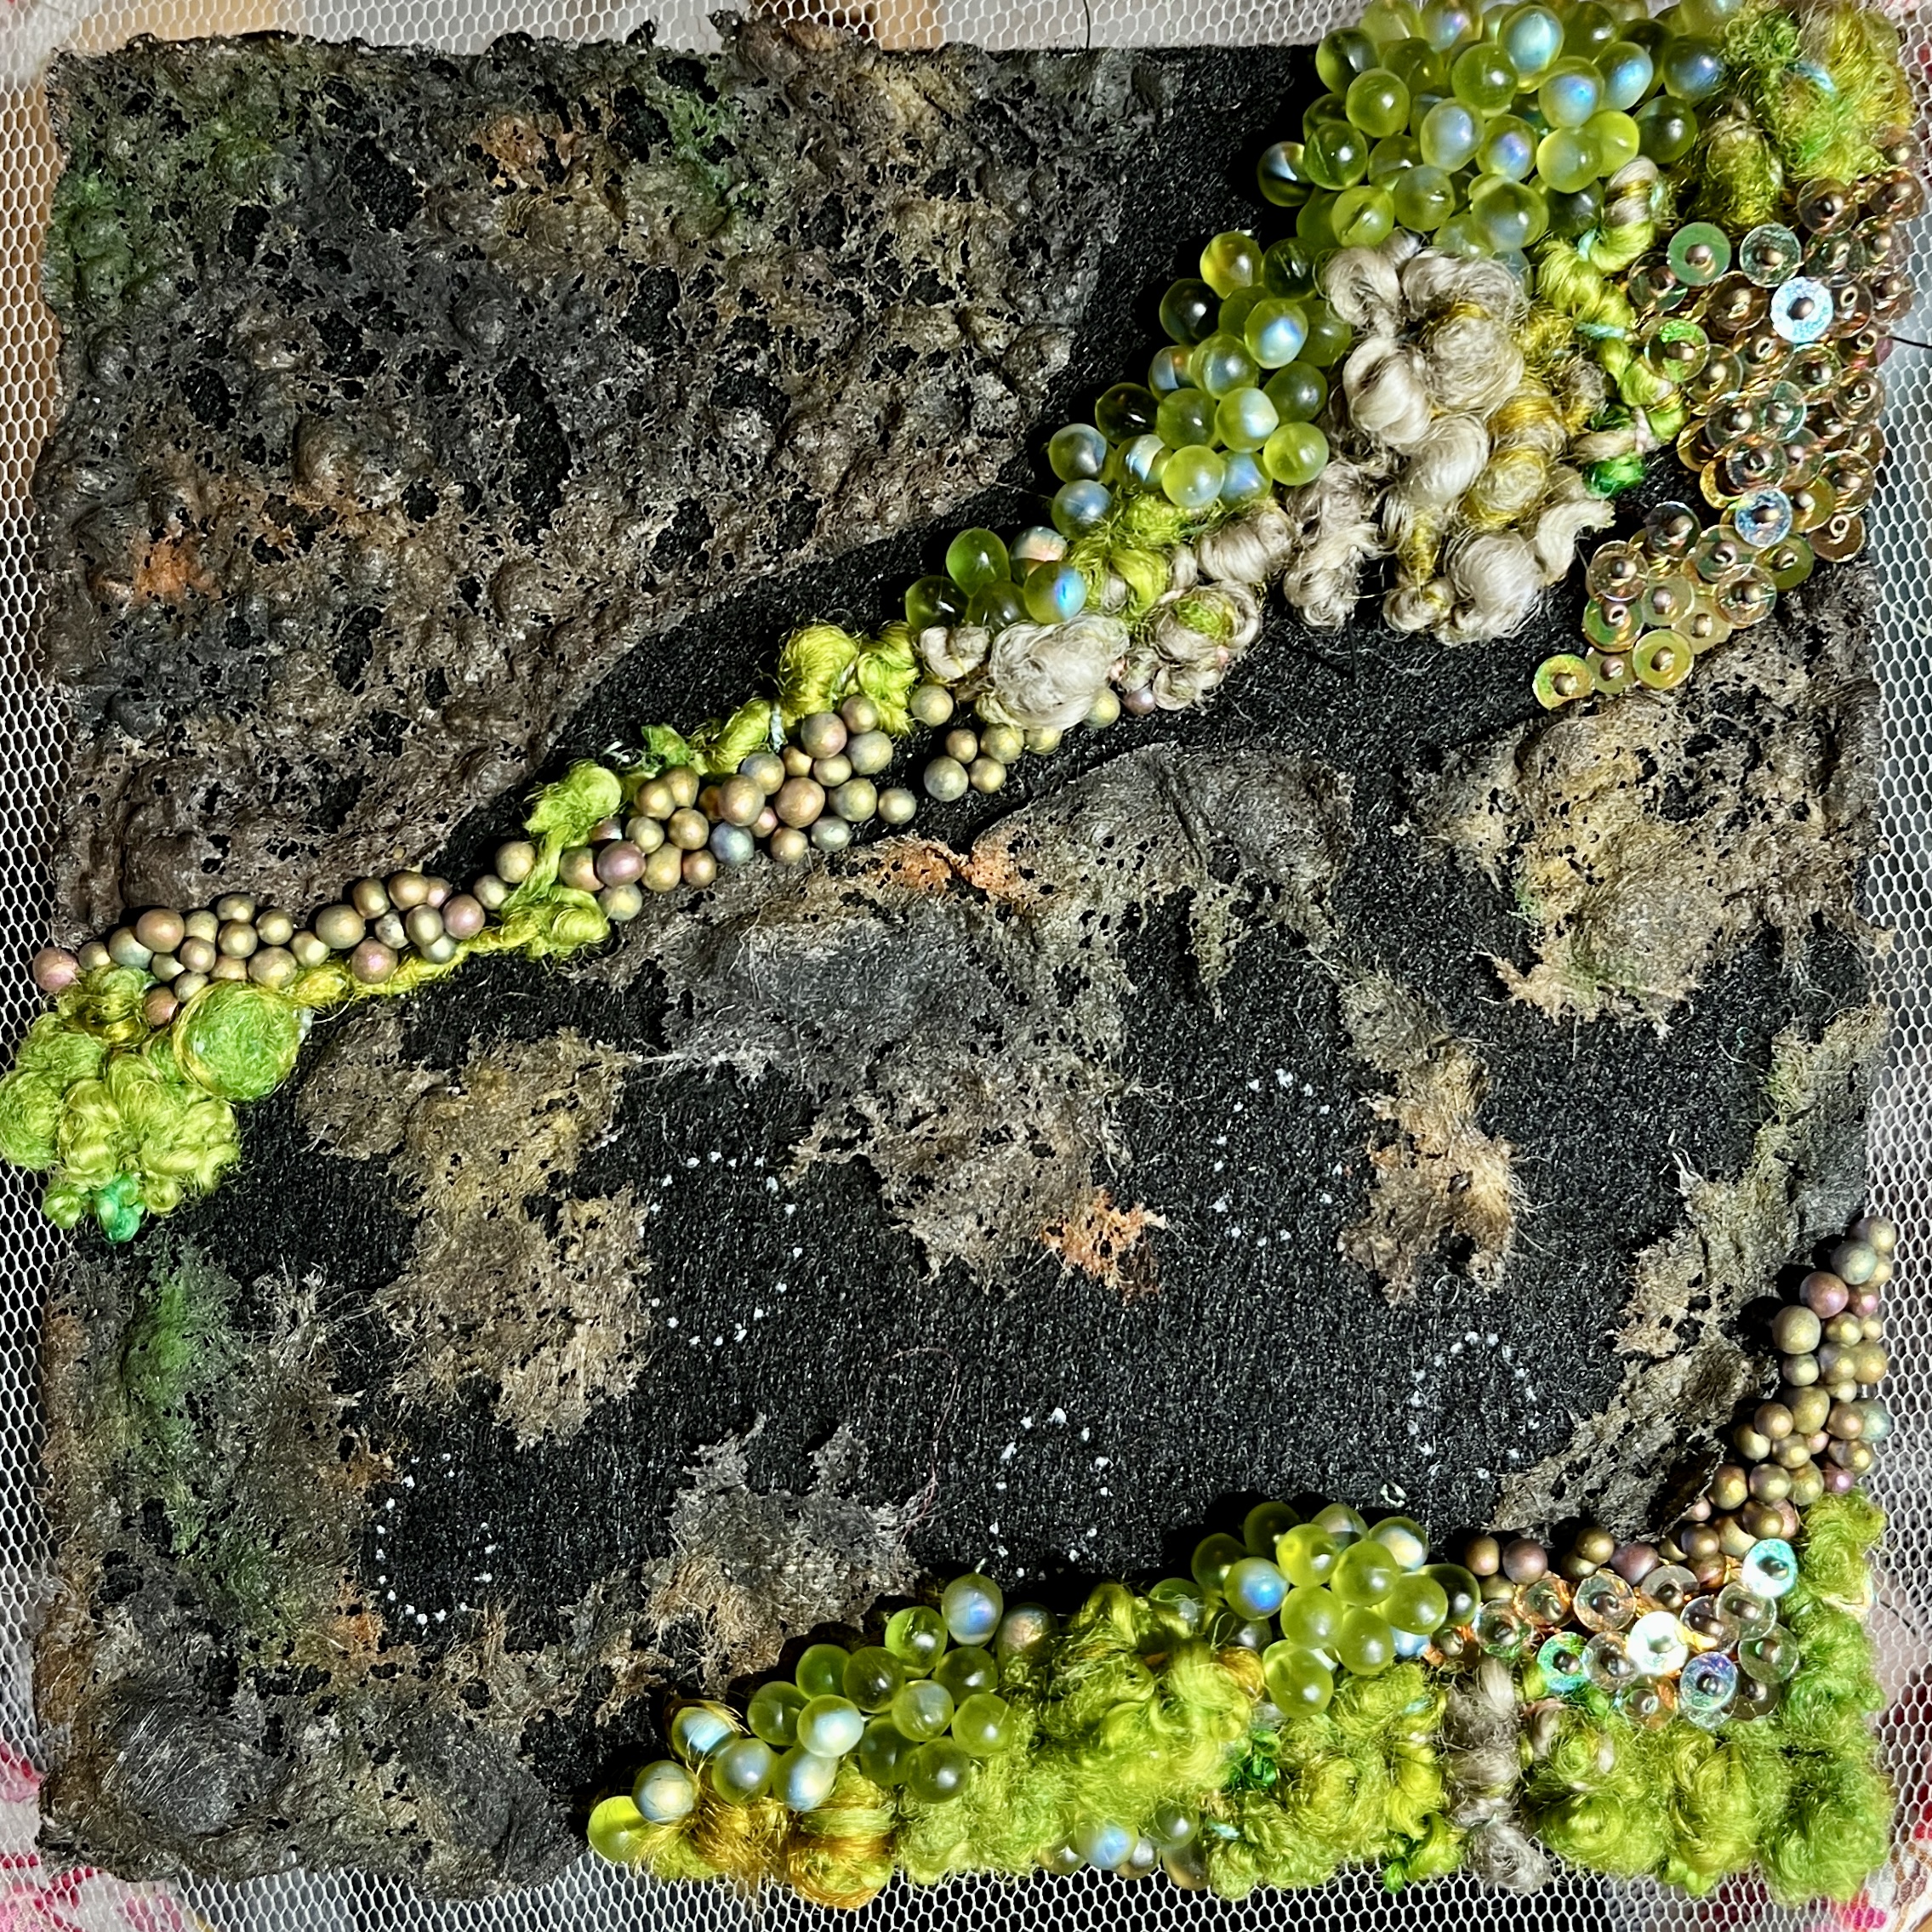
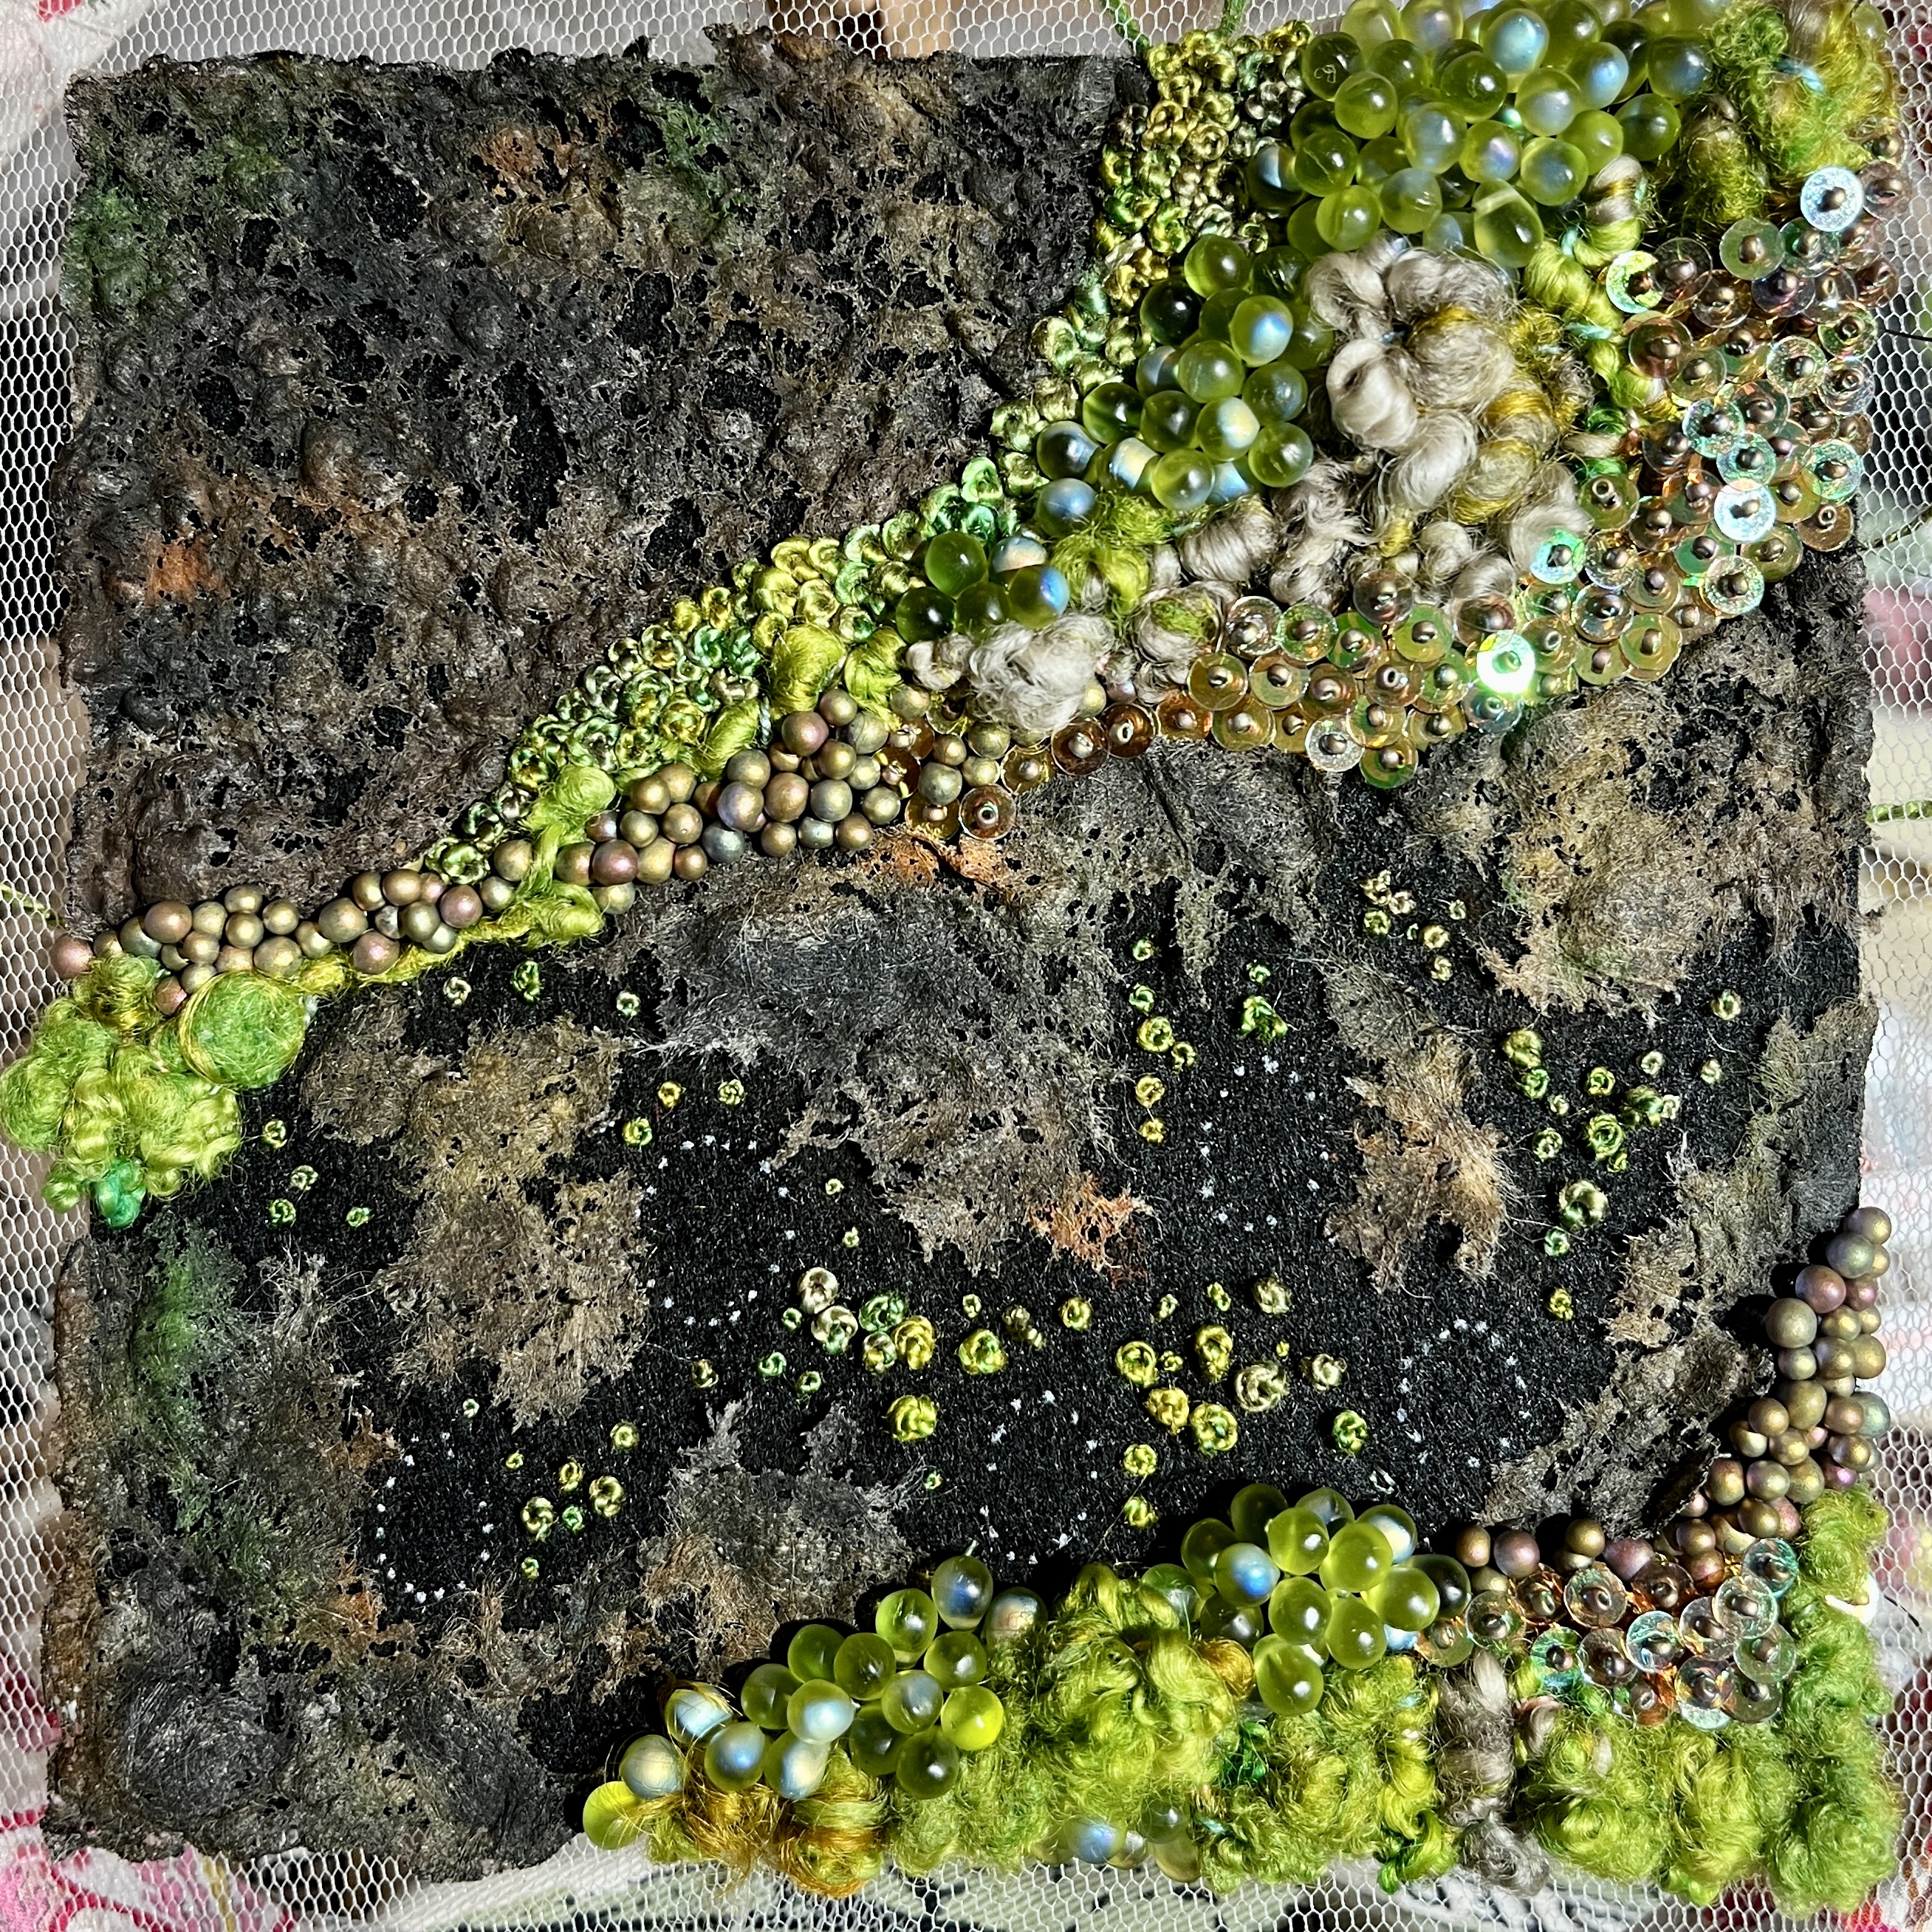
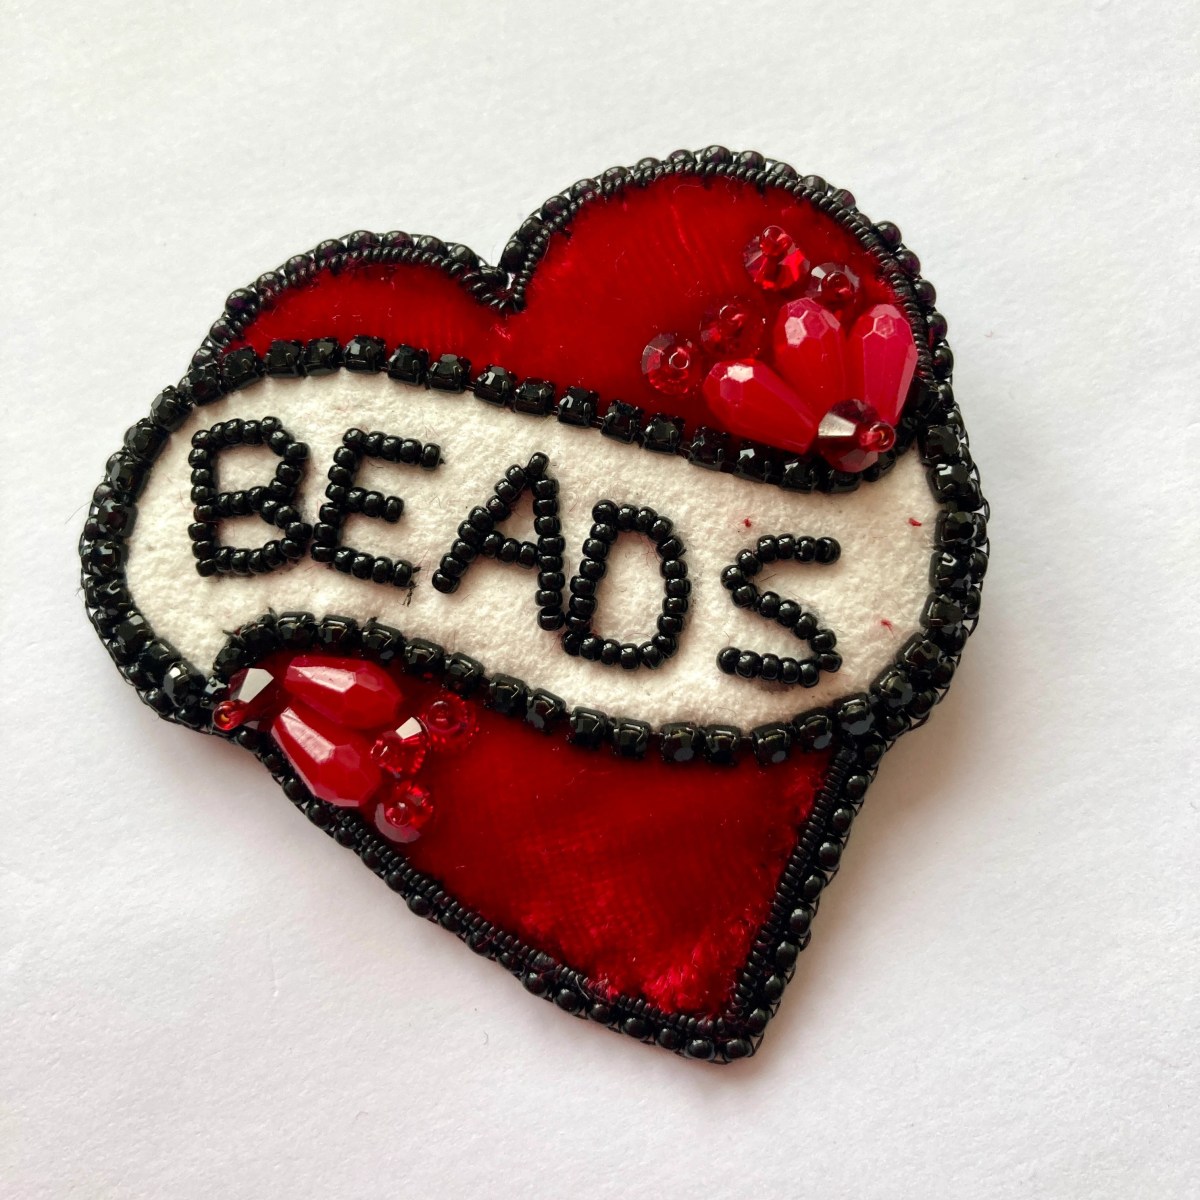
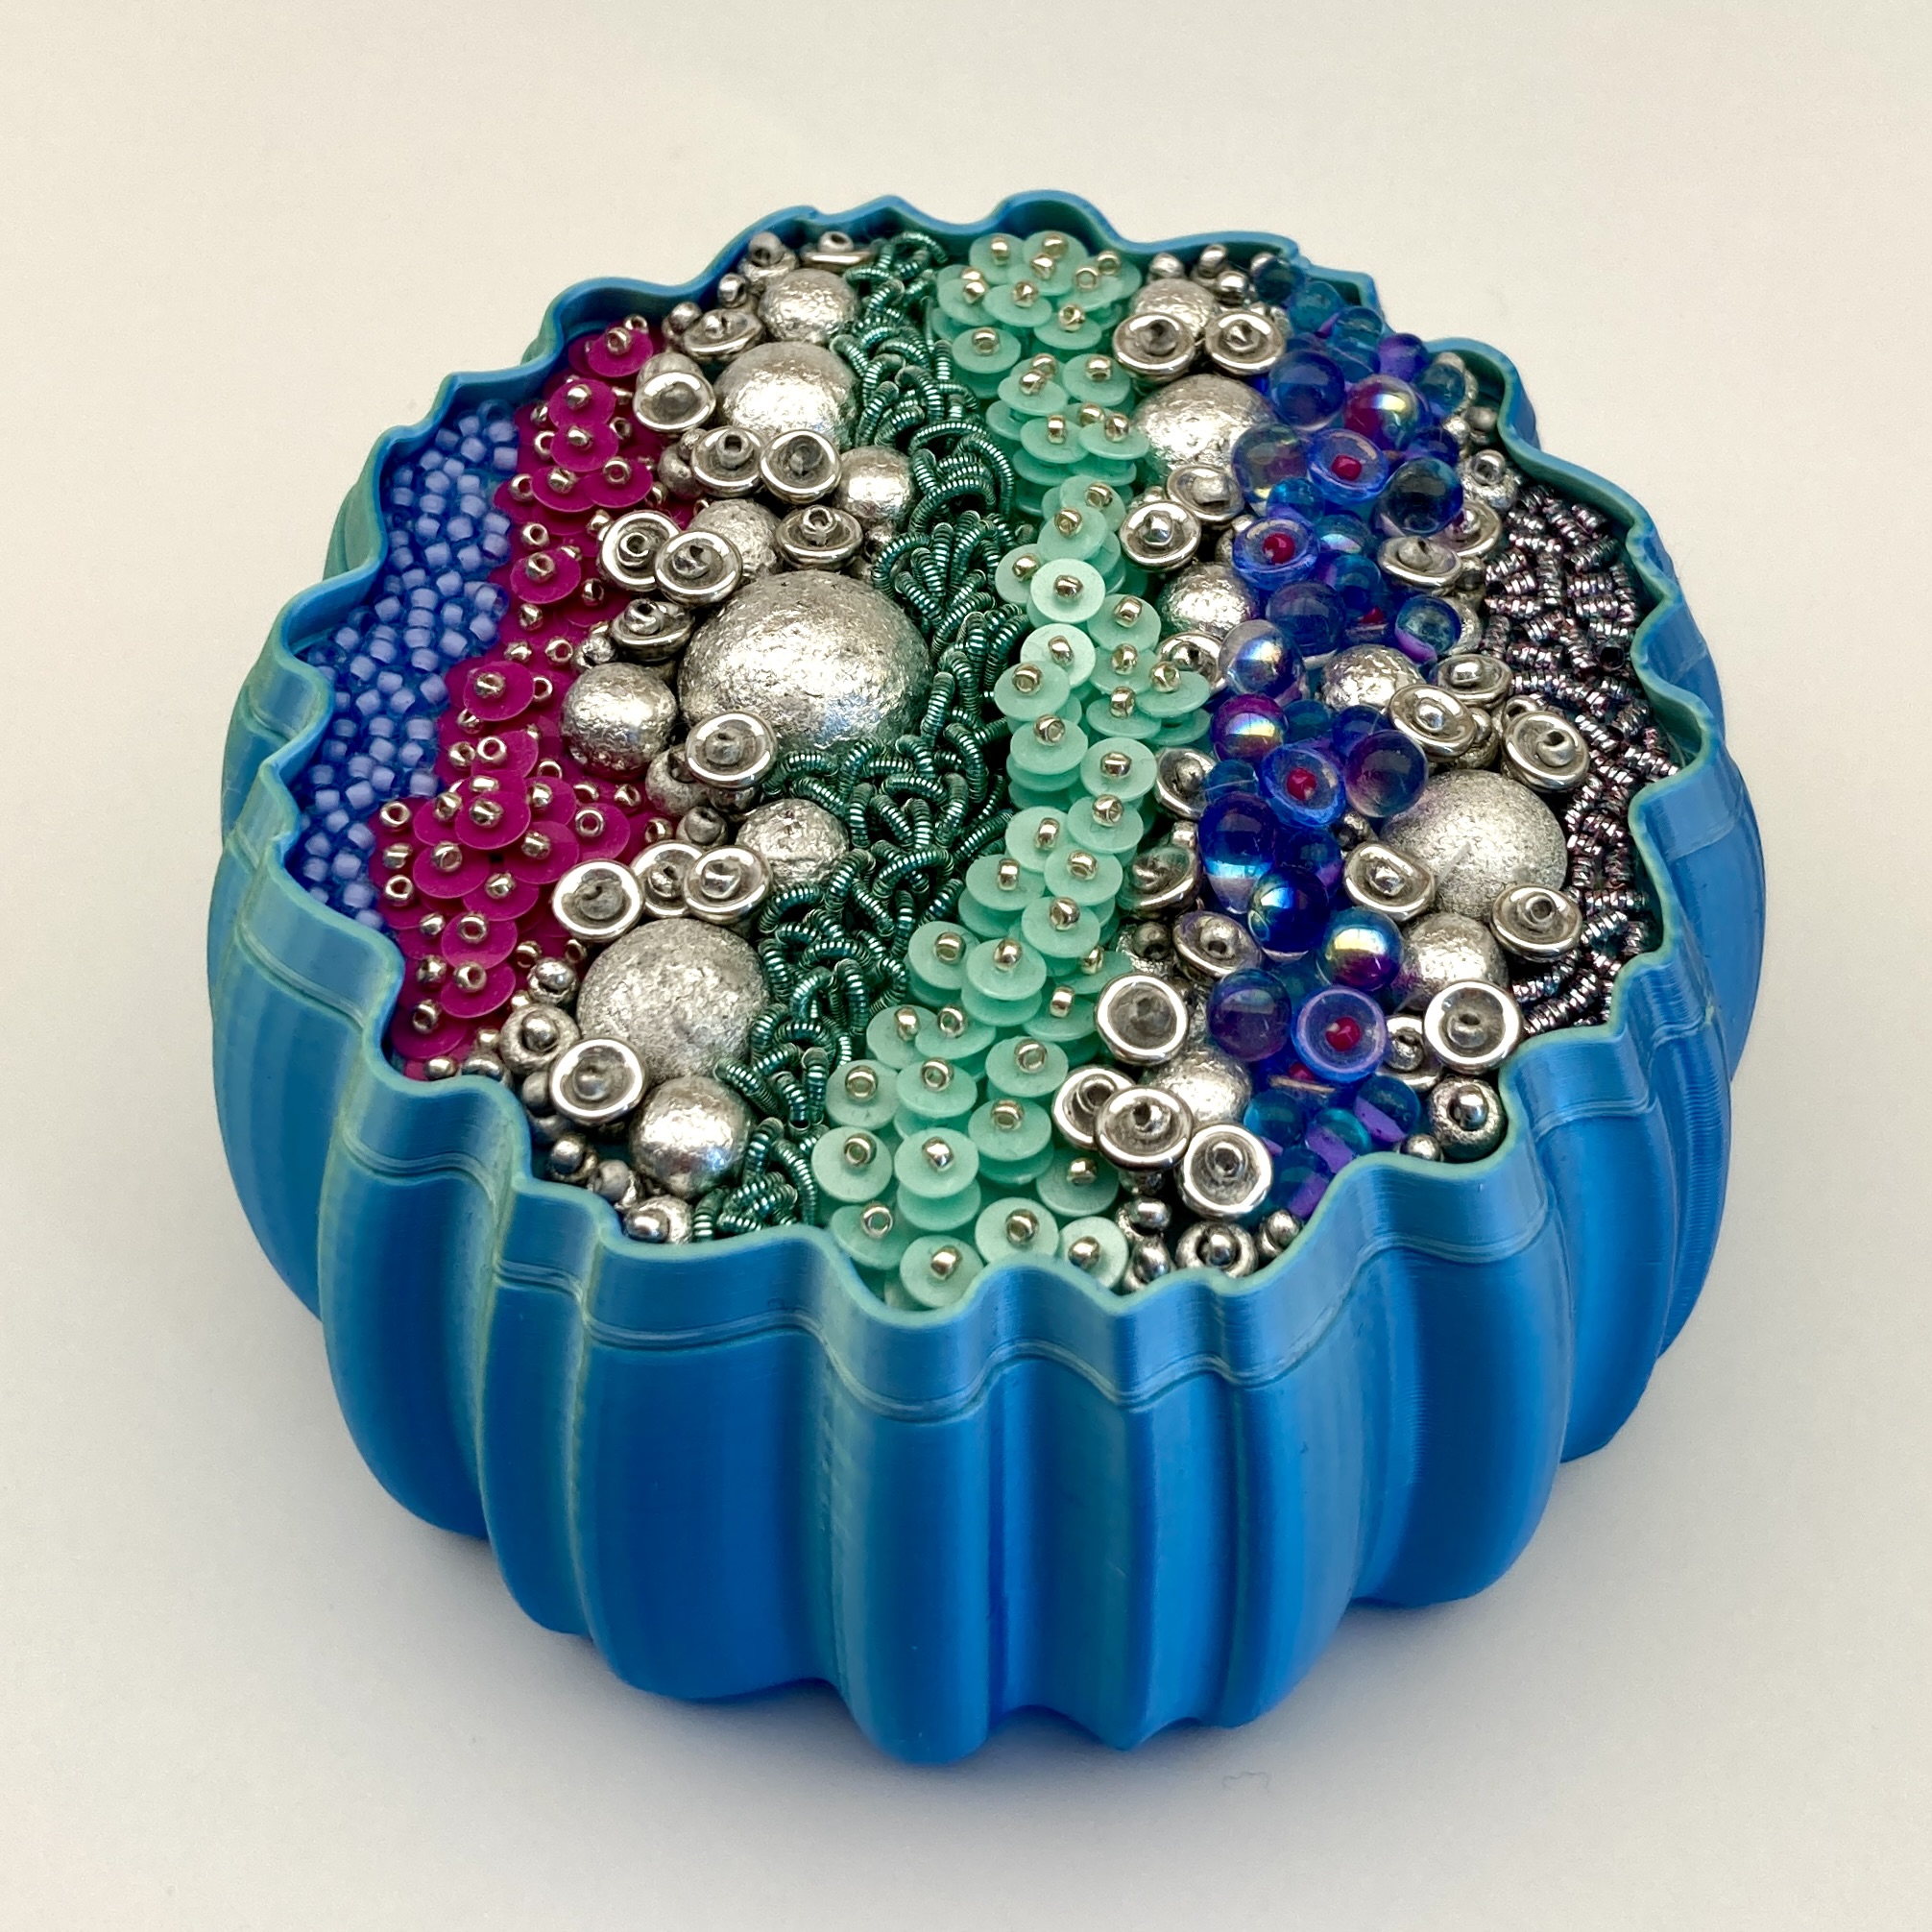
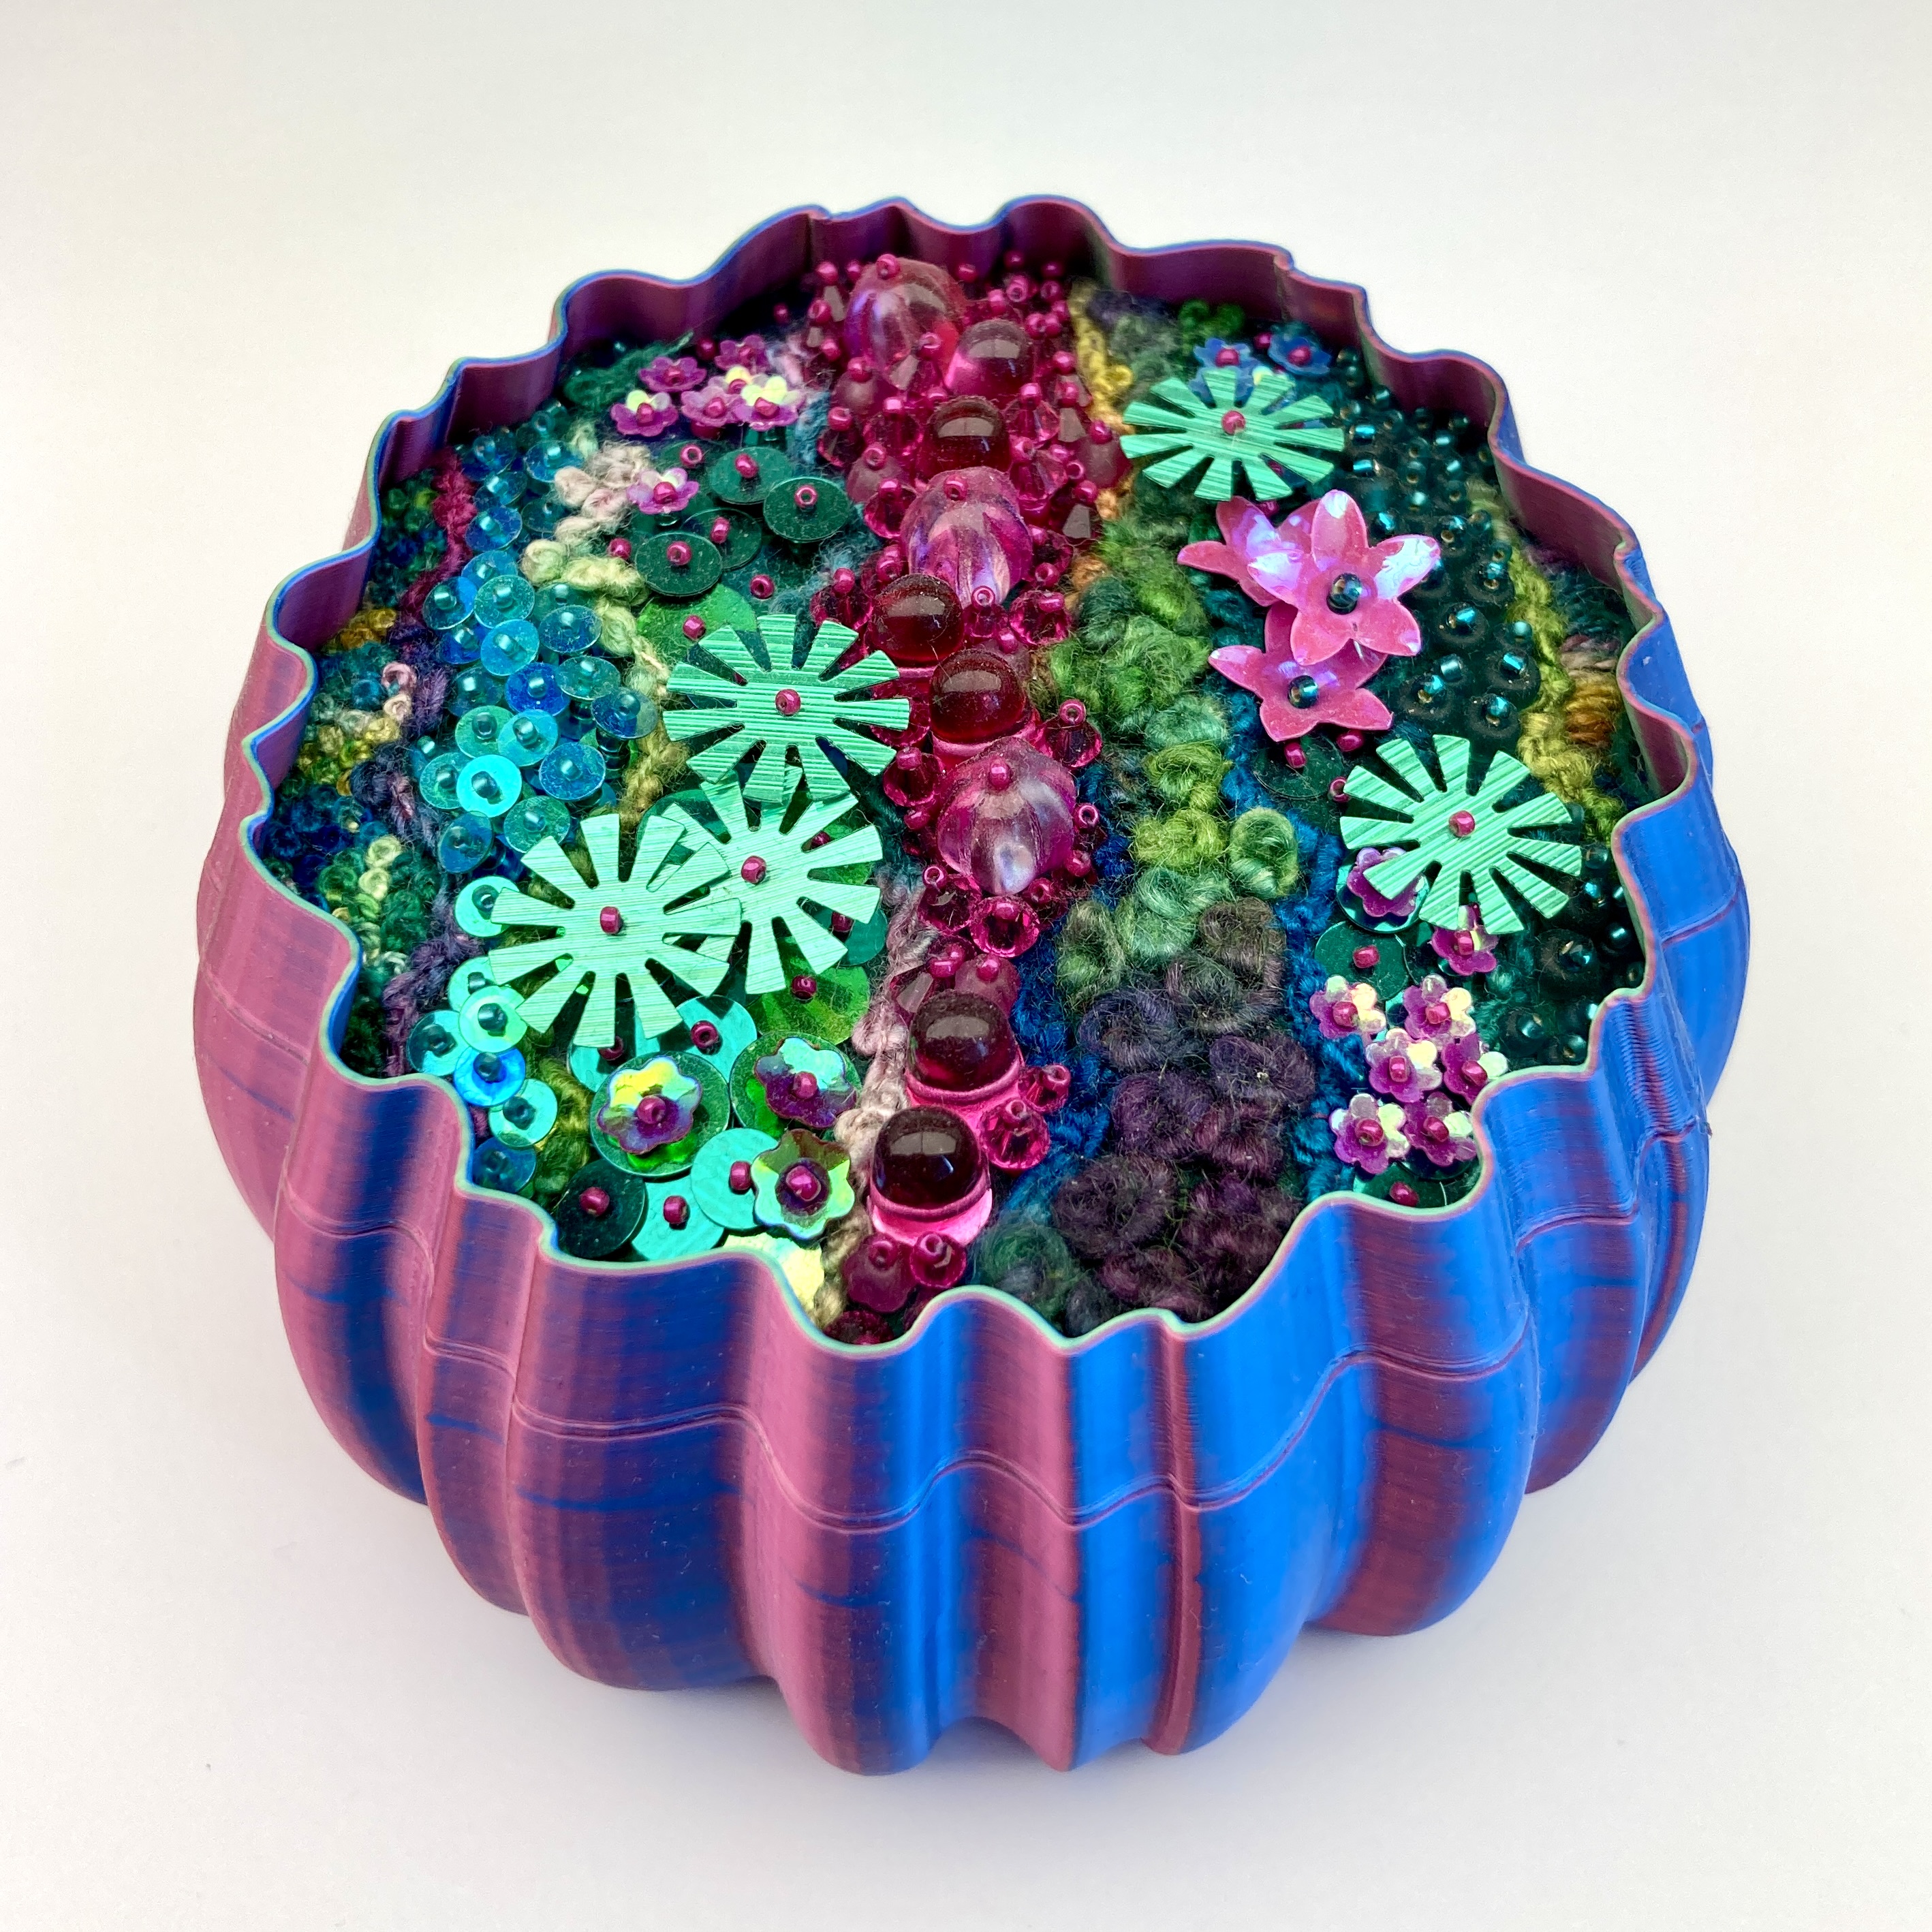
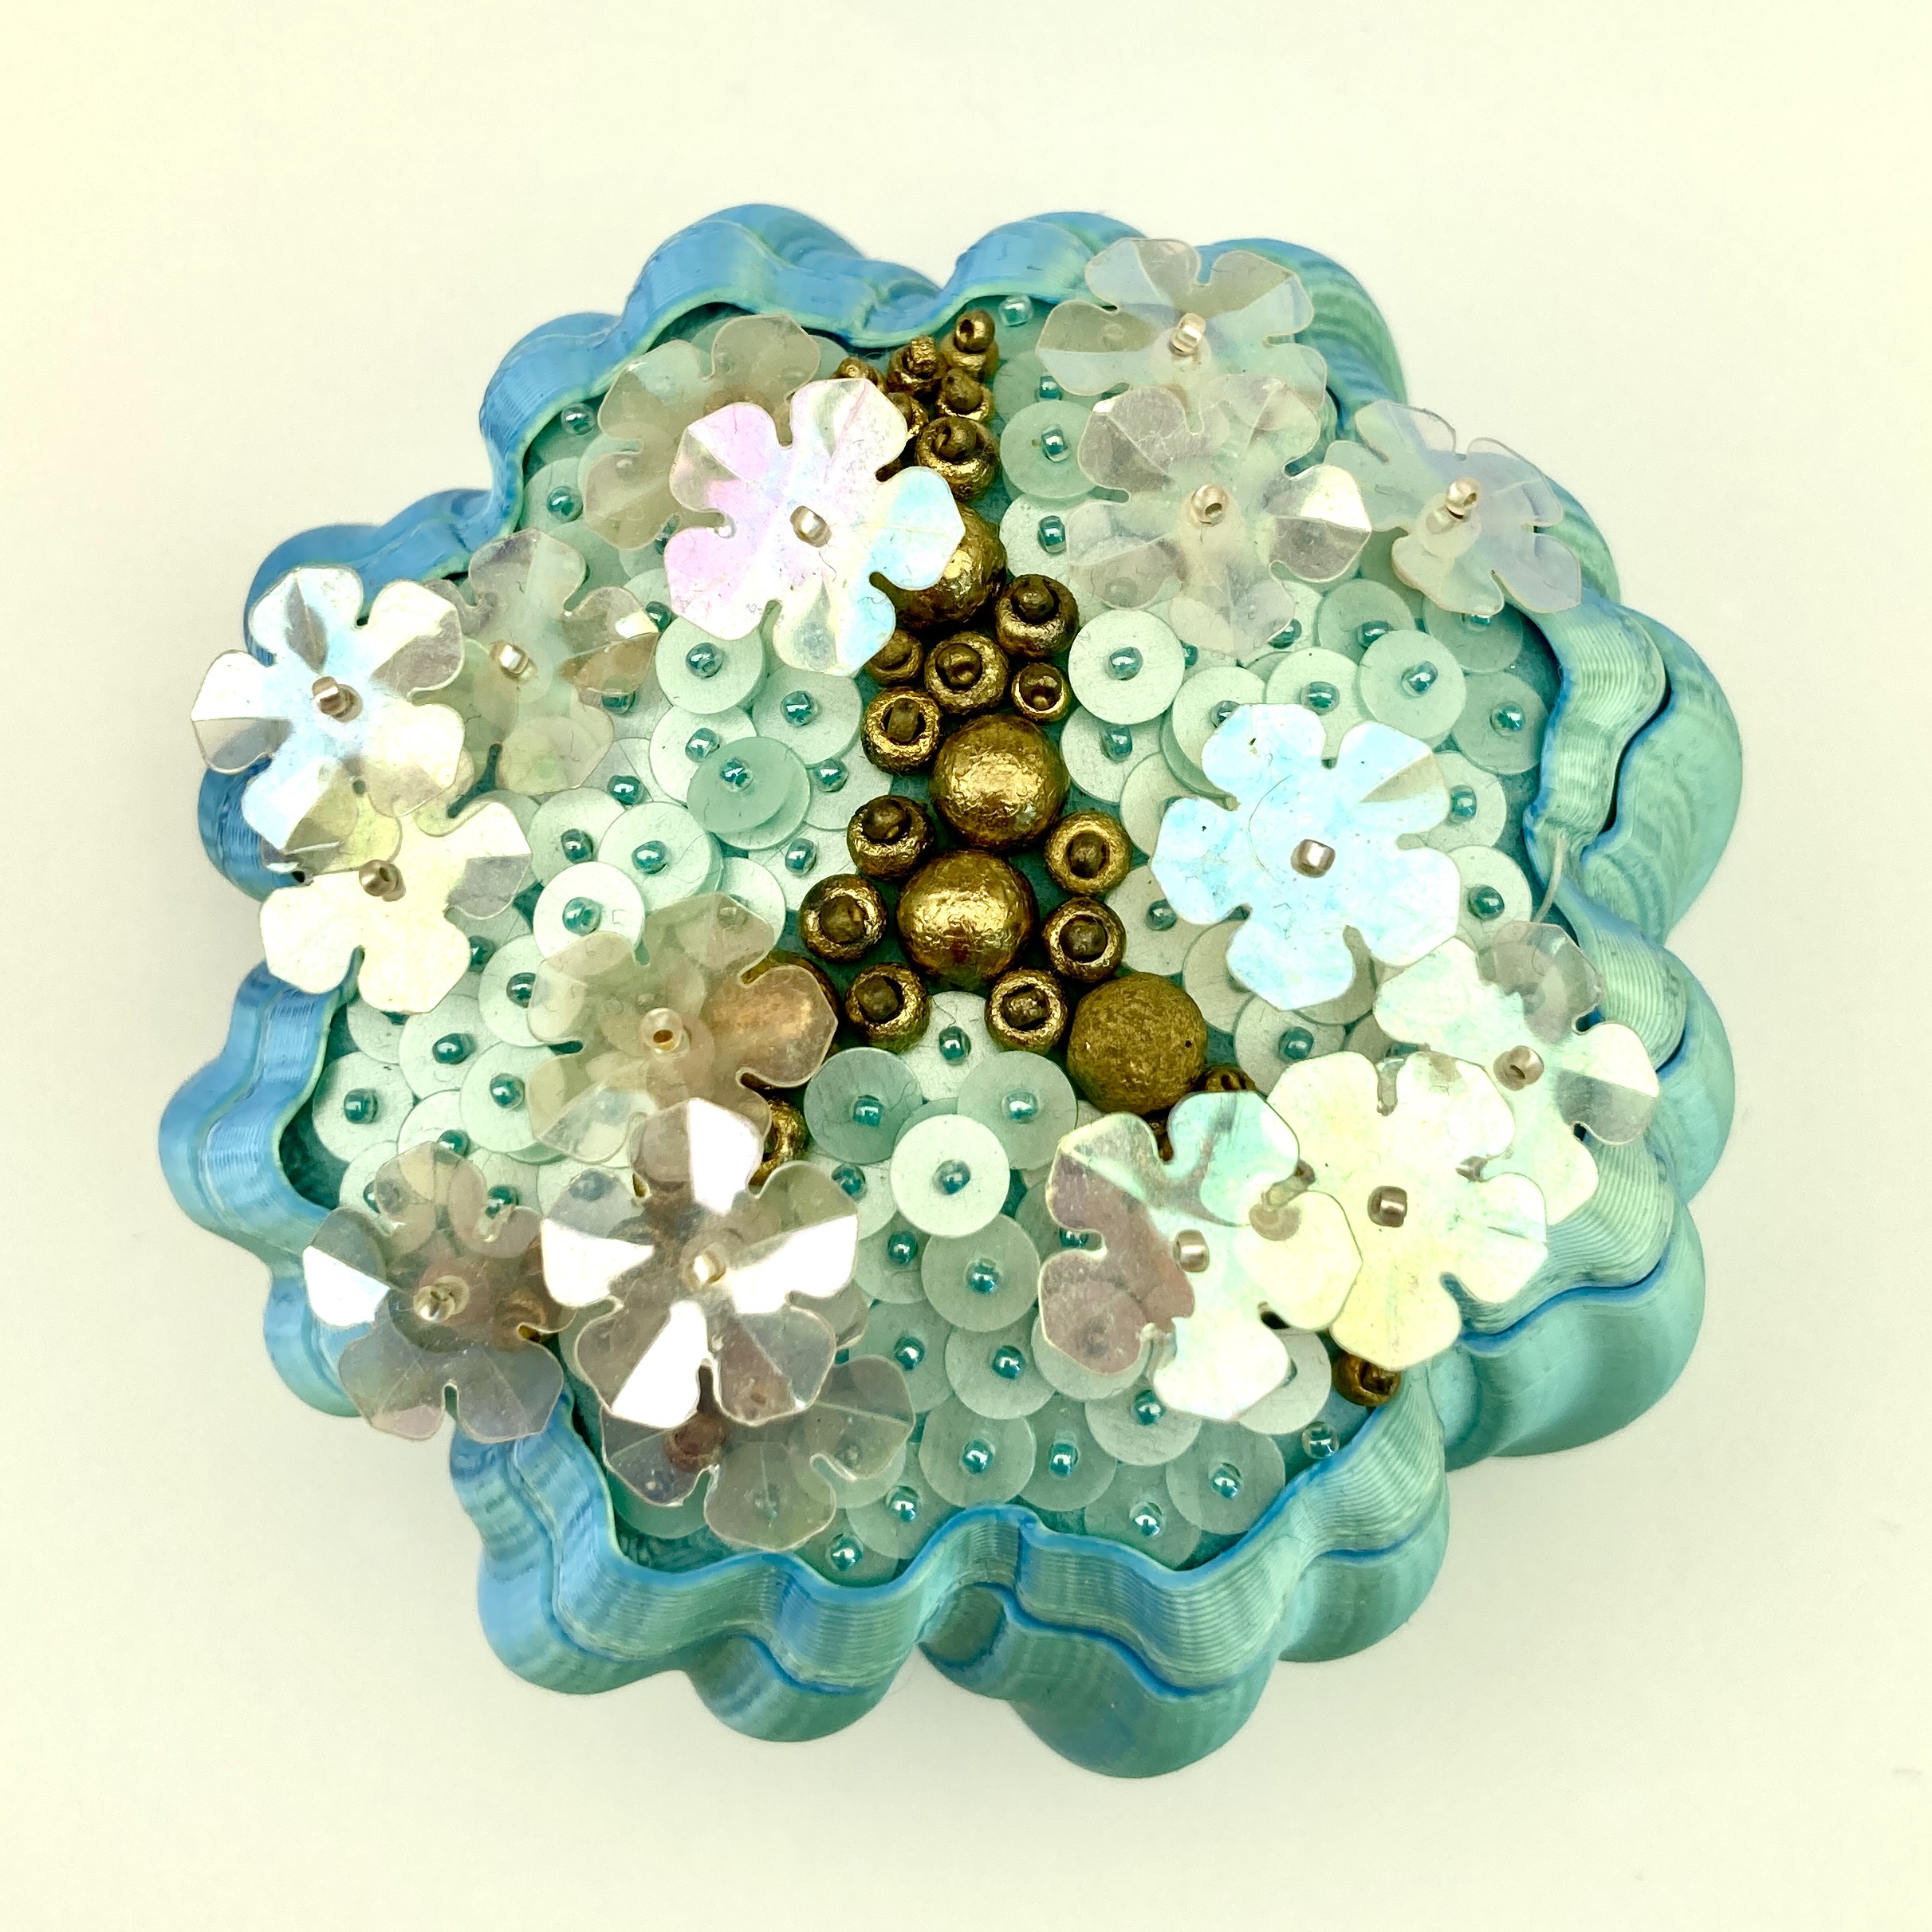
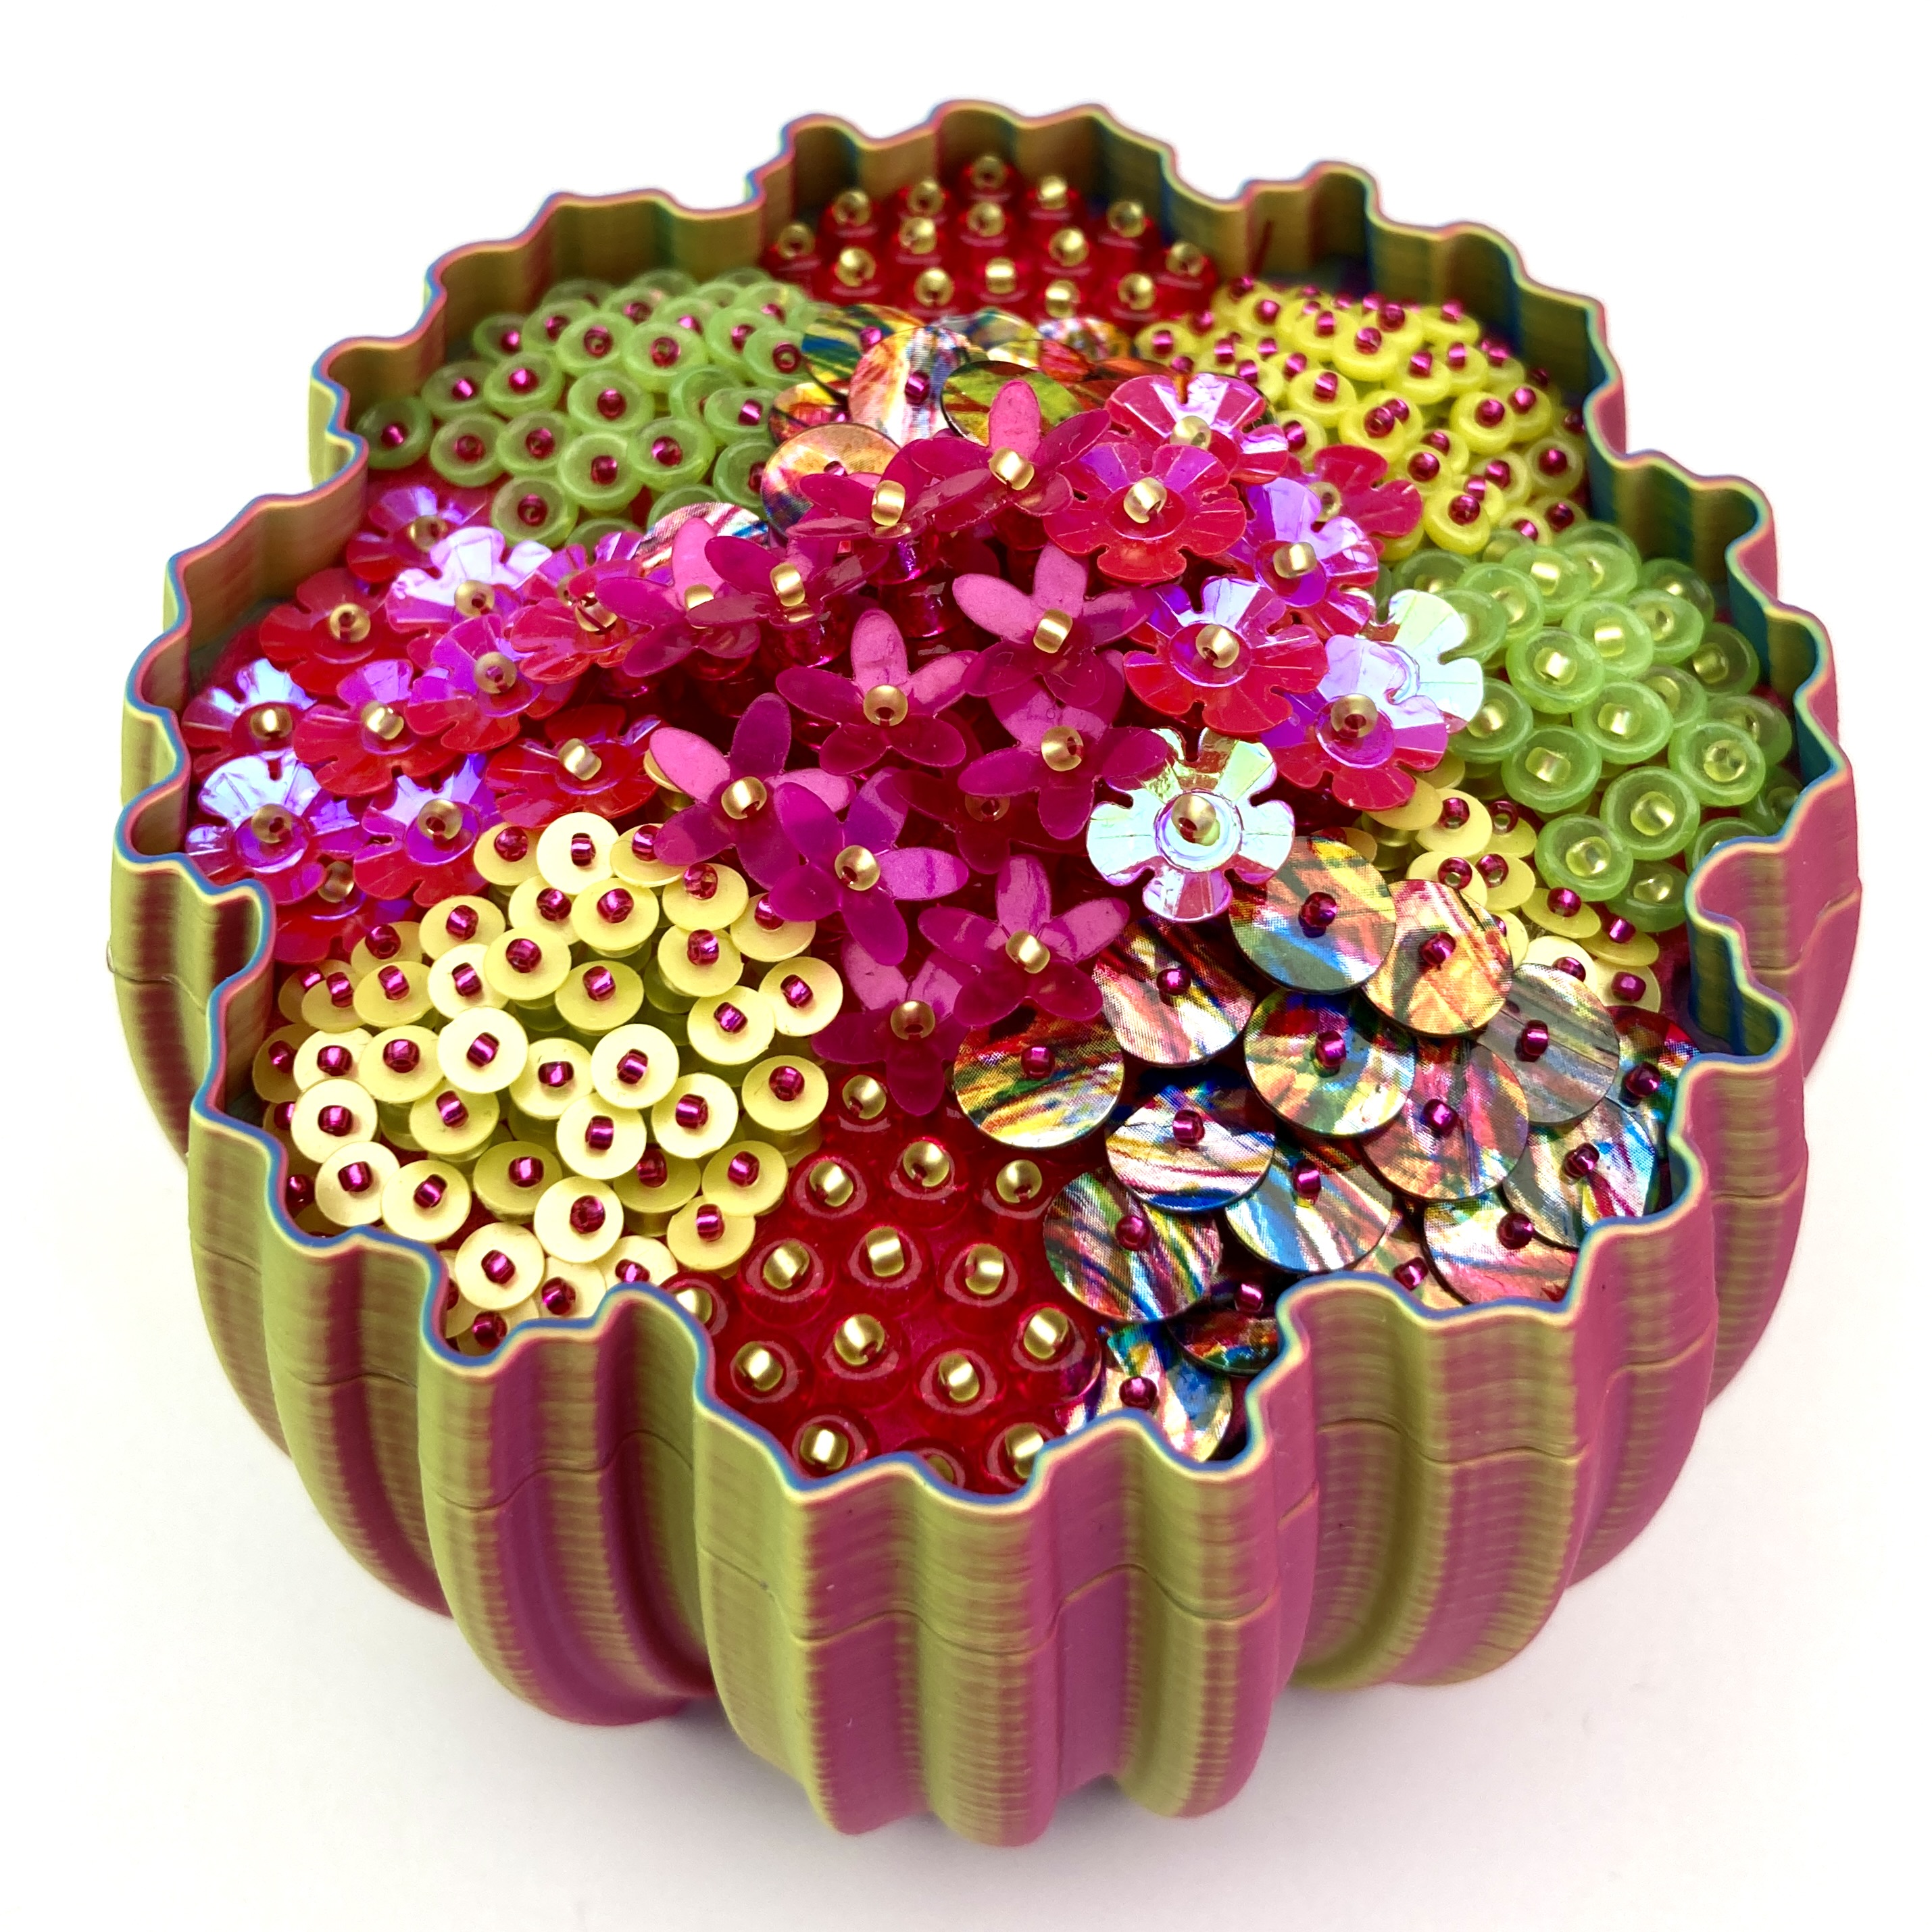
Once I had tried vase mode on other people’s designs I started designing my own pieces. The image above shows the first attempt with it’s beadwork ready to be put together.
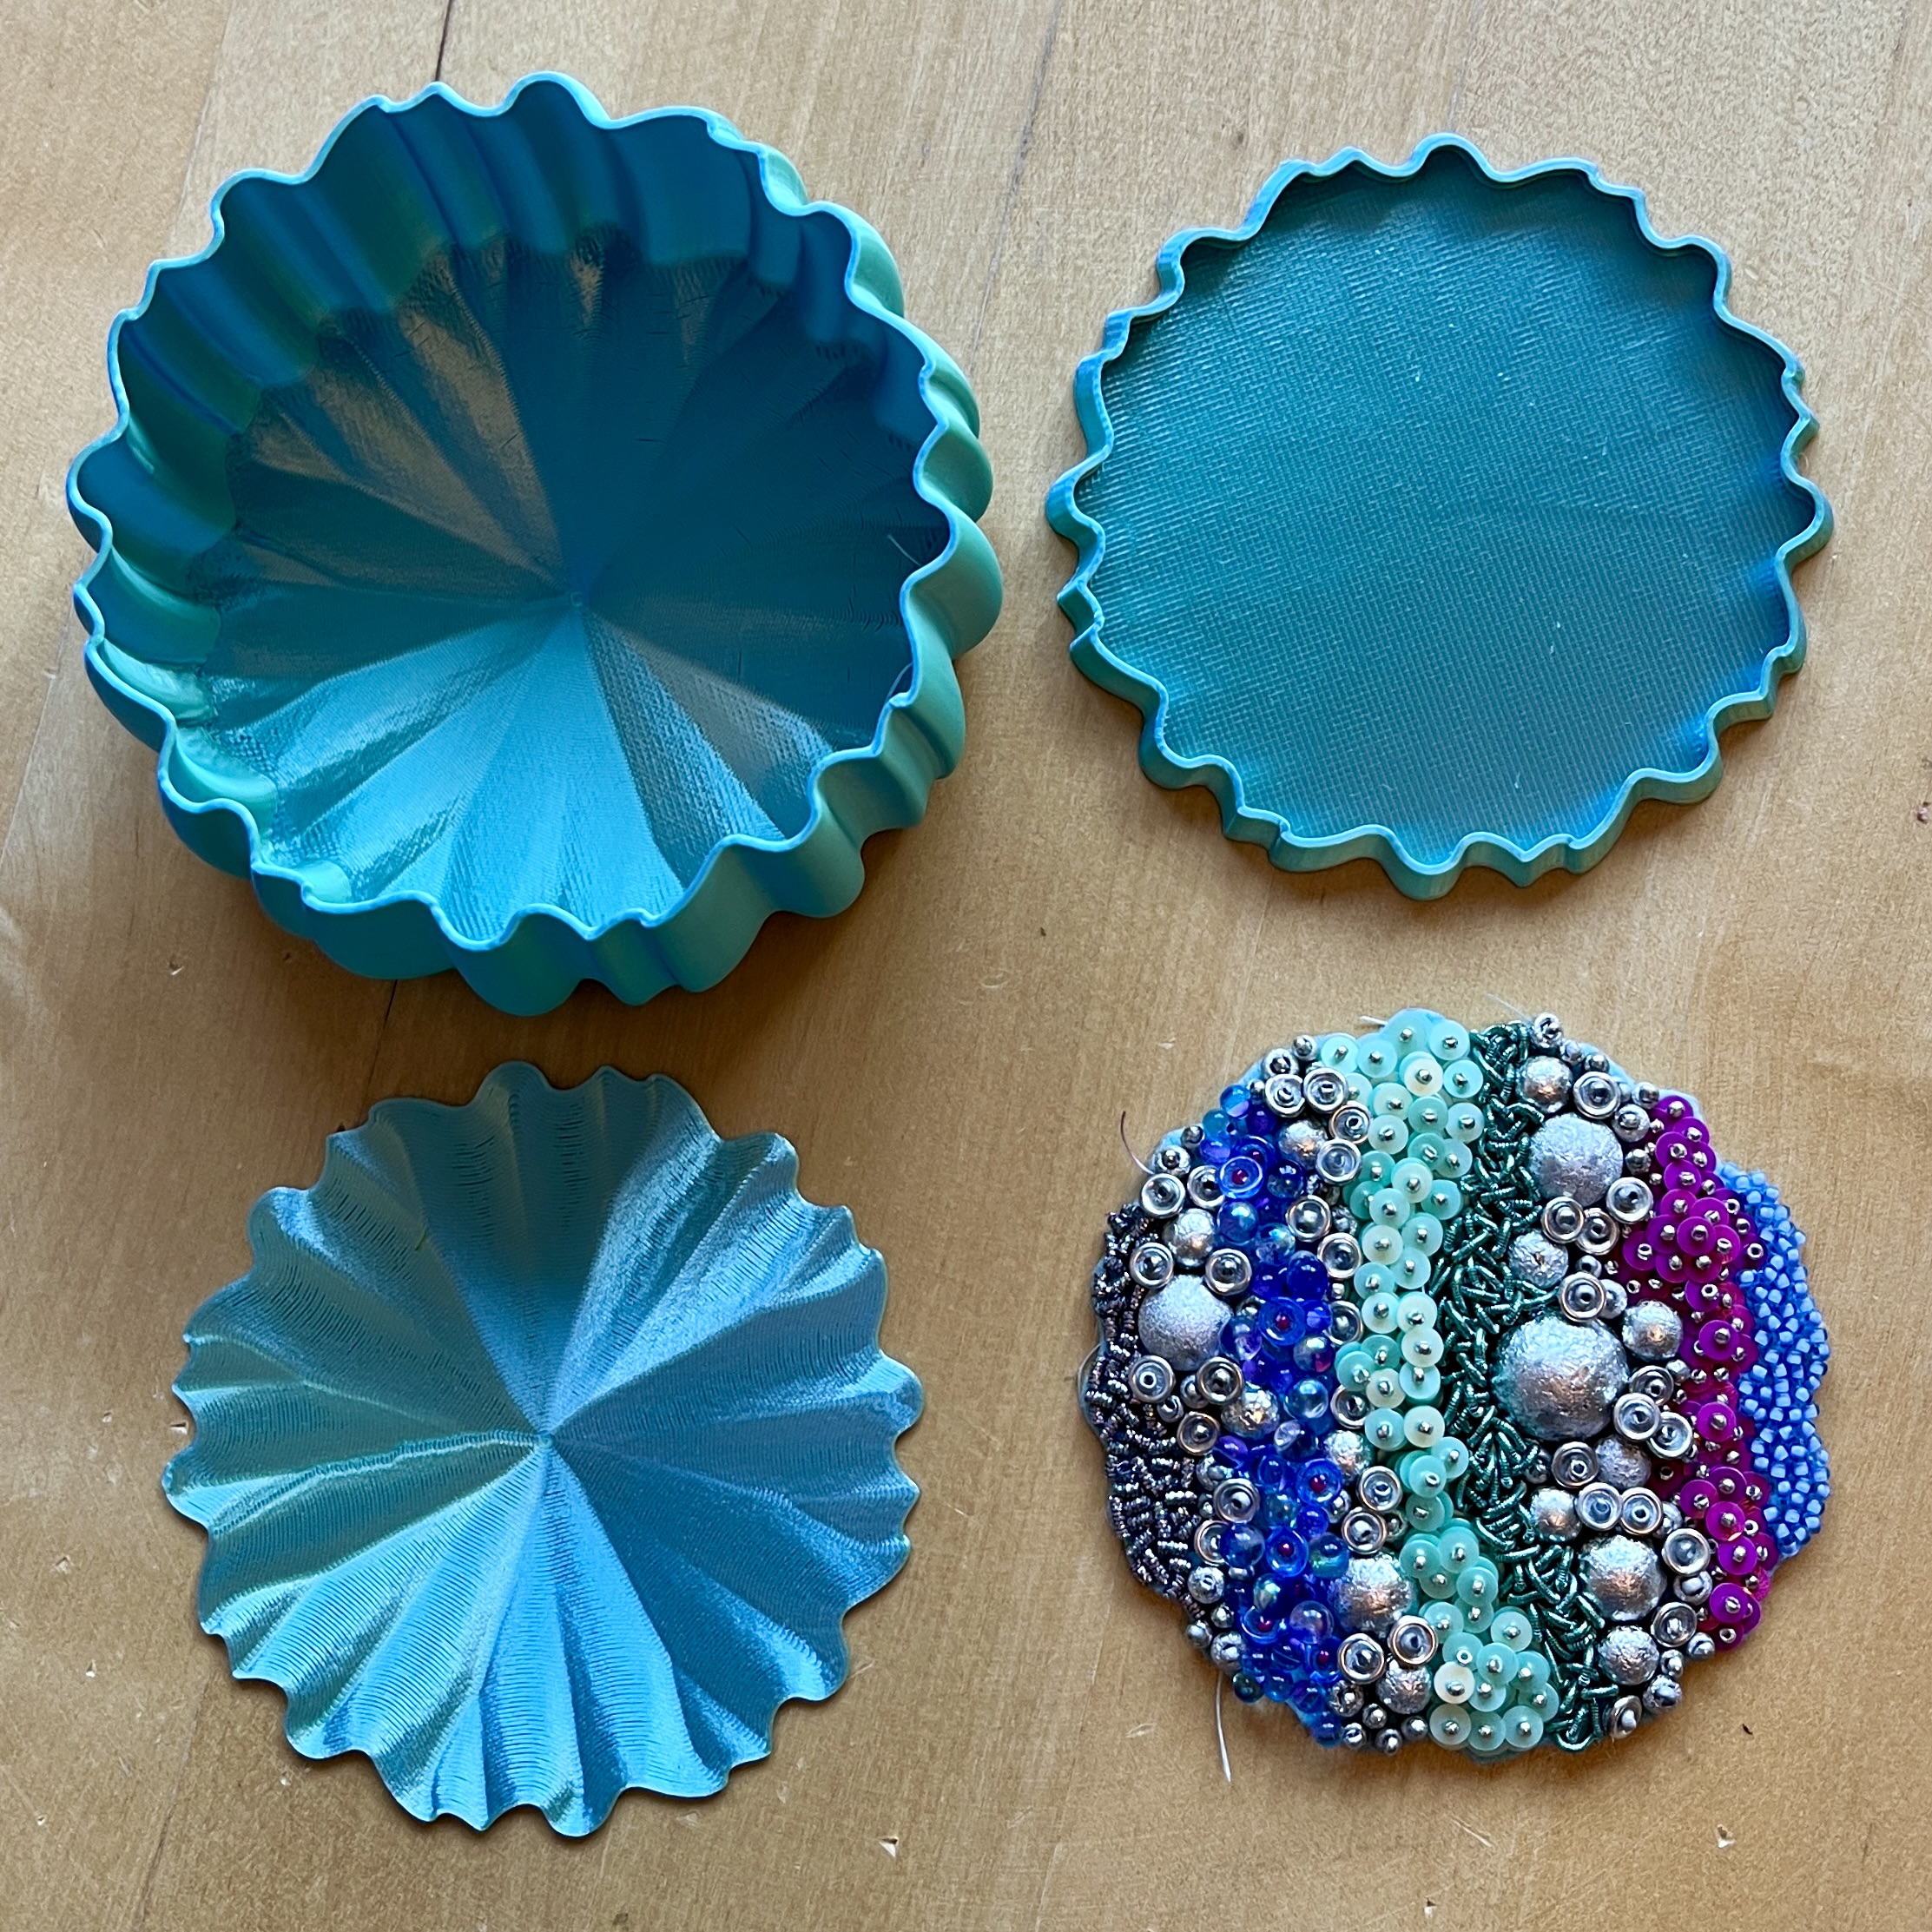
To get to that I used knowledge from drawing thread paths on 2D beadweaving diagrams to transfer to making 2D profiles of models with curves and repeating shapes. Then I learnt how to combine those to make 3D models for vases and pots, and then I worked out how to slice them up and make lidded boxes, and worked out how to make the lids stay on, and then I had a thing I’d been wanting for ages – a box with a lid which had a lip. That lip allowed me to sit a piece of bead embroidered hard felt into the lid, and to hide the edges instantly. No backing, no edging, no fuss. I do so many bead embroidered boxes, but the edges are always a dilema and a pain, so this was a pretty major breakthrough – the first time since my huge ocean inspired box that I’d had that lip to hide the edge and avoid the need to edge.
About this time I also discovered co-extruded filaments – the basic ingredient of 3D printing made interesting – instead of one colour, a duo or trio all printing at the same time, giving you different colours showing from different angles – absolutely gorgeous!
The printer is a basic one, which is fine – we have to learn properly and actually understand what we’re doing. We only work in PLA – a biodegradable thermoplastic which is great for more eco-friendly and family friendly 3D printing – made from fermented plant starch like corn, cassava, sugarcane or sugar beet pulp, and many of the filaments I use also contain recycled PLA elements.
The printer has off days, as do the filaments, and whilst 3D printing is in many ways amazing, it’s constrained by simple rules and if you try to push them it doesn’t always work. So it’s taken a while to go from the first vase mode piece I designed to a box, and then on from there to boxes that both look as I’d like and print well. Early prototypes had shallow curves at the base which rippled, an attempt to add a twist was lovely but took me away from the intent, which was to take inspiration from giant waterlily pads and buds. 7 early prototypes came, were beaded, and morphed into the next version. And it got exciting, and people liked them, so I started thinking about making them to sell, and perhaps even doing some beading kits to introduce more people to my style of bead embroidery.
Finally I got to a shape that really worked, so more prints, and I got to an embroidery design which felt right, which I refined into some repeatable kits, so more samples.
But the itterative design continued – the great thing about 3D printing is that you can keep tweaking – I’d beaded a sample in every size before I acknowledged that the lip was too high, the beads needed to dome above the edges, not sit below it, so I made one final change to get to the end design. But that’s fine, that’s what iterrative design is for, and I’m keeping the samples for me anyway.
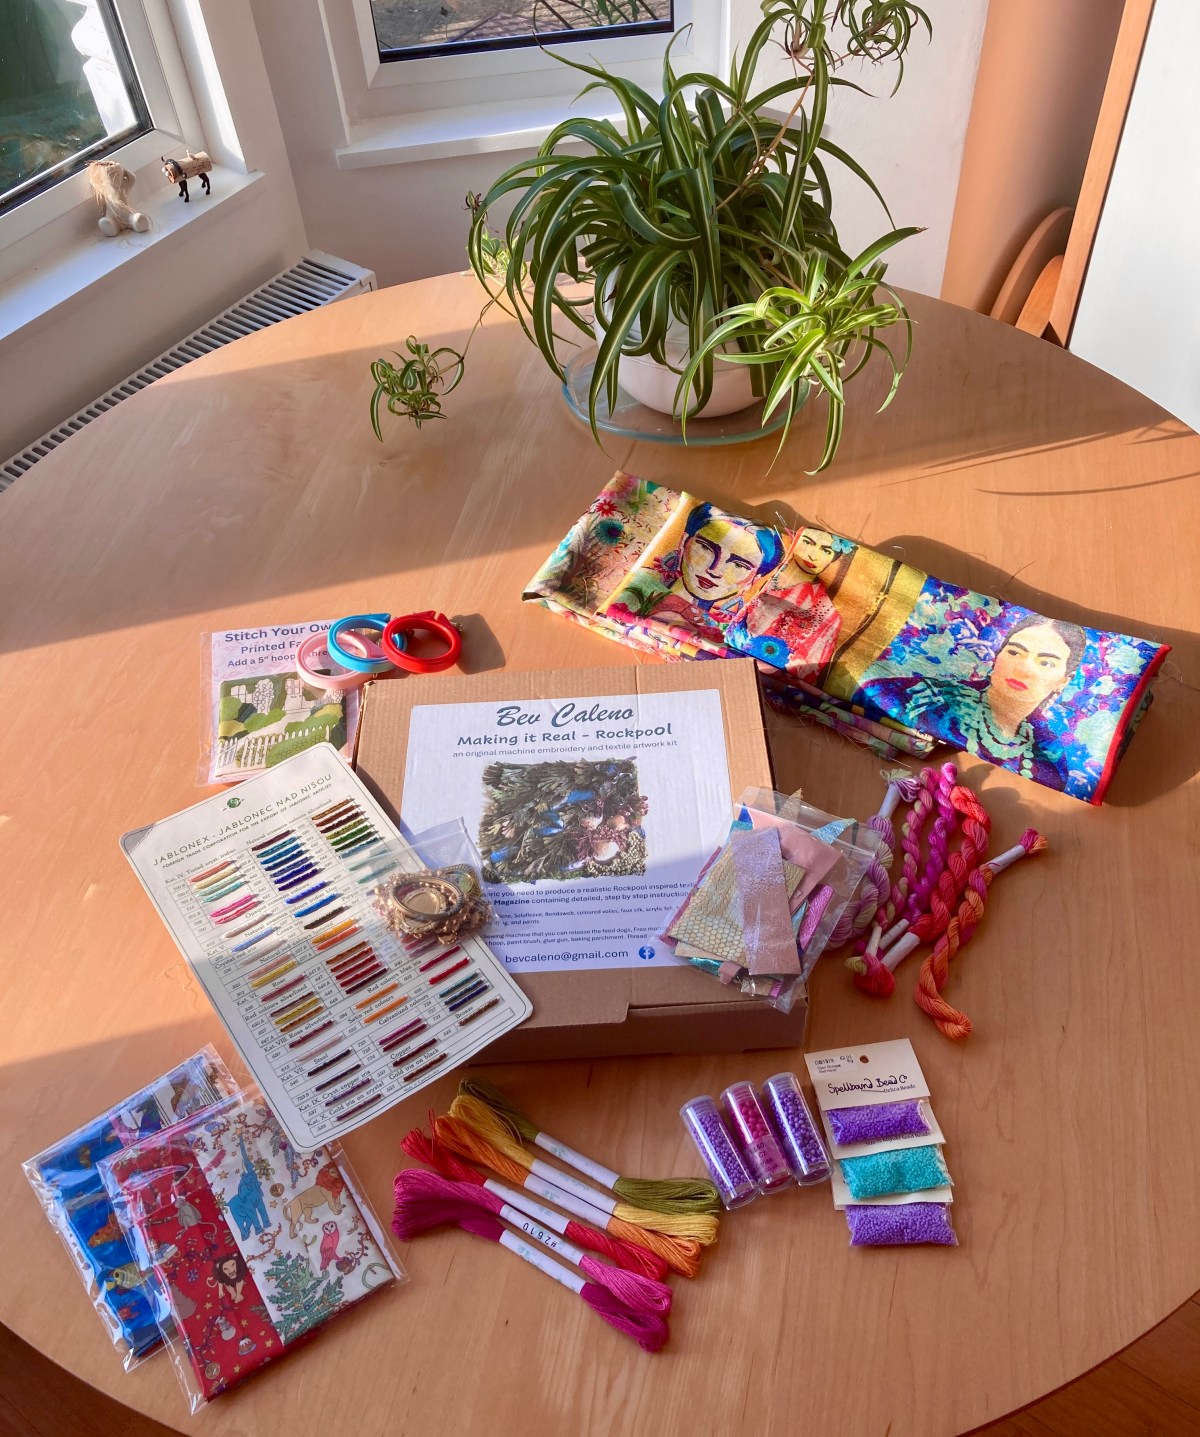
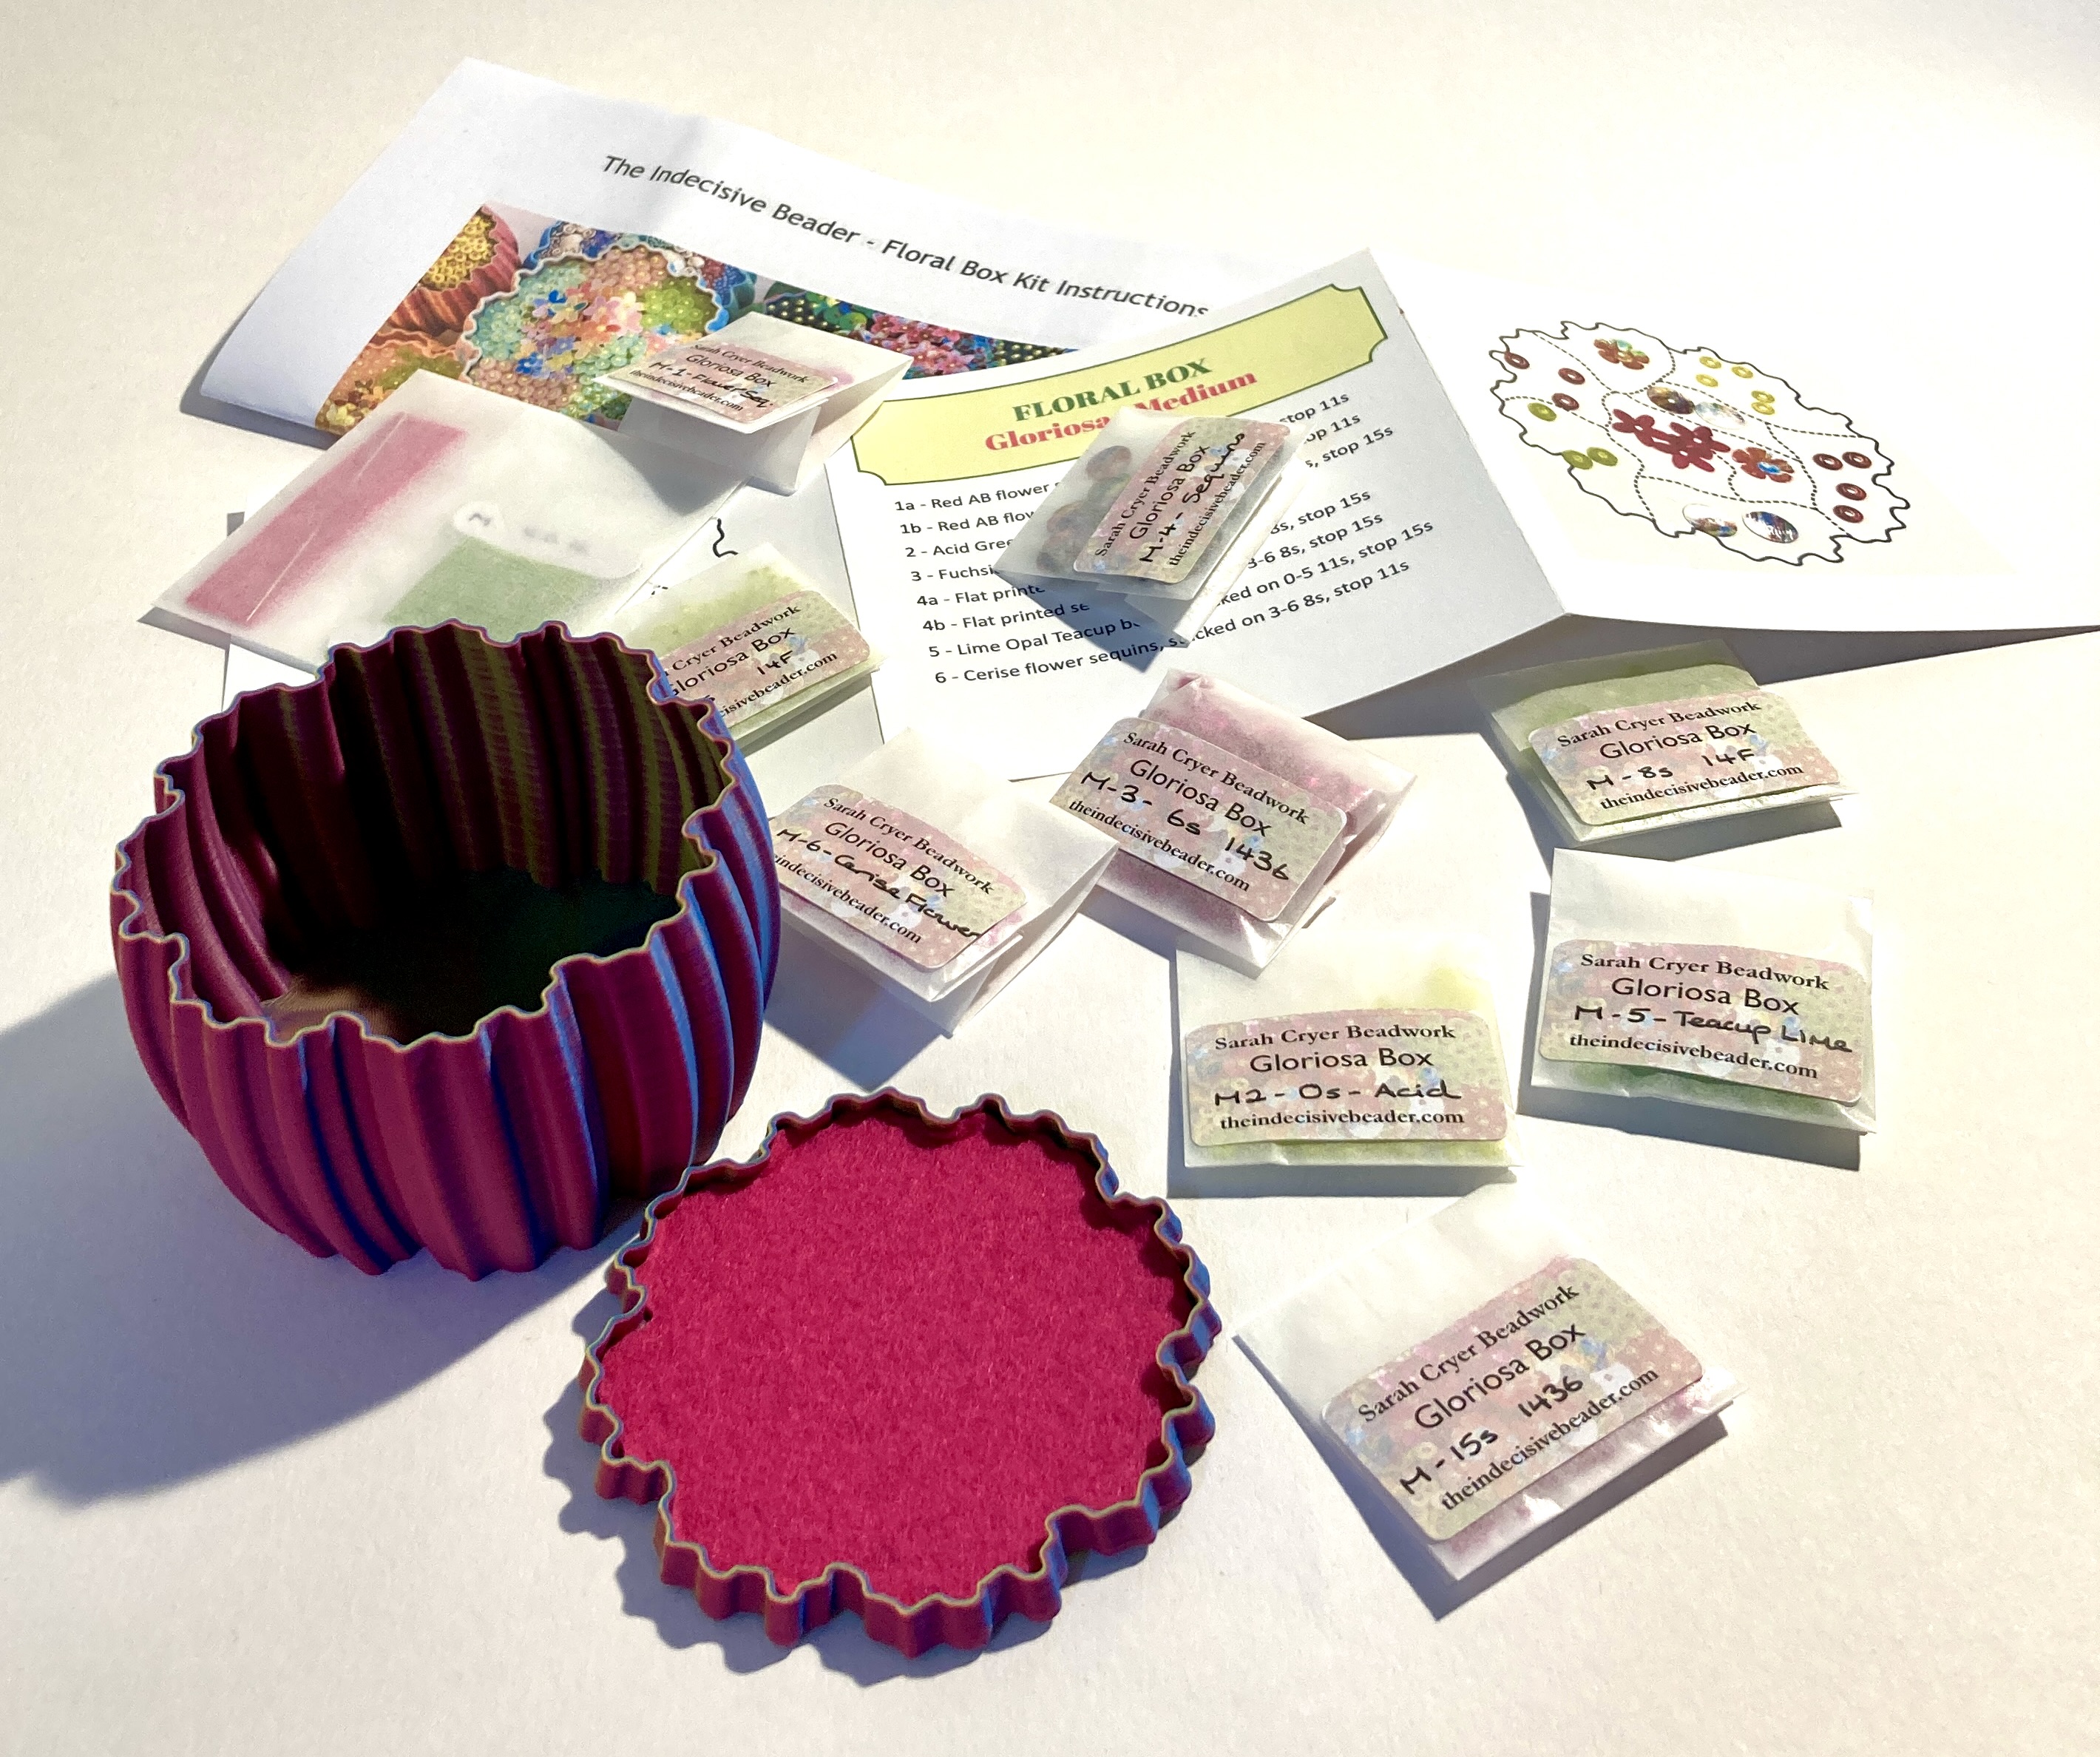
So that left me about a month ago with the final design for both box and beadwork, but with 5 colourways to refine and document, which I did patiently with notebook and scales and a spreadsheet. Then the bit which can be a little wearing – time to source enough beads & sequins to make one in each size and colour, and make sure I had enough boxes printed for that and to have some to sell separately.
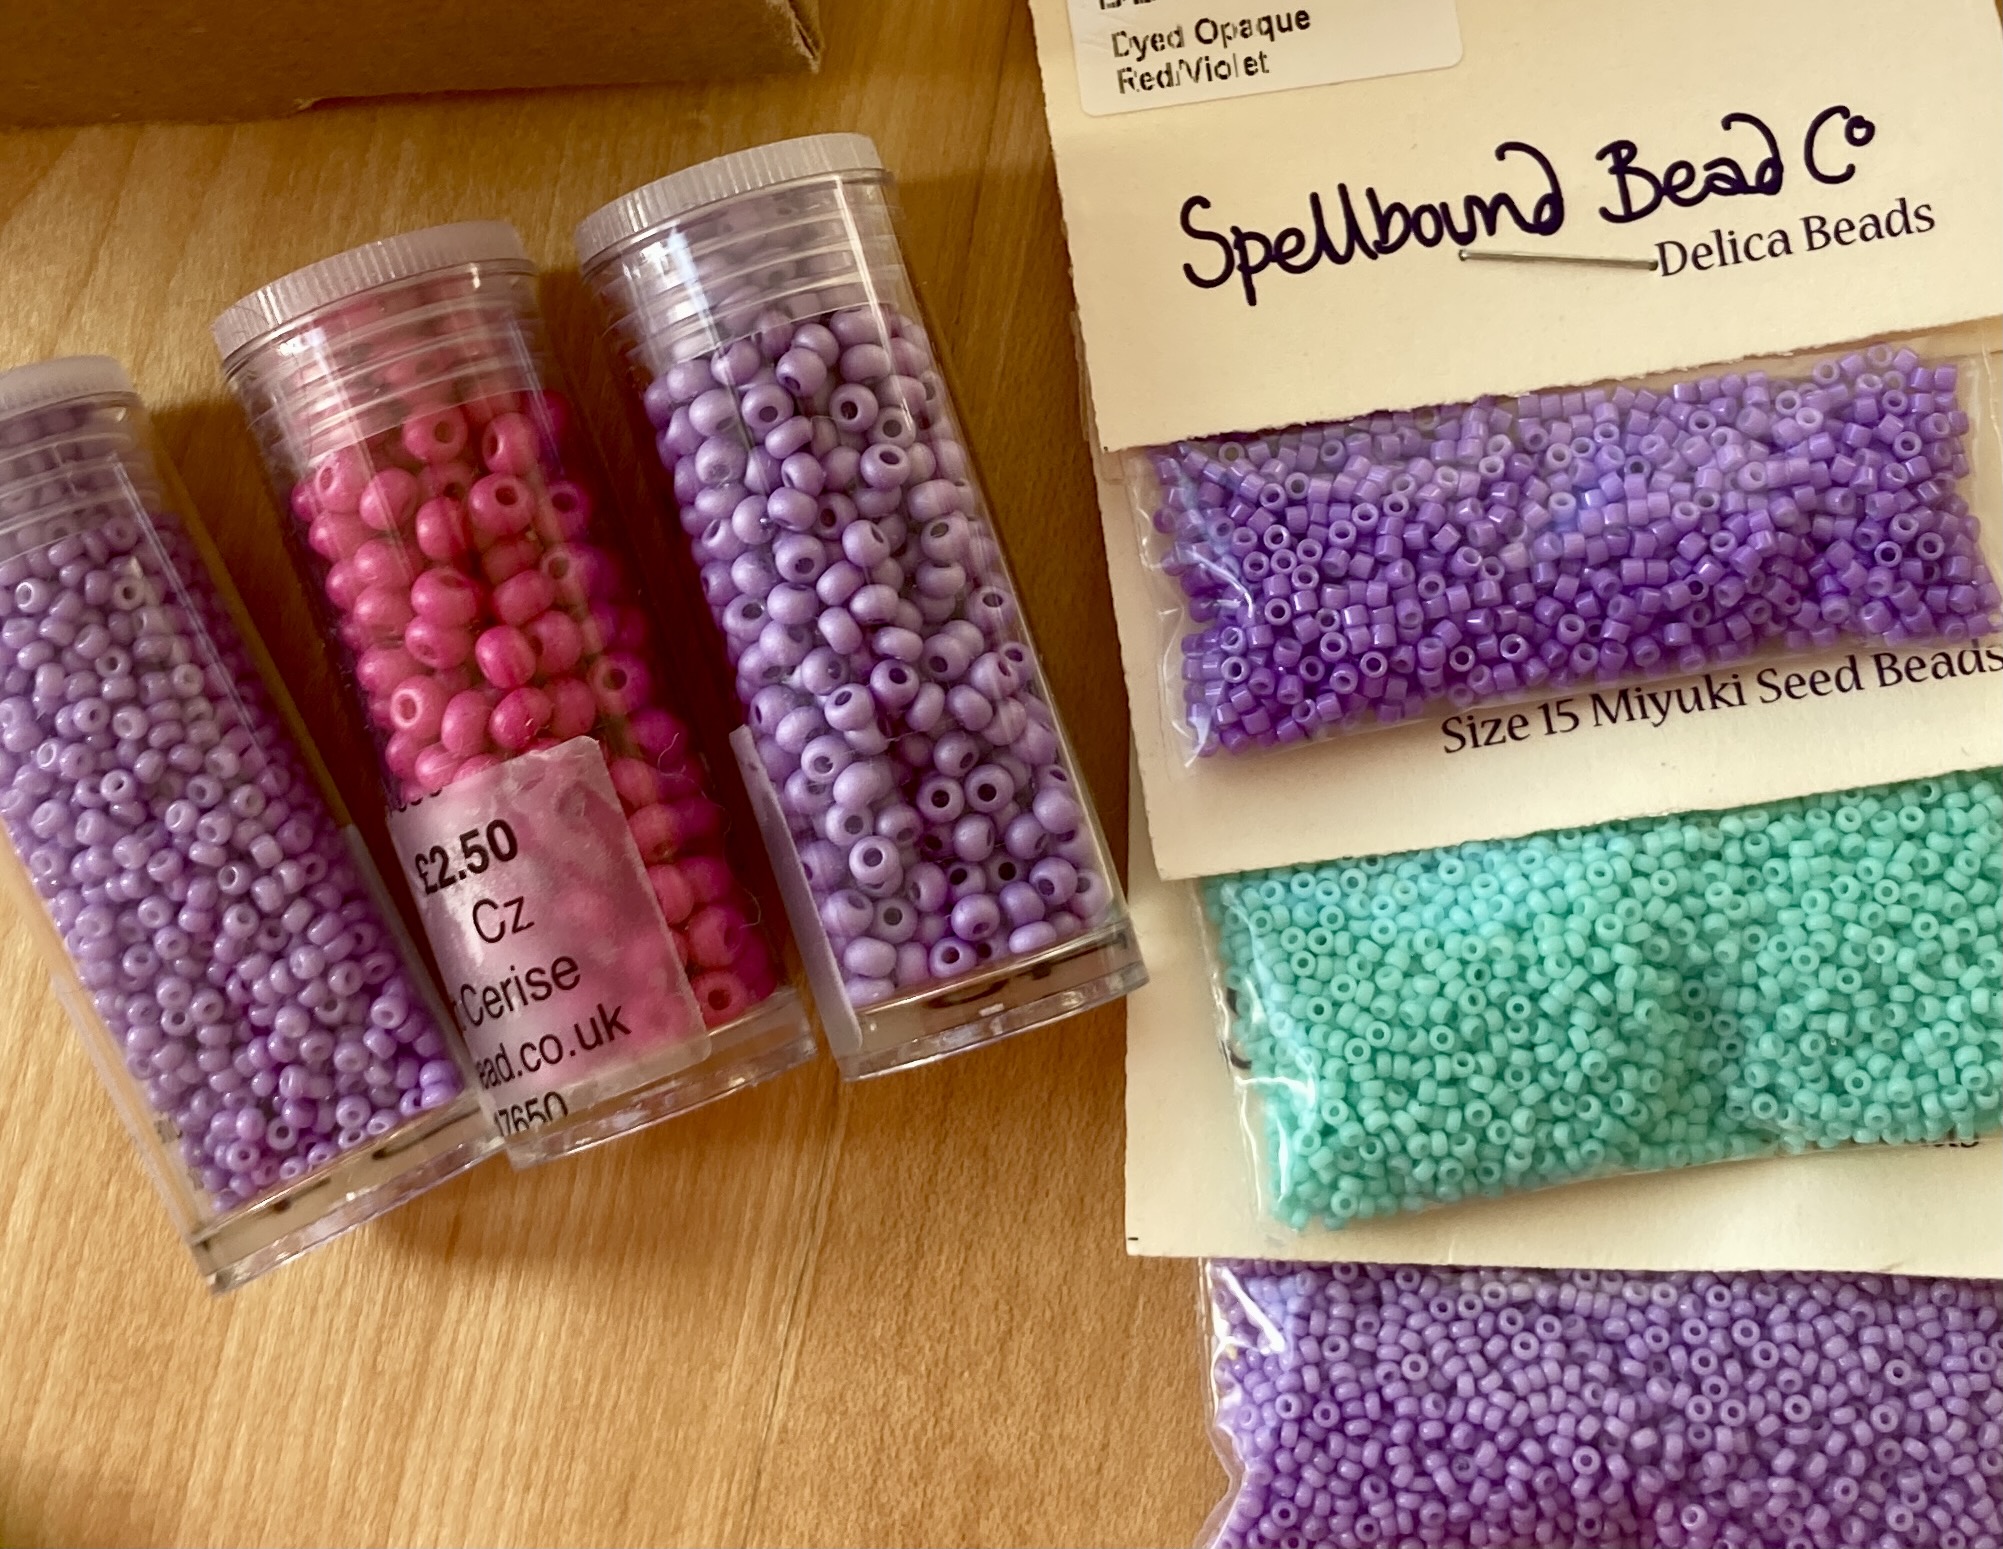
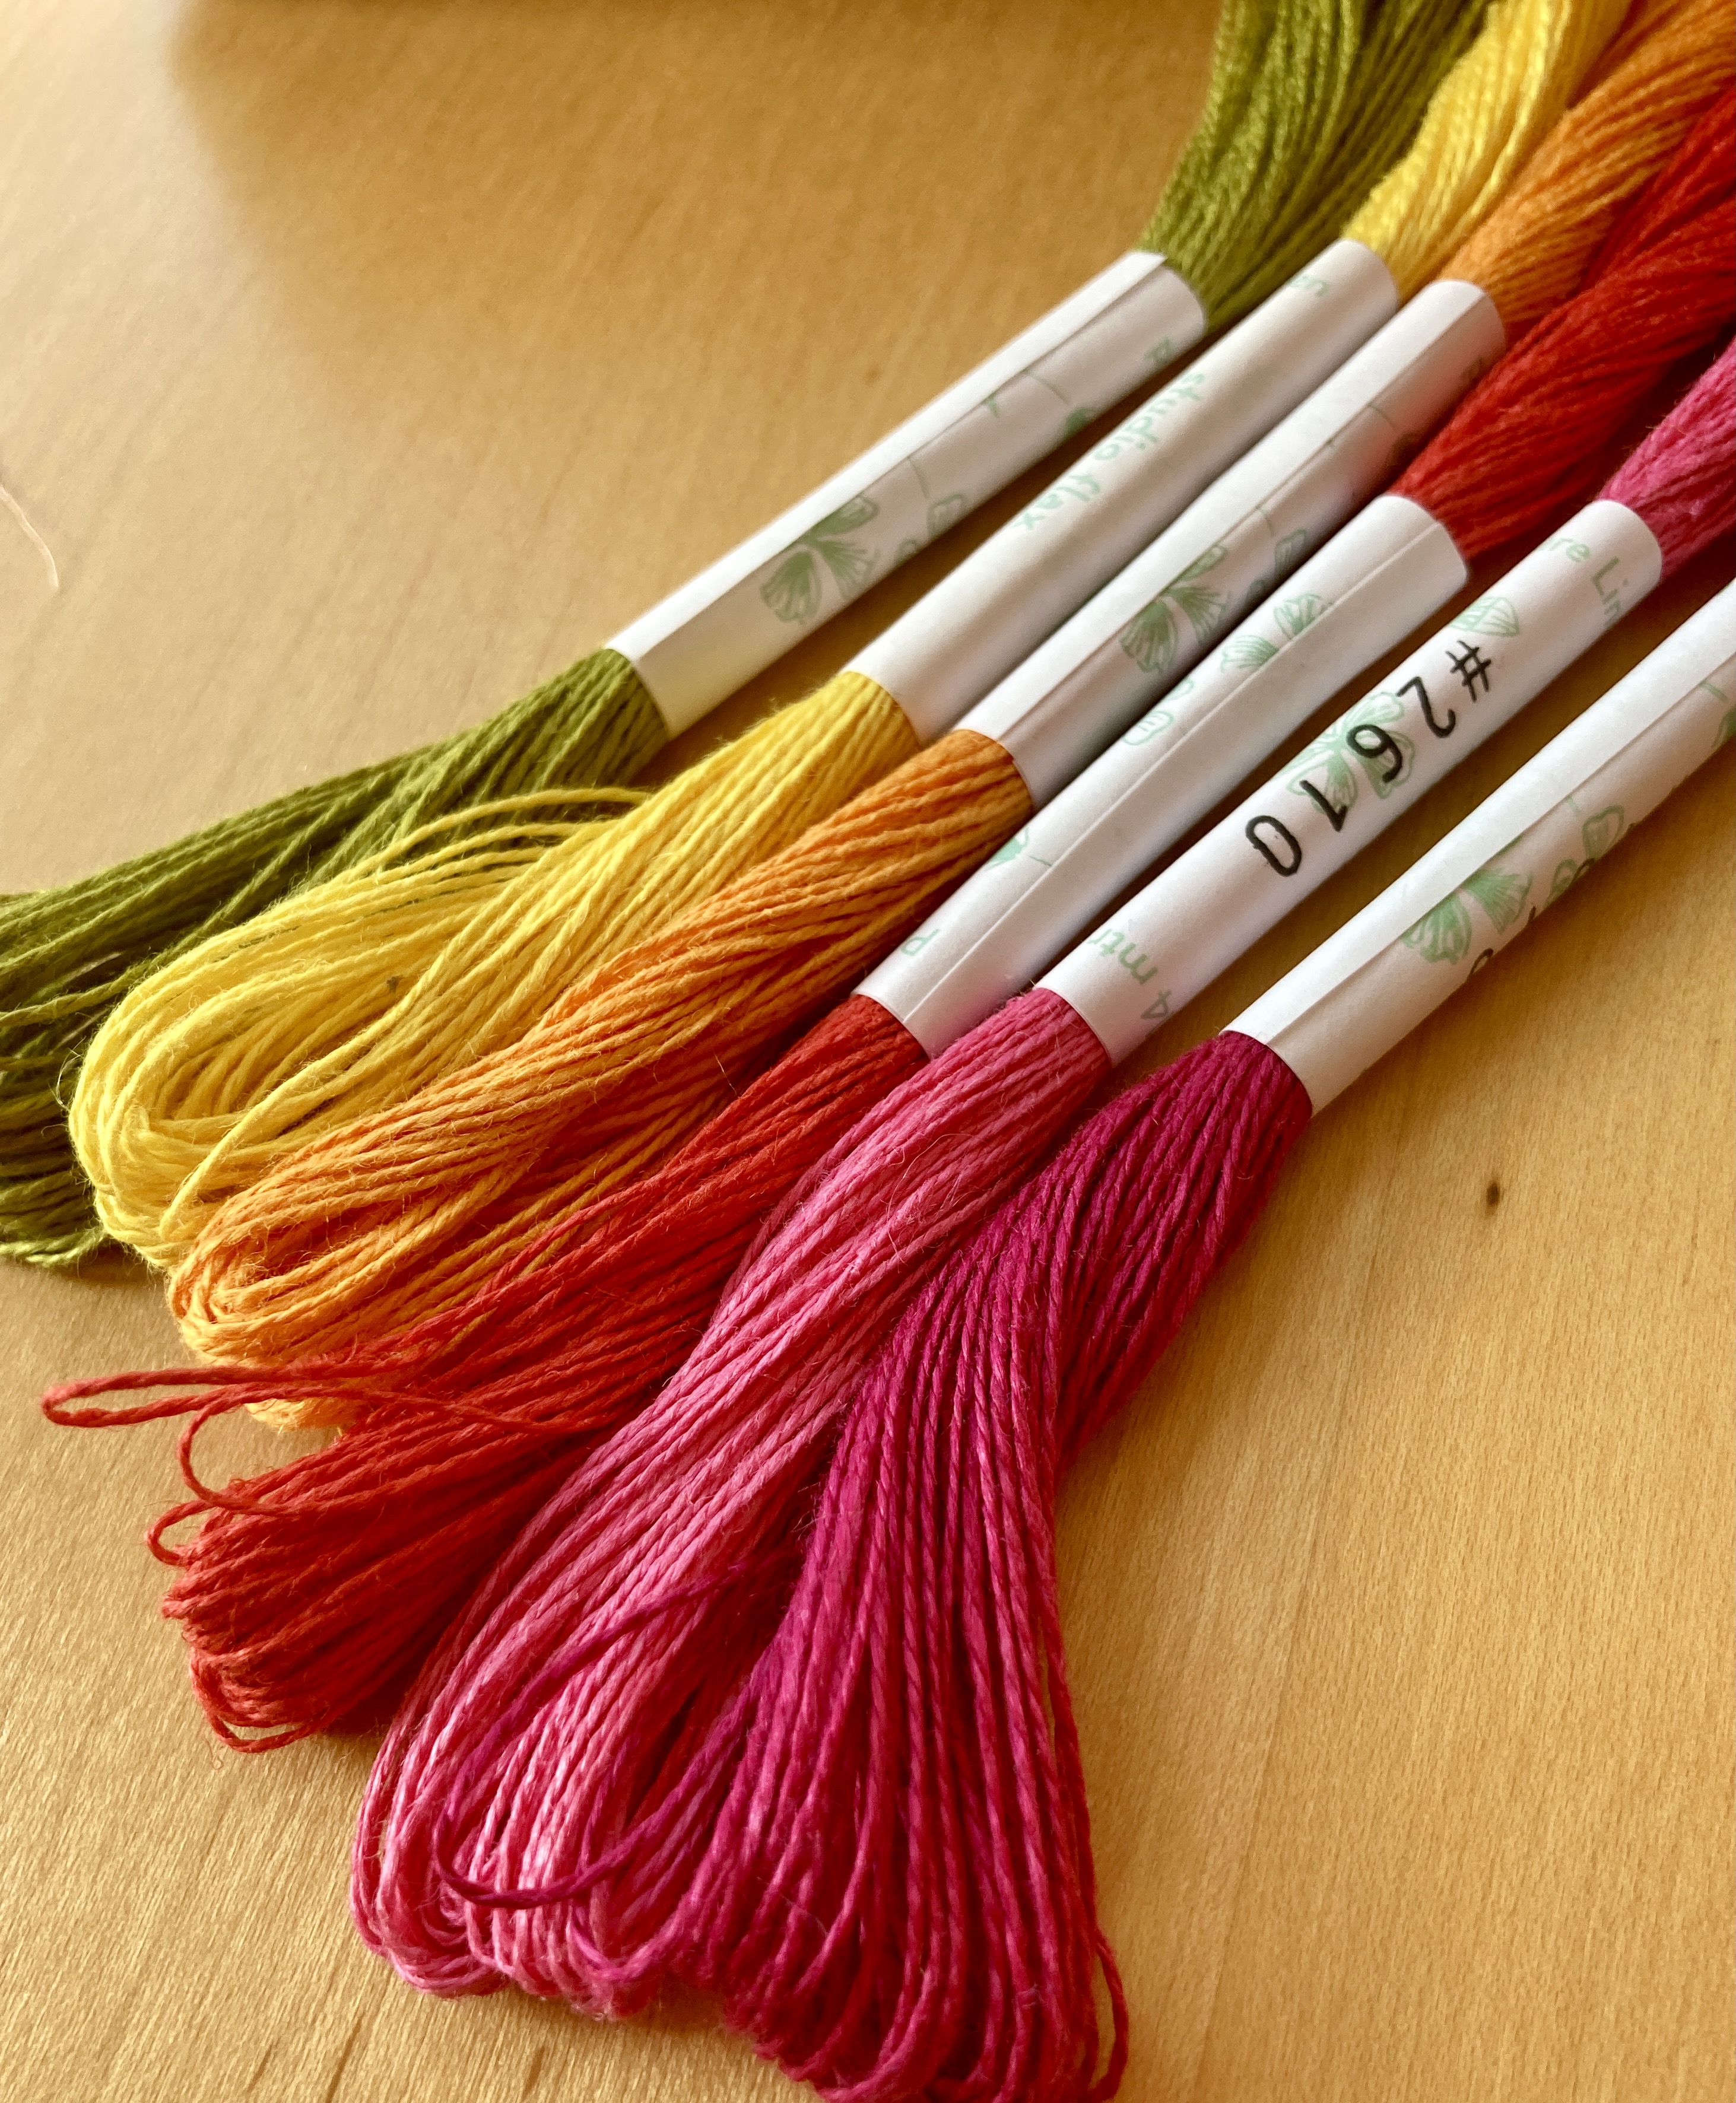
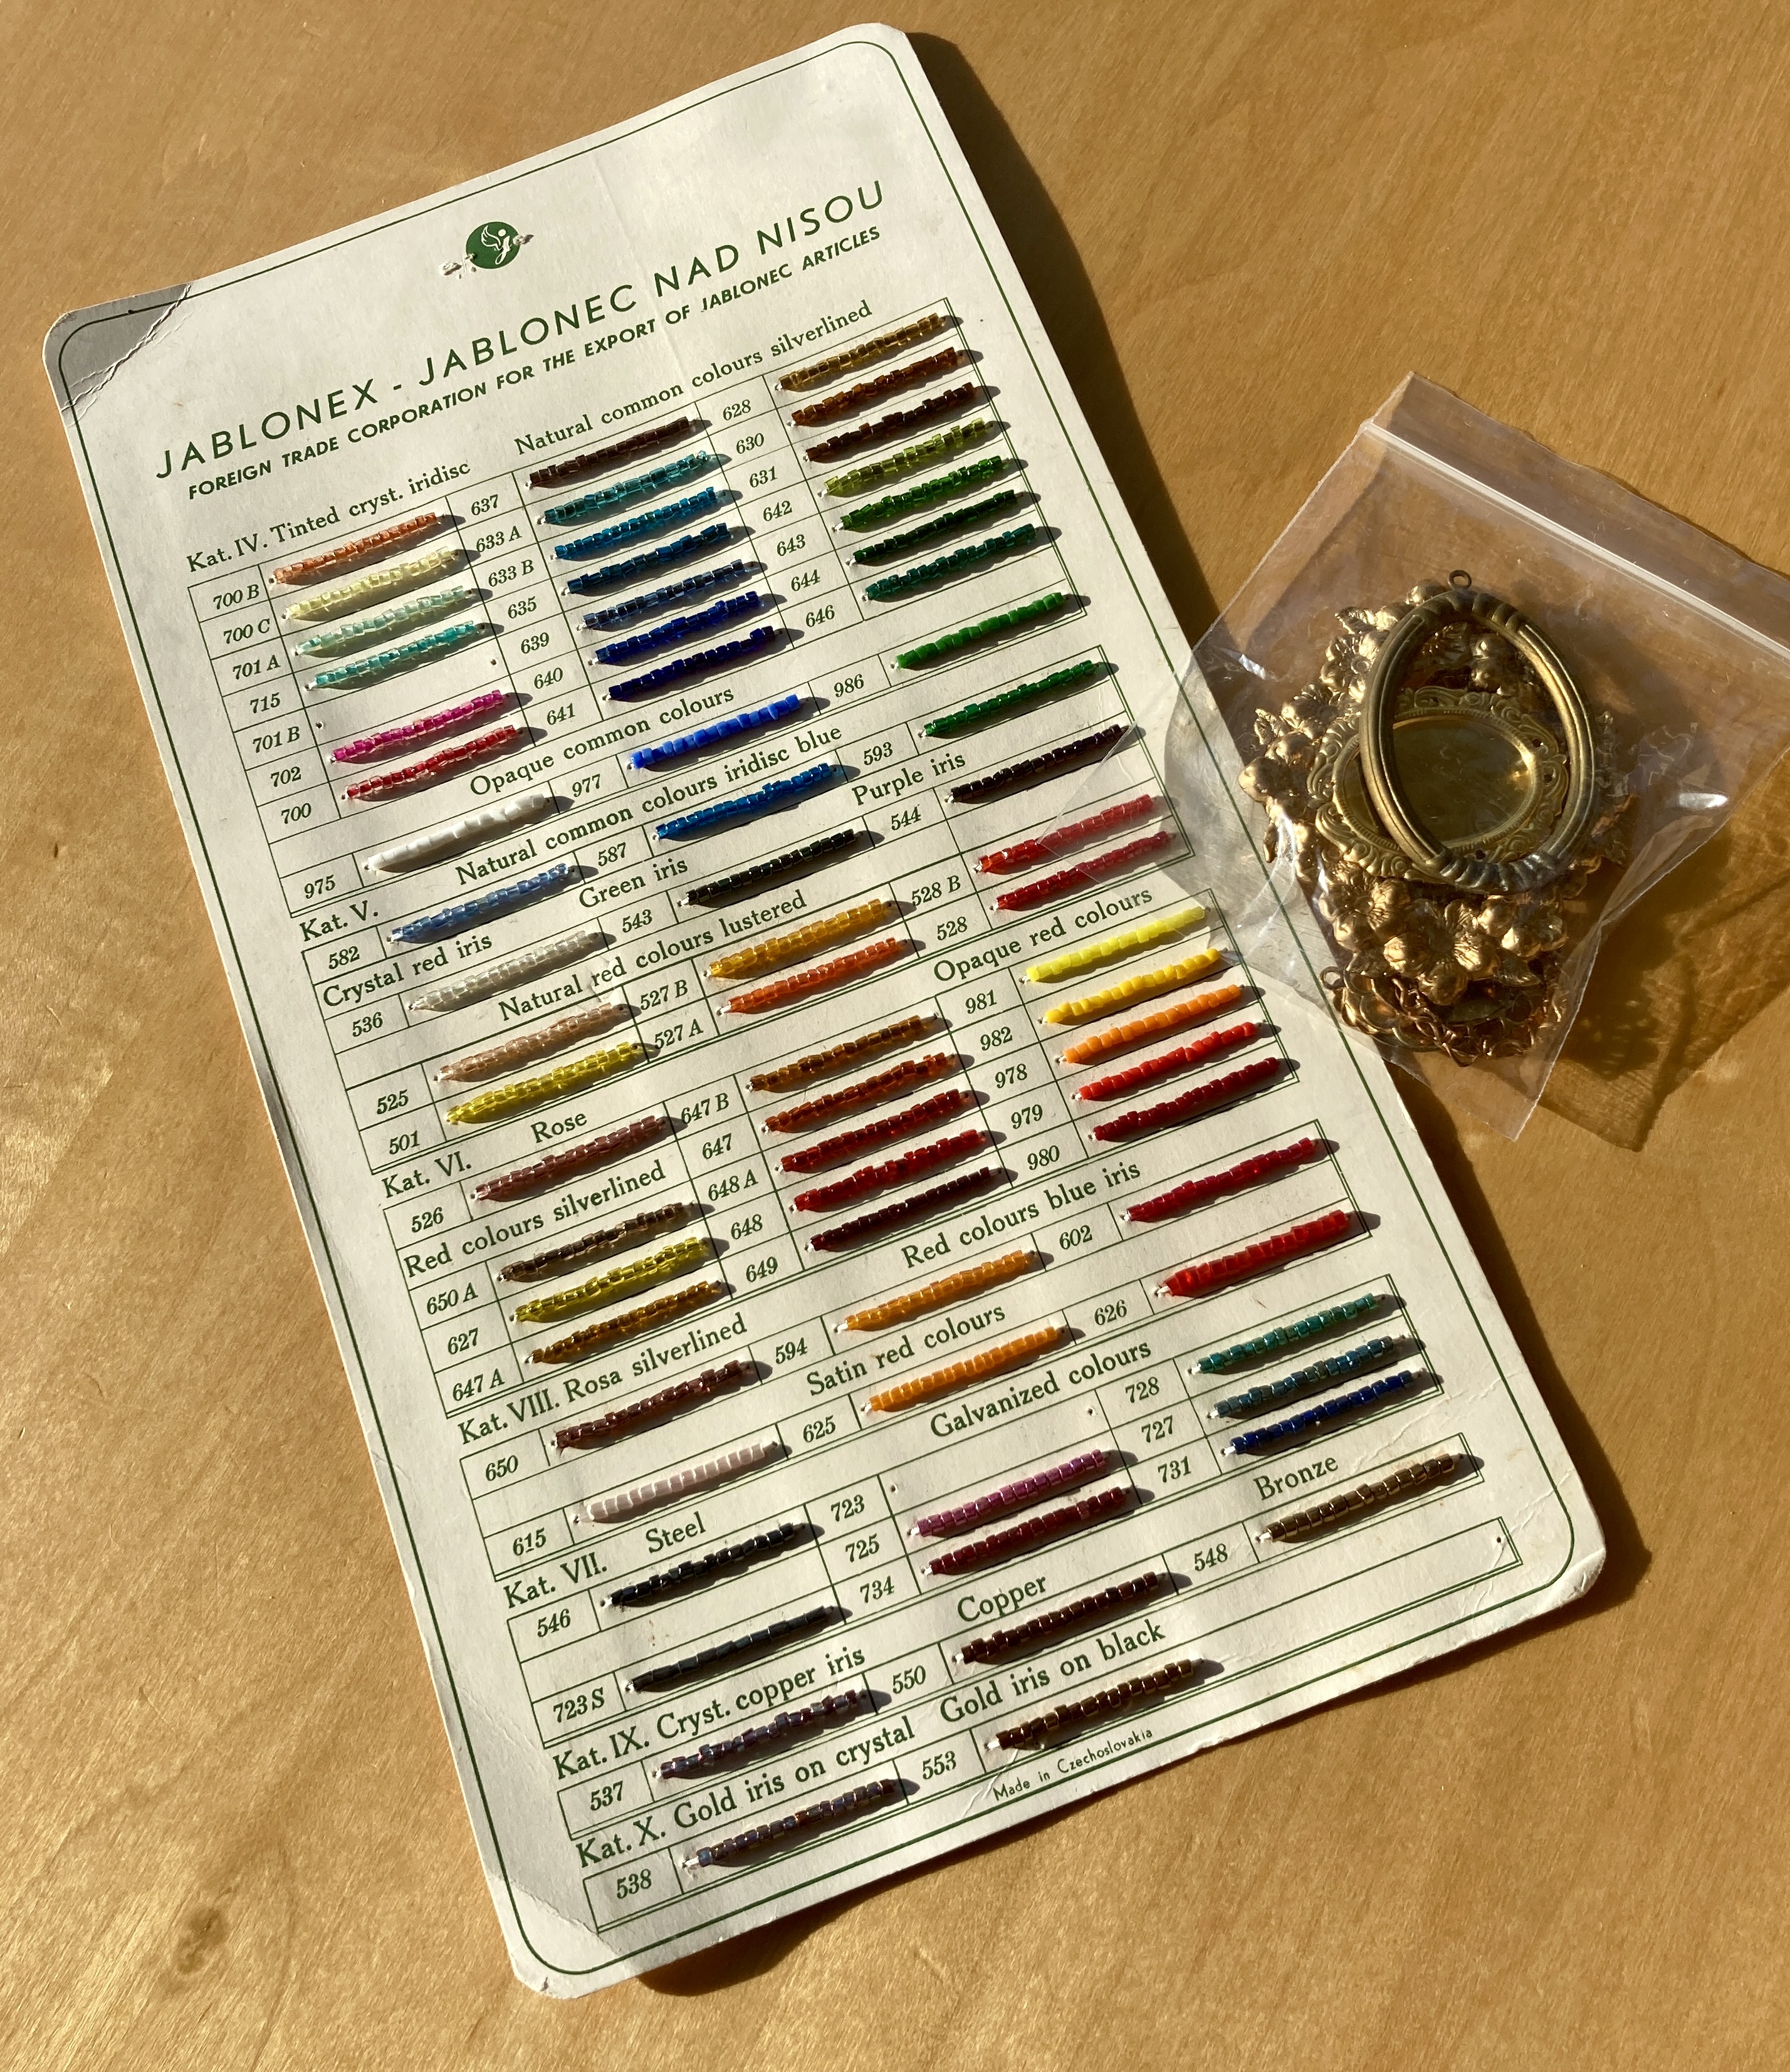
Sourcing can be pretty tedious for this type of work – I’m very fussy about colour and tend to sample from my stash first and think about being able to get the beads later – a stash which has built up over nearly 20 years so in a beading world where colours go in and out of both production, availability and style. Whilst picking the beads and sequins is great fun, by this point I’d gotten up to 5 colourways, so needed to source 20 lots of seed beads, 10 Czechs, and 20 different sequins. Some come from my overlarge stash, but shopping needed to be done, particularly for the shaped sequins. Luckily I have a range of really lovely suppliers, but it was quite a lot of beads and sequins, and of course no one even had all the beads (size 6 seeds are particularly hard to get in the colours I like at the moment). It’s taken 10 suppliers in all, to whom I’m really grateful – each of you stocked that elusive bead or sequin or filament that allowed me to do what I wanted. Shout outs to Tanzee Designs (all those teacups and Os); Old Bicycle Shop Beads (lots of seeds); Beads Mouse (more Os in really exciting new to me colours); CJ Beaders (yet more seeds including 6s); Peppy Beads (lots of 6s and 8s) and Sequin World (shaped sequins).
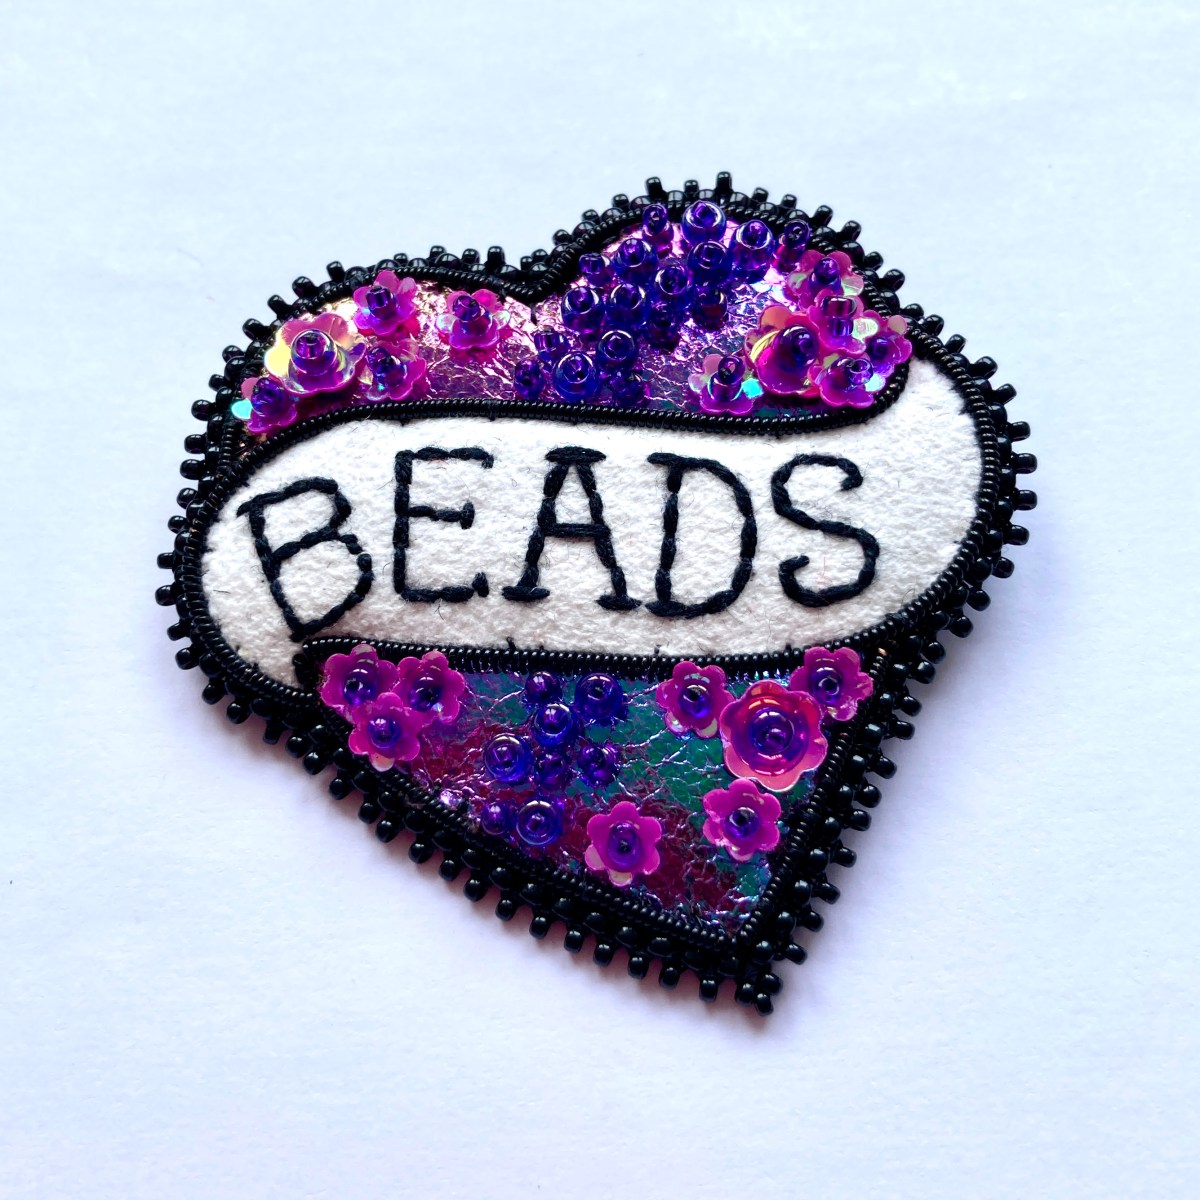
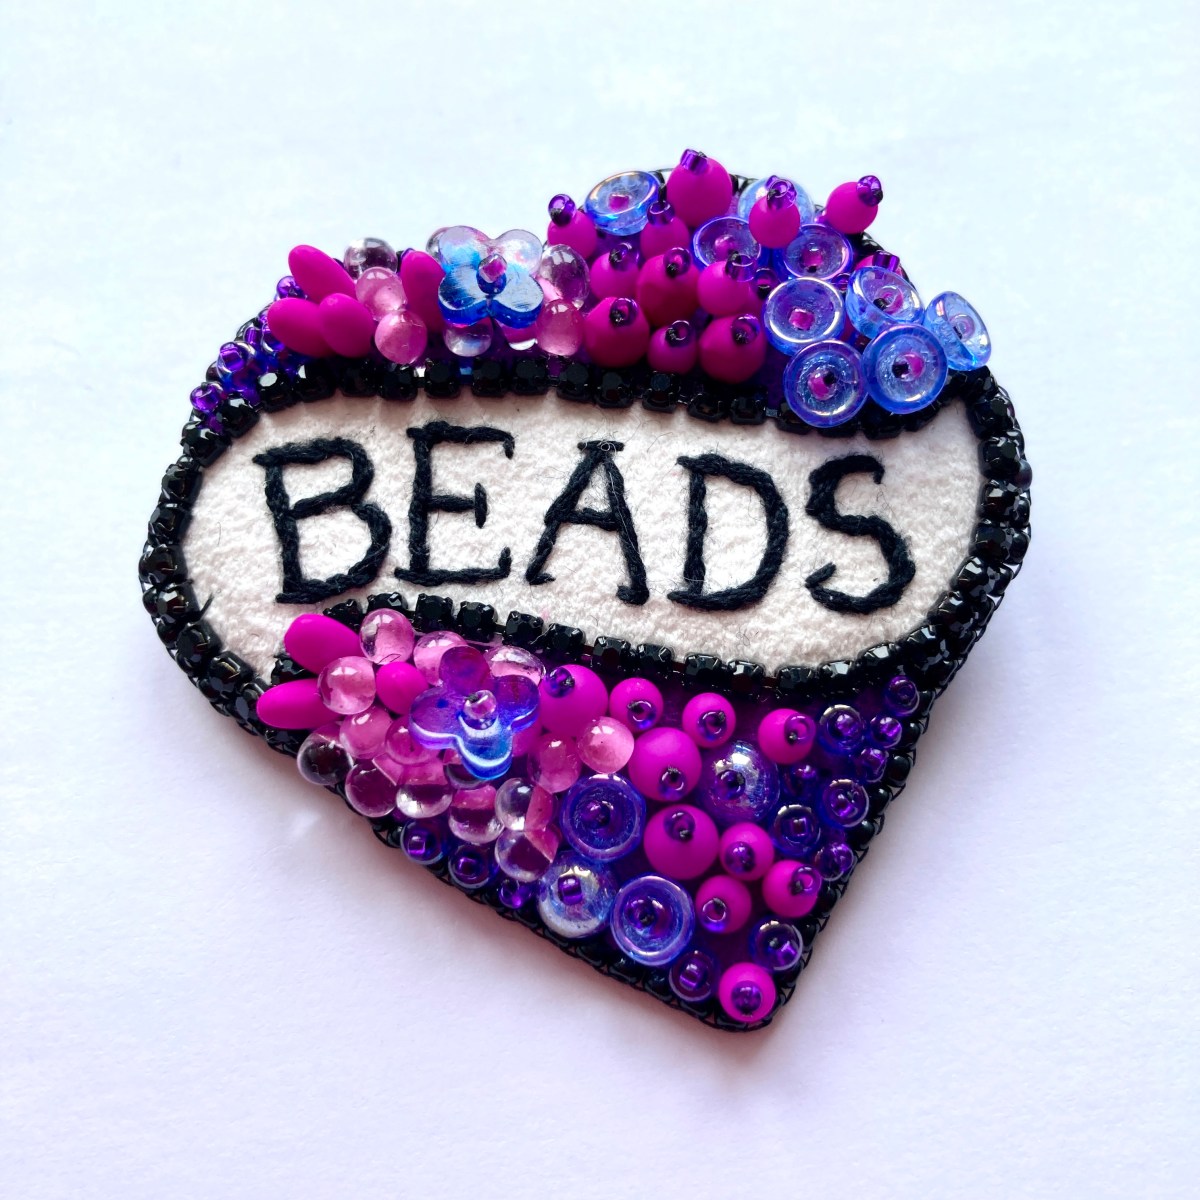
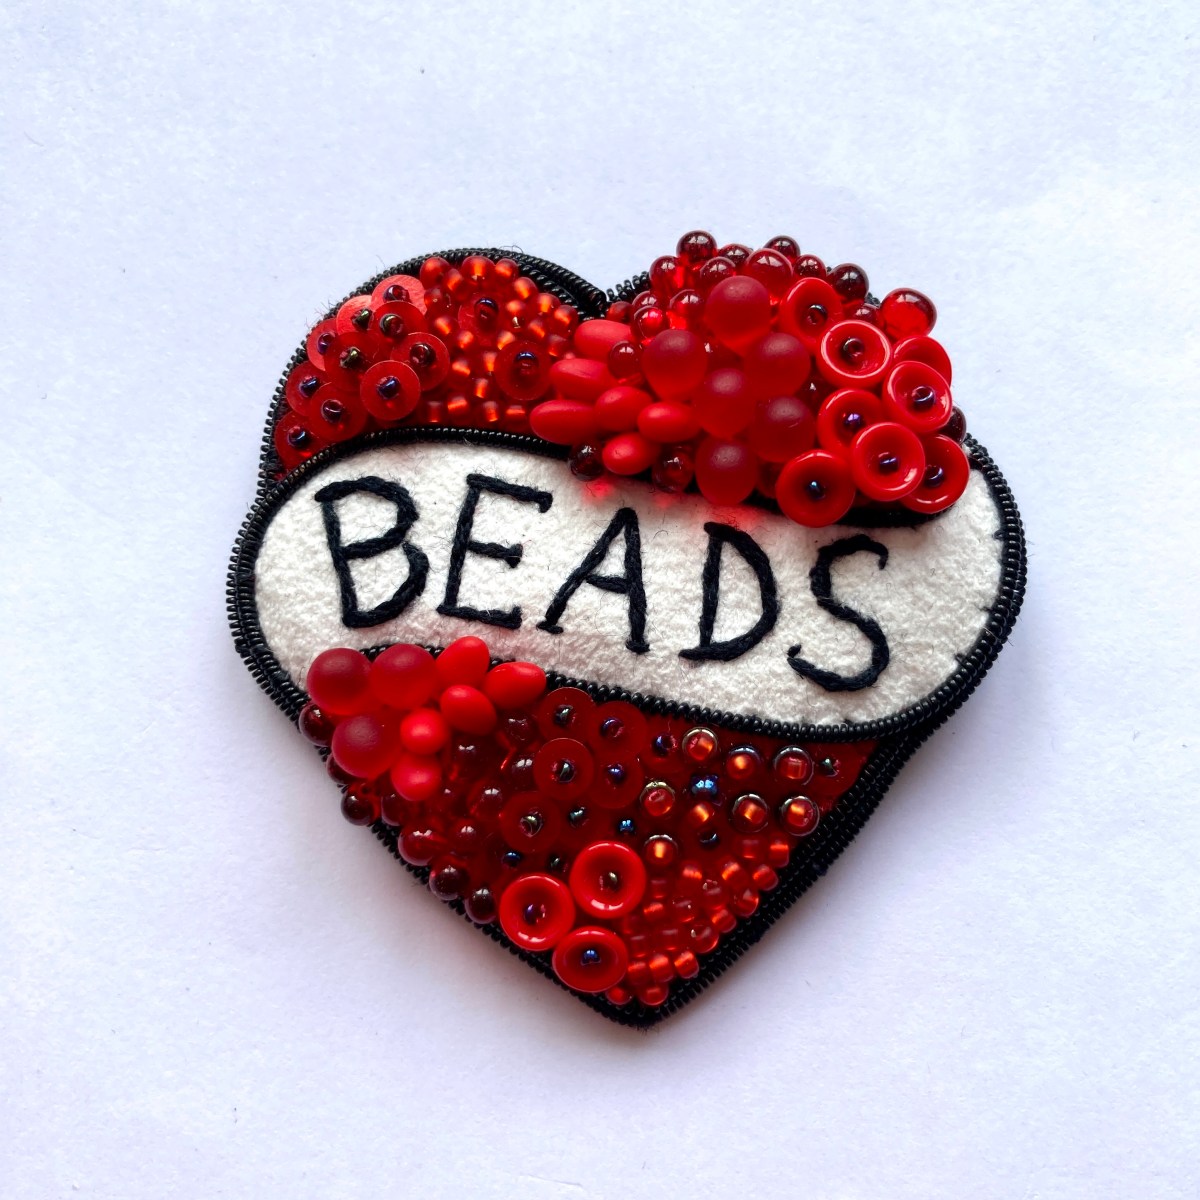
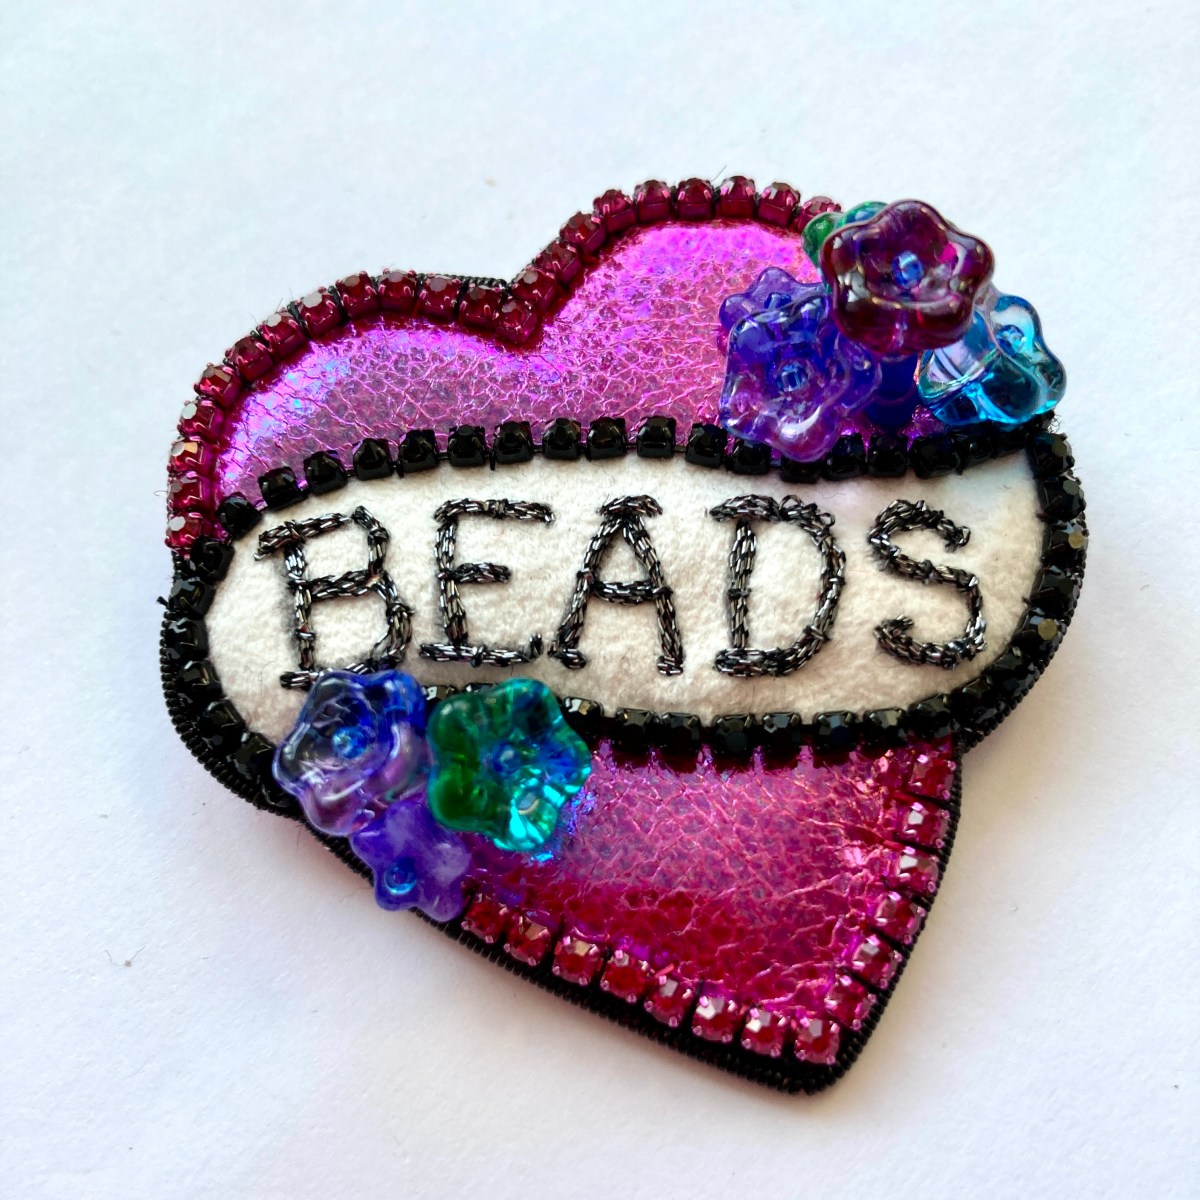
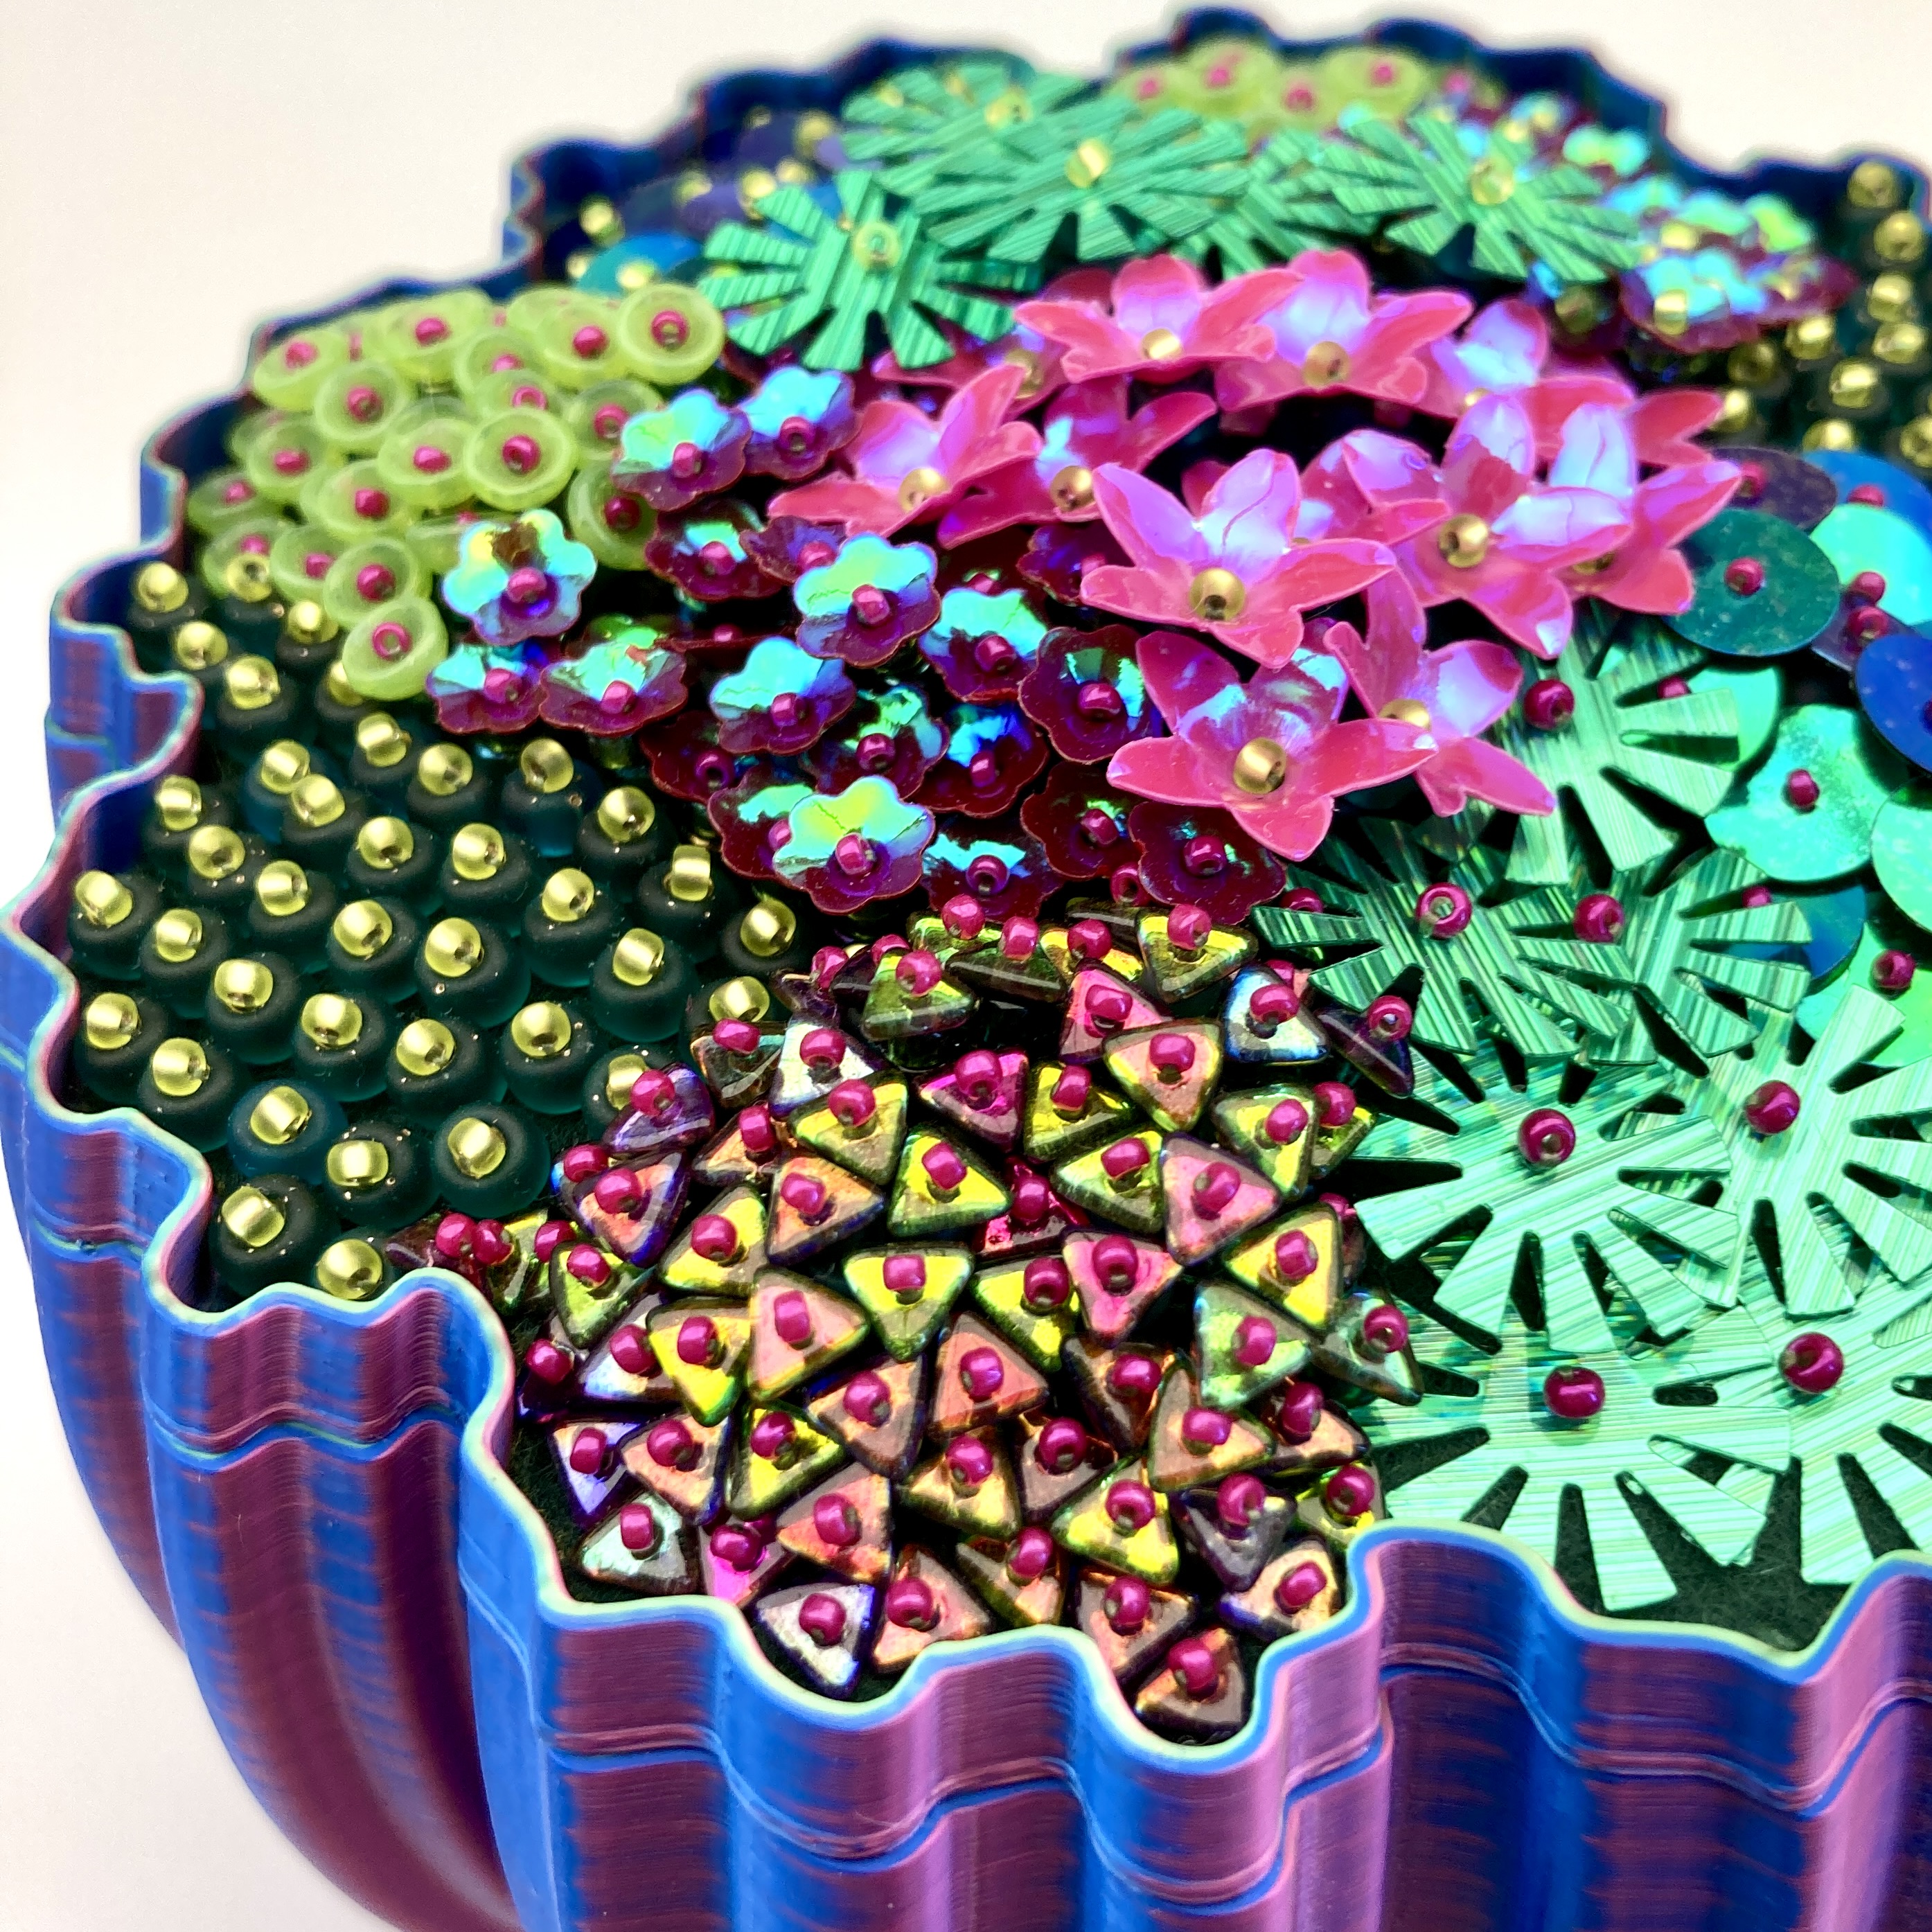
Anyway, the boxes are made, the felt is hand cut, the beads and sequins are weighed and counted and the instructions and stitch guide written and printed. For those of you wanting a full kit, I’ve designed the beadwork to incorporate my most popular bead embroidery style, so it’s heavily embellished and textural. You can either follow my design as per the individual colourway guide, or alter it by switching placements, or even incorporate additional bead embroidery stitches uing the provided stitch guide, which takes you through not only the stitch used in this kit but some other common stitched too. Either way every finished piece will be unique because of the nature of the technique.
Each kit contains – seed beads (all Miyuki of Japan); Czech beads (O or Tri, and Teacup), plain, printed and flower shaped sequins in a variety of colours and finishes, plus the 3D printed box base, a hand cut hard felt beading foundation, specialist Miyuki or KO beading thread and Miyuki beading needle. Each also includes a printed colourway guide and bead embroidery instructions to guide you through stitching and personalising your finished piece. You will just need a pair of small sharp scissors and glue to fix the finished work to the lid.
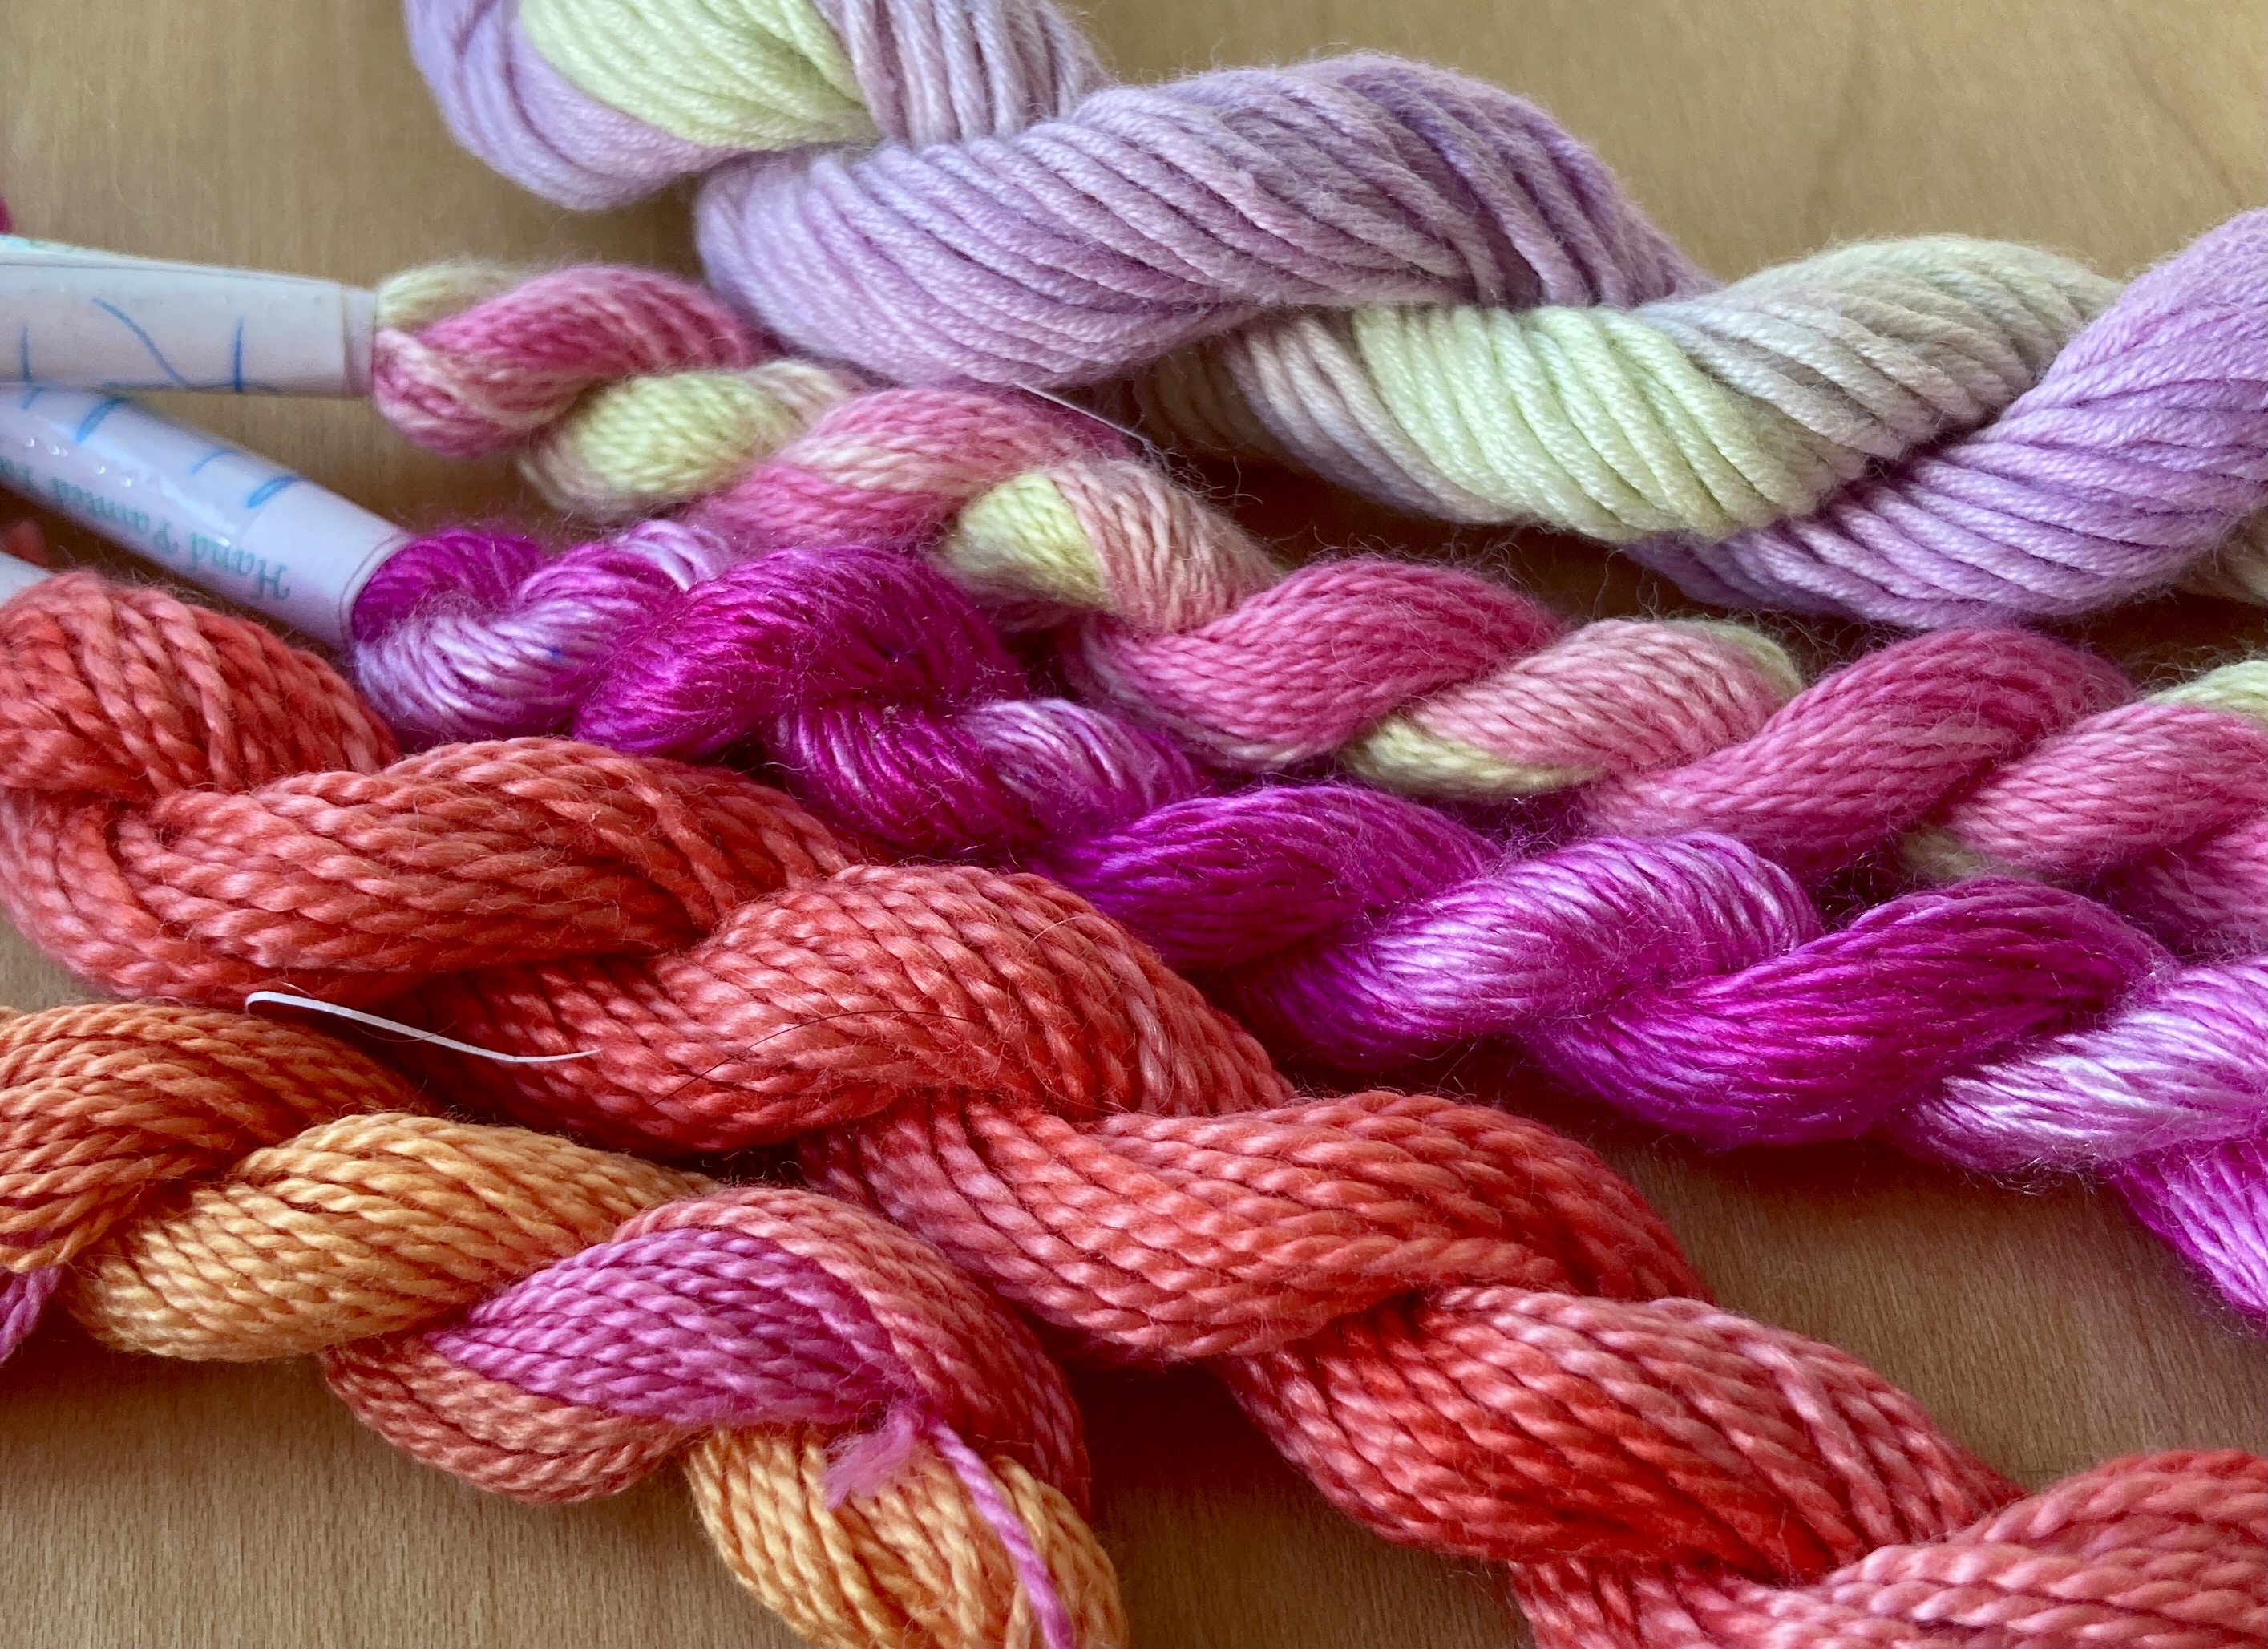
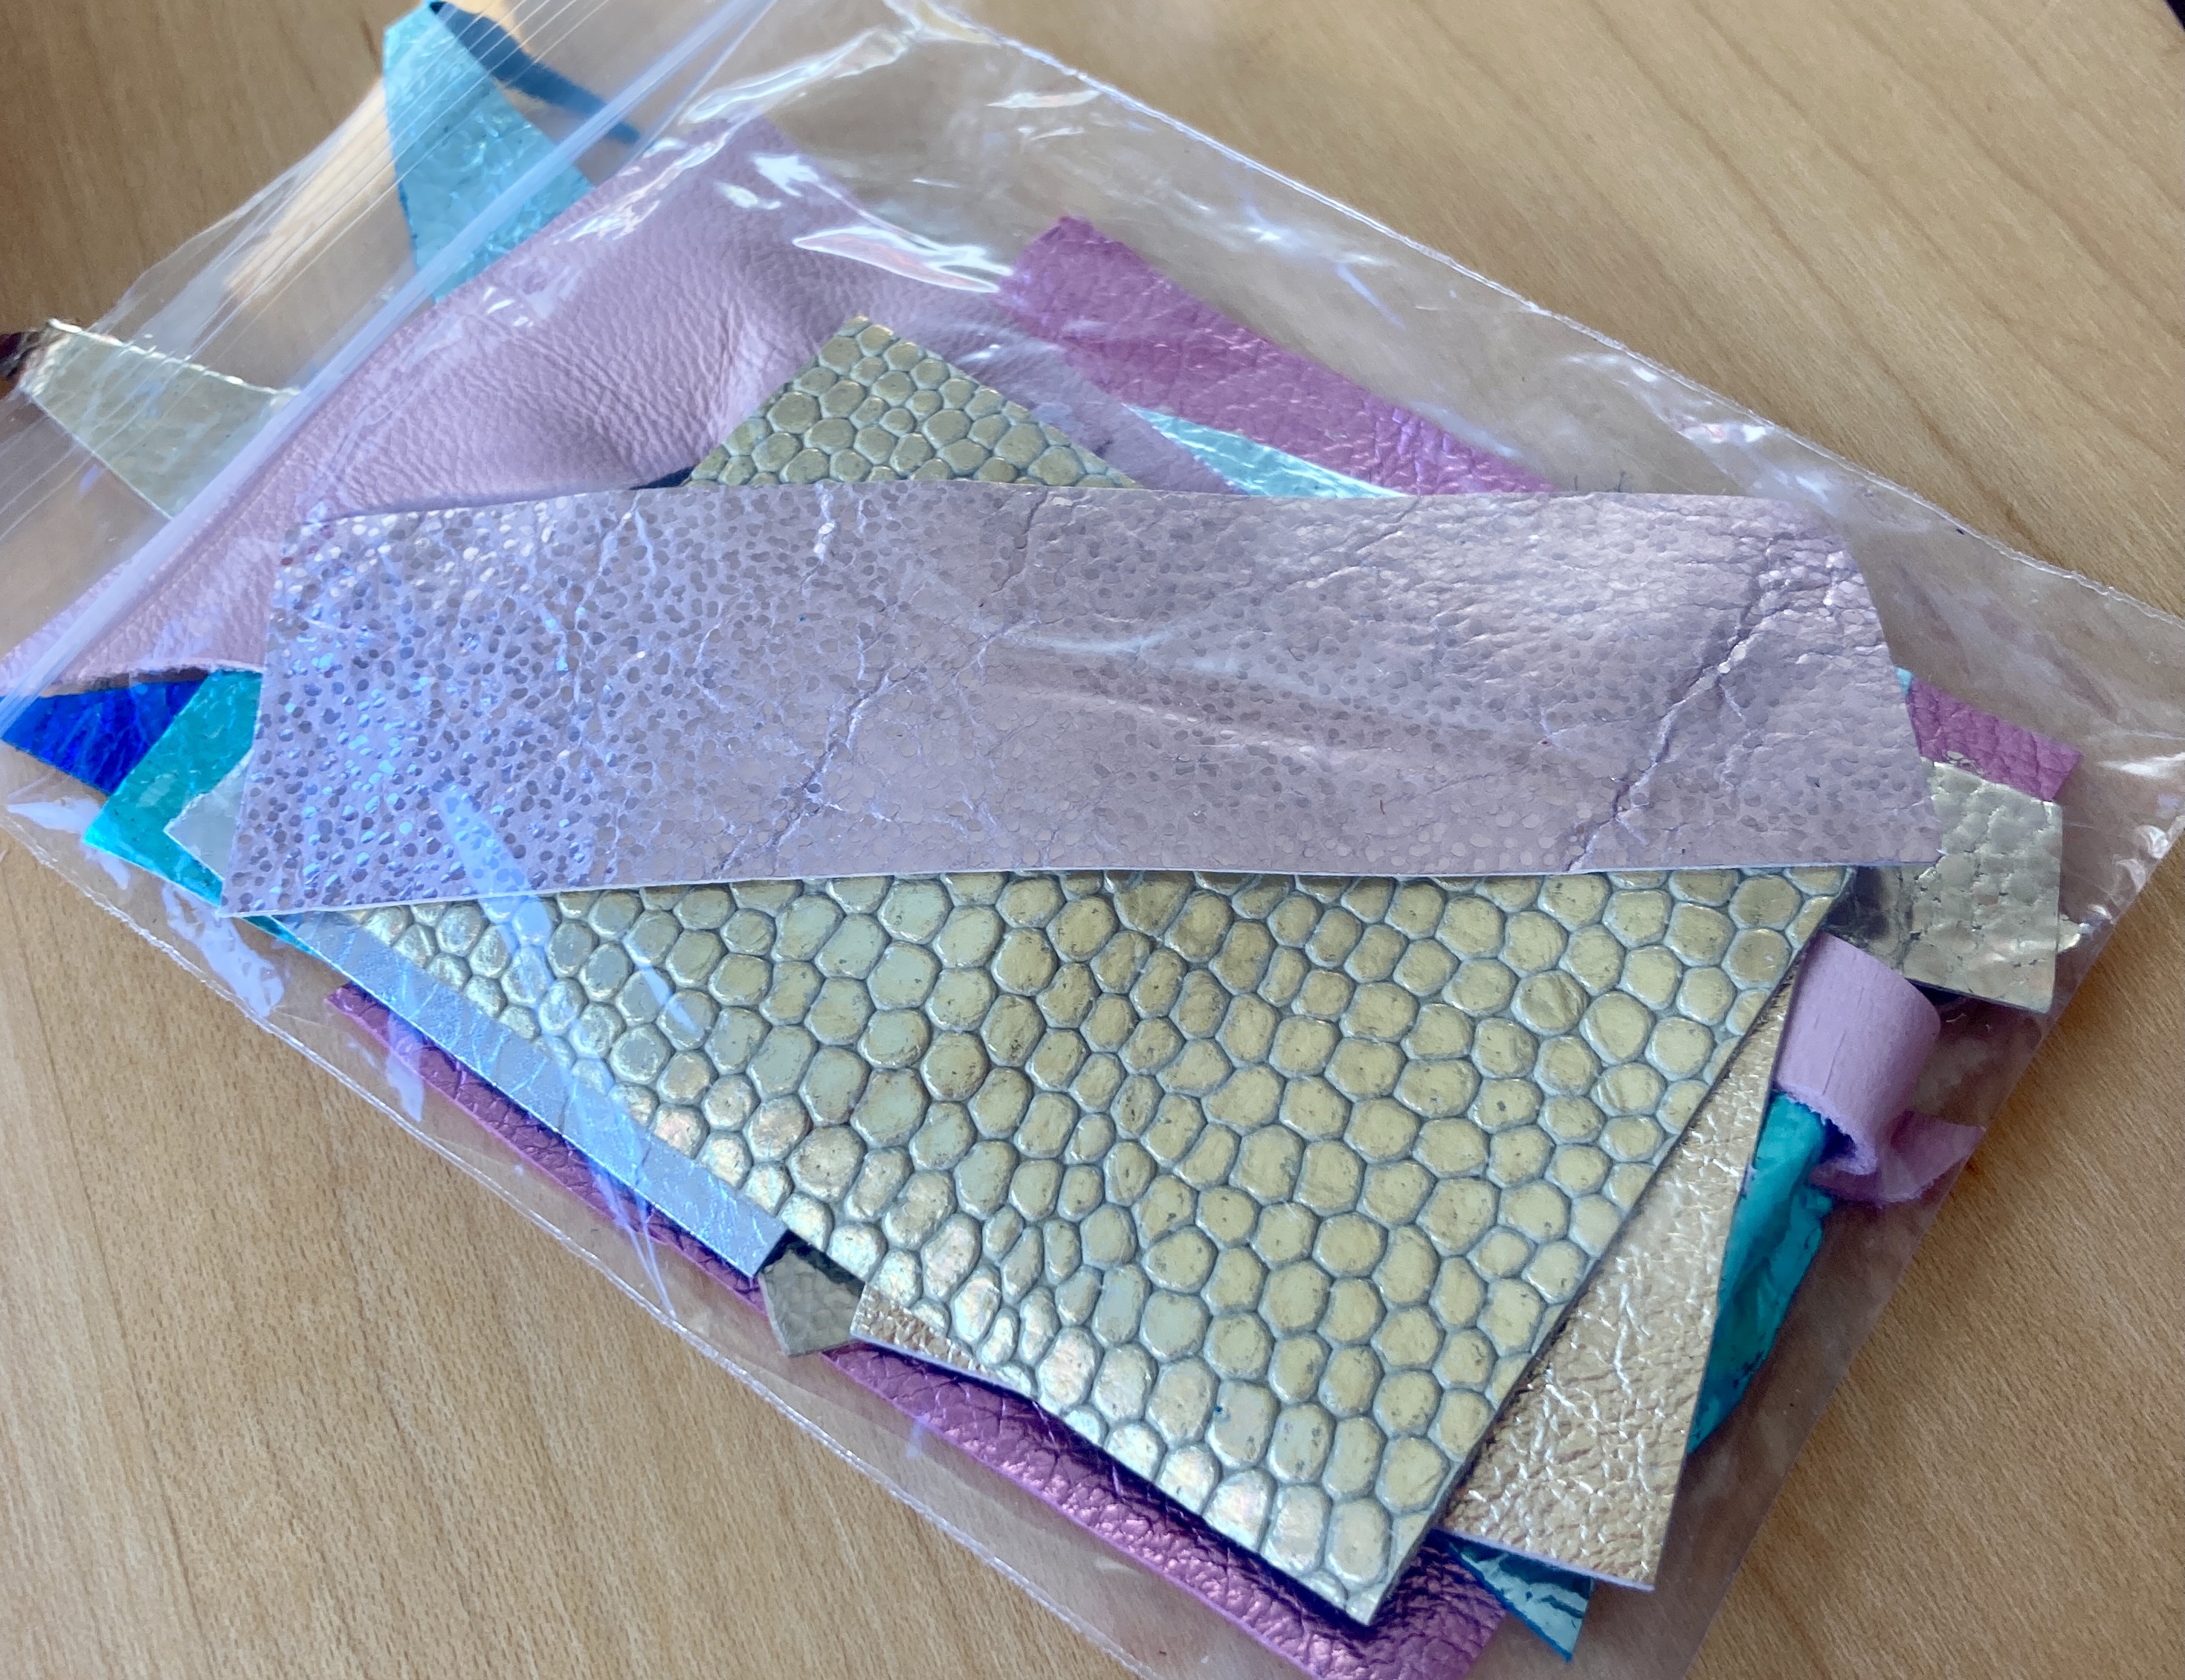
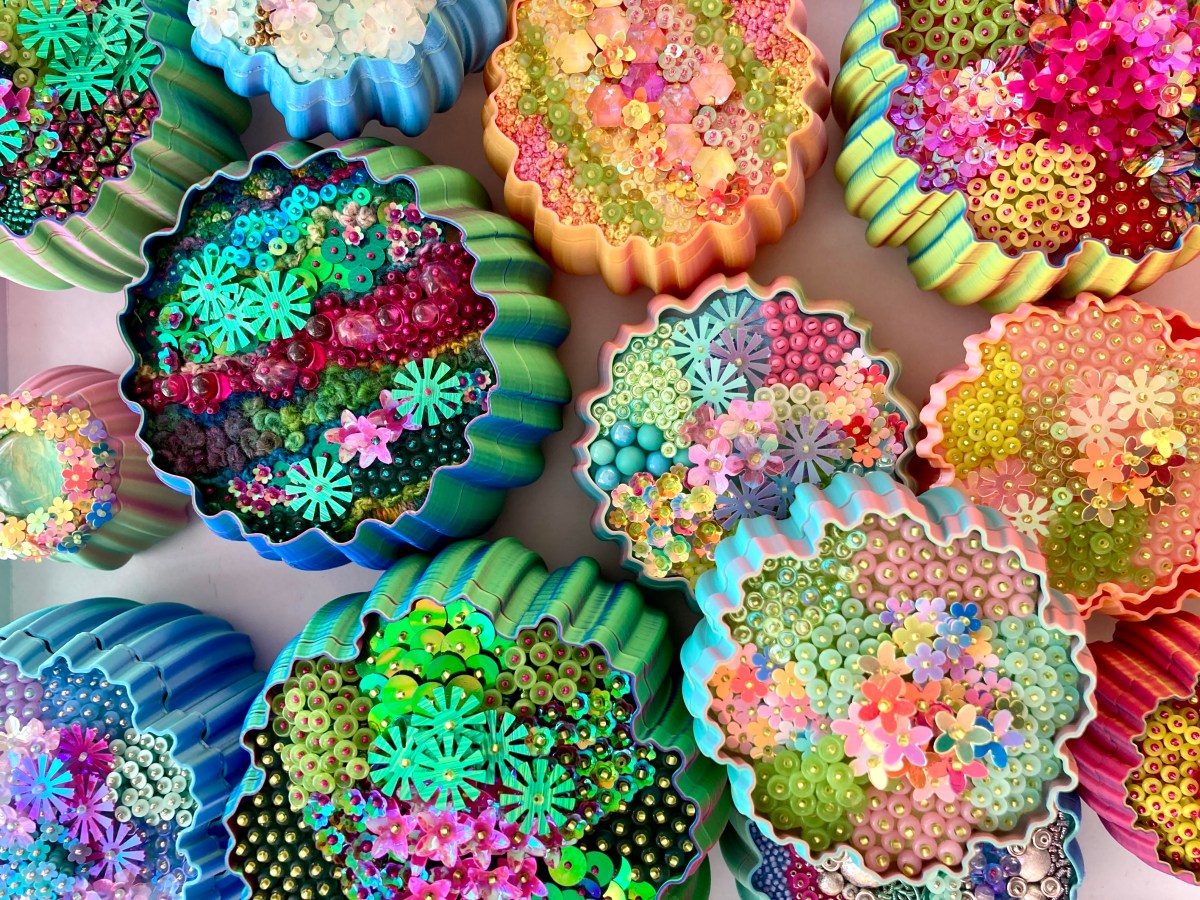
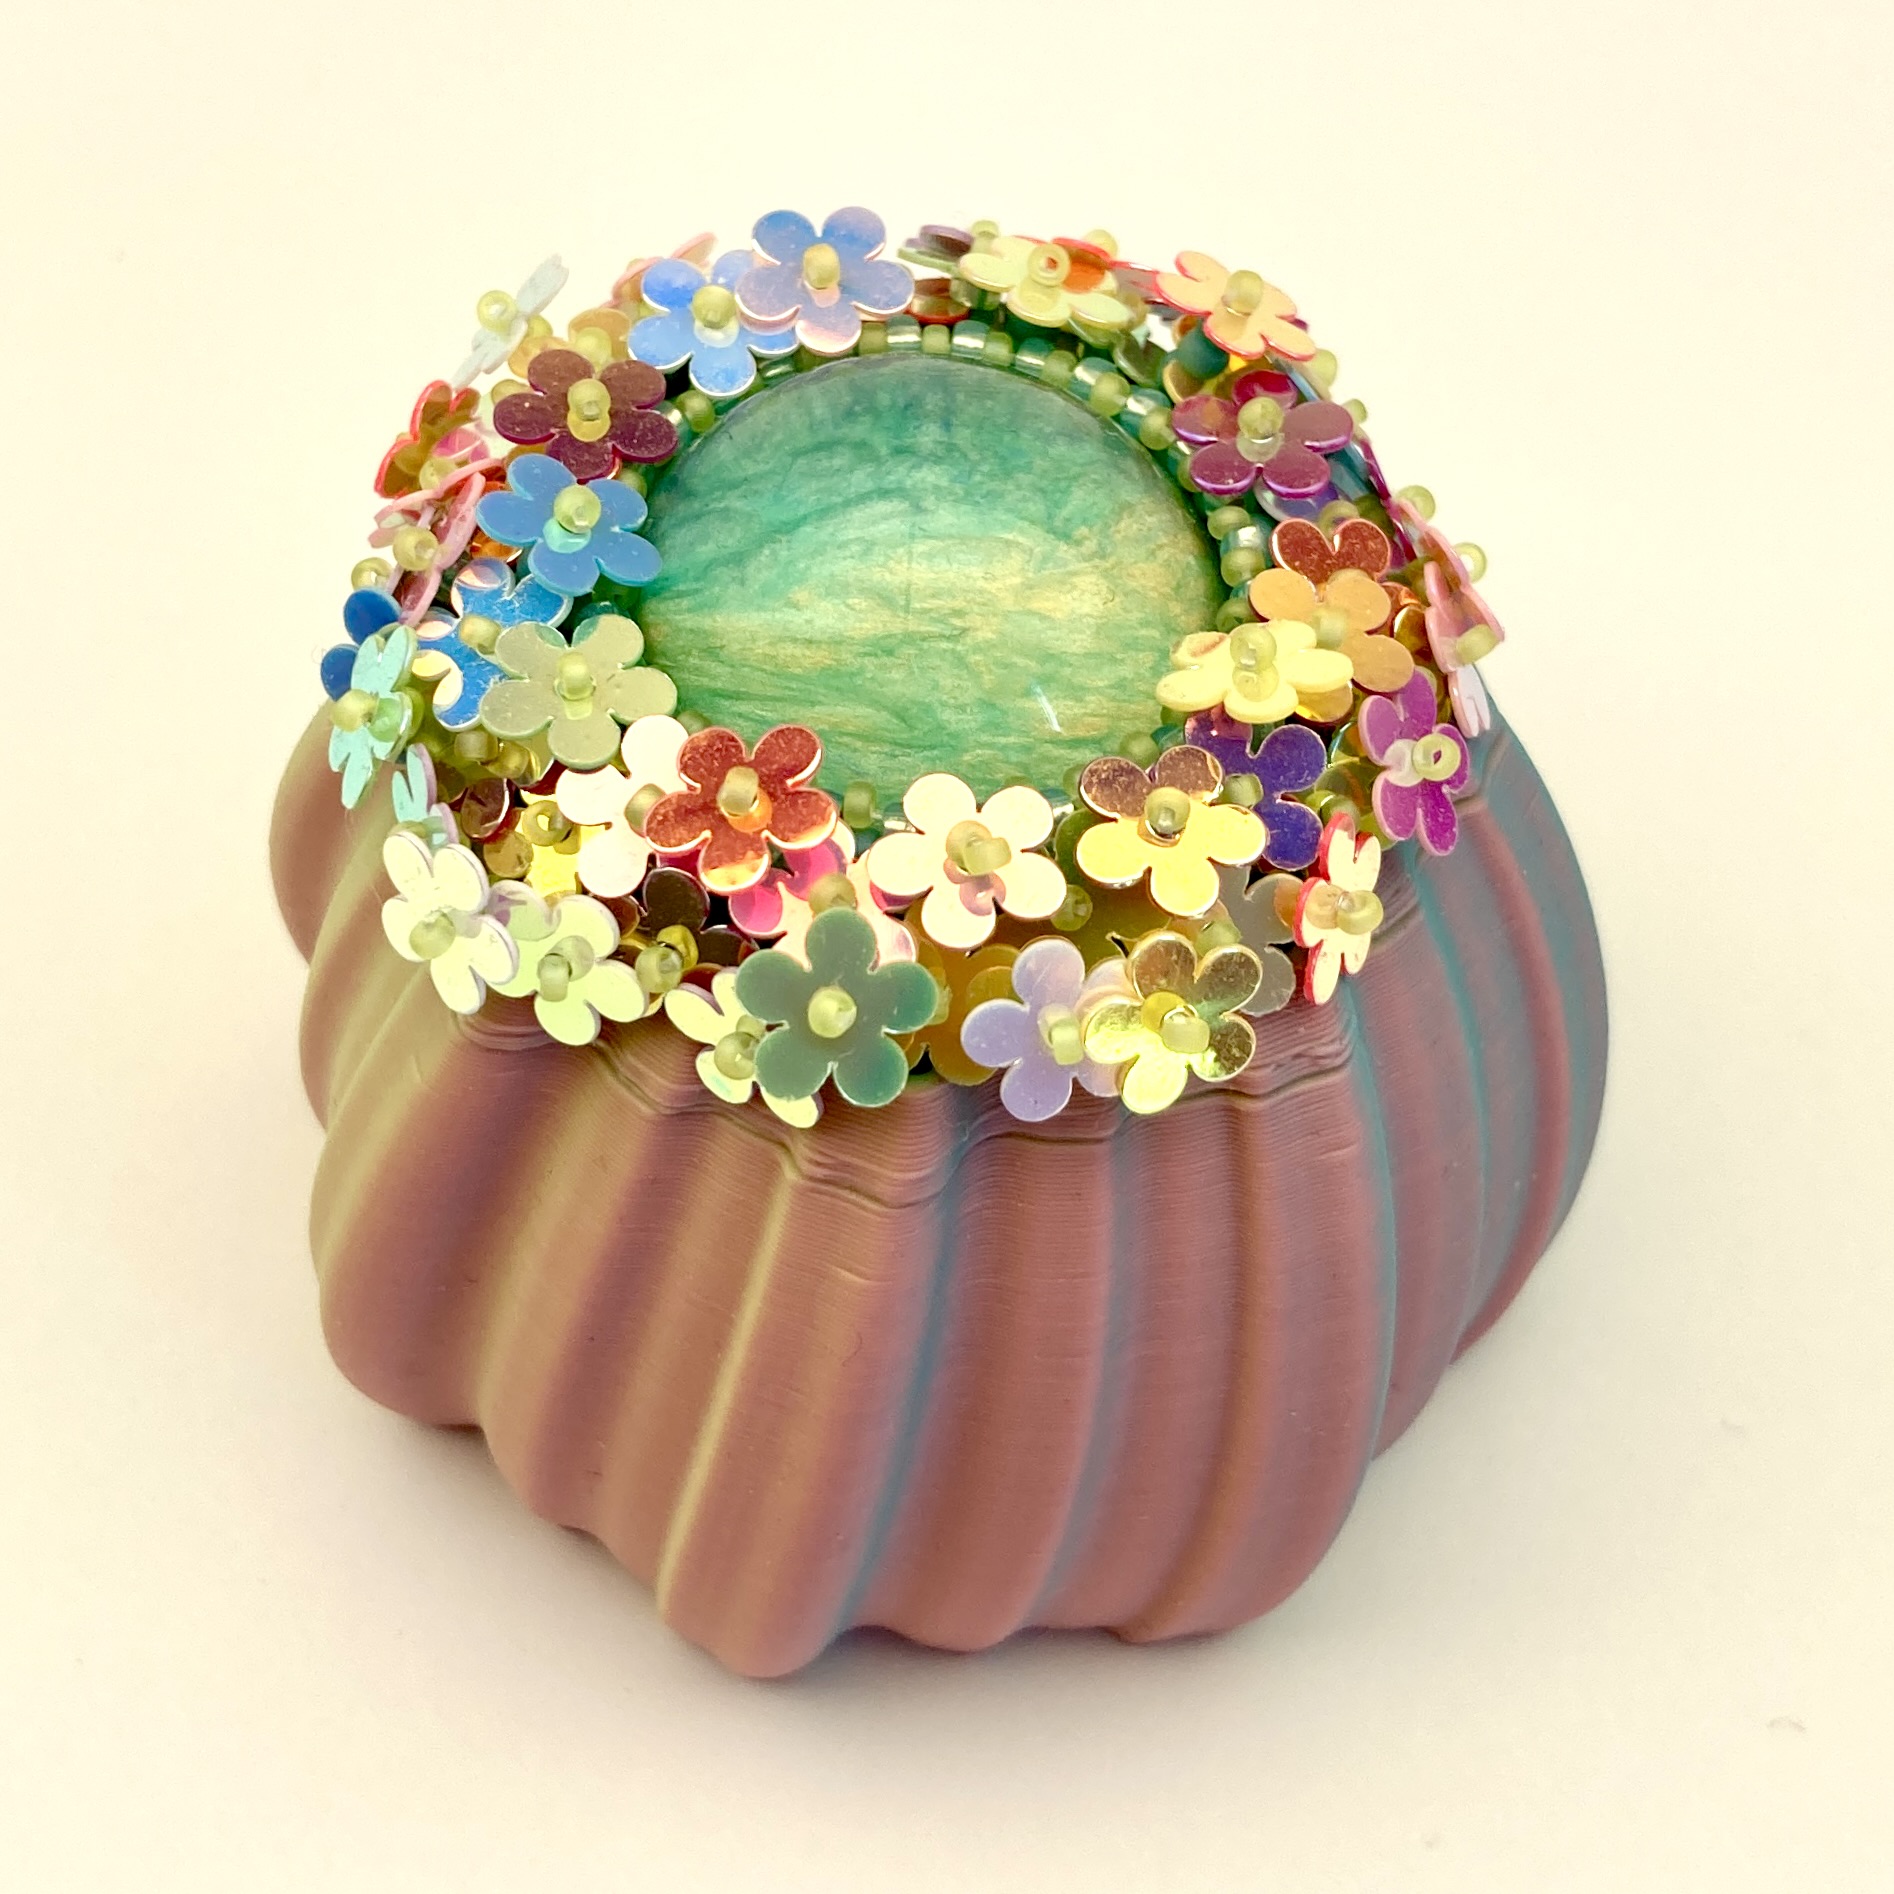
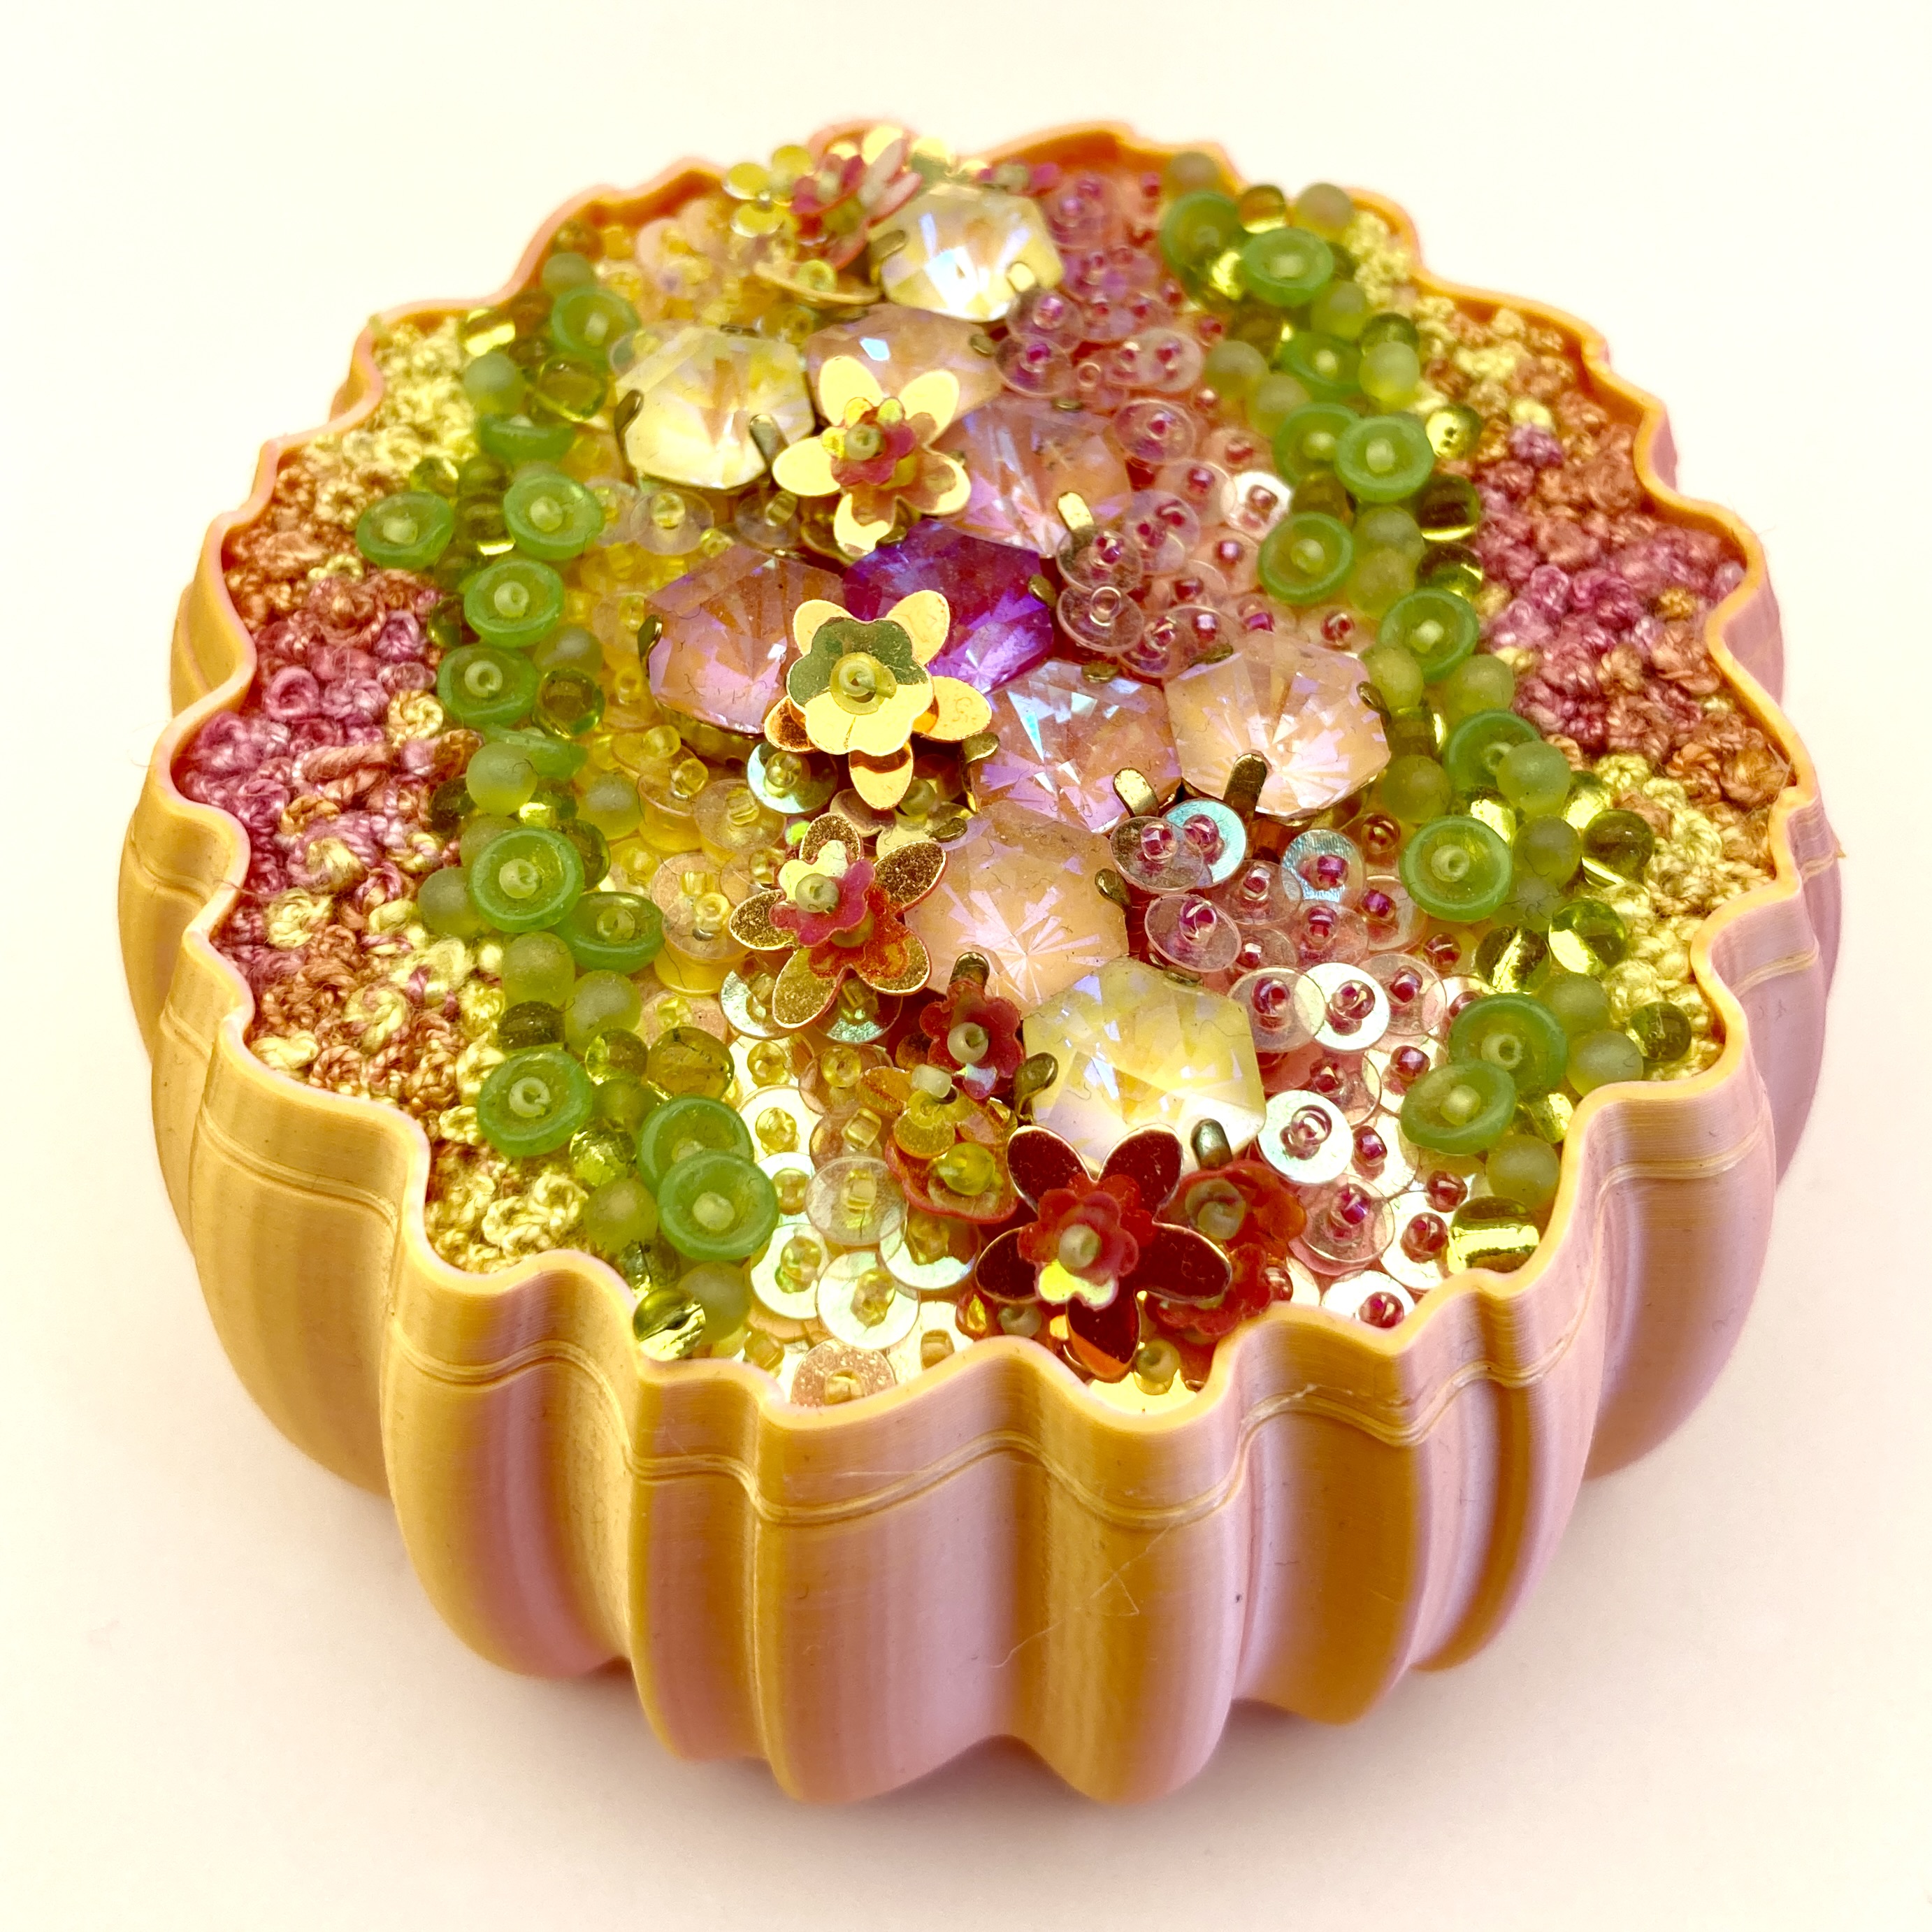
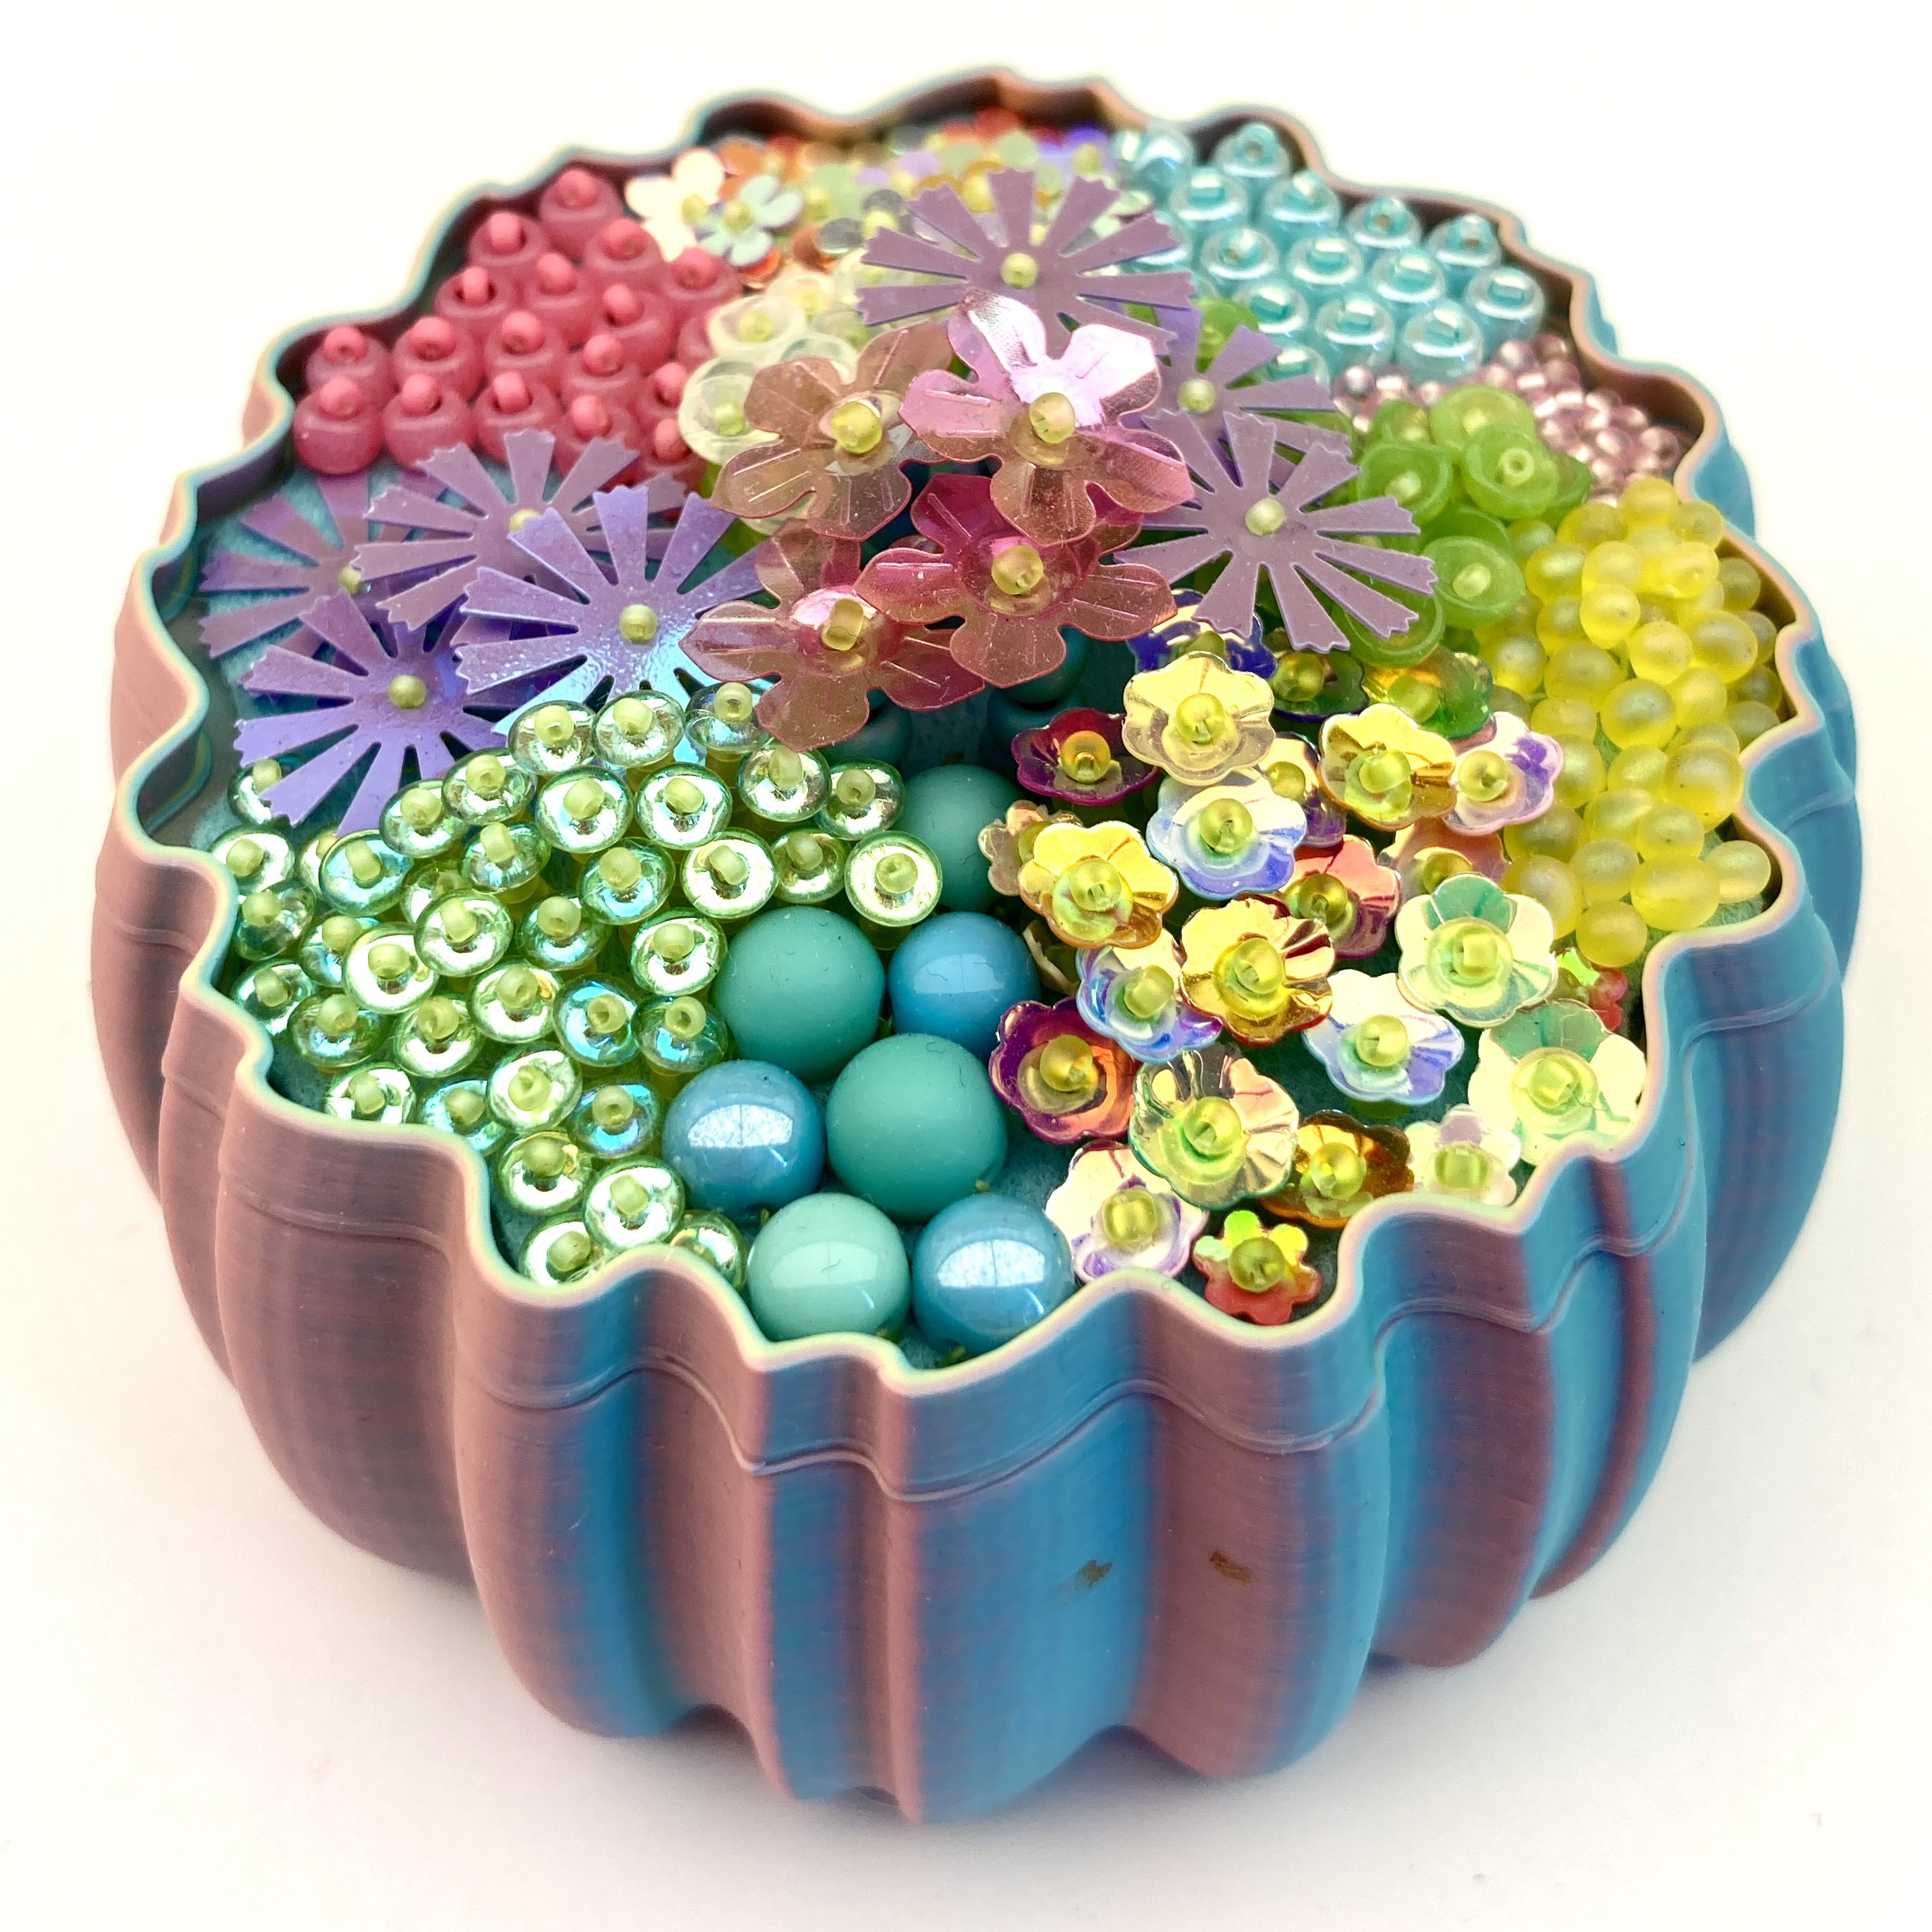
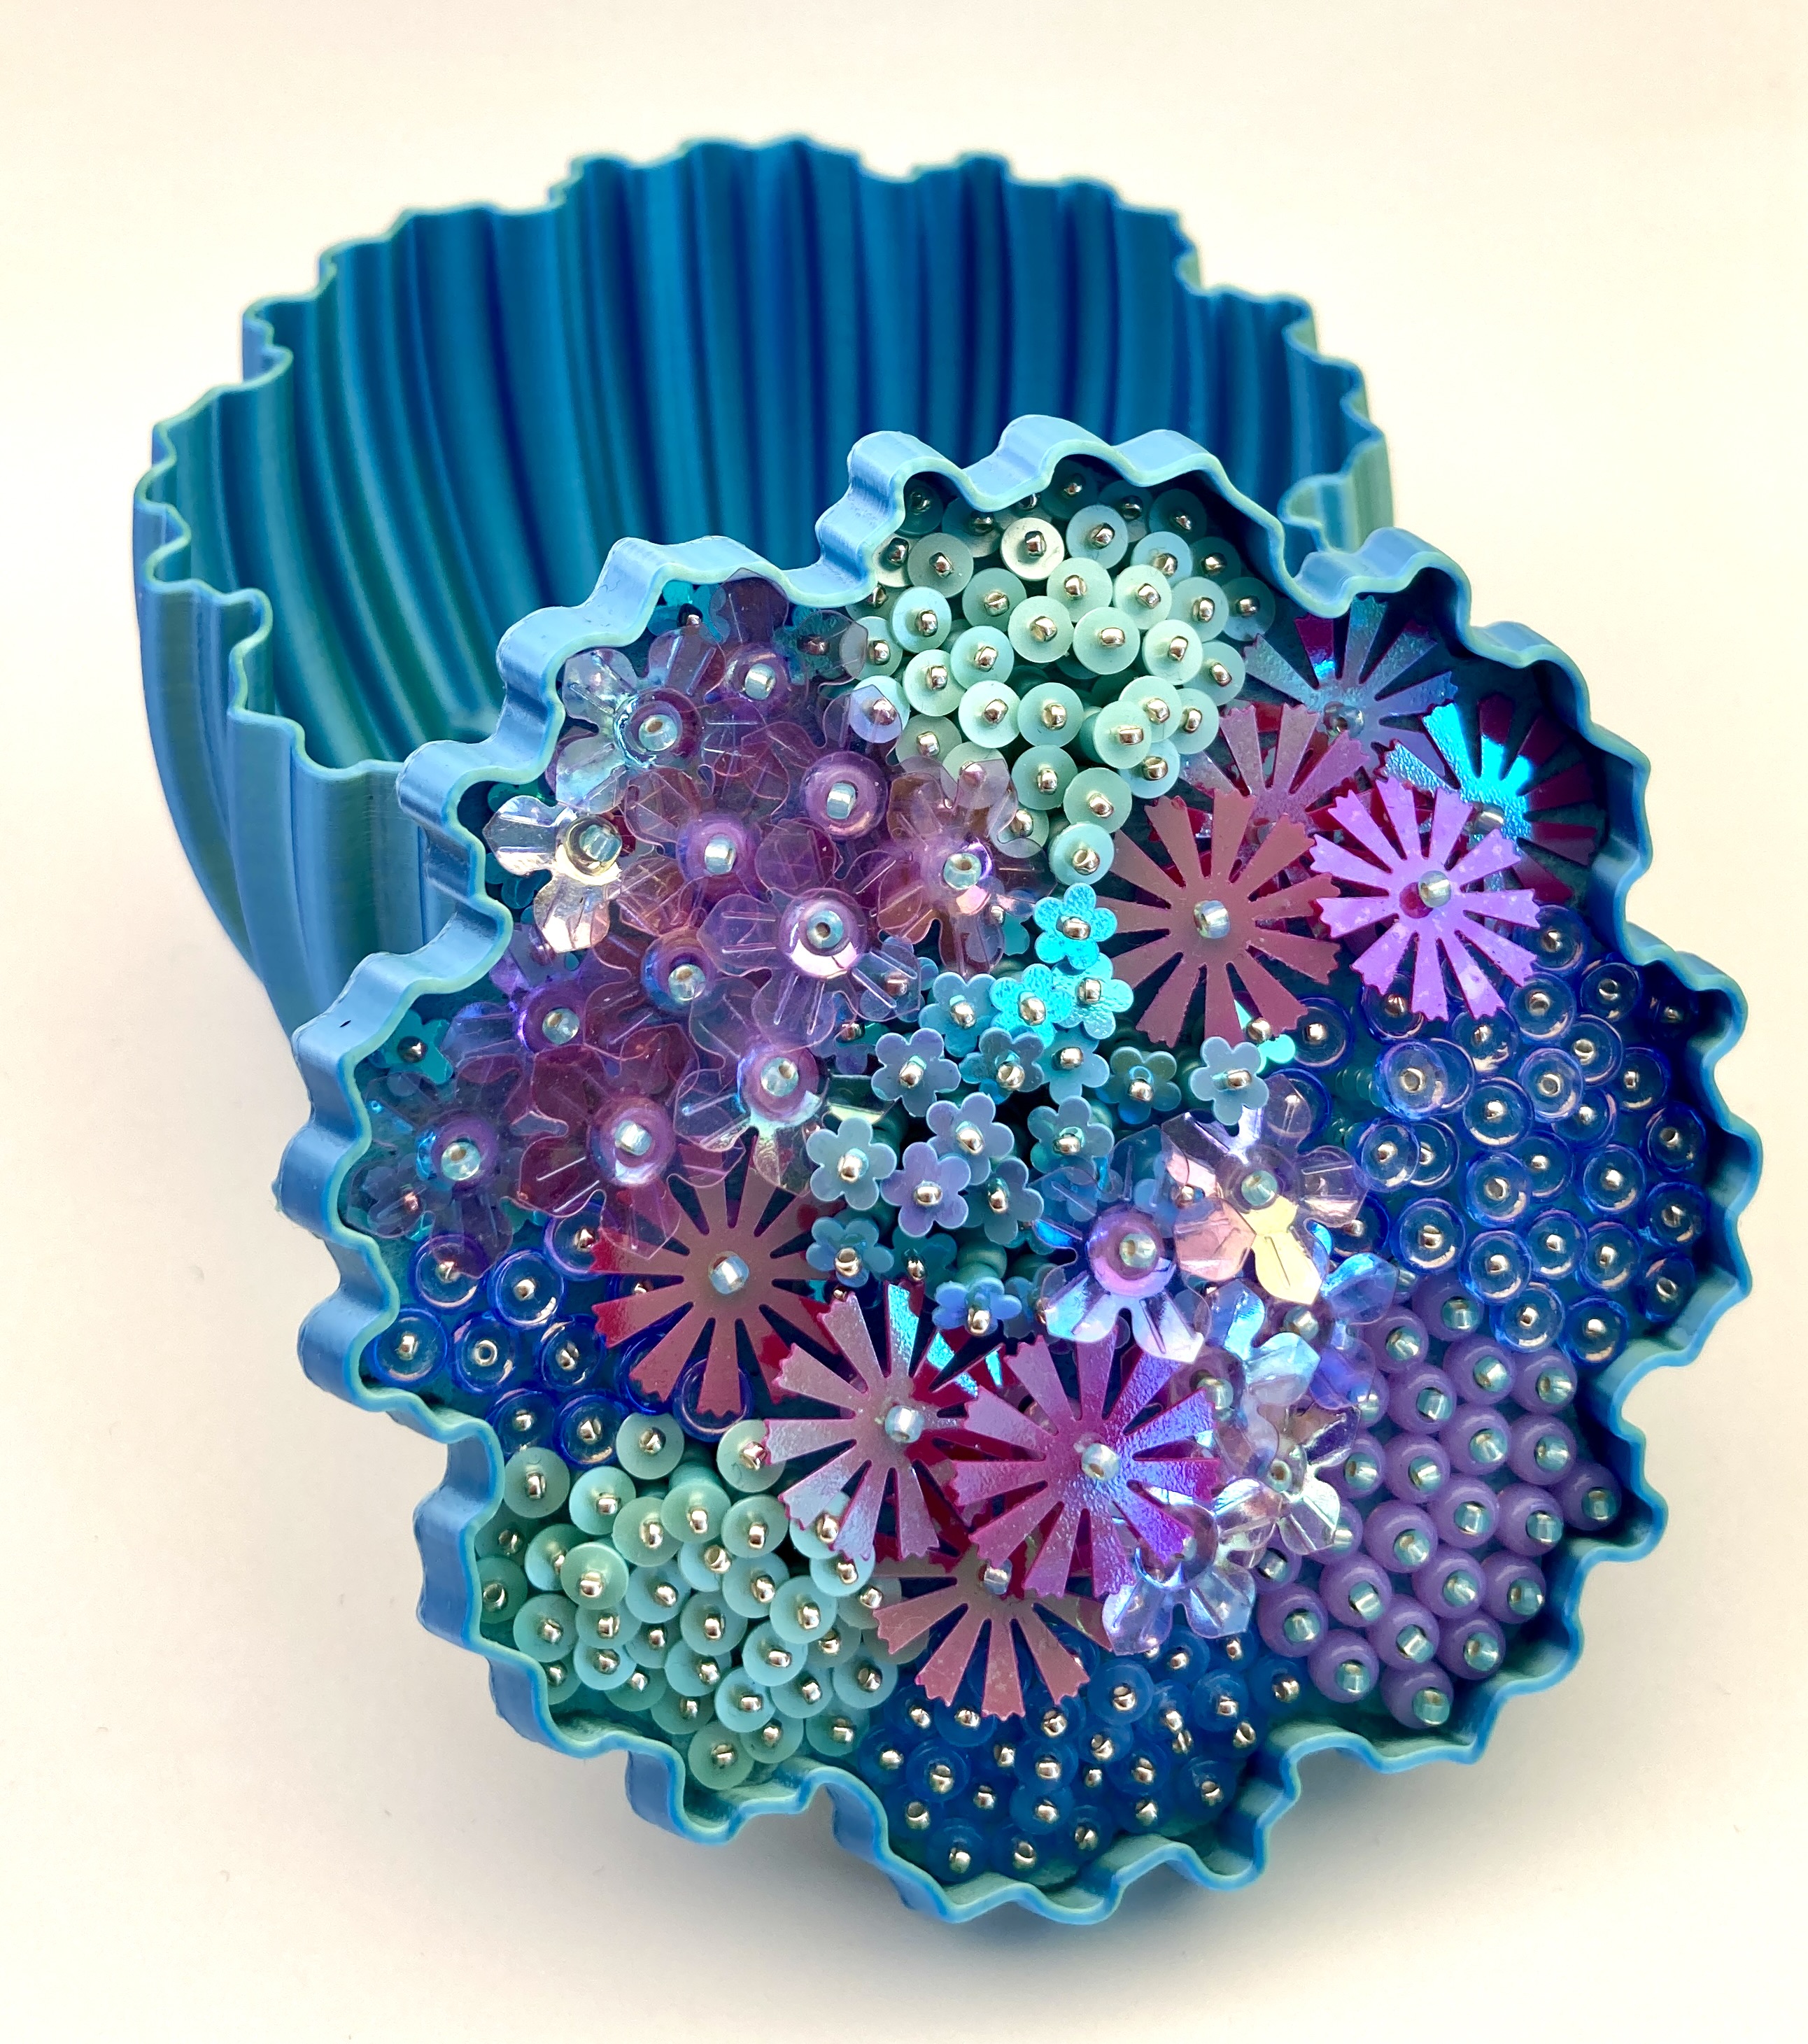
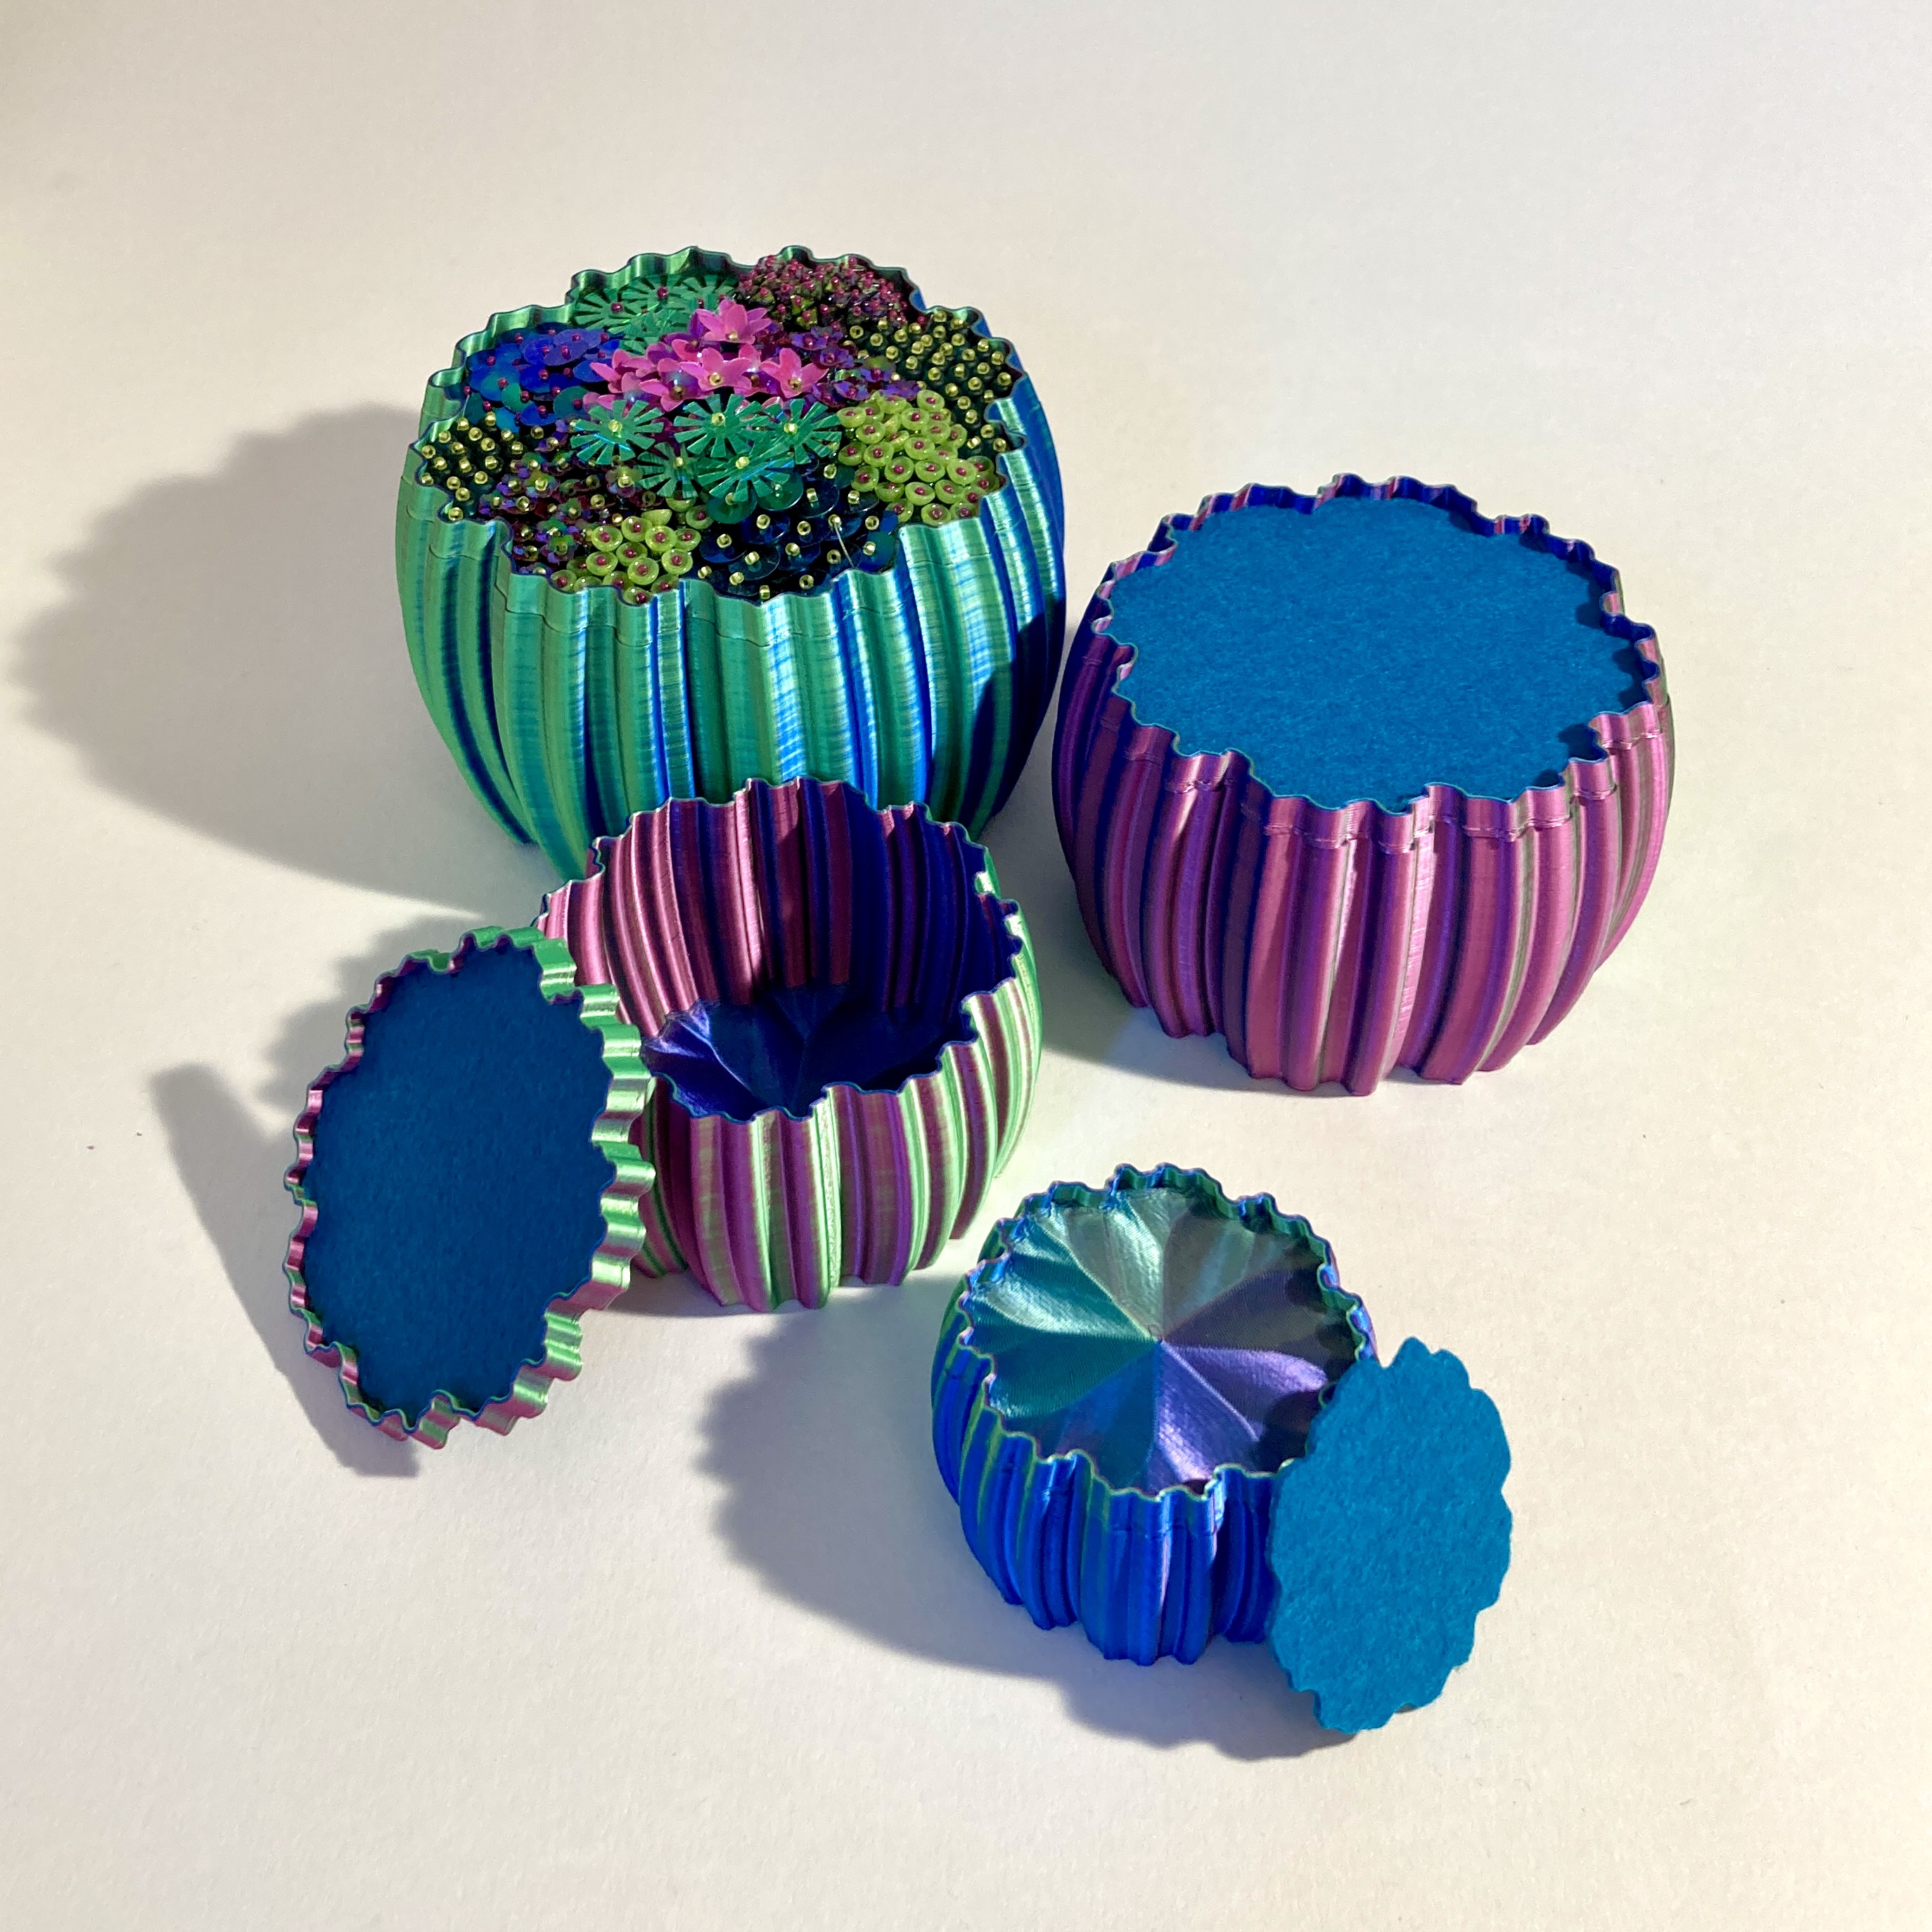
Kits come in 5 colourways named after the flowers which inspired them. Gloriosa is a joyful matte blue, acid yellow and cerise box, with cerise, fuchsia, lime and acid yellow beads and sequins inspired by our wedding flowers. Waterlily (the original inspiration) is a shiny silk blue, green and fuchsia box with green, lime, jade, fuchsia and magenta sequins and beads. Posy is a really pretty pastel set with a matte pink, baby blue and lemon box and pastel beads and sequins. Hydrangea is a silk blue and pale green box with lilac, sapphire blue, aqua and magenta beads and sequins, and a touch of silver. And finally, made in spring Sakura has a silk gold and pink box with lime, pink, coral and yellow beads and sequins.
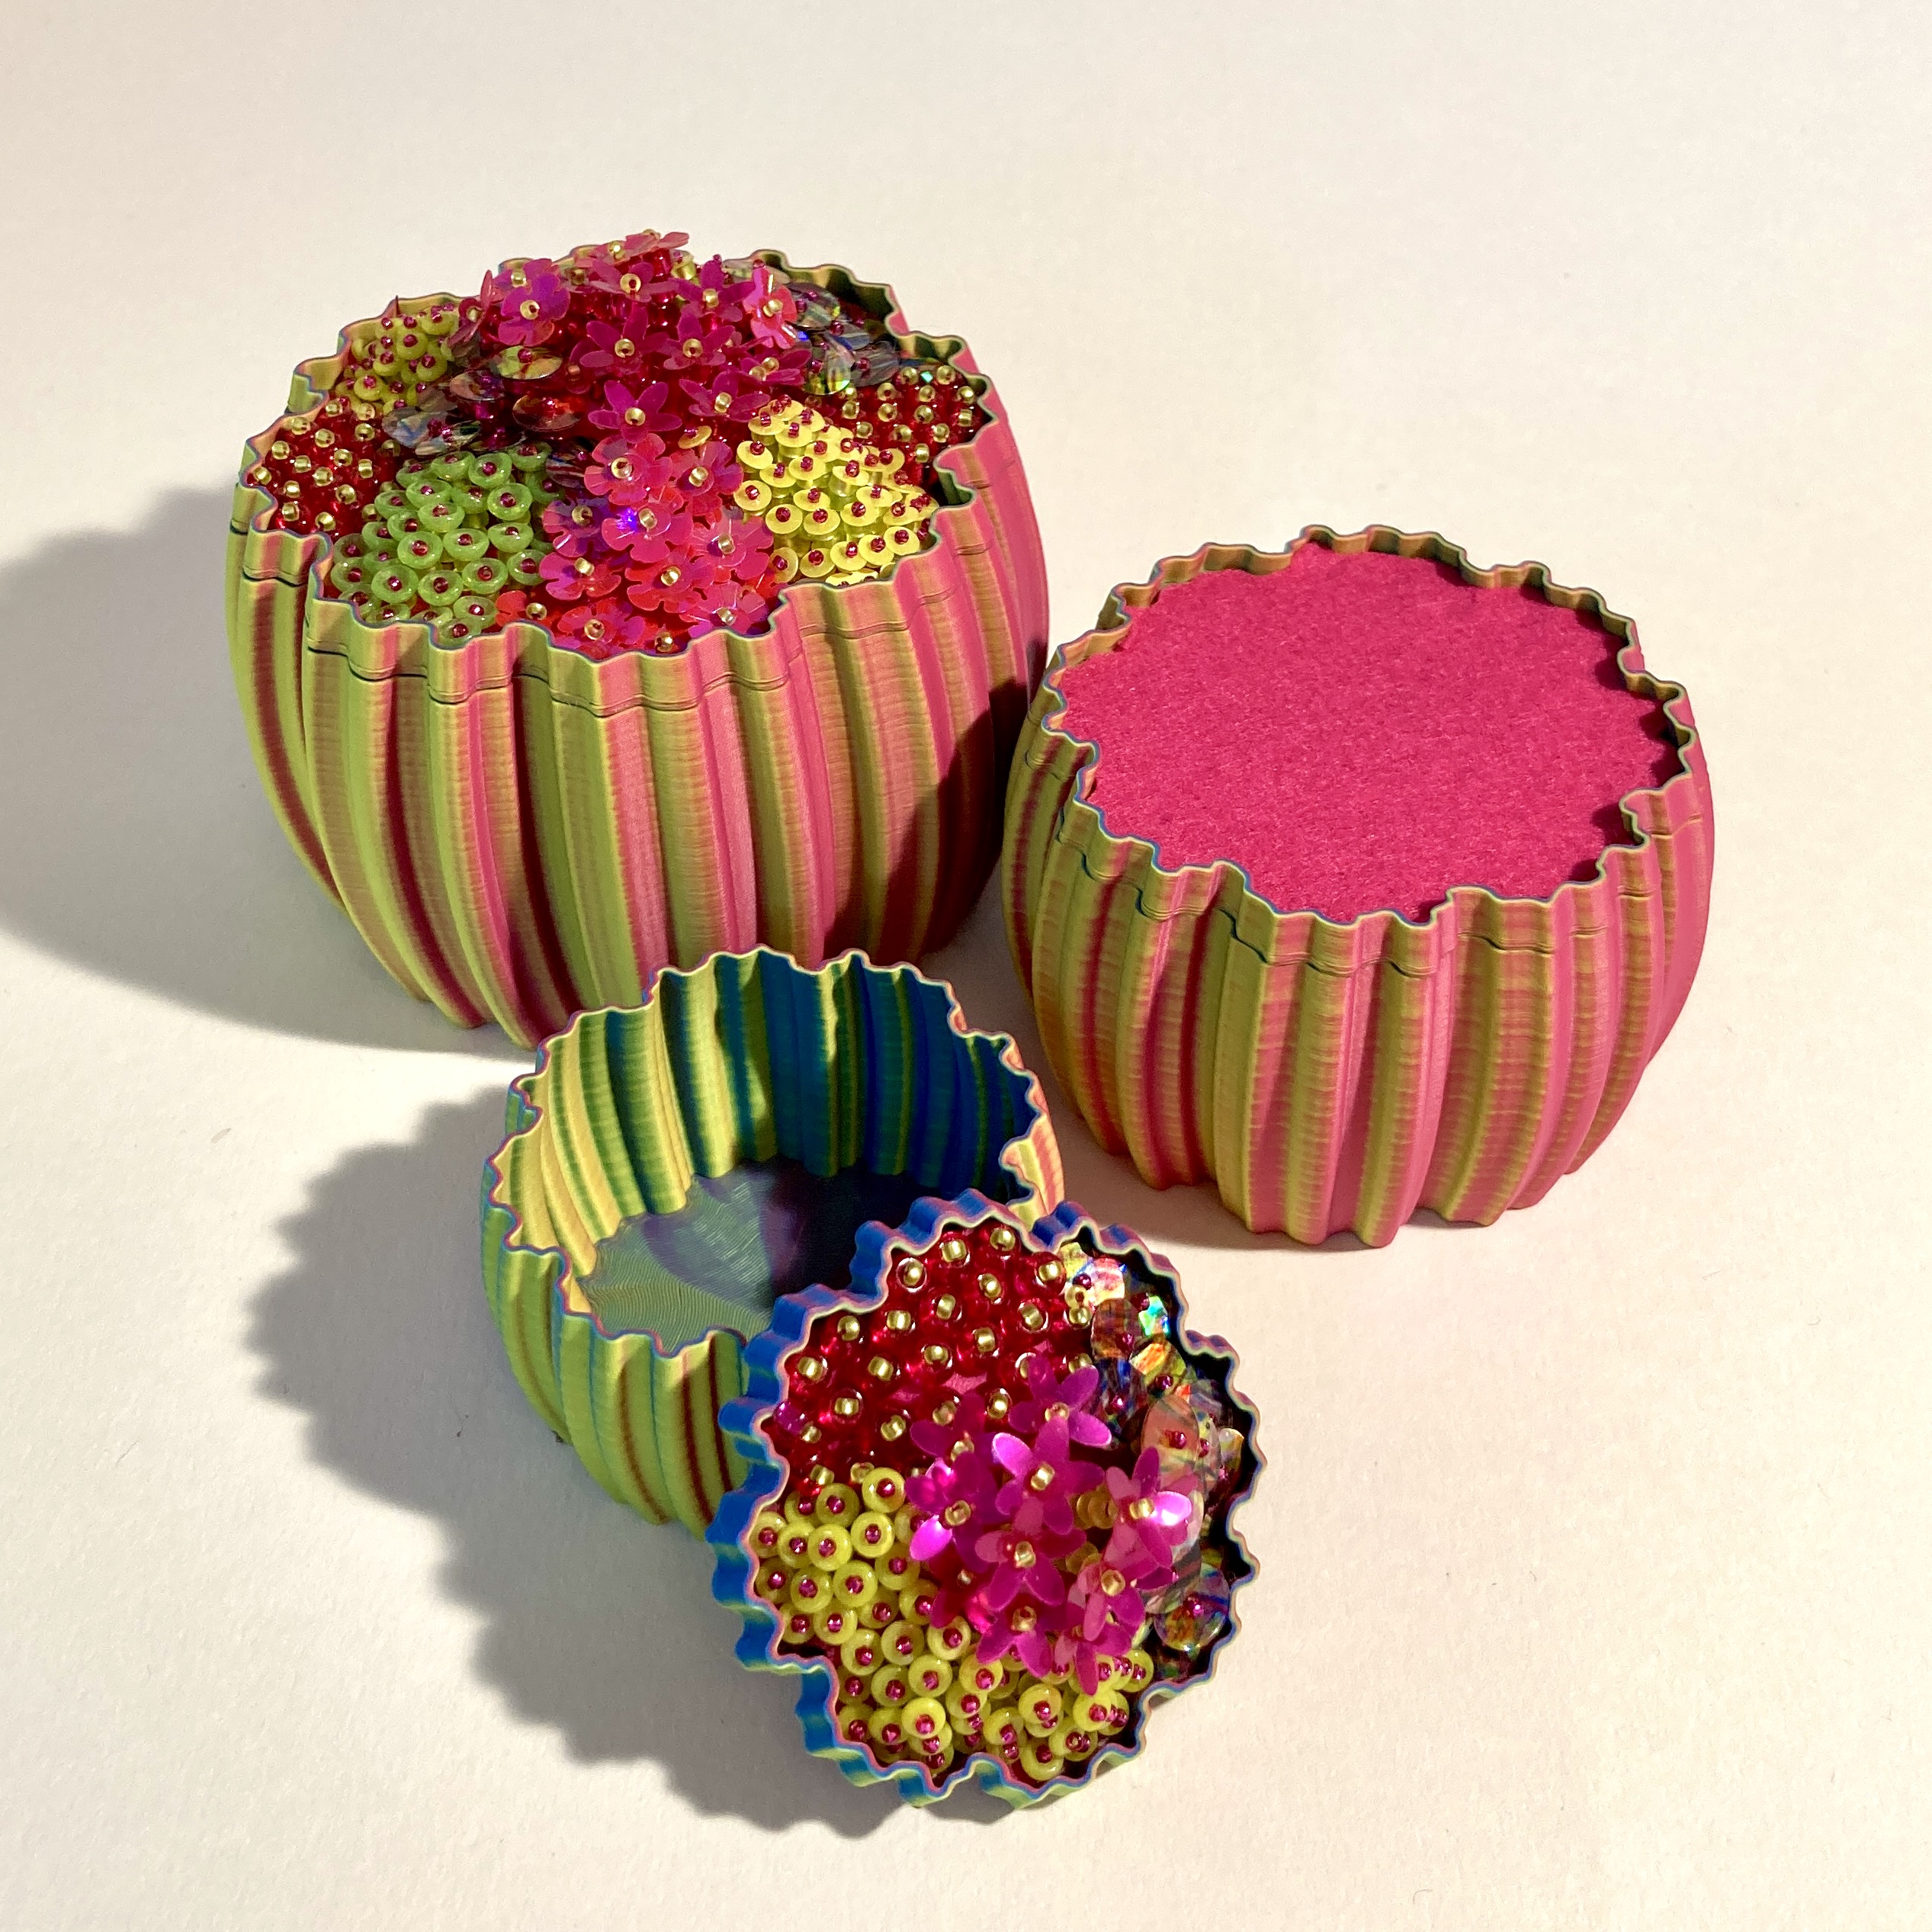
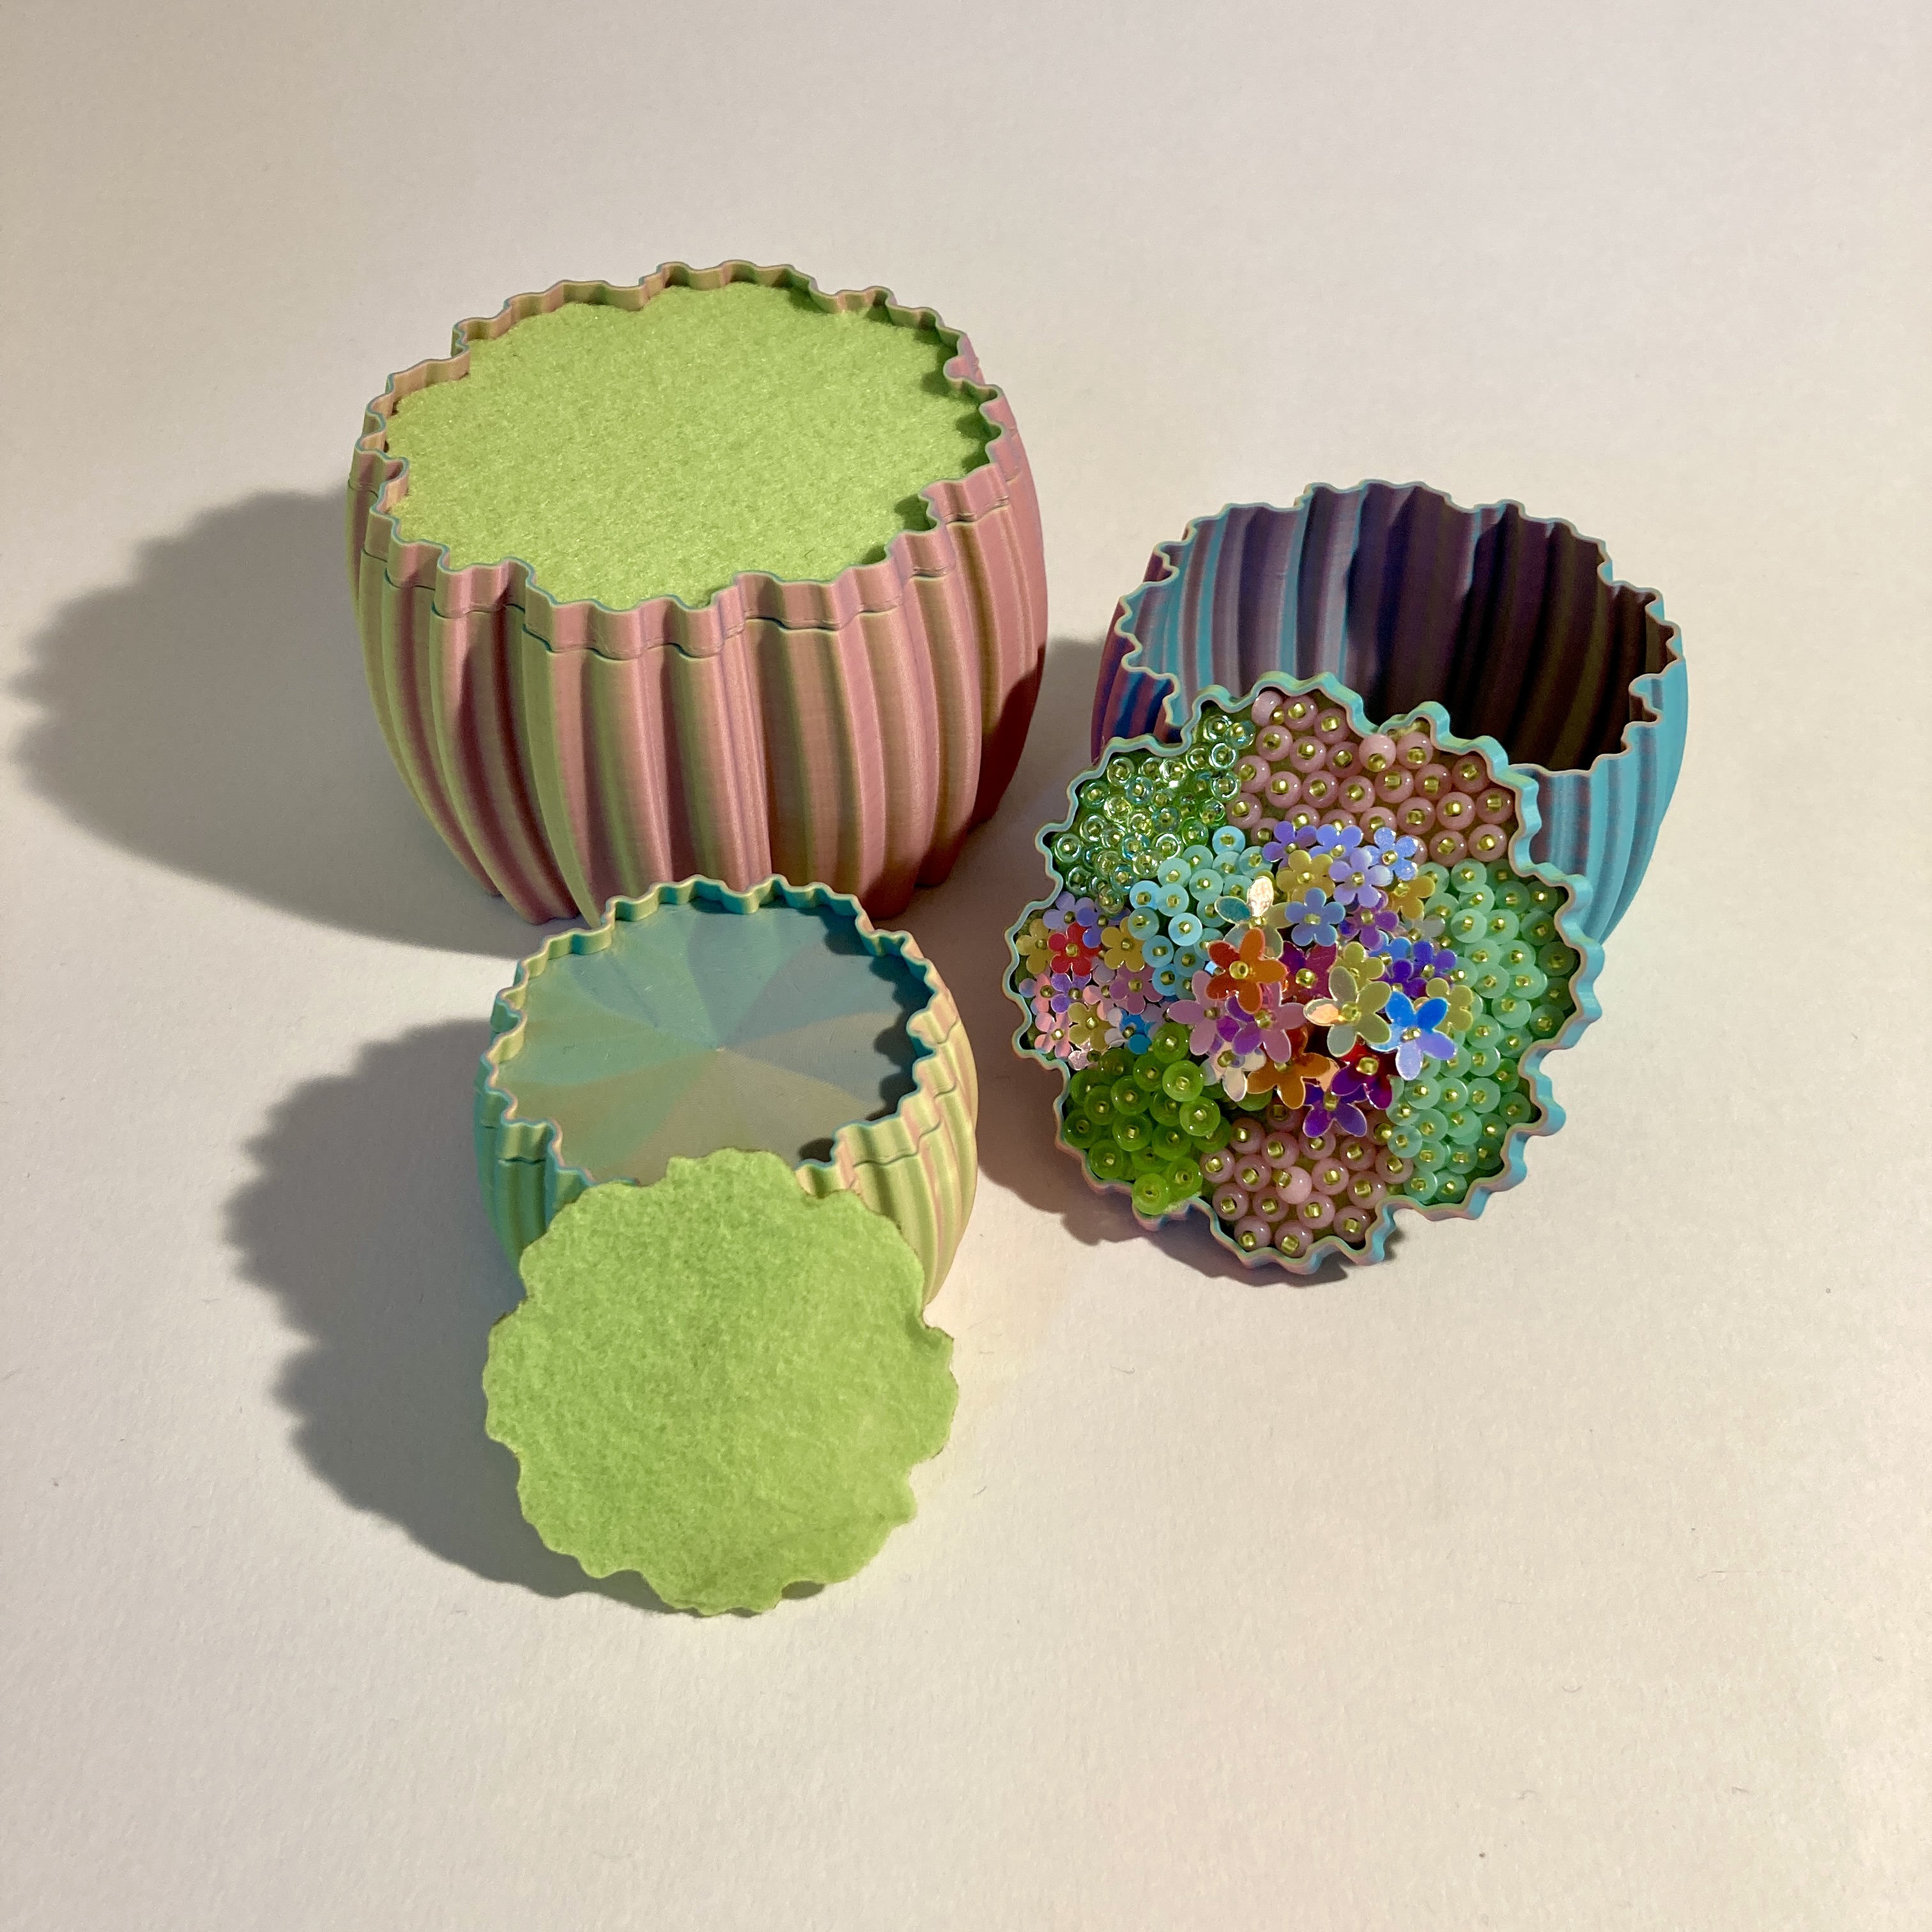

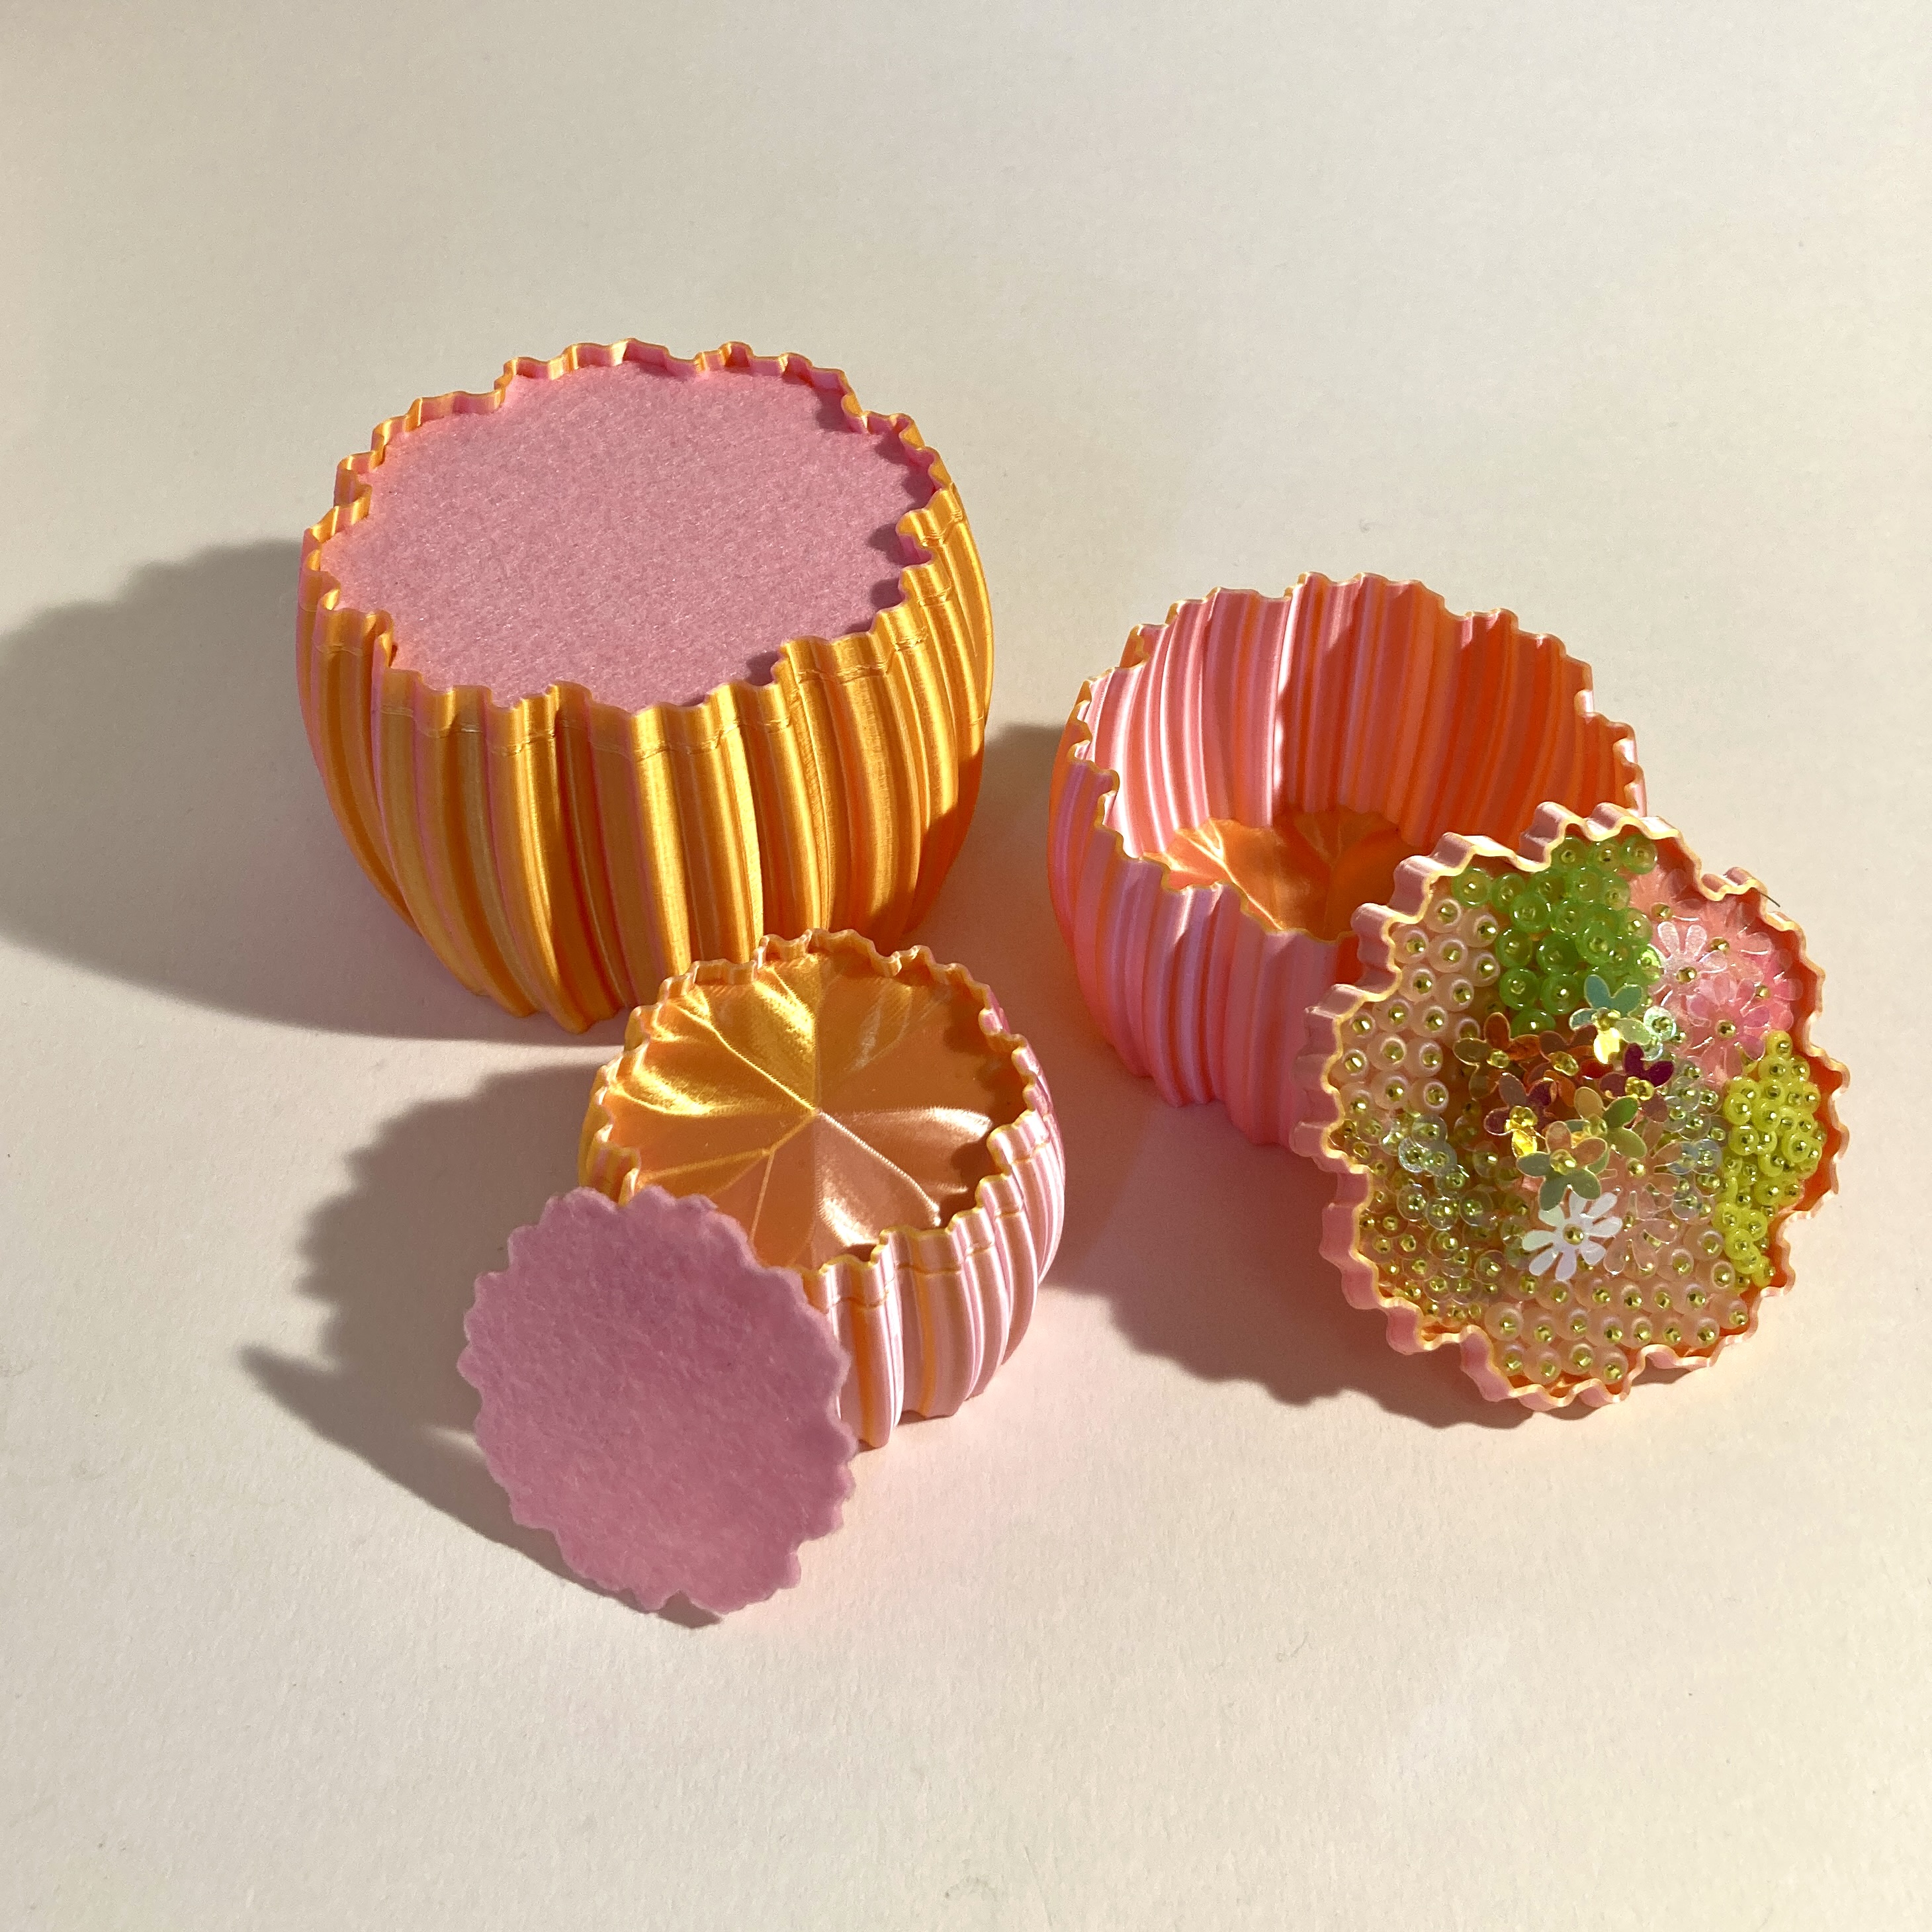
Boxes and kits come in four sizes (although the extra large may be a little rare as it requires the printer to be in a very good mood) – with the kits the variety of beads or sequins will increase as the box gets bigger, as you can see in the Large vs the Small Gloriosa versions above, but even the tiniest ‘small’ have been carefully designed and tested to ensure they’re still really lovely and include the most interesting options whilst not overwhelming their smaller size.
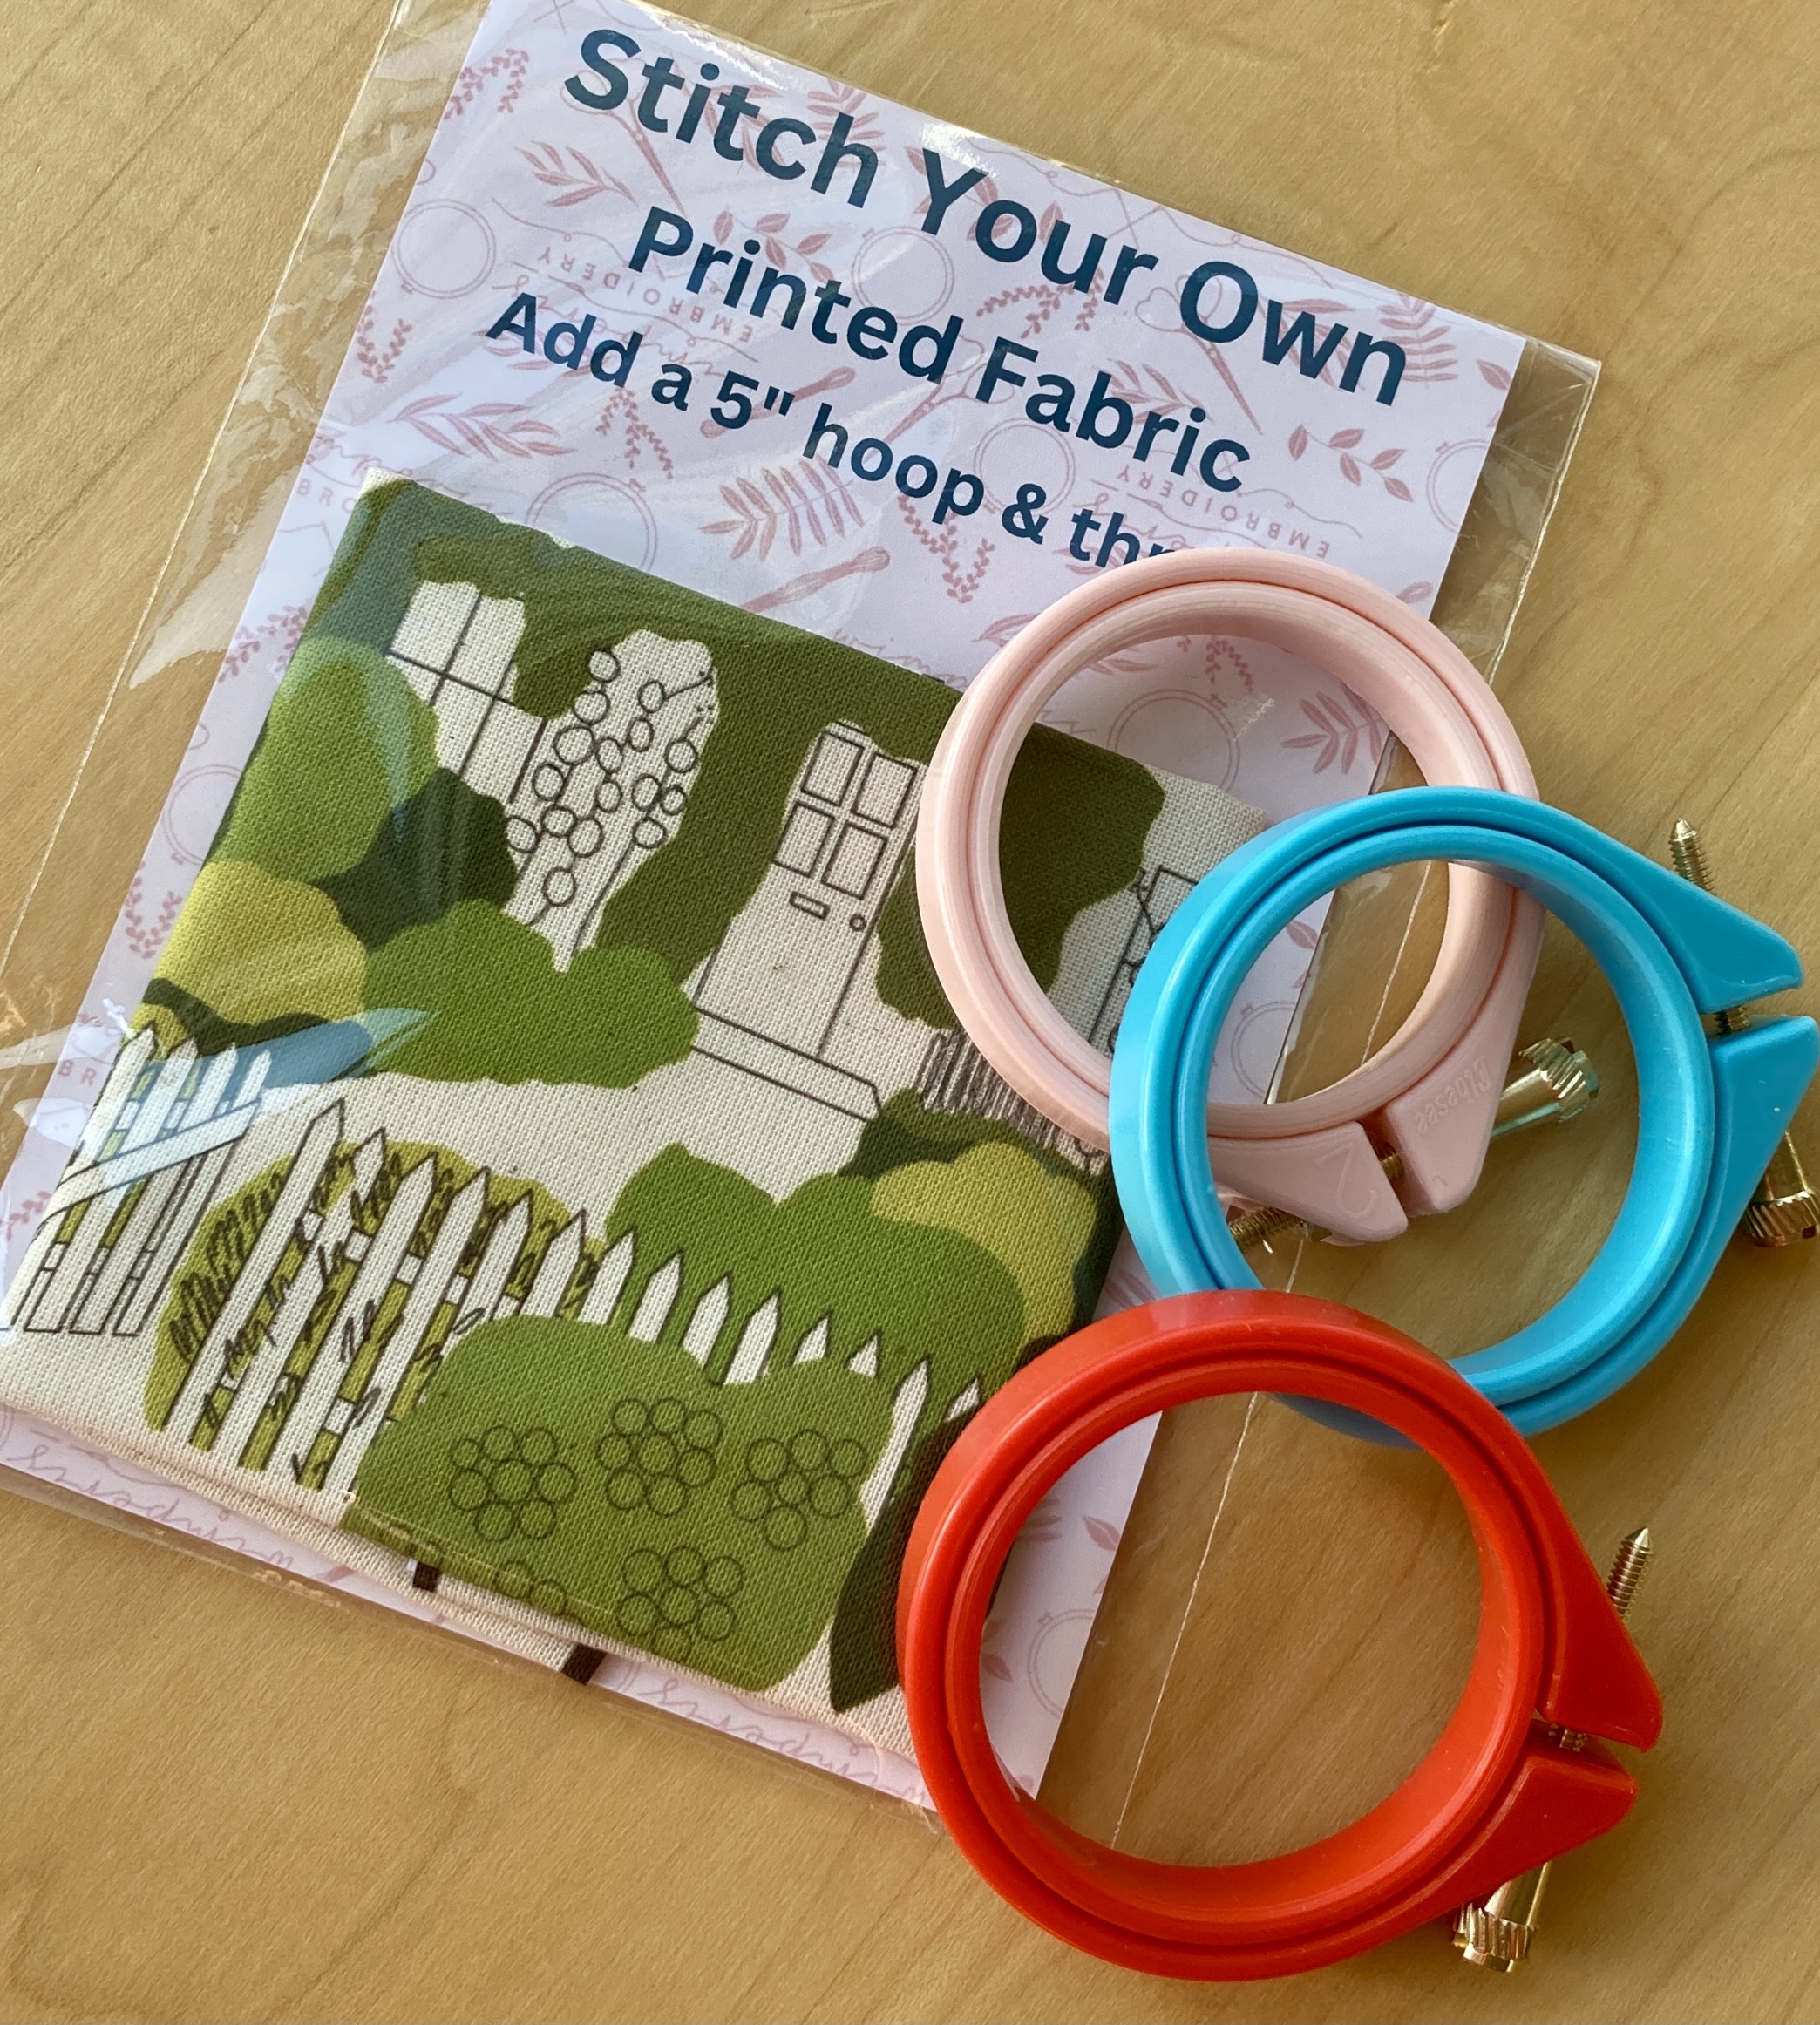
If you’d prefer just the box, and your own beadwork and design, then I have a few boxes without beads etc or instructions – simply pop out the hard felt, fill the pre-cut shape with your own beads, stitches and sequins and then pop back in place for a beautiful box. They’ll be available too in my Etsy shop from 5pm on Friday 12th June, in 4 sizes from 6cm – 12cm, from £8 – £14 plus P&P. They come in the same 5 colours as the kits, plus an additional ‘Crocosmia’ in matte red/blue/yellow which I’ve not had a chance to finish the kit for yet.
Finally because I’m very determined that this manufacturing process needs to be as close to zero waste as possible, I’ll also be having a seconds sale for boxes in a few weeks time – these will be without the felt so should be a really cost effective way of getting a box to play with. When the printer or filament has a bad day it can get a little quirky, but sometimes in a good way – all seconds will be good enough to use, with mainly visual flaws, such as a poorly printed base, or a sudden colour change (those are quite funky!). So maybe not something you’d use for a gift to a friend, but perhaps still a nice gift for yourself.
Kits and boxes go live in my Etsy shop today , Friday June 12th at 5pm. If you don’t get the one you wanted, panic not – there will be restocks. I’m happy to take requests or custom orders to target those restocks to what you’re wanting. If you don’t see a colourway which speaks to you, do let me know – there are more colourways already in the works, and the beauty of the 3D printing process is that if I can find a filament in the right colours, I can print it for you, so I’m completely happy to hear ‘not quite my colours Sarah but could you maybe do…….?’. So get in touch, and we’ll see what we can come up with together.