IBW 2023 ‘I Heart Beads’ version 5

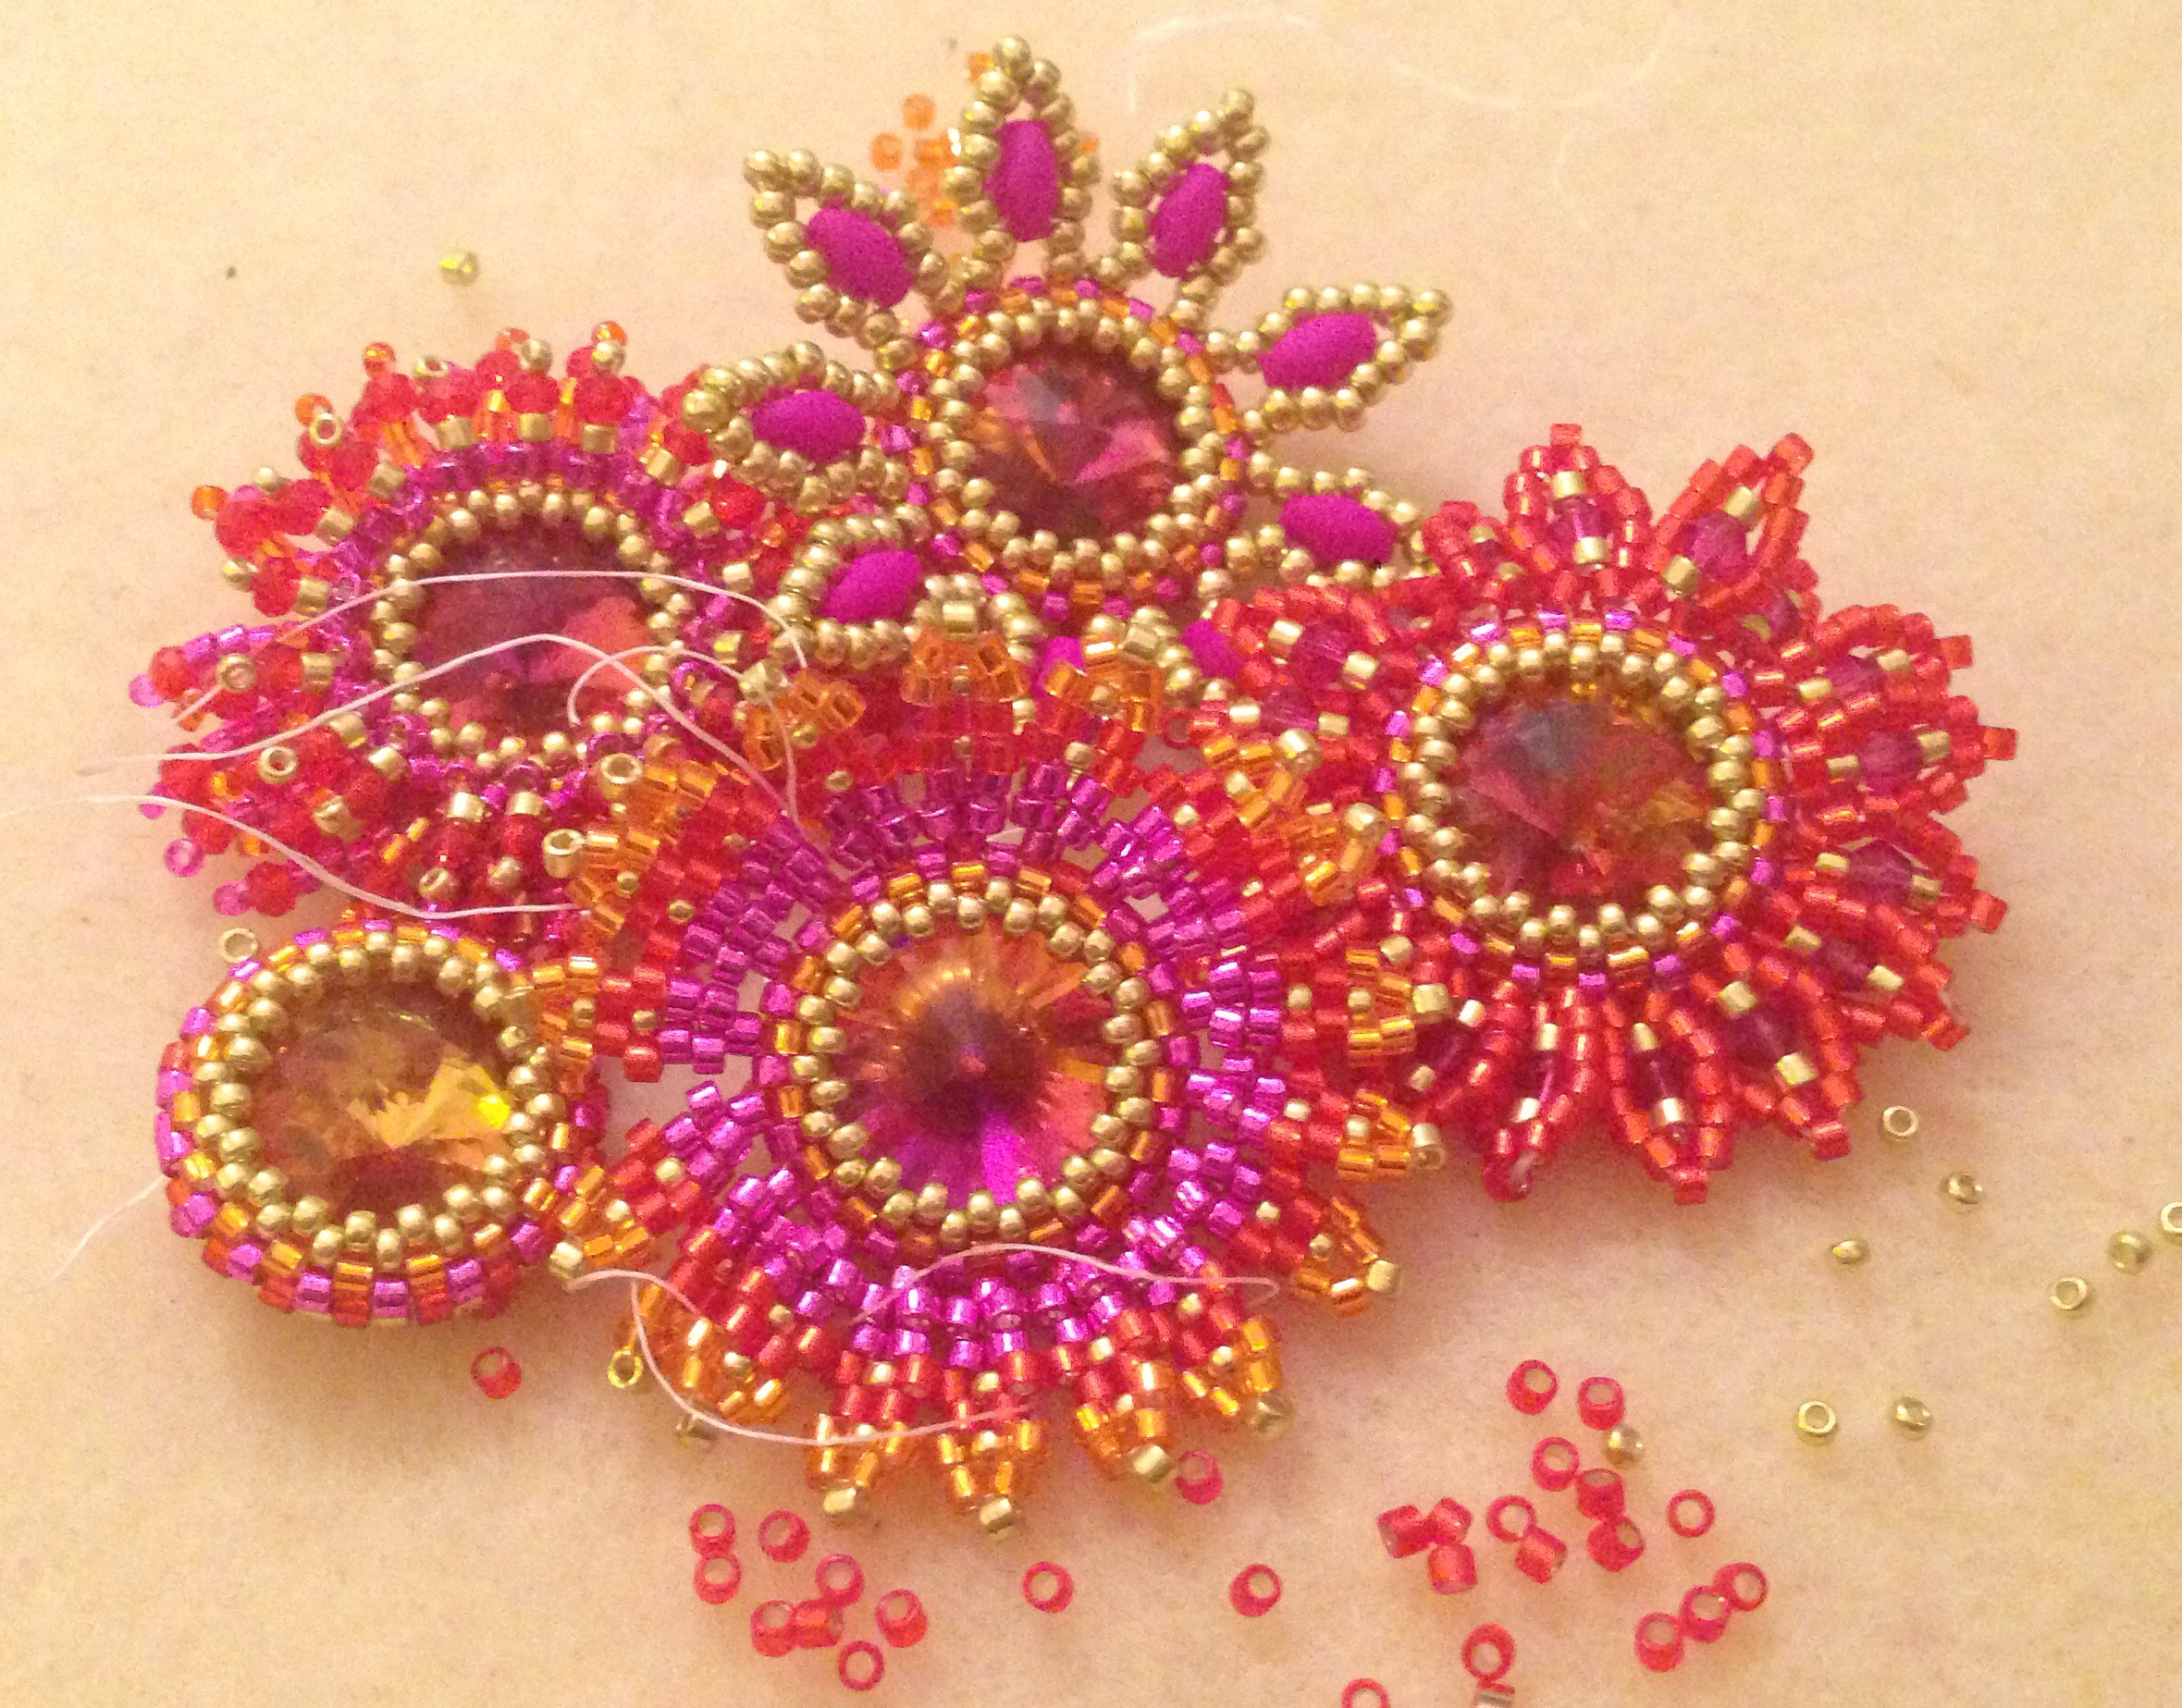
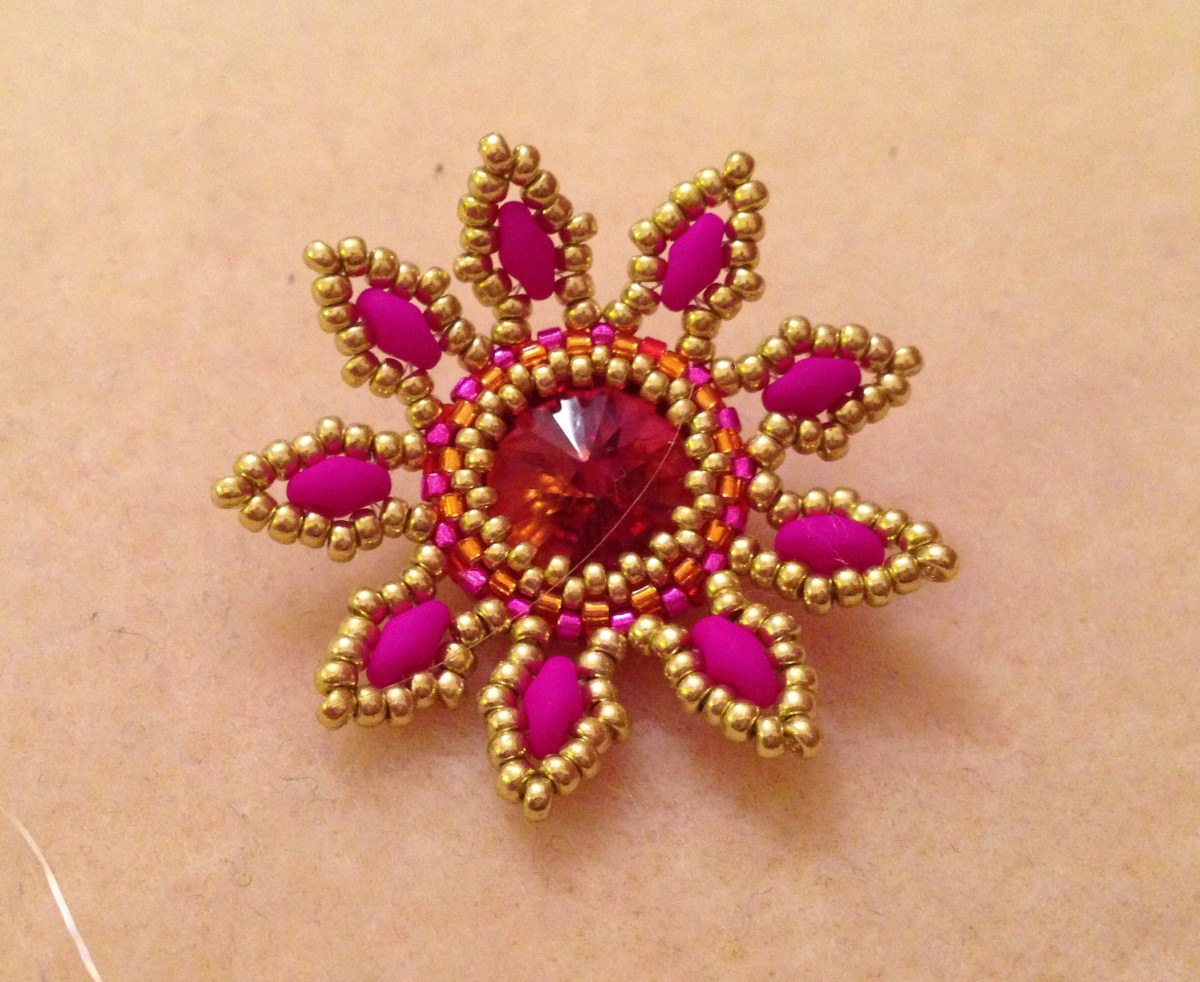
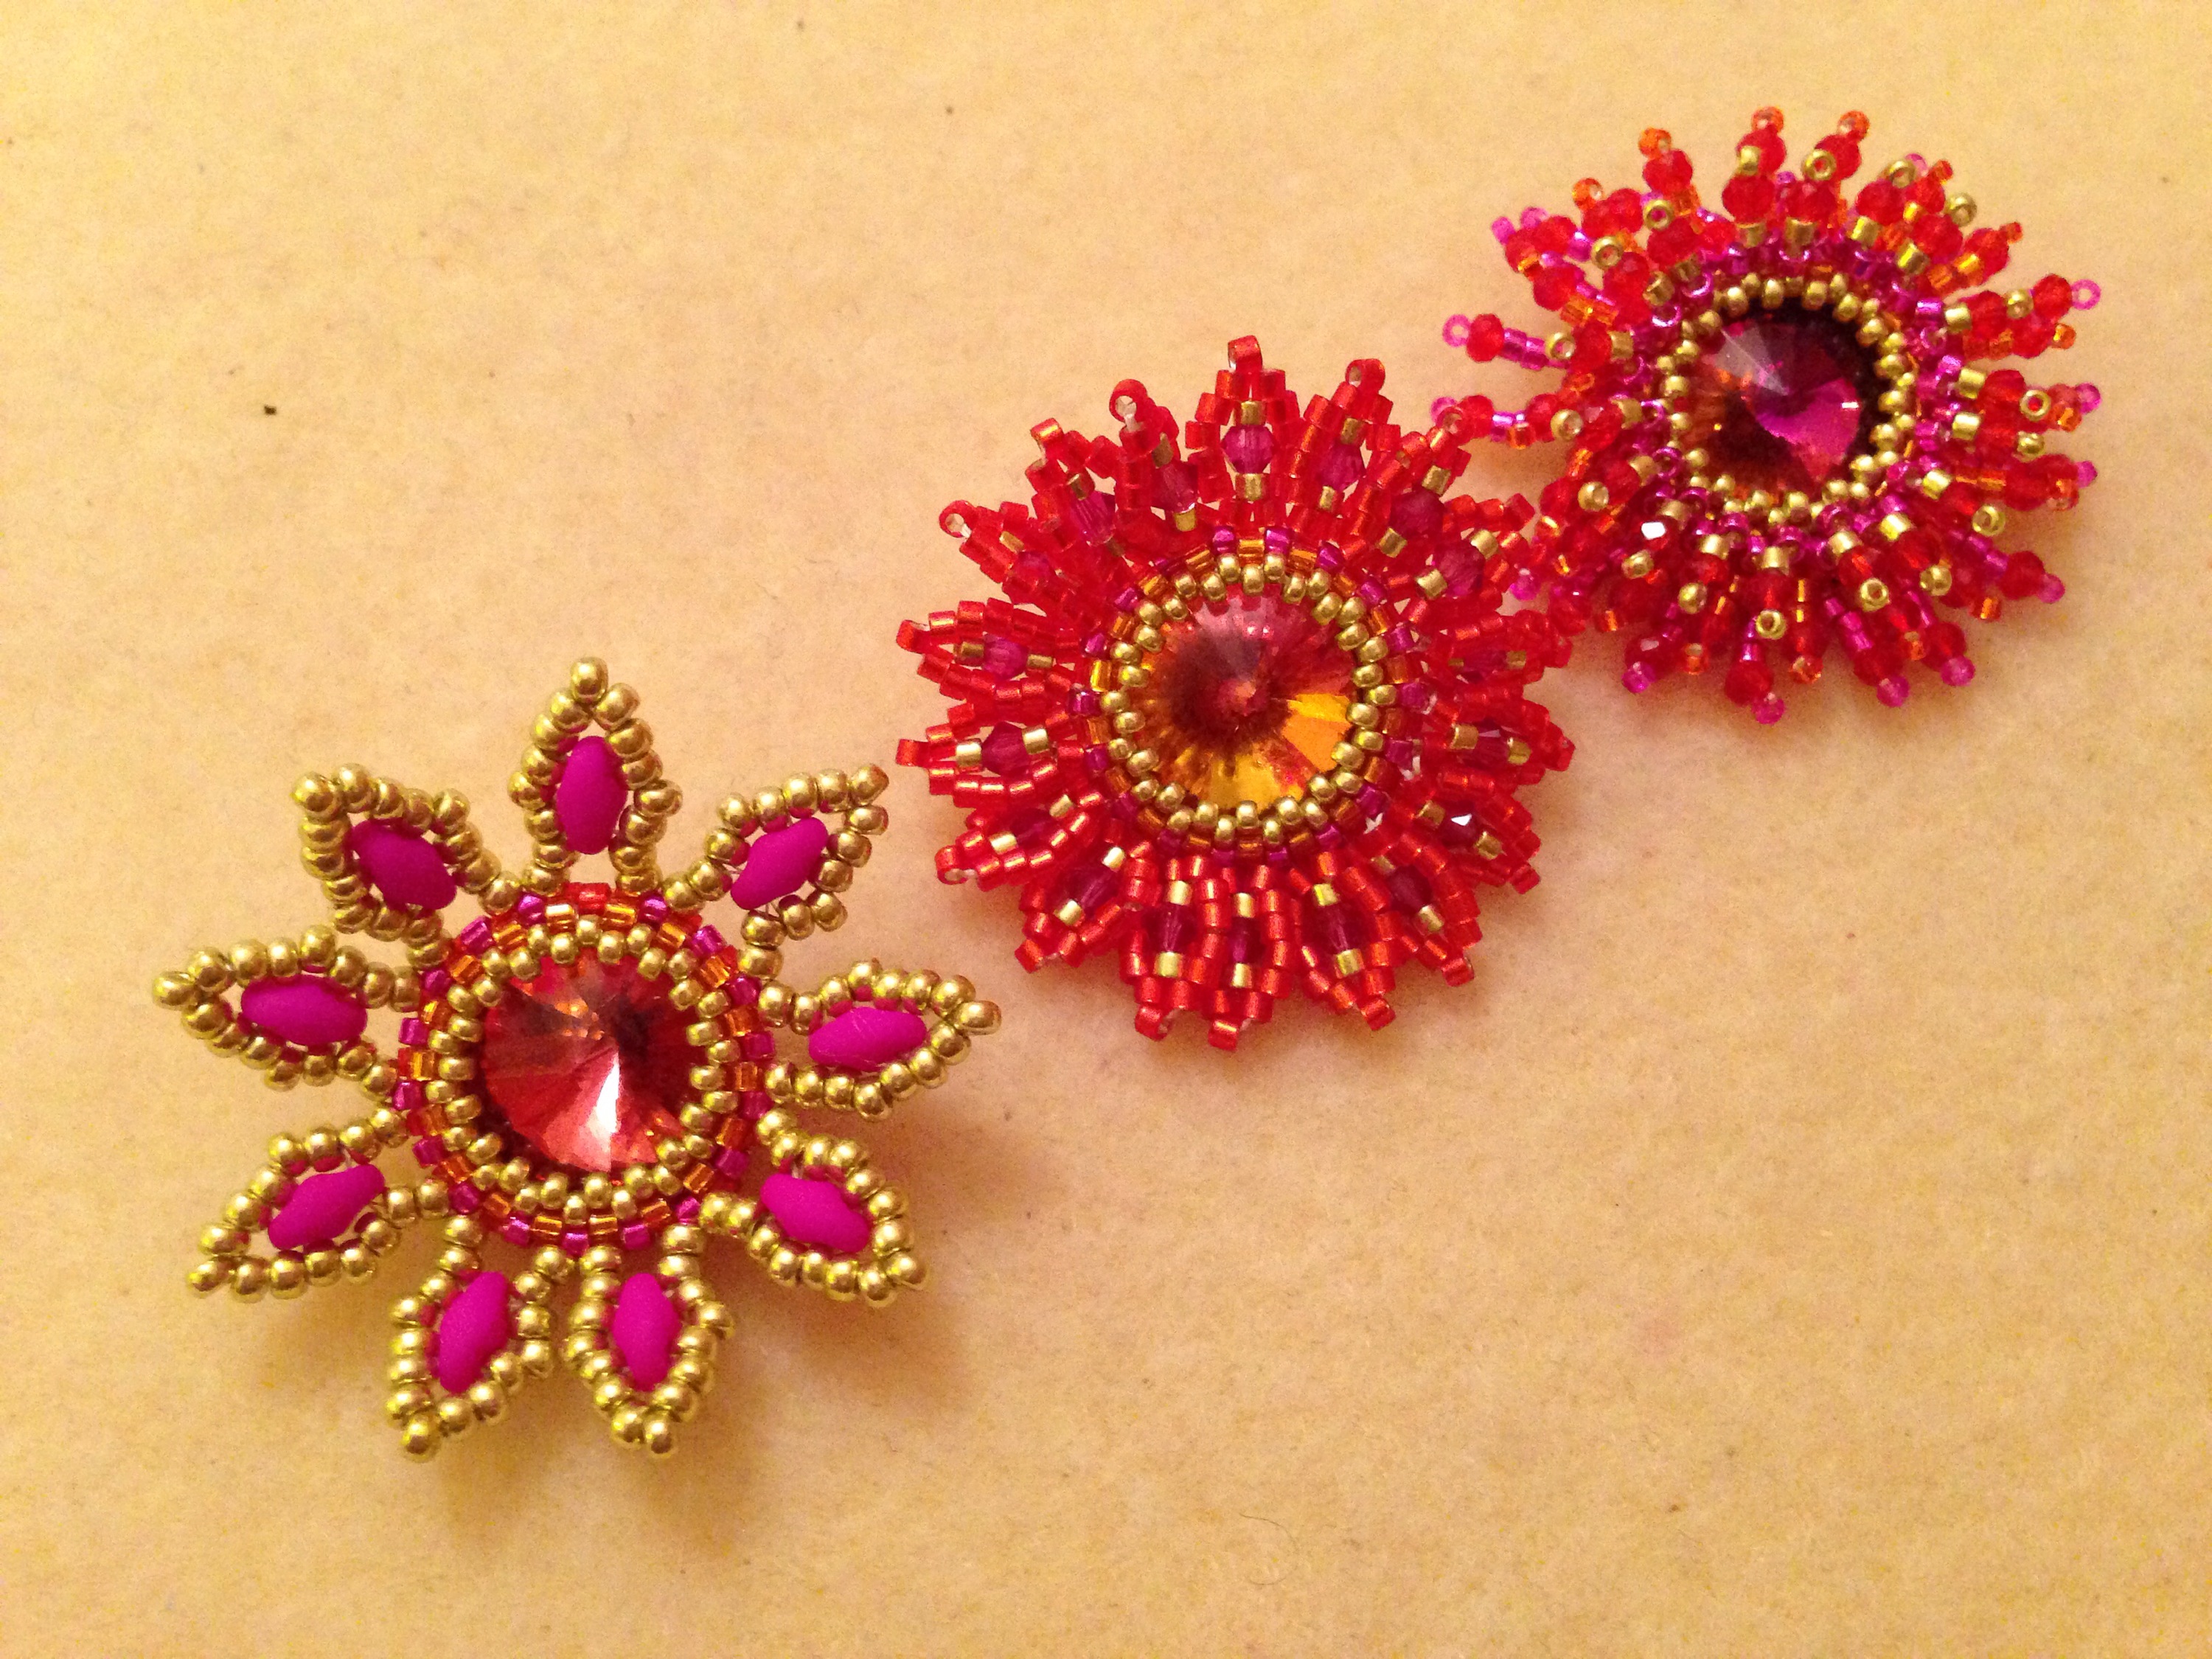
I hope everyone is having a wonderful IBW – I’m certainly enjoying making time to focus on beading. As you know I’m working using my donated ‘exploration’ PDF – a template and set of stitch instructions and ideas for a bead embroidered ‘I Heart Beads’ brooch, and every day or so I’m sharing the results. It’s kind of a week of making samples.

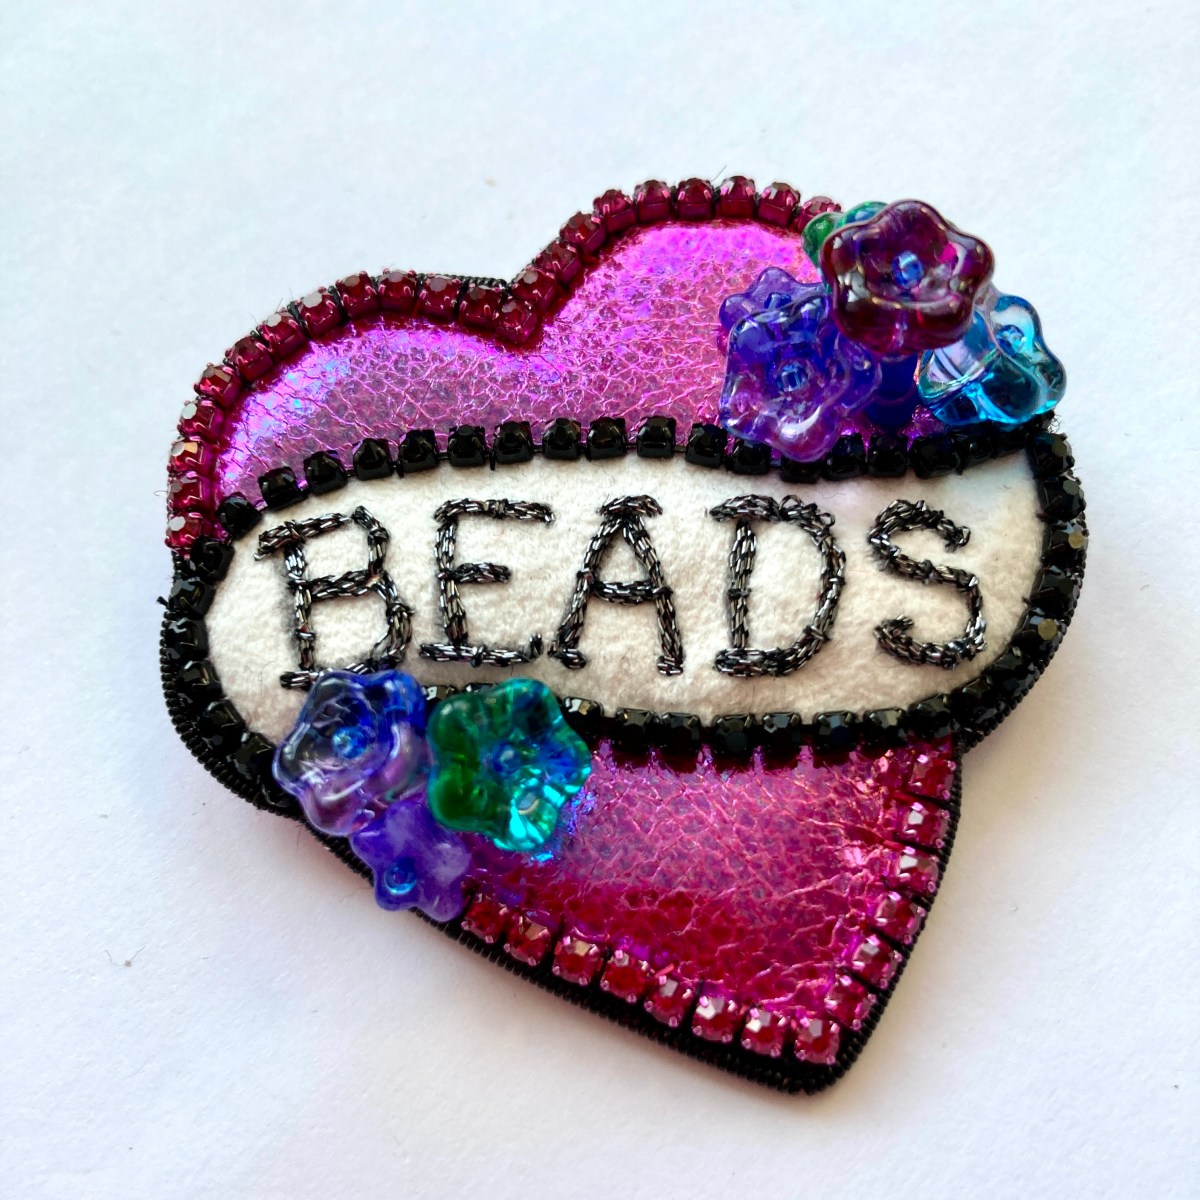
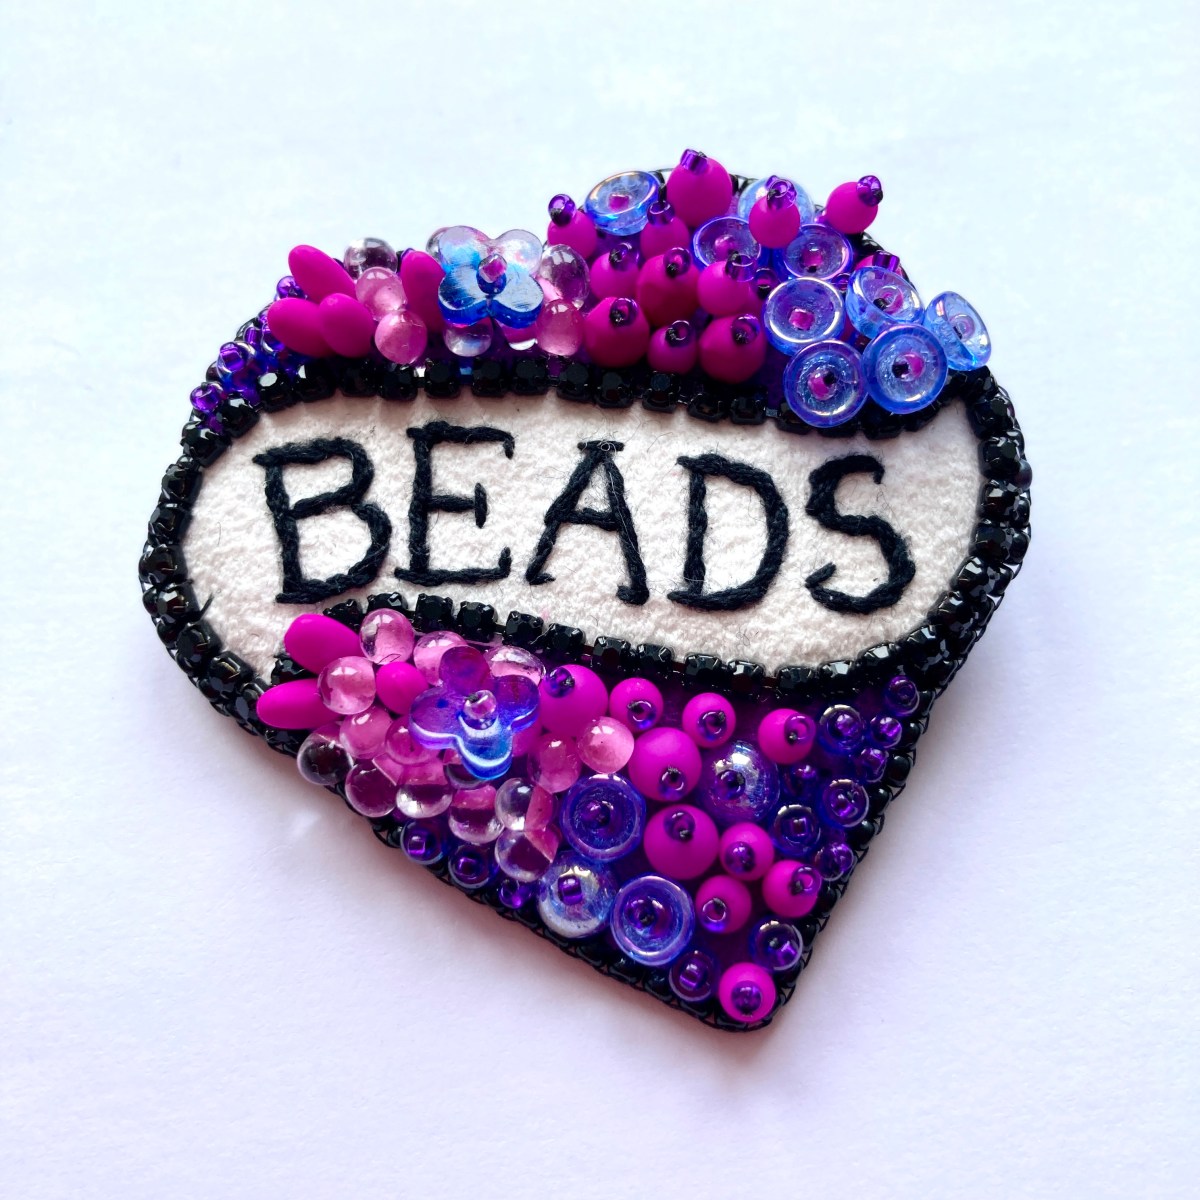
Today I’ve stuck with the heavily beaded style I shared yesterday, but if I’m honest I don’t think this one is as successful. I think it’s probably missing the flat 3 & 4mm sequins I love to use so much – I didn’t have them in the right shade and I wanted to stick with beads as a test. I think some of the bead groupings are also too numerous – this is after all quite a small piece so I need to probably stick to groups of 3, 5 or 7 of anything bigger than an 11. On the other hand I’m still keen on the stem stitched letters (with serifs!) and going back to the cup chain and a beaded sunshine edge worked (the eagle eyed amongst you will notice I didn’t put a black edging on the heart prior to that edging, which was a change and looks fine).

Steps were:

1) Black foundation, purple heart (both hard felt) and white ultrasuede ribbon with stem stitched letters (3 strands DMC). Ribbon edged with couched 2mm Black cup chain from my Etsy shop. No black edging round the heart at this stage.

2) Stacked cup beads, 4mm and 3mm rounds and FPs. Seeded Rizos, and 3.4mm drops (I didn’t have any 2.8mm which I missed – I like using both sizes together). I used to many drops together so I popped a couple of teeny flowers on to break them up (made from shrinkets coloured with acrylic inks).

3) Black ultrasuede backing, then a simple black 11 seed sunshine (brick stitch) edge.

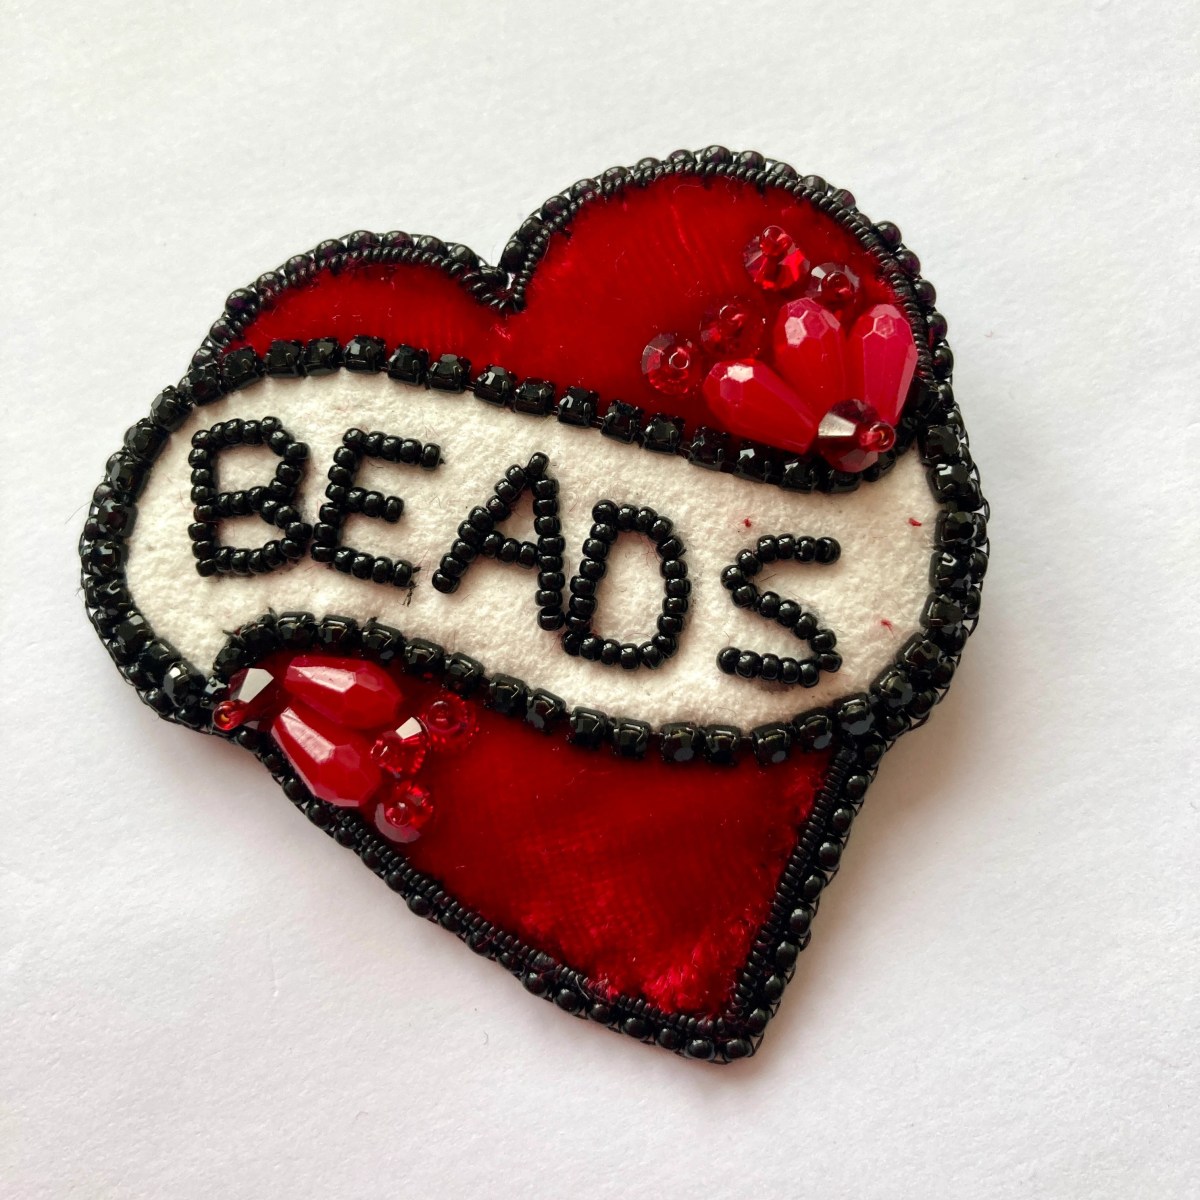
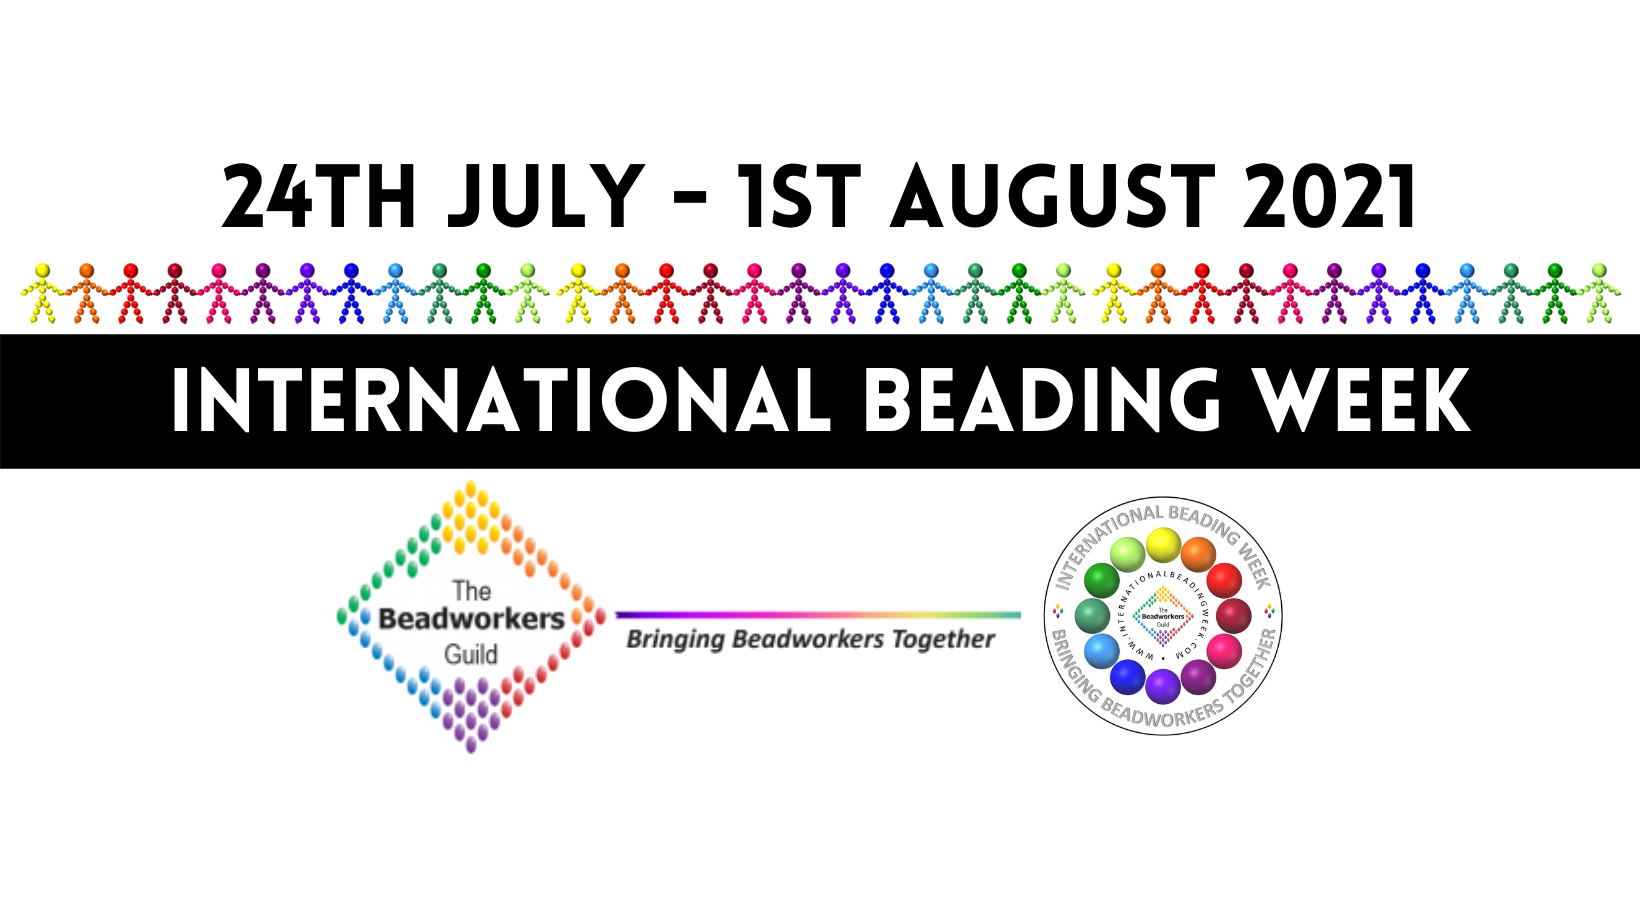
So overall good, but not as good as the red one. I’ll get the sequins back out for the next one – lesson learnt. If you’d like to see what I’m up to or look at the other kindly donated patterns then they are all on the @beadworkers website in the #InternationalBeadingWeek section here – https://beadworkersguild.com/free-patterns/

IBW 2023 ‘I Heart Beads’ – Version 2

Hello again, here’s my second version of my ‘I Heart Beads’ brooch. I’ve gifted the template and stitch instructions to IBW, but rather than just one final version I’m going to try lots of different combinations of stitches and materials over IBW to show you all how versatile bead embroidery can be and encourage you to experiment (and if that experiment looks like mine that’s fine).

Anyway, this one is quite similar to the first one, with a few tweaks of course. Here are the key steps/ingredients:

1 – Black foundation again (hard felt) with a single layer of felt padding (heart shape 3mm smaller than template), followed by a metallic/iridescent artificial leather.

2 – White ultrasuede with ‘beads’ couched on using metallic DMC embroidery thread. I worked this on a larger sheet on an embroidery frame (I did several at once) and switched to thread as I hadn’t got the accuracy I wanted in my 15 seed backstitch yesterday. It’s better but this thread is a pain to work with and I guess I miss it actually being beads, so I’ll try some other options. The ribbon is again surrounded and attached to the main piece with couched down 2mm cup chain from my Etsy shop.

3 – The heart was also surrounded with couched down 3mm fuchsia cup chain, and I then used stacking to add some clusters of jewel coloured flower beads, with a tiny blue 15 seed as the stop bead, putting the central one on a stalk of size 8 seeds to add height.

4 – Metallic leather again as a backing, plus the brooch back, then used a cross between couching and a brick stitch edge to join the layers and capture a 1.25mm Pearl Purl on the edge. I did try a sunshine (brick stitch) edge in size 11 black seeds but it was too much next to the cup chain, but unfortunately I don’t think the final edge has enough black to get the tattoo look.

Verdict – great quick technique for a fun and flashy piece but considering the theme, definitely not enough beads on it! Also I promised something ‘Barbie’ and this doesn’t take it far enough (needs more pink!). Tomorrow I will be sure to go all in on the beady and Barbie front……

PS if you’d like to try this or the other gifted patterns they’re here on the @beadworkers website https://beadworkersguild.com/free-patterns/

IBW ‘I Heart Beads’ – Version 1

One of the great things about International Beading Week are the gifted patterns from a huge range of designers, beaders and of course the IBW Ambassadors. My gift this year is a little unusual in that it is more of a guide than a set of instructions – I’ve given a template and some detailed bead embroidery stitch guides, but not a ‘put this bead here’ step by step process. Instead I want beaders to embrace the freedom that bead embroidery can give you and strike out on your own – and I’m going to be doing the same, beading as many of the design as I can bear over the week, then posting right here to describe how I did it each time.

So here’s the first one and the steps to create it (refer to the tutorial for how to’s on stitches etc):

1) Black foundation, then three layers of red soft felt (3mm smaller than the template or previous layer each time) stitched in place. Silk velvet cut into the heart shape stab stitched around edge.

2) White Ultrasuede ribbon, held in place by couching on black 2mm cup chain. ‘Beads’ lettering added by backstitching 15 seeds.

3) Small selection of beads, bicones and lochrosen (crystal sequins) added using stacking and seeding (see tutorial).

4) Brooch back and black ultrasuede foundation added, then a simple ‘sunshine’ beaded edge (all included in the tutorial).

Learns – well if I’m honest the lettering is a bit messy, I’m not sure that I can face using beads for this step again! And the velvet is a bit messy round the edges – overall I don’t think this has the impact I was looking for yet – perhaps it’s too far from my usual style, although it was lovely and quick to work with a visible foundation fabric. Bearing those lessons in mind the next one will be OTT Sarah style I think – very encrusted and probably Barbie pink as that’s everywhere today! Stay tuned……..

PS if you’d like this or the other gifted patterns they’re here on the @beadworkers website https://beadworkersguild.com/free-patterns/

International Beading Week

As part of the IBW social media team  for several years it’s lovely to be able to show my support as a designer as well by becoming an IBW Ambassador. Beading along with others is such a pleasure, whether it’s done in person or remotely, and I’m looking forward to seeing the results all of the events and activities the IBW/Beadworker’s Guild team work so hard behind the scenes to prepare for you every year.    This year’s International Beading Week runs from July 24th – August 1st, and as well as working away with my lovely colleagues on the Guild’s Social Media team I’ll of course be beading along with the wonderful annual Jean Power Summer Secret Beadalong.

As an Ambassador I’m proud to donate a design (or two or hopefully when I have time, three) to the event – here is the first one, a charted brick stitch and fringe piece which is available as a free PDF here. It’s also available via the IBW section of the Beadworker’s Guild website alongside many other wonderful free patterns from other Ambassadors and Beaders – have a look at the amazing selection.

This piece can be adapted to change the length, colours or overall use but at its’ core is the 12 colour spectrum of the IBW logo and a rainbow. The rainbow has come to mean a lot symbolically in the UK over the last year or so, so seemed an appropriate choice, although making curves out of things which want to run straight was a challenge – quite a few rejected versions here:

It’s also worth saying that this chart was created with Beadographer, which is a wonderful new chart/design tool. Prior to starting using this I’d never really got on with charted designs because I found the planning process inhibiting creatively. However I’m sure you can see from my recent work that Beadographer has allowed me to overcome that bias and I’m now embracing charting with the tool on my laptop (or even better on my iPad with an Apple Pencil) as an alternative way of creating with beads, so thank you to Leah and William for a super, very easy to use creative tool.

Secret Beadalong – Days 4 & 5

So day 4 was not such a good day for me. I lost my nerve as regards my colour scheme, and switched in my etched rainbow coppers in place of my matte dark metal. Because they are etched they are a bit smaller, so the netting surrounding the superduos was a bit thready.

So I unpicked that and tried again with my antique copper highlight beads.

They looked much better, but when I got to the rope on day 5 I realised that gave me way too much copper in comparison with the other beaded beads.

So I ripped out the central section (just a few steps worth) and switched in the correct dark grey beads, which has toned it down nicely. Without some copper I think this bead would have been too different from the rope to wear alone, whereas now it has a connection.

So onto the rope, which should take up days 5-7 (although I've only spent one evening in it thanks to all the indecisiveness around day 4). It's lovely. Pay attention to the instructions, they are very clear so I have no excuse, but I messed up the first couple of inches by getting the 8s to sit vertically rather than horizontally. Not only is this very fiddly to do, and much slower, it gives you a very inflexible rope with far too much thread showing. Once I twigged I was able to switch to the correct orientation and now it's beading up more easily, and has a nice curve. I'm definitely thinking of making some bangles using this rope – the maximum curvature feels like it would be spot on for a rigid bangle, it's easy and relaxing to bead a whole armful, and it looks great.

So I have a few more hours ahead of beading the rope, and need to dig out a clasp. I had been planning to use one of the Anna Bronze clasps I've just bought, but I can see now that the finished piece will work well with one, two, three or even none of the beaded beads, so I need to ensure that the clasp doesn't stop me sliding them on and off, so may simply have to obey Jean and get a S clasp.

Secret Beadalong – days 6&7

So, I finished my rope a little late (a couple of days), but then realised the catch I’d planned to use was too fat, and the components wouldn’t have slid on or off the rope over it.  Given the way it was designed, I assume Jean means this to be an adaptable piece – wear one, three, all none of the bezelled rivolis as you please.  For that to work the catch either has to be removable (which a simple s clasp with loops would b), or small enough that the components can slide.

So, not the right clasp then.  As we were away I had to wait until we returned to my stash to dig out a tiny magnetic clasp that will allow the components to slide on and off, and hey presto we’re done.

National Beading Week 2015 Secret Beadalong - designed by Jean Power, beaded by Sarah Cryer Beadwork
National Beading Week 2015 Secret Beadalong – designed by Jean Power, beaded by Sarah Cryer Beadwork

Many thanks to Jean for a lovely project and for the phenomenal amount of admin she’s had to put in as a victim of her own success.  And to all the beaders worldwide, it’s been fab – let’s hope someone is brave enough to do this next year!

Secret Beadalong – colours

One of the wonderful things about the Beadalong is seeing all of the different colourways.  It’s unusual to be exposed to so many interpretations of the same design so quickly, and it’s been fascinating looking at the different approaches we all take.  Some of us chuck as many colours as possible in, others focus on their favourite colour and use different tones, and others pop a single colour as a highlight with neutrals.  For me, as a bright beader, it’s been lovely seeing some really outrageous combinations, but I’ve also become drawn to some of the more sophisticated palettes.  I think my next delica project might be done in matte steel, with some antique gold – classic with a twist, and perhaps more wearable than lime, orange, scarlet and fuchsia…..?

Anyway, a few people have asked me to post my bead details so here you are.  Seeds and delicas are all Miyuki & from Stitch N Craft (of course):

Rivolis – Chinese ‘Volcano’ from Southampton Bead Shop.  I don’t normally buy cheaper rivolis but the colour on these is unique.  They are a bit fat, so you need to adapt the pattern (one extra row of delicas did it here), and I don’t use them for my own patterns and materials packs because of that.

Delicas – 1835 Duracoat Galv Zest; 45 Silver lined Orange; 683 Dyed Semi Frosted Silver lined Red Orange; 422 Galv Fuchsia

Seeds – 11 – 4205 Duracoat Galv Zest

Seeds – 15 – 4205 Duracoat Galv Zest; 1310 Dyed Trans Fuchsia

Crystals 3mm – Swarovski Fuchsia

Pearls/Rounds – 2mm Scarlet Czech Rondelles.  Not a clue where they came from!!

And as for the next step, I’d guess I still need another 18g or so of delicas, so I may have to make up a mix from my stash (I’m only using stash beads for this and I won’t have enough in a single colour by a long way), or come up with a way to use multiple colours once I know what we’re doing.

Secret Beadalong – Day 5

Nice, although my tension on the surround has a tendency to distort the bezel, and I prefer the look of the back set of petals to the front….

Secret Beadalong Day 5 (Back ) - Sarah Cryer Beadwork
Secret Beadalong Day 5 (Back ) – Sarah Cryer Beadwork

…..and I cheated a bit too. I wanted the second set to be seen in the middle of the gap of the first set (so offset by two bezel beads), but going out of the next row of peyote was going to leave them only partially offset (1 bezel bead). However, as I had used non-Swarovski rivolis, which have a thick band around the middle (rather than a neat pointy edge), I had already added an extra row of delicas to the bezel, so I was able to bead the second set two rows back from the first set and acheive the tidy offset.

Secret Beadalong – Day 4

Domestic commitments yesterday mean I am no longer working a day ahead!  So here is day 4, just in time.  This one was quite fiddly and took a while to complete, but I like the results.   As a set they are looking rather splendid.

  
I have also done half of day 5, which went together more quickly, but want to check placement of the second half, so will wait for Jean to post her picture tomorrow……….and it is way past my bedtime anyway!