
Boy 2 and I popped up to Tate Britain yesterday to look at the incredible Late Turner exhibition. The paintings and sketches were as ever extraordinary, and in one room my eye was caught by a description which talked about criticism of Turner’s apparent ‘chromomania’. As I stood surrounded by glorious paintings I almost laughed – what was a narrow minded criticism then seems like a huge compliment now. If you are in London, go see, and rejoice in the exquisite use of colour. And if you do go, pop along to see the earlier Turners and enjoy Olafur Eliasson’s fascinating colour studies – very interesting. I will of course be using ‘chromomania’ as my new beading watchword………
Month: October 2014
And another one……
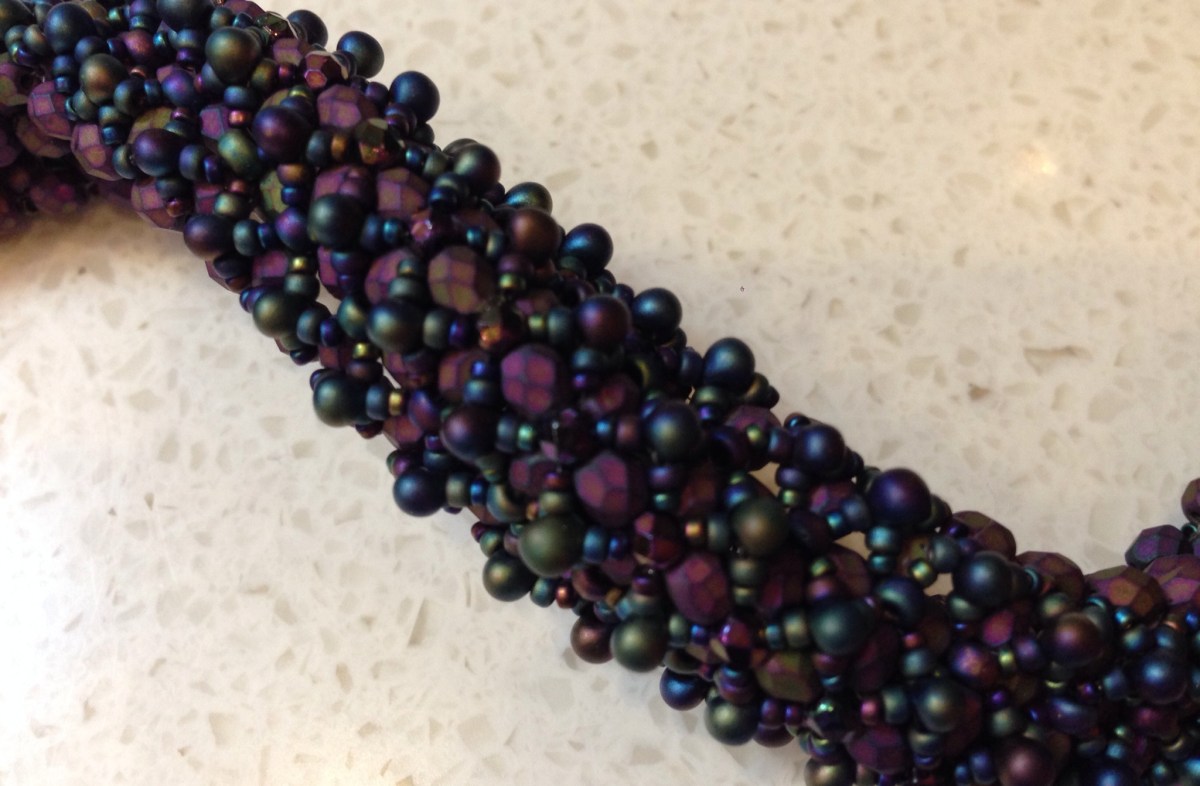
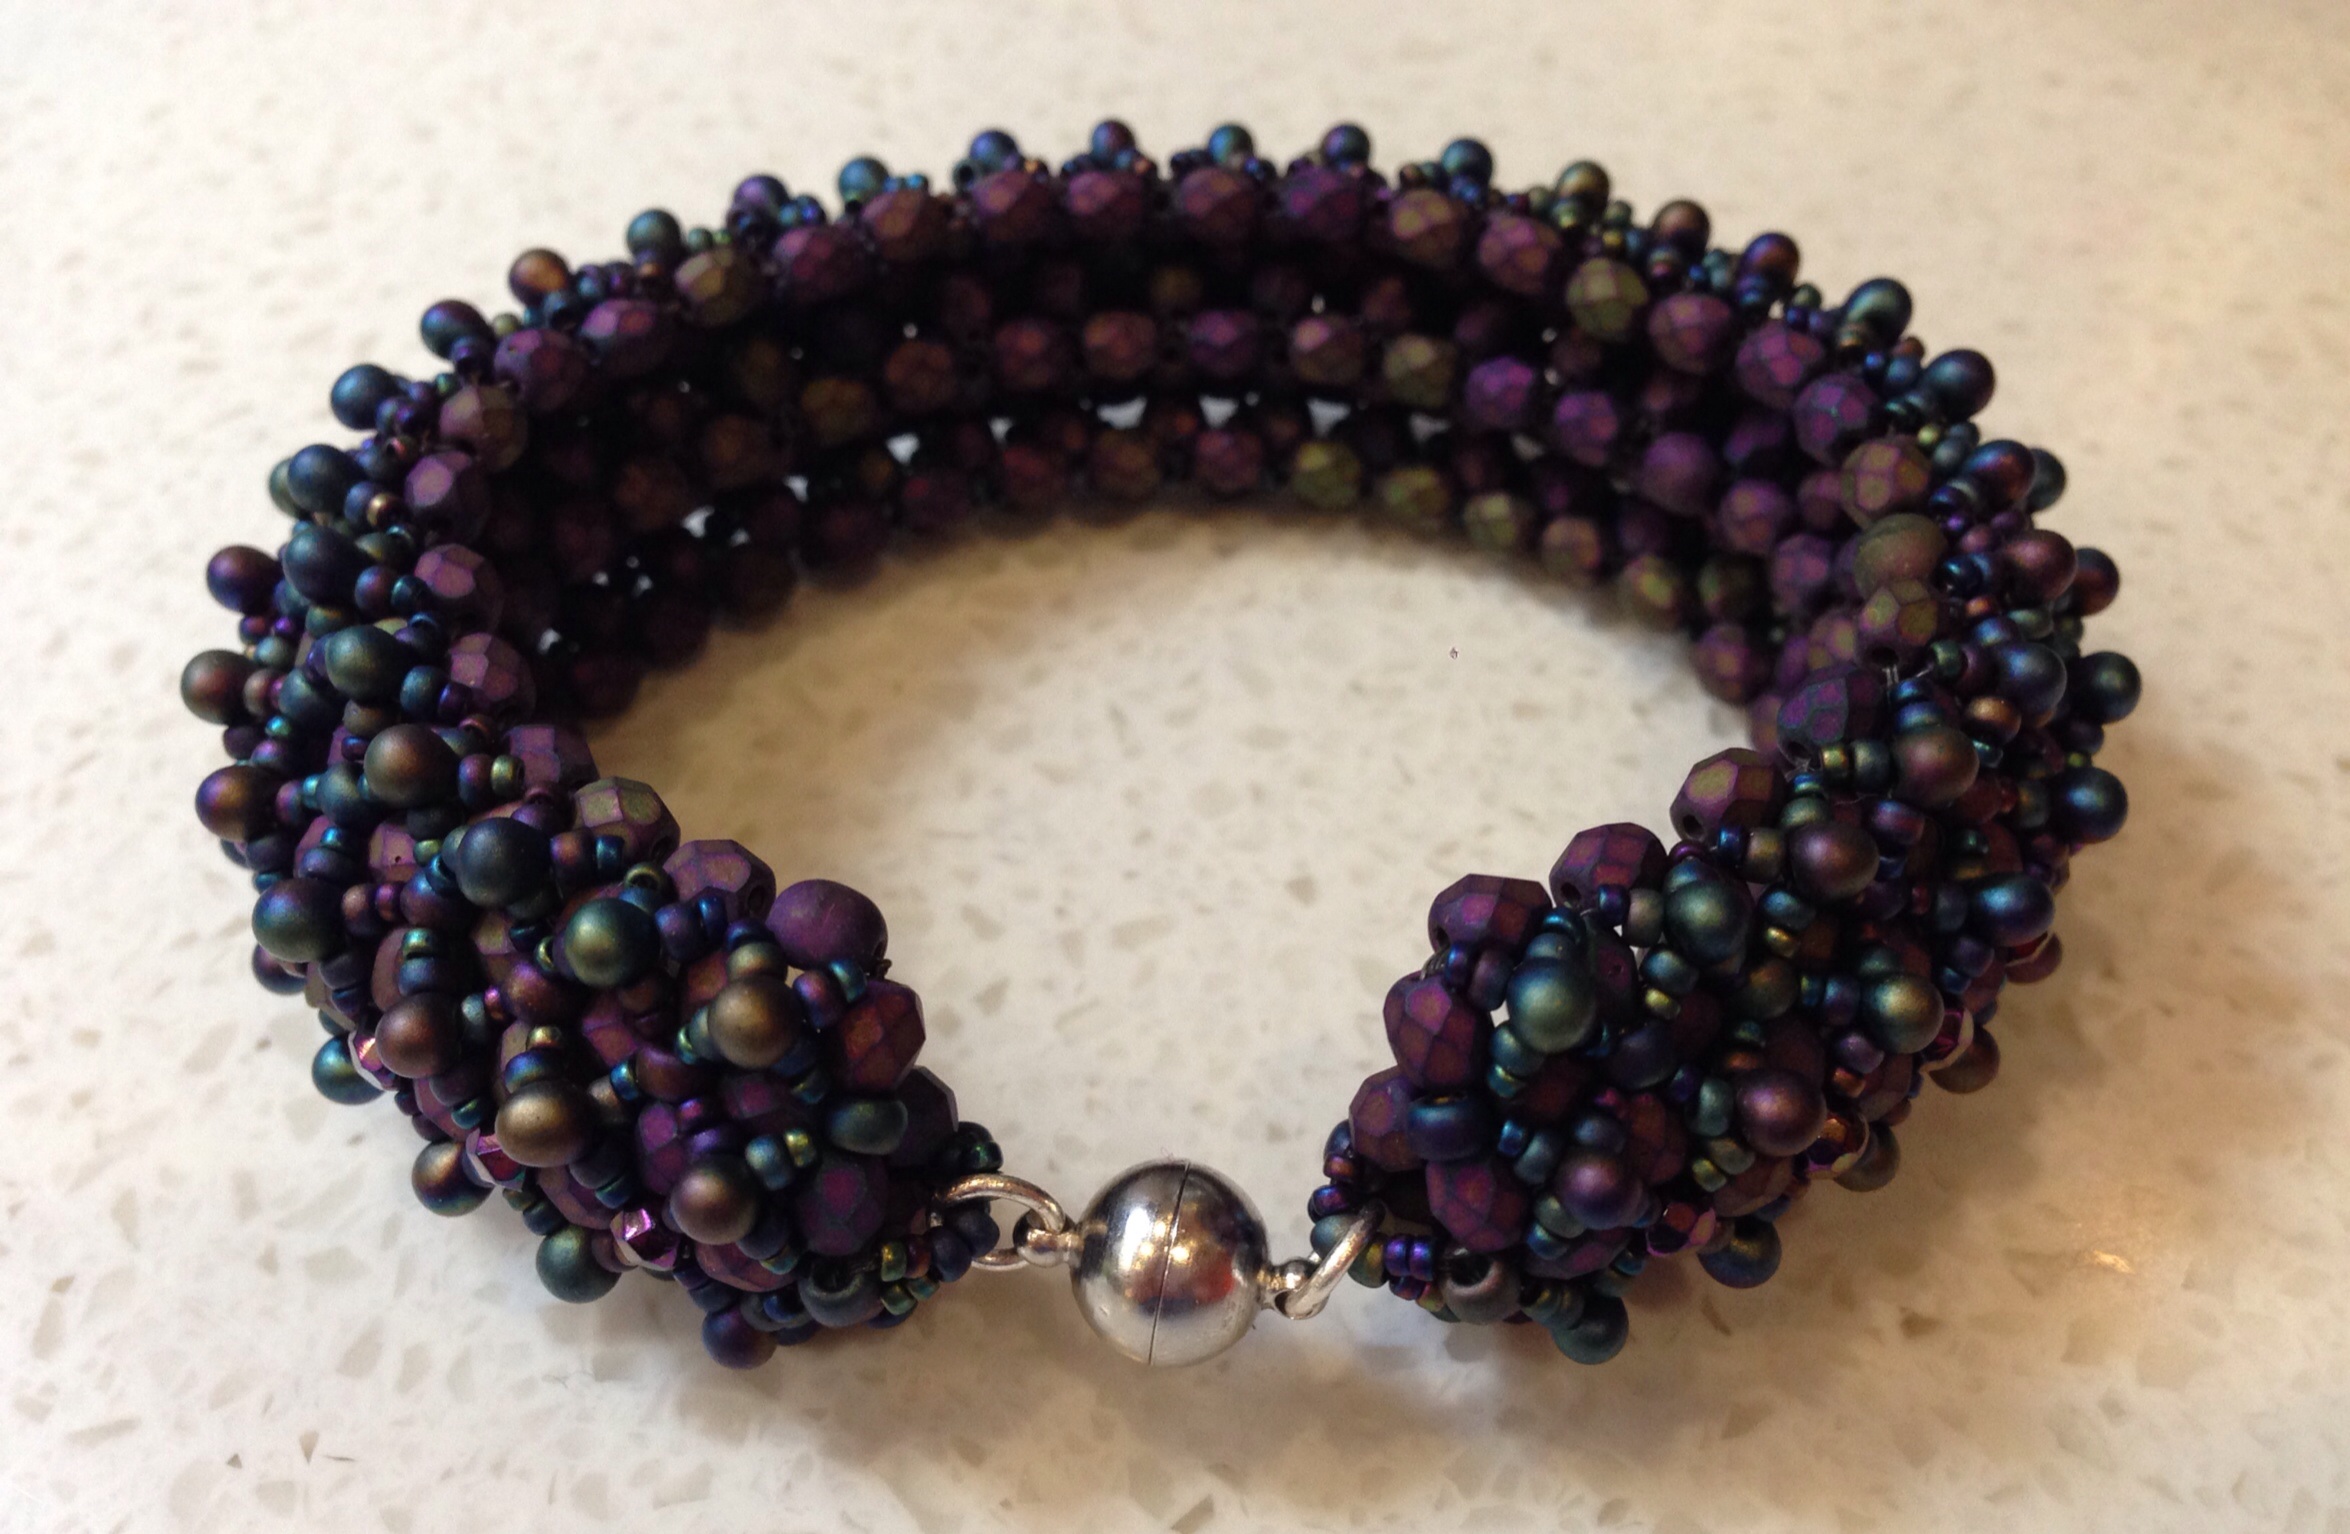
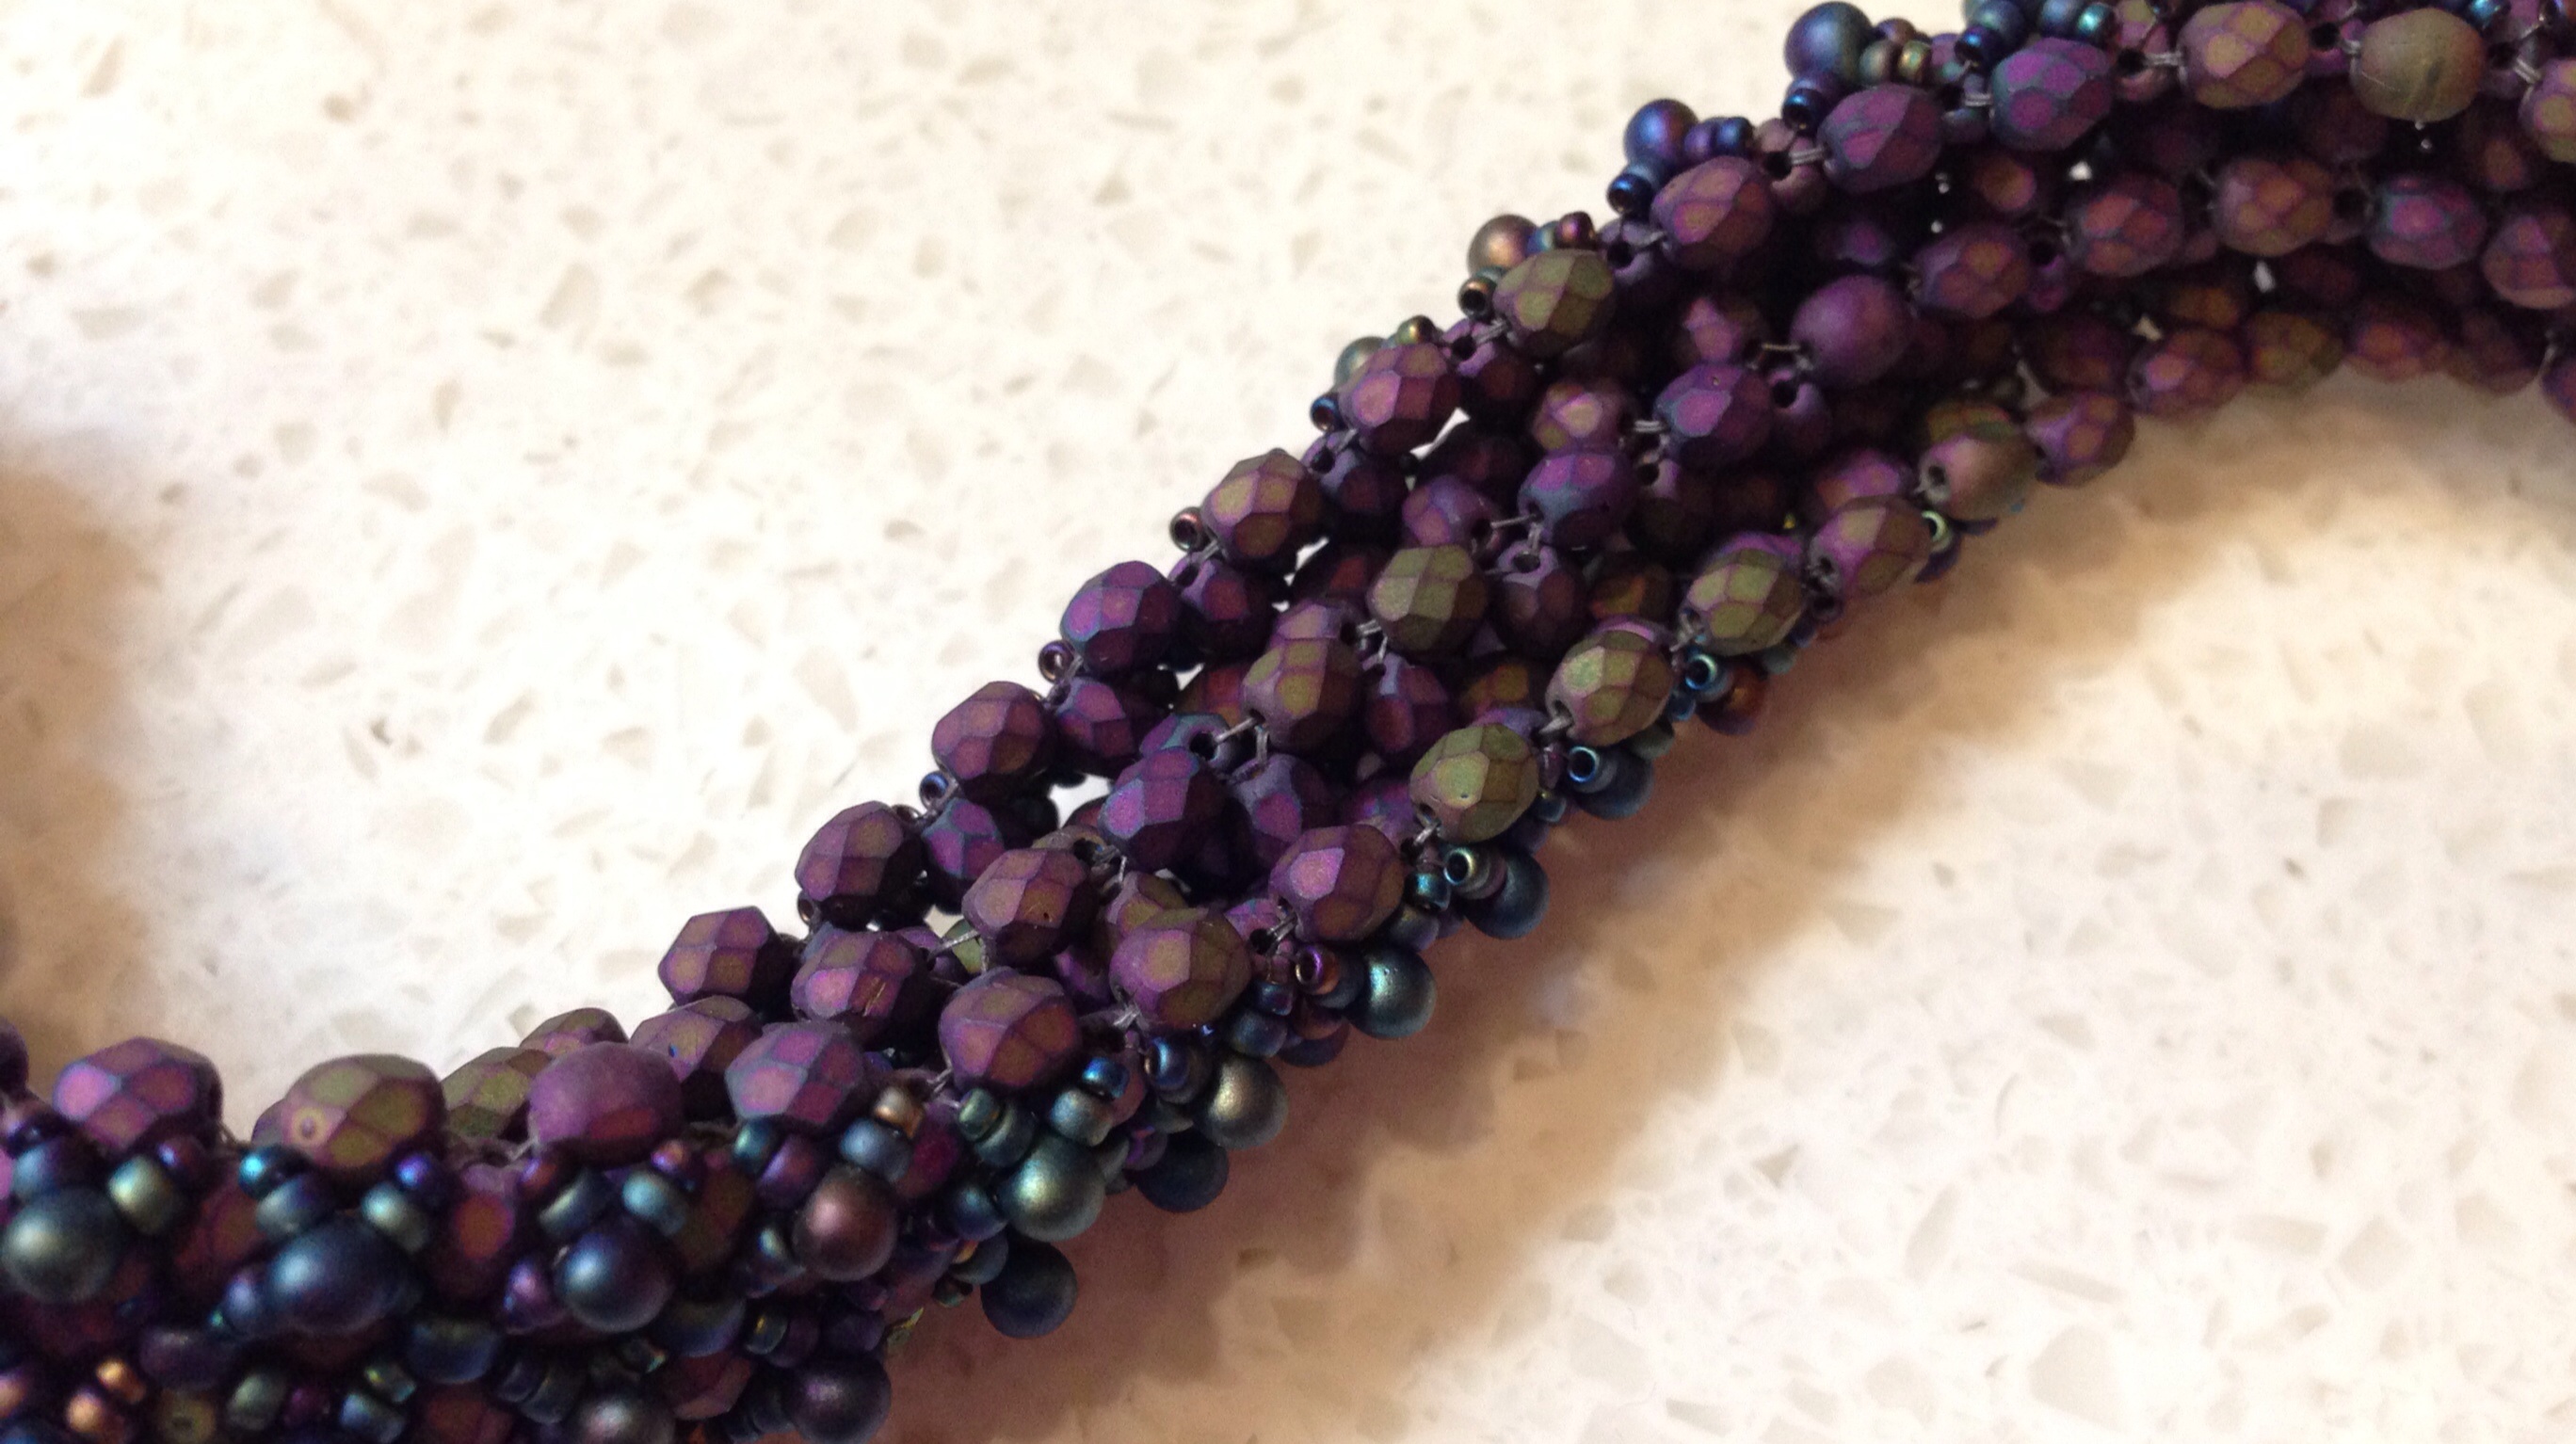
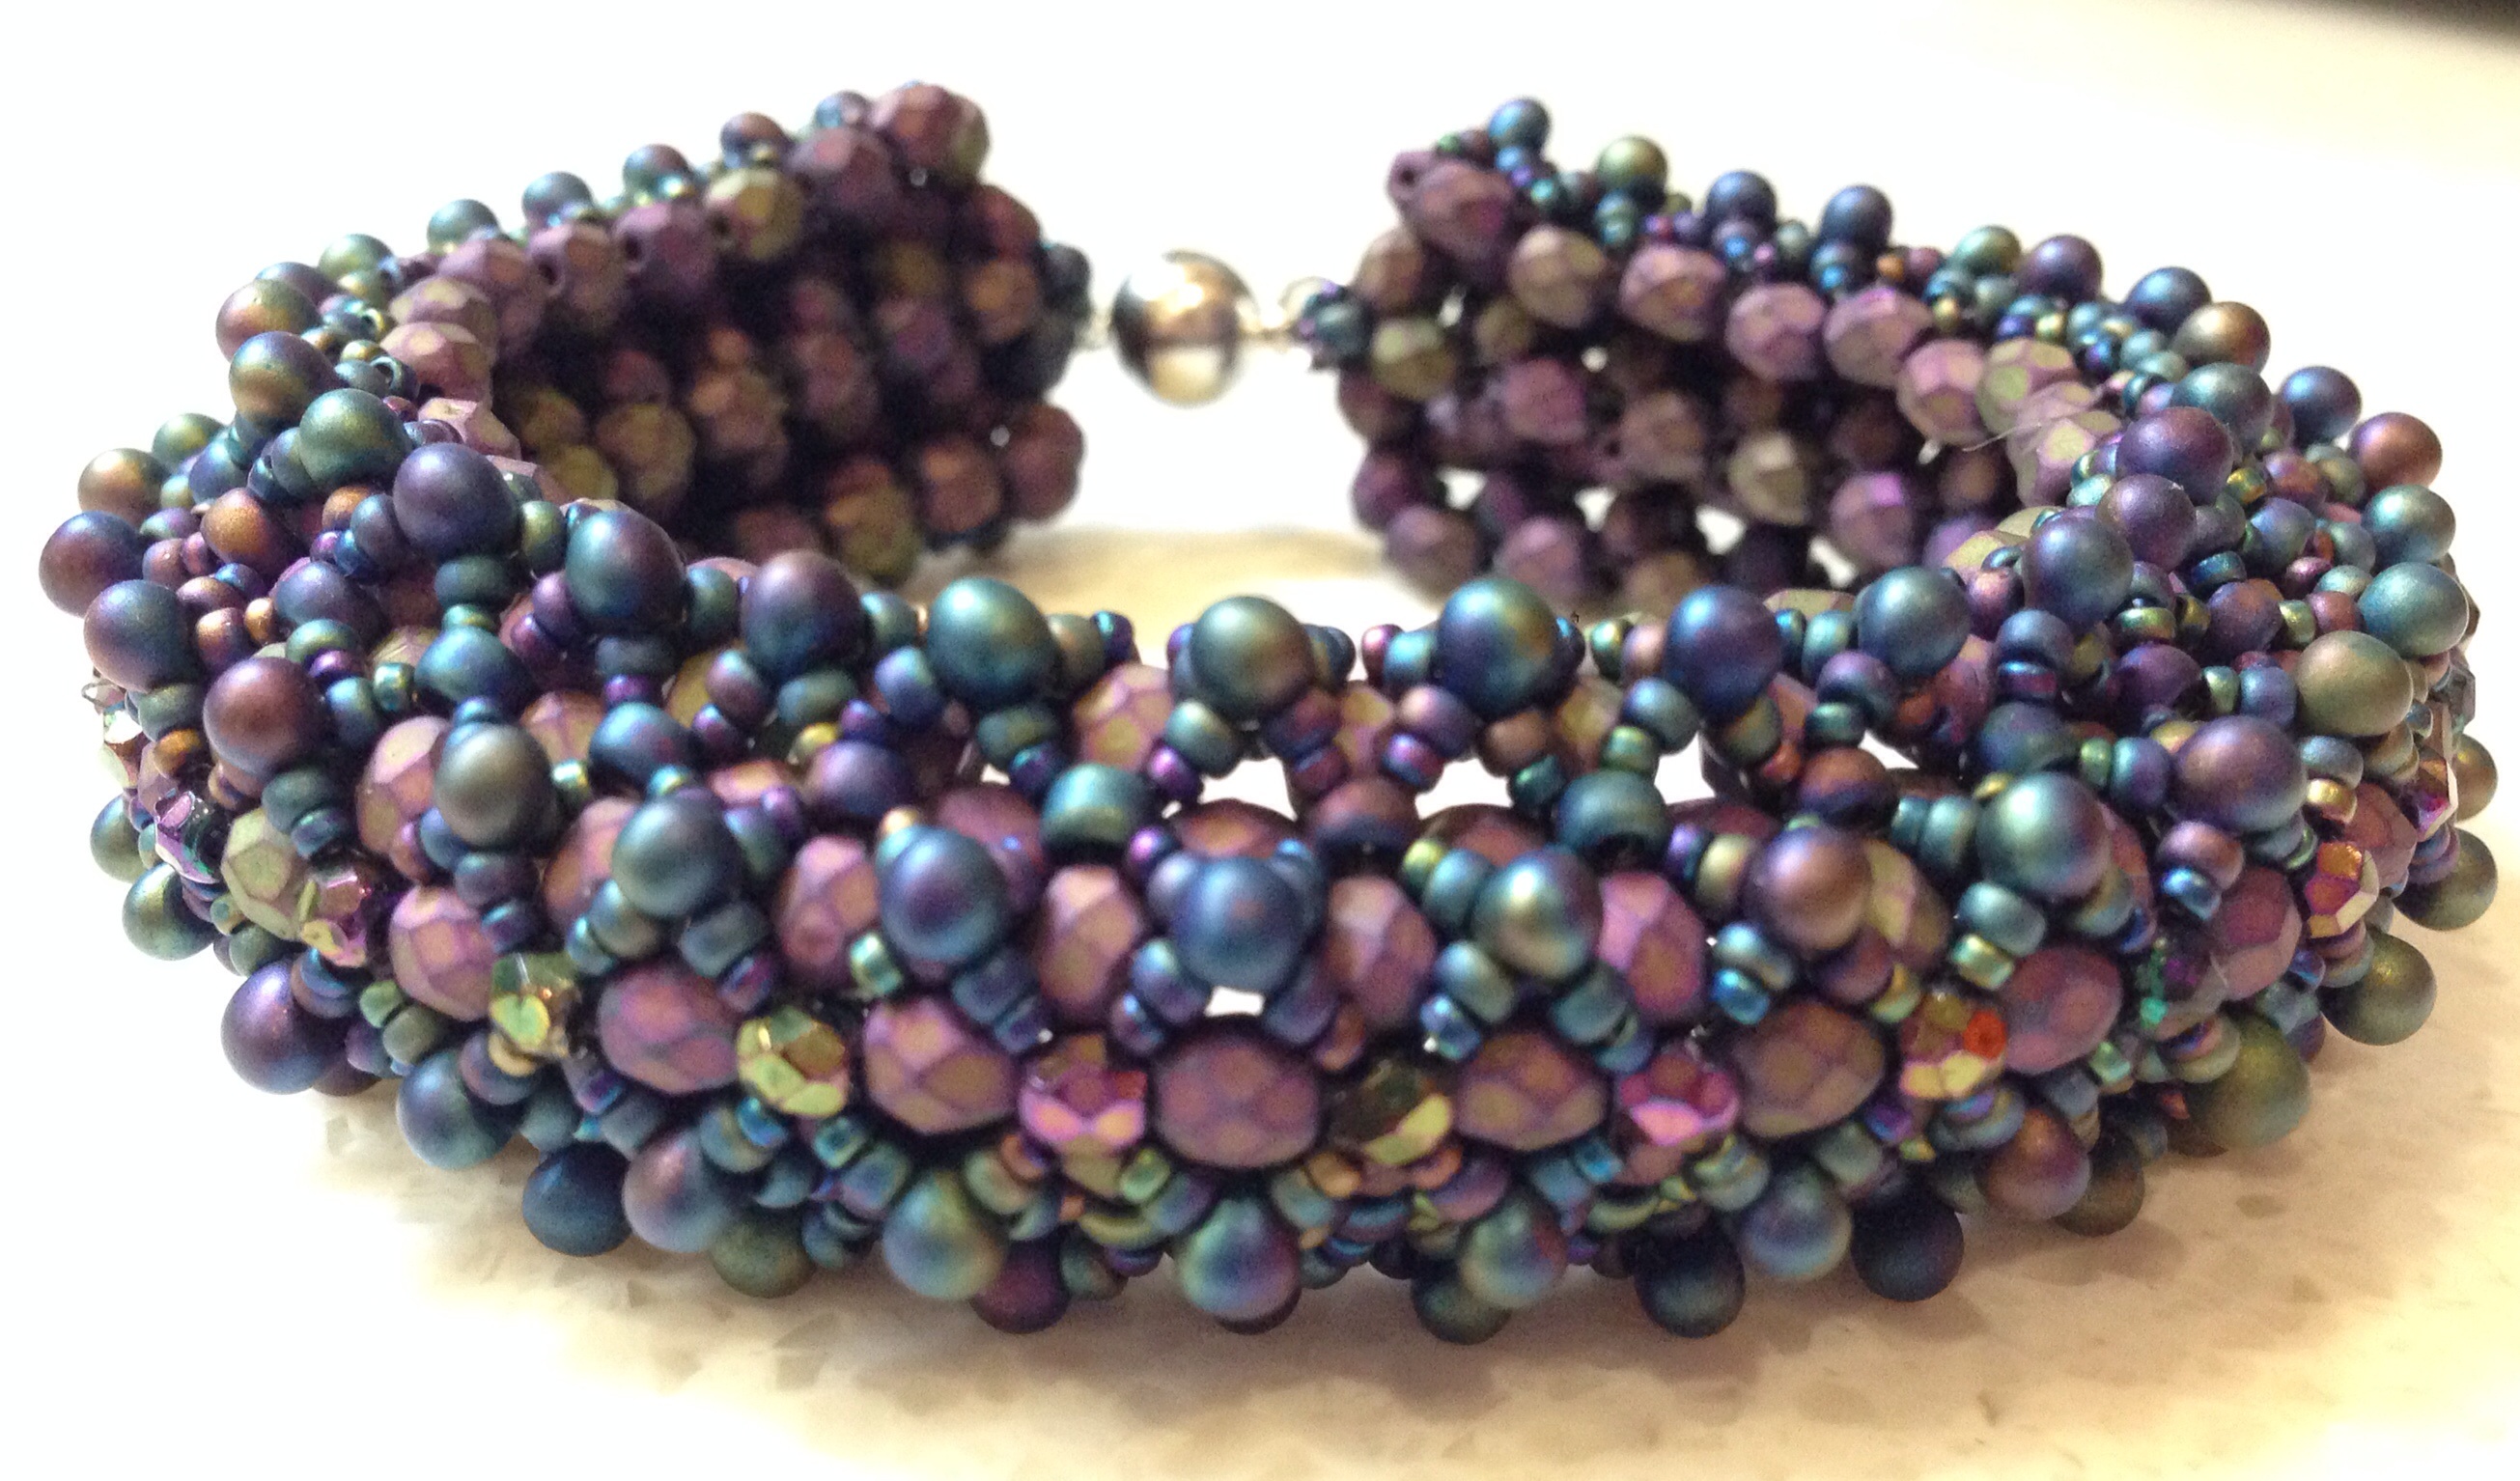
Since I had the pliers out yesterday I finally got round to adding a clasp to a Sabine Lippert piece I finished beading a while back. It’s a Baroque Dimensional Bracelet and instructions are available for download from her website, and the simplicity and repetition made it a really lovely piece to make – but of course as with all Sabine’s pieces it looks absolutely amazing. It curves beautifully – both around the wrist and across the width of the piece, making it seem lovely and fat and chunky. Very pleased with this one.
Recipe
Fire polished beads 4mm Matte purple iris (from Etsy More Beads4U)
Fire polished beads 3mm Purple iris (from Robins Beads)
3.4mm drop beads Miyuki 401FR Black Matte AB (from Stitch N Craft)
Size 11 & Size 15 seed beads Miyuki 401FR Black Matte AB (from Stitch N Craft)
Fireline 6lb
Silver magnetic clasp, jump rings.
The Miyuki Black Matte AB are a current favourite as they are a kind of navy blue base, and I’ve not been able to find another good match for navy. For some reason I am wearing a lot of navy at the moment and it is certainly easier to work with than straight black.
Tips
- I did 30 repeats as per the instructions, and it fits very nicely. The finished beadwork measures 20cm (without the clasps) although do bear in mind I am quite a tense beader.
- On that note, relax, relax, relax your tension, particularly for the base layer. For me that means beading in a way which felt baggy, floppy and downright messy, but you need plenty of give in order to add the embellishing layers. This is common with embellished RAW pieces.
- Otherwise as usual Sabine tells you everything you need to know……..
Next steps
Another good relaxing project, like the Faux Cro, I’m definitely going to make another one of these when I have assembled enough Fire Polished beads (it does use quite a lot). Perhaps this time I’ll go a bit wilder with the colours (I’m thinking some sort of outrageous red, pink and orange with lime highlights again). Or perhaps something bright but wearable instead.
And I’ve got the pattern for Sabine’s Tweed bracelet to do as well yummy yummy. Sabine has also put together some beautiful kits, and one day I will definitely treat myself……..
A quick comment about ordering from abroad before I get told off for listing MoreBeads4U: I usually try to stick with local suppliers – although sadly I don’t have any ‘normal’ bead shops selling teeny beads locally, I use UK mail order shops where possible (mainly Stitch N Craft and Robins Beads). However wonderful they are though, it isn’t possible for them to stock absolutely everything I need, and I have now found (through Etsy) a super supplier in Latvia for Czech beads (links above) – reasonable and prompt postage, and pretty much every colour and size of fire-polished beads I could want, competitively priced. So while I continue to use and support my lovely UK suppliers when they sell the colours and shapes I need, and will always look here first, I do sometimes have to go elsewhere. I don’t take this lightly, as shops like Stitch N Craft are so wonderful for the beading community – their class programme is probably the best in the world, they are very supportive of the Beadworkers Guild and bead groups and their range is absolutely wonderful. So their website will always be the first one I go to so that I can support them in return.
Of course one day I will open my own bead shop, sell everything I want and consequently go bankrupt in a year. But it will be fun.
Faux cro rocks!
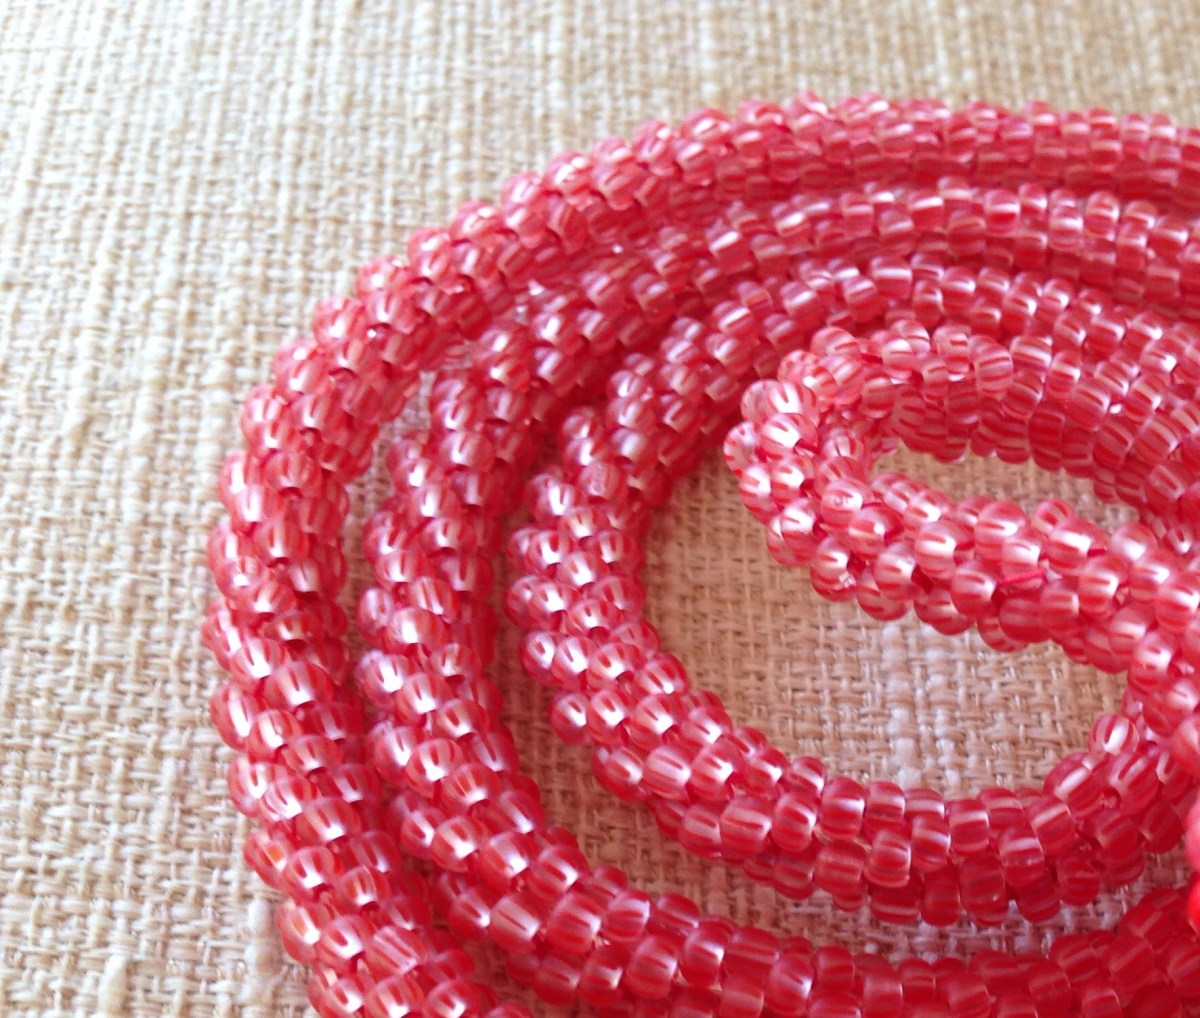
For several years I have been eying up the photos on Jean Power’s website of her ‘faux bead crochet’ bangles. Now I love the appearance of bead crochet, but I’ve had several goes at doing it which have always ended in tangles, uneven work and tears. I’m sure it’s lovely and quick once you are expert, but for me it is incredibly slow, and combined with the absolute tedium of threading all the beads on before you even start I feel it’s not for me. However it does make the most beautiful beaded ropes, so a fake version using beadweaving techniques I’m familiar with seemed worth a try. Staring at Jean’s photos repeatedly over many years sadly did not reveal her secret, and though Jean has been teaching it as a workshop I’ve never been able to go. So when her recent newsletter announced she’d released a tutorial I grabbed one straight away (the joys of instant downloads). Reading through revealed I had been a numpty, as her solution is elegantly simple, but there is much in the tutorial that I would never have worked out even after years of playing, particularly the joins, so it was well worth the money to skip the experimentation and go straight to a very refined solution. All I need now Jean is to work out how to split the rope into two or three so I can do branches please?
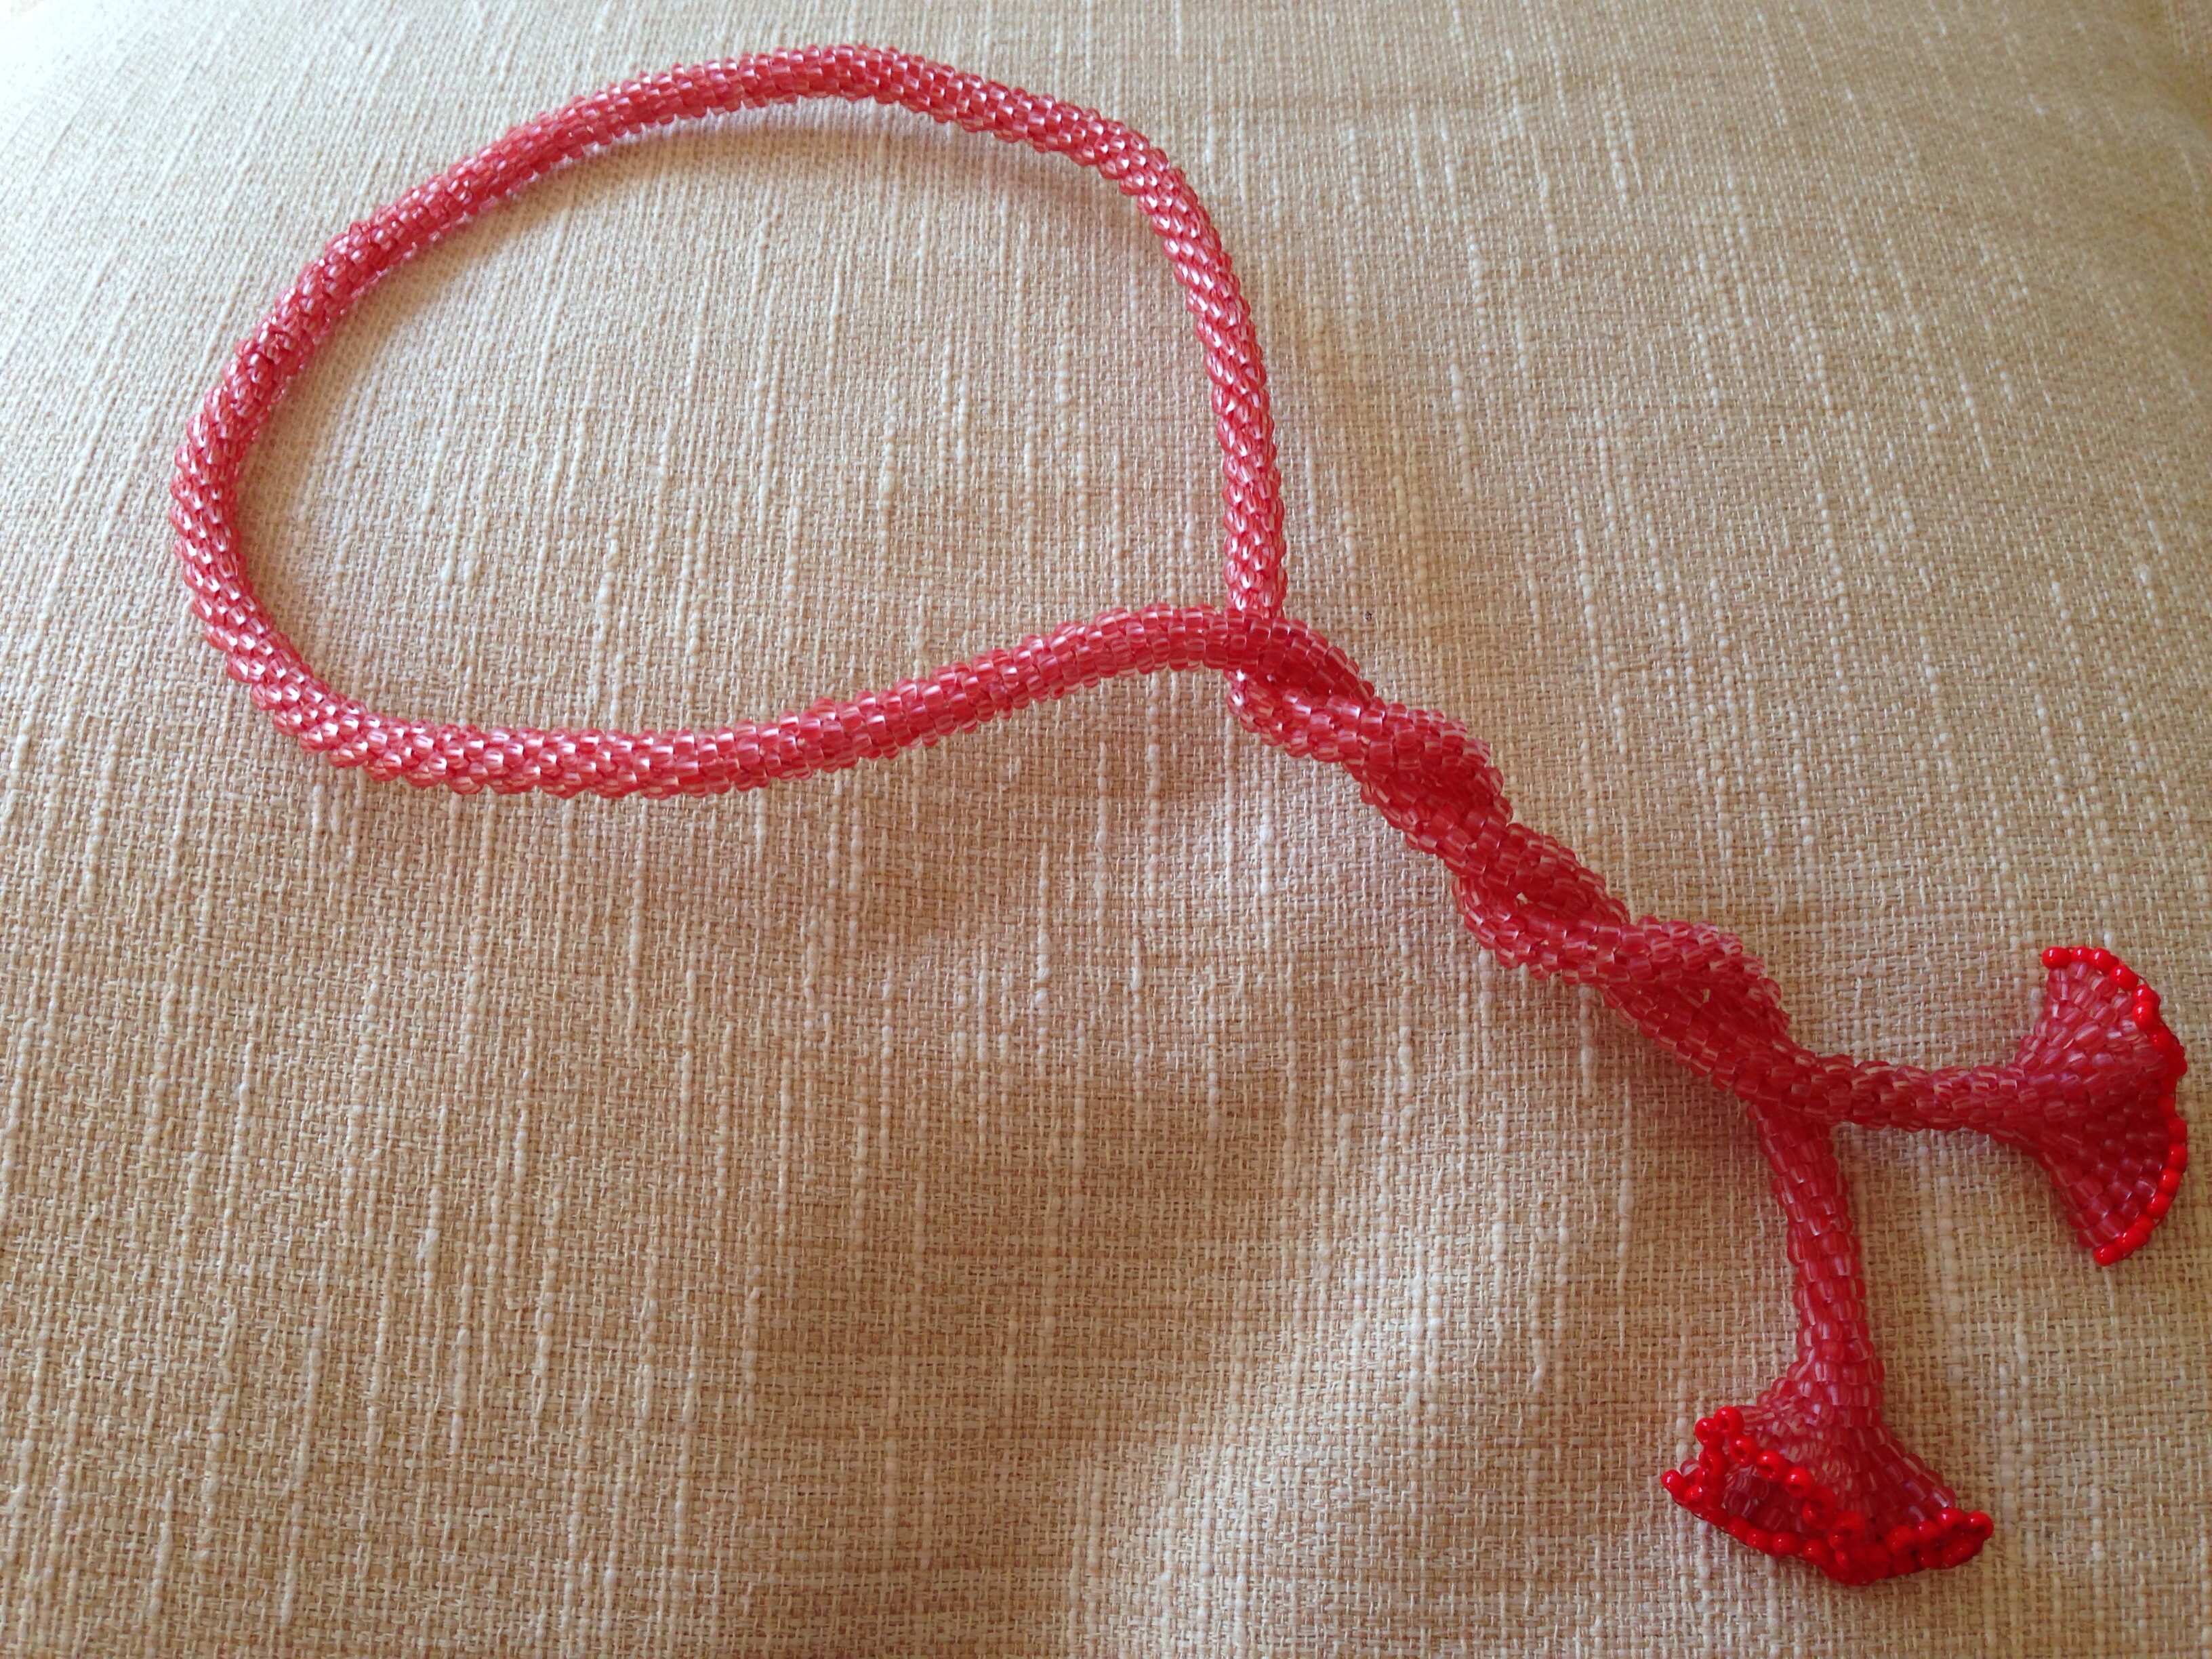
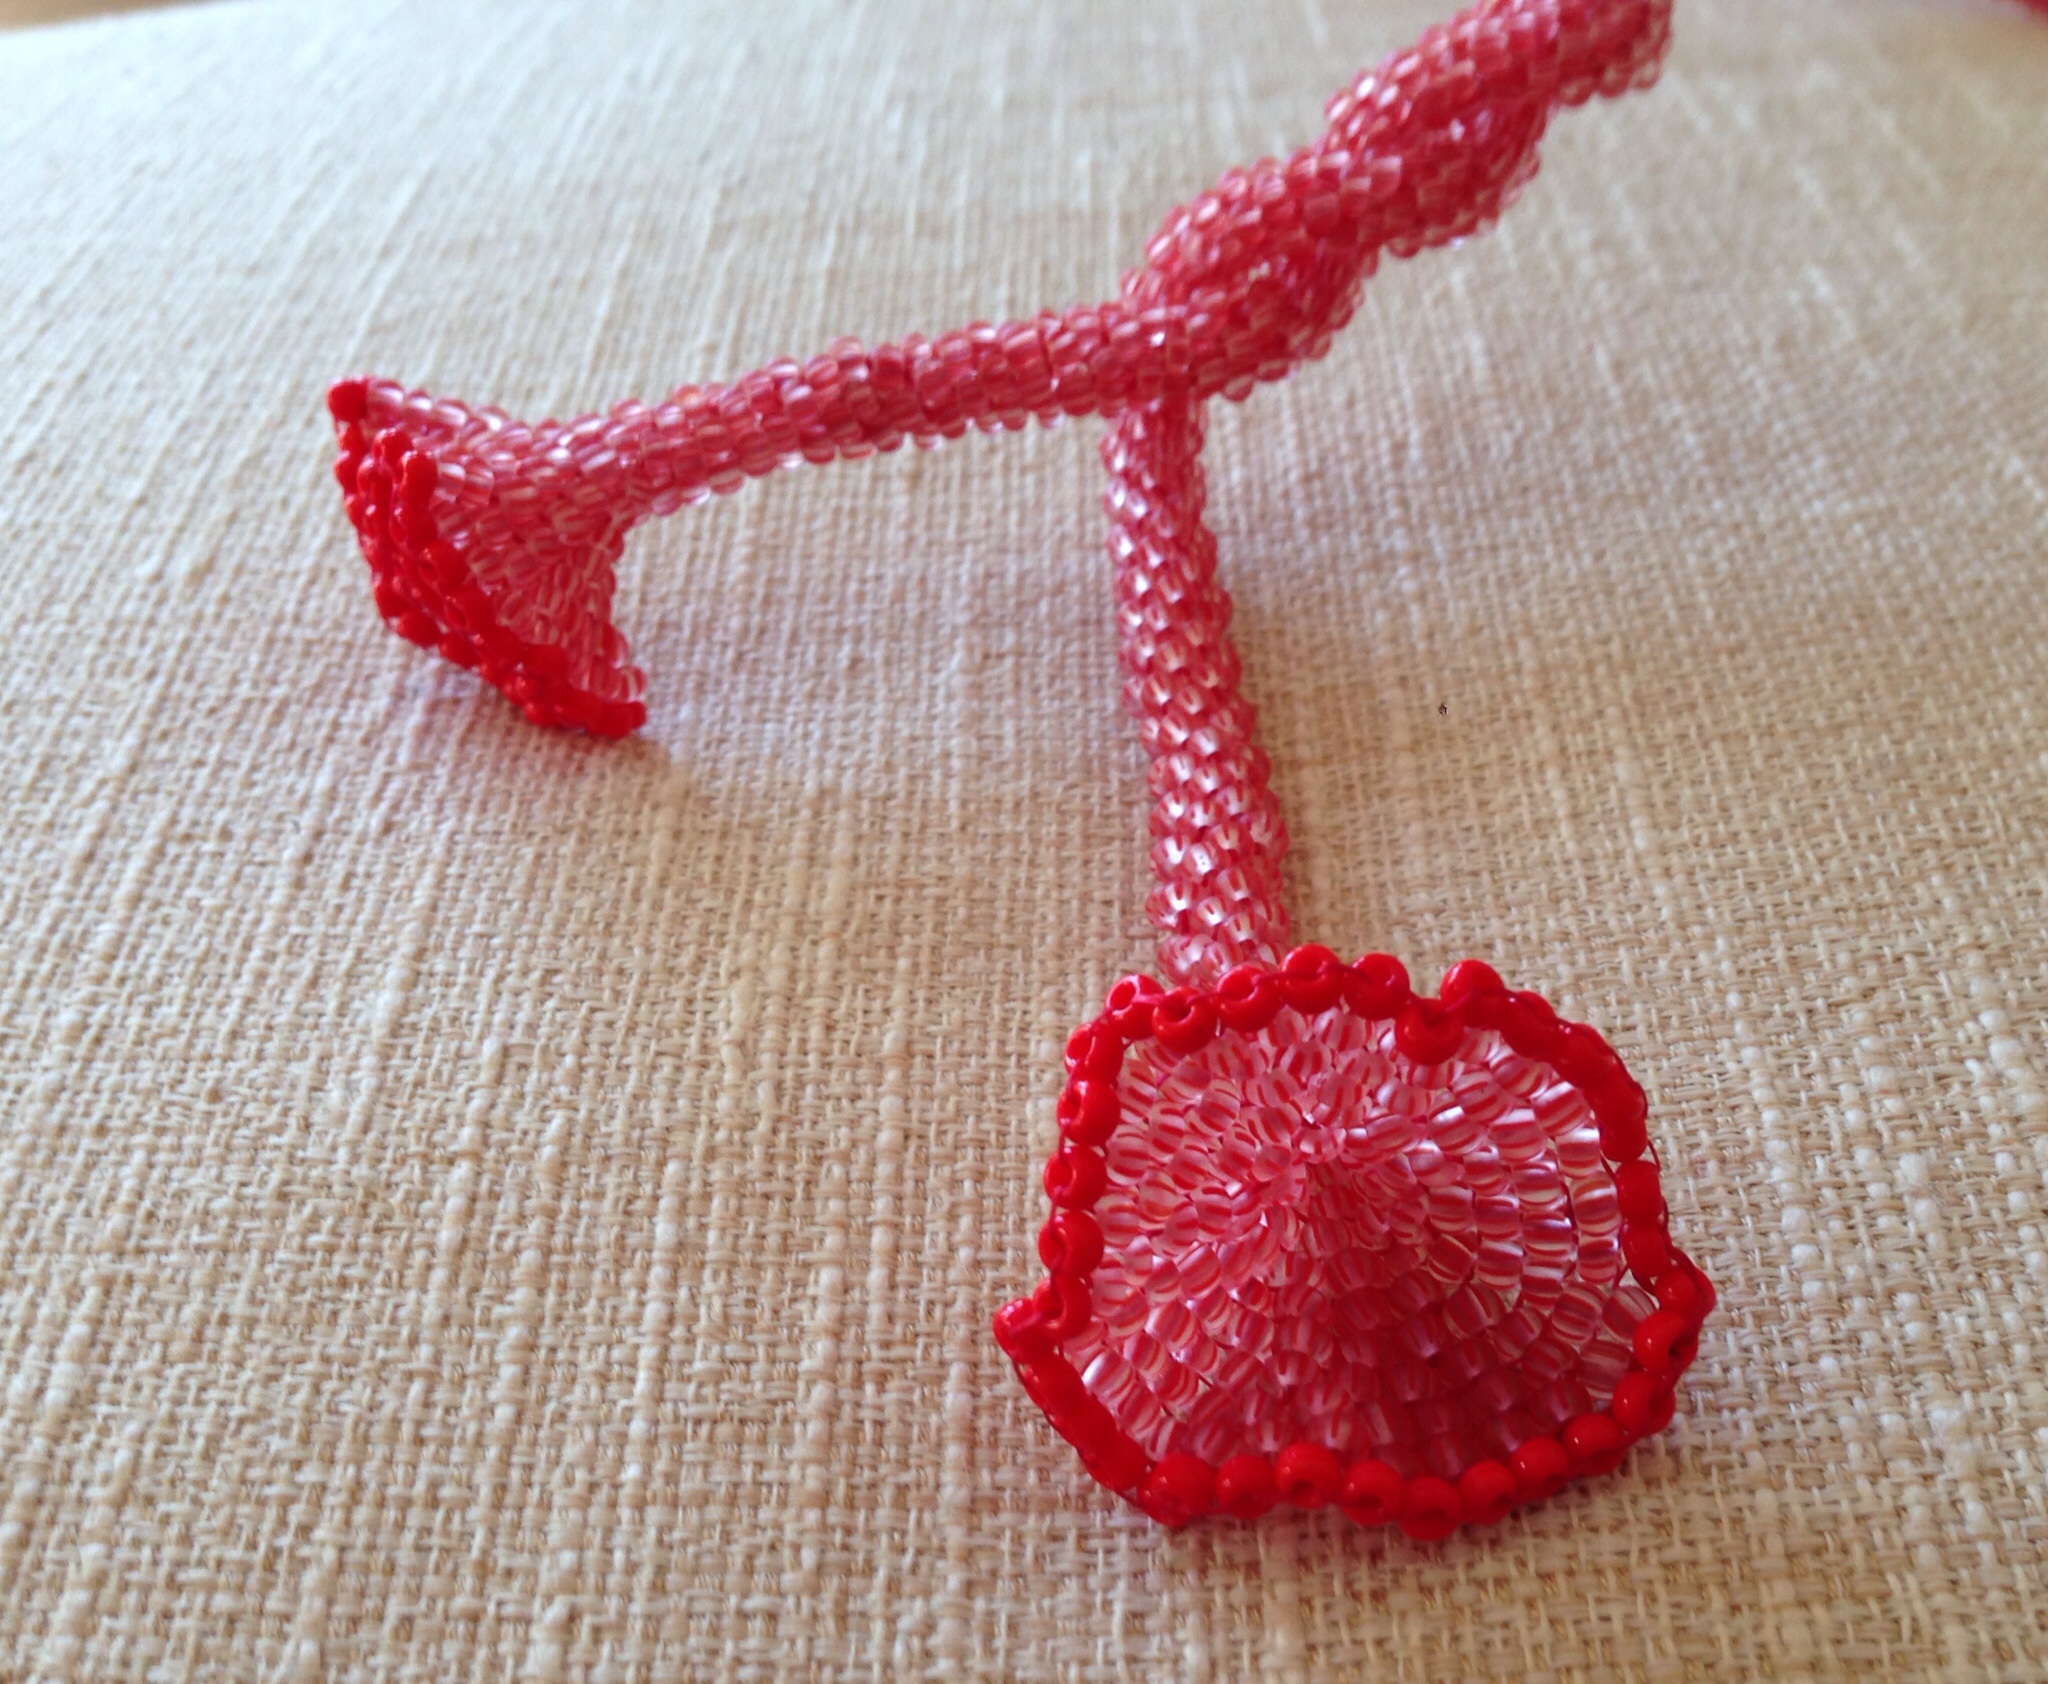
Anyway I’ve made so many bangles lately that I thought I would instead make something more like a lariat, but I ran out of beads (poor planning) so I’ve made a short rope with increases at either end to form frilly cones (a la CGB 1 although using Jean’s stitch with increases, not their technique as it didn’t really work for me). I then threaded a wire through the middle so the piece can be sculpted into a choker, bracelet, whatever. The simplicity of the design and technique made it a very relaxing, stress busting kind of piece to make, so I think I will be using this technique again soon.
Recipe
- 20g of red striped frosted crystal size 8 seed beads – mine were from Beadworks
- 1g of opaque scarlet miyuki size 8 seed beads – 407 from the Bead Merchant
- Red miyuki KO thread
- 65cm 1mm silver plated wire
Tips
- Read the instructions all the way through. Jean explains the theory as well as giving step by step instructions so you will be better equipped to improvise and add your own touches, as well as to complete the projects she details.
- If you are not used to the basic stitch Jean uses, do a flat square sample first so you can get your technique (particularly tension) sorted.
- Use big beads. There are some extremely beautiful bead crochet works out there using teeny weeny beads, and this technique will undoubtedly work extremely well for those, but you need to practise first. I would definitely heed Jean’s advice and start with 8s.
- Make sure you have enough beads as this lovely speedy technique will munch them up quite quickly – 20g made a 5 around rope (probably the thinnest you can do with size 8s) 70com long. So I’d reckon at just under 30g for a 1m rope which would make a versatile long necklace or lariat, and you should get a bangle out of the standard 6g tube of 8s. You can always do a sample of say 10cm and then weigh it to estimate.
- The slightly more organic appearance of crochet or faux crochet with 8s means this is a really good way to use up those beautiful but sadly wonky and uneven seed beads you bought all those years ago before you discovered the easy uniformity of Japanese beads. And you can also use the beads you bought for kumihimo but couldn’t use because the holes were too small for the bigger working thread (although you can use thicker threads for this technique and make a feature of them if you want, just like bead crochet).
- Wiring the piece allows me to sculpt it each time I wear it – it would look very nice with the wire poking out and drops or rizos dangling from jump rings attached to a loop at the end
What’s next?
In theory you can use this technique for any bead crochet type piece – there are some amazing patterned ropes out there and I can’t wait to try. Have a look at my Faux Cro Pinterest board for some ideas if you’re interested.
I’d also like to try working round a core of cord or tubing so that I can tie on and bead over some feature beads, and I will have to find some quiet time and work out how to split the rope so I can do branching designs.
