Monet’s Garden at Giverny

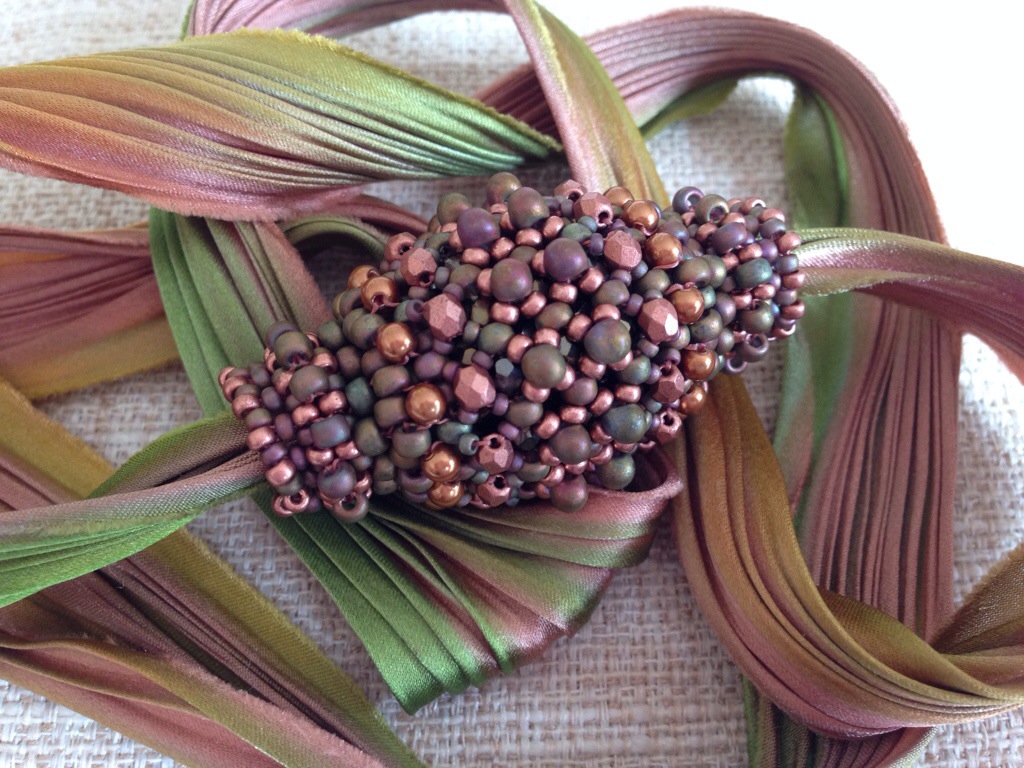
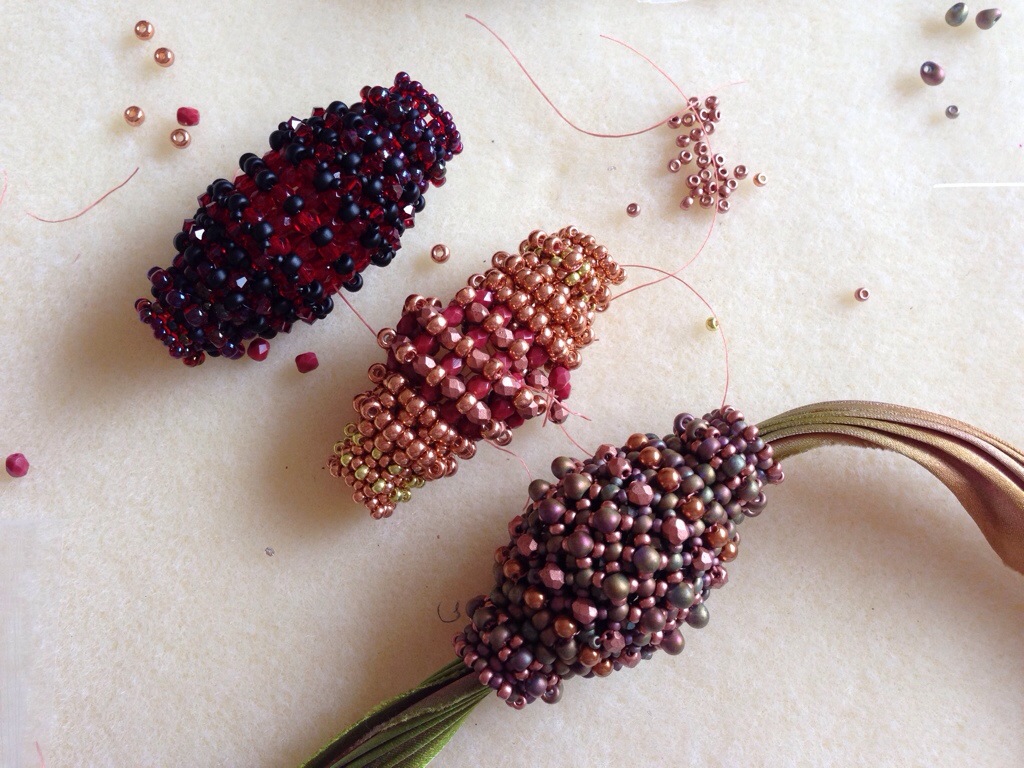
This year for the Stitch n Craft challenge the theme was ‘Anything Goes’ – so no theme, no packs, no requirements, just enter something you’ve worked on this year that you’re proud of.  So I beaded away at a particular thread of an idea, and was getting really pleased with it when I realised it didn’t really meet a key requirement to use some beads bought from them.  Yes the core of the work used their beads, but the flashy bits, the visible bits were all from elsewhere.  So this didn’t really feel to me like it was entering into the spirit of the competition, so although I ‘d already paid the entry fee I decided to pause for a little think.

Whilst I was thinking (OK procrastinating) the theme was announced for another competition that fit my nearly complete piece perfectly.  In every other way that competition seemed like a better fit for it, so I decided to enter something else at Stitch and Craft instead – another one of my big bead embroidered necklaces perhaps, using beads that were definitely from them and some of my own cabochons?

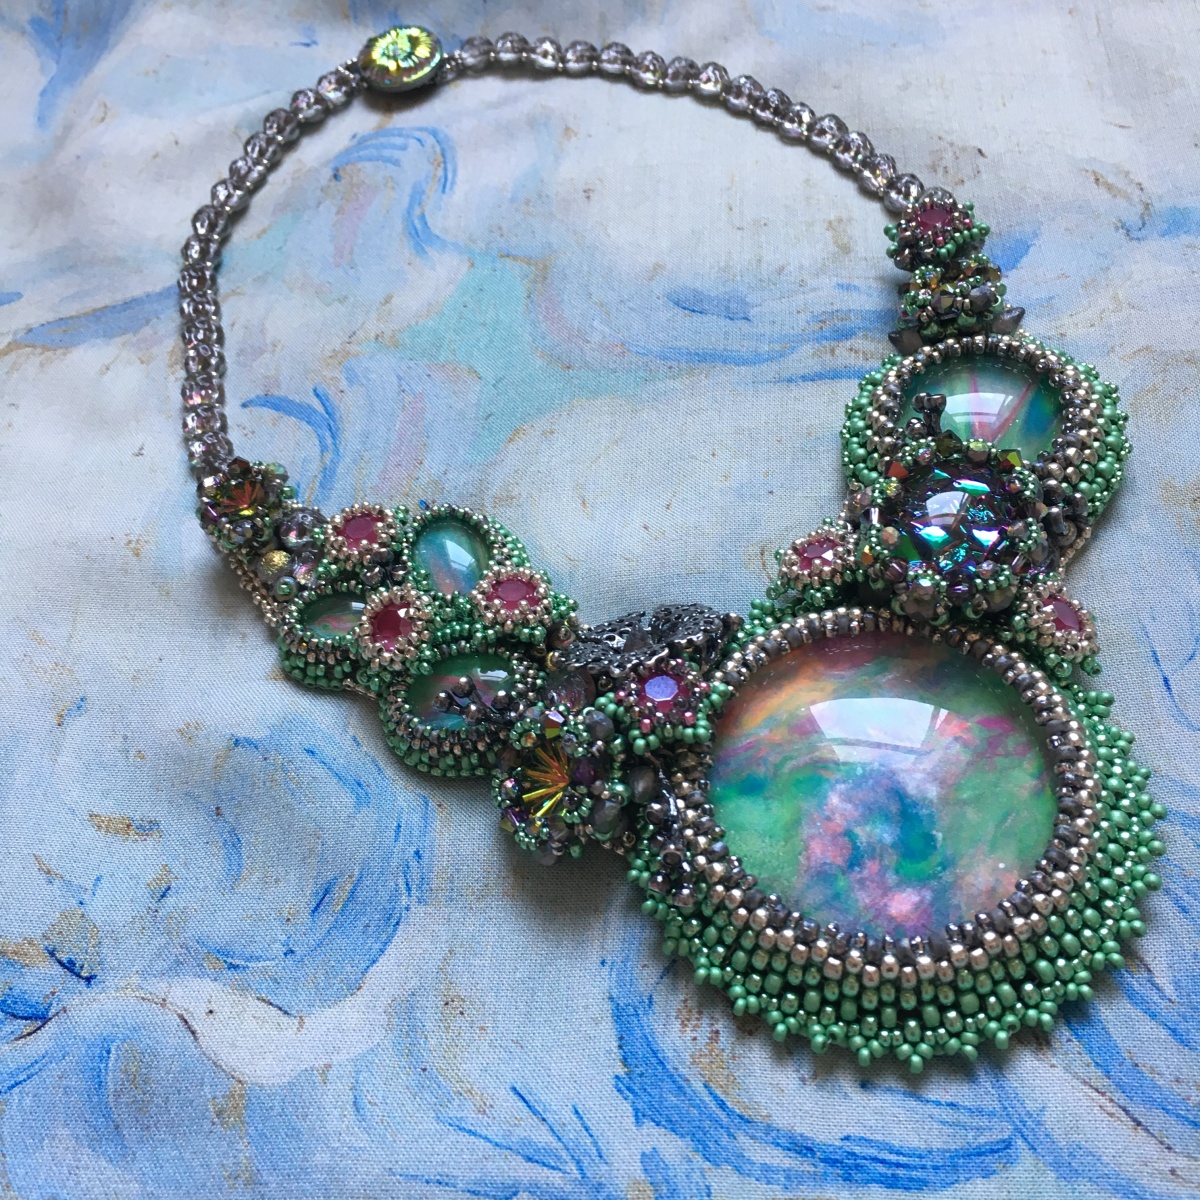
Digging around I found a set of experimental cabs that I made in the early days using the left over paint mess from a salad spinner painting session with the boys.  Surreal but true.  The drips and dribbles gave an acrylic pour effect, and I’d even tried mopping up the excess paint from the side of the spinner by blotting, giving a lovely blotchy effect which I’d then used to make a huge 50mm cab.

The large cab made me think of Monet’s waterlily paintings, particularly those in the Orangery in Paris, where if you stand close the beautiful paints form gorgeous abstract patterns.  In turn that made me think of water, with silvery bubbles and that got me to my base colour scheme of silver, etched vitrail and metallic mint green (Miyuki 4214 and 4214F), and I started my usual process of pulling out a big range of beads to kick start the design process.  A stash search unearthed some vitrail ridged back cabs from The Old Bicycle Shop, and a wonderful crumple backed oval Crystal Electra geode cabochon from Stitch n Craft themselves.  The colours though were still a bit subtle, and I needed to call on more of the contrasting colours in the cabs and crystals, so I added some pink – not my usual fuchsia though, but a more subtle Swarovski Crsytal Peony Pink (again from Stitch N Craft).  And finally I spent some of my Beadworker’s Guild Founder’s Award prize money on some gorgeous Anna Bronze findings, this time in an antique silver finish, but repeating some of the organic shapes I’d used in that piece.  Then I got stuck in, using what is becoming a standard process for these type of pieces.

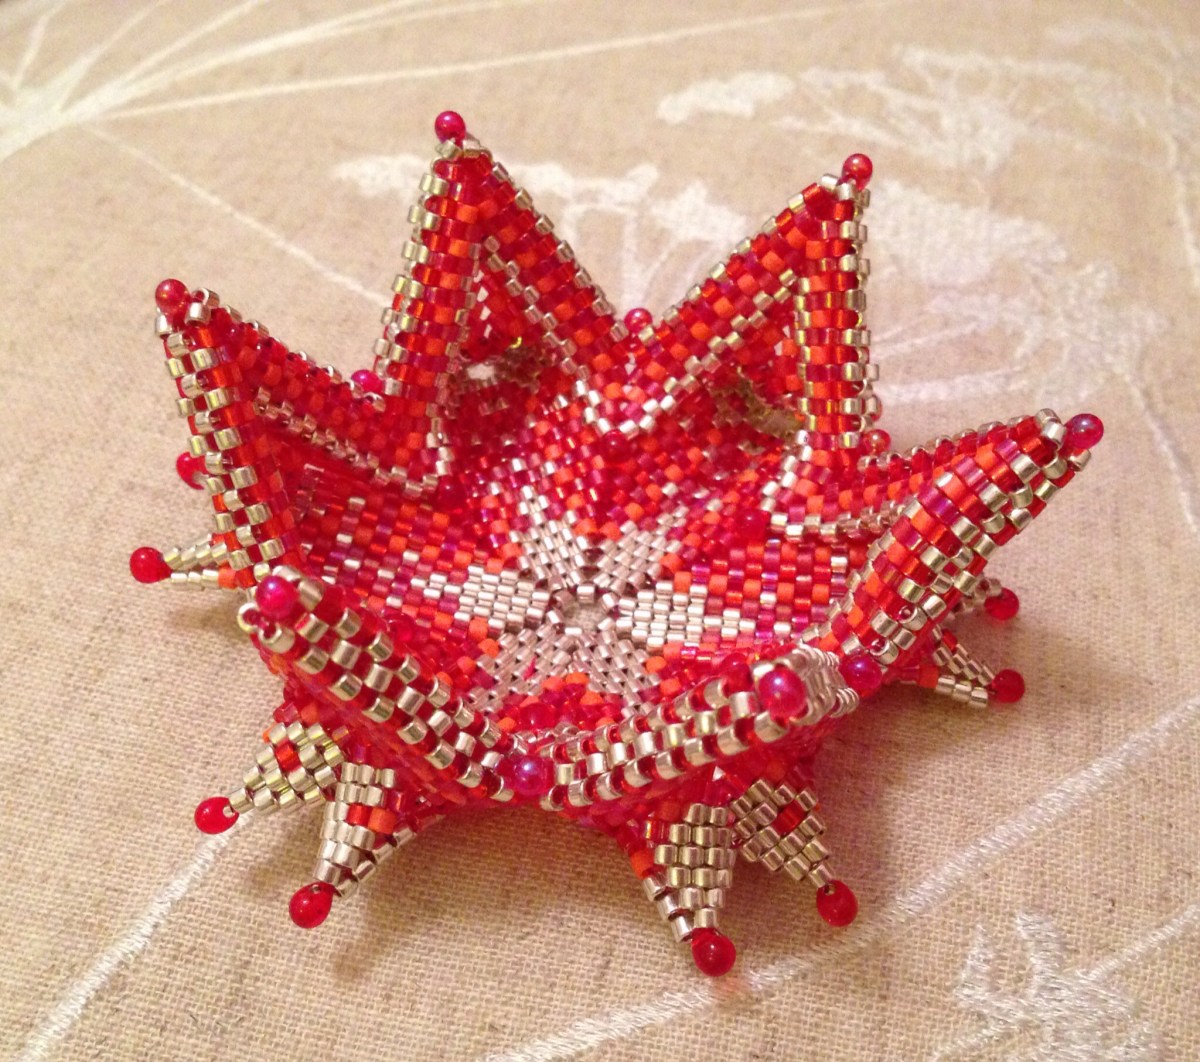
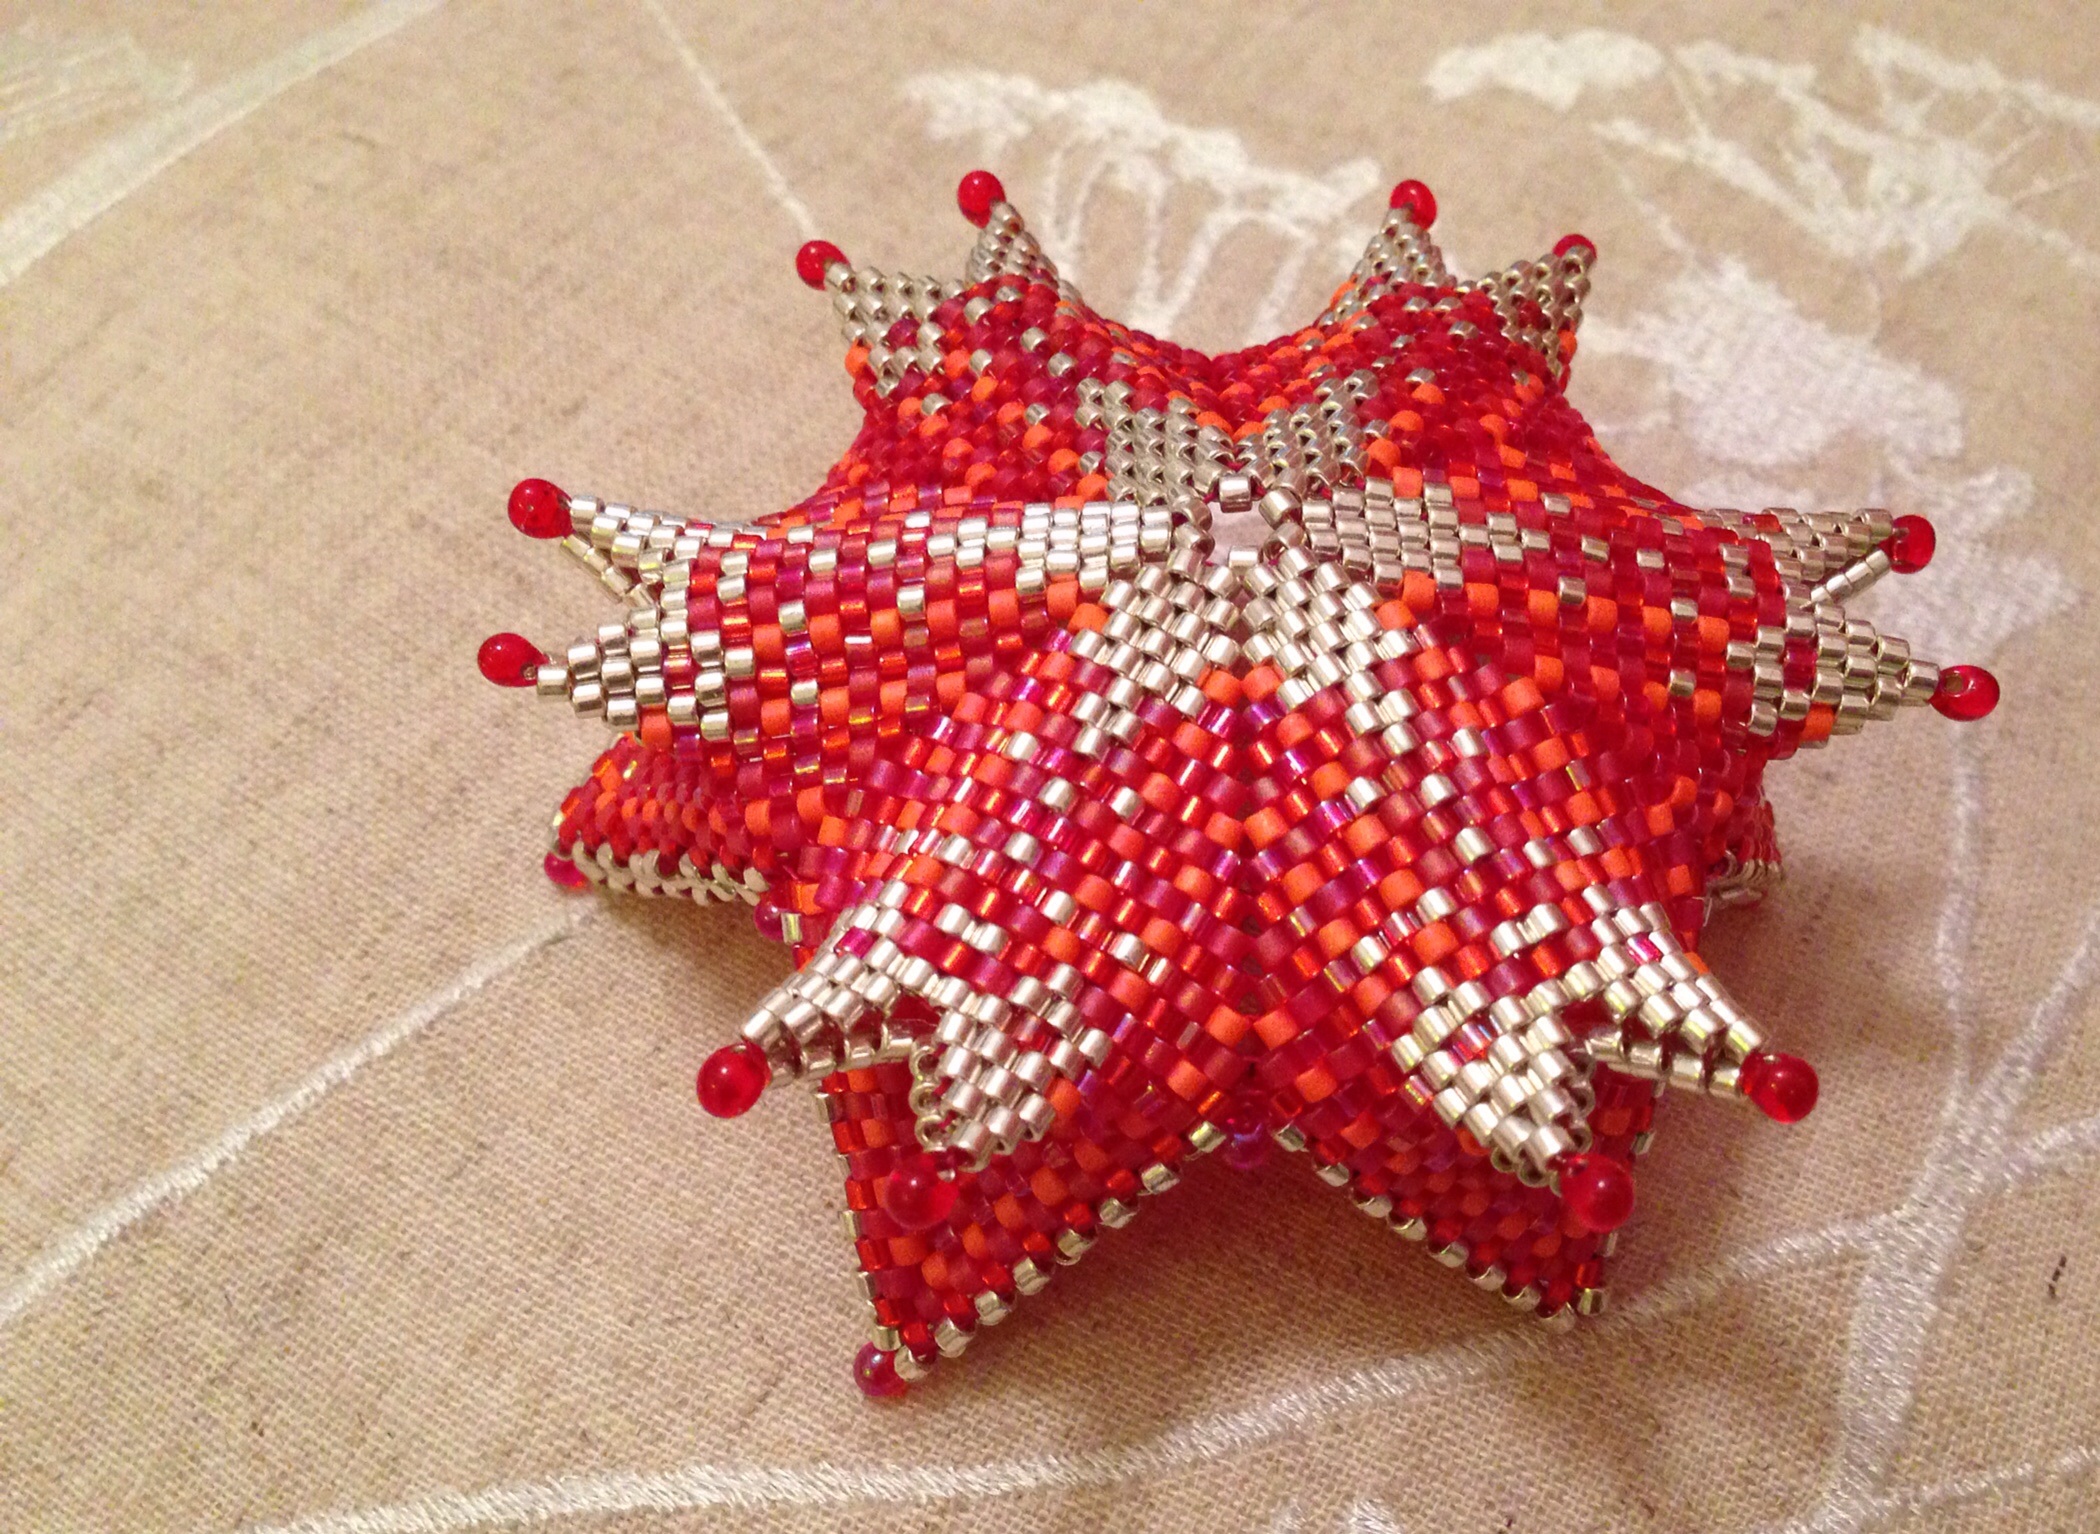
First I did a rough layout and photographed it, then rather than bezelling onto a single backing I bezelled each of the flat backed hand made cabs onto a separate piece of backing.  I do this because I find that adding the bezel changes the shape, size and overall appearance of the cab, and usually means I want to alter the layout significantly (usually to add more space).  I used a simple backstitch/peyote bezel – quick and secure, adding a picot to some but not all.  If you want to learn how to do a basic back stitch/peyote bezel then take a look at my SunStar tutorial which takes you through this technique.

Then I did the beadwoven bezels for the crystals and other cabochons – biggest first, then using a variant of whatever bezel I came up with for that one (with less repeats, or smaller beads) on the smaller ones to give a sense of continuity, and a repeat of the method I used on my Great Dixter necklace for the chatons.

Then I looked at layout again, adding the metal pieces, and did my trick of deciding on a shape based on a specific neckline – in this case I’m really glad because the original layouts had been for quite a shallow ‘v’ which wouldn’t have been great in wear.  Then I was ready to start attaching the bead embroidered cabs to a fresh base, using both glue and stitching (these are big cabs so it’ important to be secure, particularly if there is any flex in the finished piece as this could break the glue bond on bending).

Then I checked the layout yet again, working out how I would attach the bead woven cabochons (which sit up above the base and bead embroidered cabs, and where and how to attach the metal pieces.  This showed me what space to leave free, and where I needed to cover the base with bead embroidery – which I then did using simple stack stitch, and supplemented with some lovely Backlit Spectrum and Etched Vitrail 2 hole cab beads (in my head these were the bubbles in the water).  Next the attachment points for the straps (I didn’t complete the whole strap, as I wanted to check the length with the finished centrepiece, but I chose the beads, got it started and reinforced it repeatedly), and then finally I was able to secure the metal pieces and crystals.

At this point it was becoming apparent that the 50mm cabochon was pretty heavy.  Inevitably the bead backing is weakened as well when you stitch into it, so it was time for some serious reinforcement, sandwiching, glueing and stitching on additional sheets of backing, and even some flexible plastic cocktail sticks.

Of course those are hidden by the beading above, and the ultrasuede behind, so once that was on I worked on the edging, adding a picot to the focal cab and a simple sunshine edge to the remainder.

The neck strap of backlit 2 hole cabs was completed with simple loop and a vitrail Czech button from Snoochy, and then the whole thing was posted off to Dorset.

You can see all of the entries here on the Stitch n Craft website – in the end I was beaten on the day by Chloe Menage’s gorgeous bead embroidered headpiece, which she’d made for her own wedding.  However that’s not really why I enter competitions – it’s to stretch and challenge myself to do something original and ‘me’, and  I’m still really very pleased with this piece.  It’s the third I’ve made using this process (the first was my ‘Diva’, the second ‘Great Dixter), and each time it gets a bit easier, and a bit more enjoyable.  It was the last Stitch N Craft Beady picnic (and probably the last challenge) as they’re closing the studio to focus on mail order only, so as I’ve enjoyed them so much over the years I was really glad to be able to enter again this year, and I’ve got a lovely necklace to show for it too.

Marie Antoinette

Every year the lovely team at Stitch and Craft in Dorset hold a ‘Challenge’ Competition.  I’ve entered four times now, and every year I’ve found the process both challenging and useful – it’s the best way I know to push myself, using their topics and materials to explore new techniques and styles, and try to produce the best work I can.  It’s produced some of my most successful designs (both the Baroque Tape Measure and Space Needle Case started life as elements of my first entry, a Beader’s Chatelaine) with several more from other challenges just waiting to be written up.  Sometimes it’s a bit painful, sometimes it’s fun, and often as with this year I end up with something quite unexpected.

So this year the theme was ‘Fit for a Queen’.  We were sent three packs across the course of the year, each containing a brief and some Swarovski Elements which needed to be used.  That’s always a challenge – I knew early on that I wanted to produce a set, so not knowing what colour the elements would be made things very tricky, and effectively meant that the bulk of my work wasn’t done until I’d had the third set at the beginning of this year.  As I was busy on my pineapple this wasn’t a problem!

My palette was etched and matte vitrail, silver, light siam and light siam AB, a smattering of fuchsia, and crystal and crystal AB.  I also used some hand dyed and rolled habutai silk cord,  some vintage French velvet ribbon, a lot of Nicole’s Bead Backing, some foam board, cocktail sticks, some crinkled metallic silk organza, a metal hairband and a fair amount of glue.  If that sounds a bit Blue Peter, then I think the pictures of the final piece probably explain the odd ingredients.

The cuff is an MRAW bezel around the supplied Crystal AB Navette with added bicone fringe, mounted on a peyote band which allows it to slide sideways so you can access the hidden catch.  The antique velvet is appropriately French, the gathers onto the catch hopefully make it look like a bow as Marie Antoinette wore bows on absolutely everything.

The necklace is a Riviere – a late 18th century style which she might have worn (although I can’t find any pictures of her wearing anything other than a simple ribbon choker).  The graduated stones are a mix of the supplied Light Siam and some Light Siam AB, with a 3d netted bezel which uses the same pattern and thread path for every size of bezel – just with different sizes of the different types of beads.  I’m quite please with this as it’s lovely to be able to use the same pattern for so many different sizes (running from 8mm to 18mm), so I hope to get it written up and published reasonably soon.  To tie in the ribbon/bow element I used rolled silk habutai cord in the same shade as the velvet of the cuff as a tie instead of a catch, adding vitrail spike beaded beads to the ends for a nice finish.  The pictures below show the evolution of the layout and design (it started as a very different piece!):

And then finally there is the tiara.  In all honesty it doesn’t seem that Marie Antoinette wore tiaras – they weren’t really in vogue until a little later, with aristocratic French ladies of her time wearing ribbons, brooches and jewels in their enormous, elaborate ‘pouffe’ hairstyles.  And of course they also wore funny little models – the most famous of which were ships – frigates in full sail worn to commemorate the victory of ‘La Belle Poule’ in battle.  Completely barking, and I really, really just had to bead one, and somehow make it into a tiara.  After some pondering and in response to a rapidly approaching deadline (and slight competition fatigue) I abandoned my original plan to bead weave one (honestly what was I thinking) and switched to bead embroidery as although the beading side is not quicker, once I’d designed and cut out the structure I would know it would work – beadweaving is way too hard to predict and design on this scale.  I’d noticed that the Nicole’s Bead Backing I’ve started using is quite stiff, and wondered if I could use it for a 3d structure – so I made the hull of a frigate out of card, fiddled a bit and then got going.

This was very much a ‘just get on with it’ experiment – my first 3d bead embroidered structure, with everything other than the flat stitching entirely new to me and completely made up.  But I think in the end it worked.  It’s probably safe to say that it’s not my most polished work (the wire on the masts is particularly cringeworthy) but it is beyond a doubt my most favourite beaded piece ever.  Many of you have asked if it will be available as a tutorial and I can safely say absolutely definitely not – the chances of being able to recreate it in such a way that anyone else could repeat it are nil, and I think it will remain as a unique example of what trying to beat beader’s block late at night after too much wine can do.  But I will be doing more bead embroidery in the future and in will definitely not be in any way flat.

In the end I didn’t win (I did win last year so I think it was a bit much to hope to repeat that with such a very different entry, that was so very very bonkers), and neither did my little sister Susie Hoad (who entered the same class – we need to stop entering the same competitions for the good of family harmony).  All of the entries and most especially the winners were quite amazing – the theme generated some stunning work of incredible variety, which you can see on Stitch and Craft’s Facebook page,  and  I really enjoyed taking part.  All three pieces were great learning experiences, and two out of the three are very wearable.  I’m still not sure whether I will ever wear the third………………so it will join my pineapple in some kind of suitable display, and make me smile.

Adapting

I’ve been making another Fortuneteller, but this time with size 10 delicas.  I used my previous one as a template, measuring the various distances as I beaded along and at first it went well.  However, as it grew it became clear that the bigger beads meant that the thickness of the MRAW band made the inner layer significantly smaller than the original, and finishing the joins between the small horns was definitely going to make it unwearable by me at least.  So rather than hoping for a tiny handed customer, or giving it to one of the boys (boy 2 is very keen on bangles) I’ve made it into a rather splendid bowl and I like it.  Which is just as well…………

image


Recipe

  • Size 10 delicas in three shades of red, one orange and silver, 26g in total.
  • Size 3.4 drop beads.

Tips

  • Unless you actually want to make a bowl, I’d suggest a starter MRAW band which contains six repeated ‘Vs’ with 9 units on each side of the V (not the 8 units I used).
  • To get the colour effect I used, start the MRAW band with the silver, using one of the reds as the fill bead.  Add a drop bead as one of the inner beads on any increases or decreases (you may want to miss them on the decreases – I chose to leave them in as I like the look of the drop nestling in the V.  Then change red/orange every row.  As you approach the horns, start adding the odd silver in, then more each row until you are just using silver.  I chose a random pattern, mirrored on each pair of horns, but kept it identical for each round so that the graduation was even across all the horns.  Then gently fade the reds back in, and finally as you approach the final tips work the silver back in again.
  • Size 10 delicas are still quite hard to get hold of in the UK.  Stitch n Craft are expanding their range gradually, and as usual offer probably the most competitive pricing (assuming you spend enough to qualify for free postage, which I never fail to do), although their colour range is still quite limited.  Charisma have a good range of colours, as do Fine Lines.
  • Finally, with this kind of work, especially with larger beads, you really can’t make any mistakes as they will be very obvious on the finished piece.  I made quite a few as I was very tired, and the lovely push pin and eraser combo I was sent by the lovely Jean Power with my copy of Geometric Beadwork 1 was worked quite hard.  I can’t remember having to break out this many beads for ages.

image

Other than my general incompetence it worked really well with the size 10s, and in many ways it’s the best use of these for geometric beadwork that I’ve tried before.  I will have a go at an actual bangle once I’ve got all the other things on my beading list moving along.

And another one……

Since I had the pliers out yesterday I finally got round to adding a clasp to a Sabine Lippert piece I finished beading a while back.  It’s a Baroque Dimensional Bracelet and  instructions are available for download from her website, and the simplicity and repetition made it a really lovely piece to make – but of course as with all Sabine’s pieces it looks absolutely amazing.  It curves beautifully – both around the wrist and across the width of the piece, making it seem lovely and fat and chunky.  Very pleased with this one.

image

Recipe

Fire polished beads 4mm  Matte purple iris (from Etsy More Beads4U)

Fire polished beads 3mm Purple iris (from Robins Beads)

3.4mm drop beads Miyuki 401FR Black Matte AB (from Stitch N Craft)

Size 11 & Size 15 seed beads Miyuki 401FR Black Matte AB (from Stitch N Craft)

Fireline 6lb

Silver magnetic clasp, jump rings.

The Miyuki Black Matte AB are a current favourite as they are a kind of navy blue base, and I’ve not been able to find another good match for navy.  For some reason I am wearing a lot of navy at the moment and it is certainly easier to work with than straight black.

image

Tips

  • I did 30 repeats as per the instructions, and it fits very nicely.  The finished beadwork measures 20cm (without the clasps) although do bear in mind I am quite a tense beader.
  • On that note, relax, relax, relax your tension, particularly for the base layer.  For me that means beading in a way which felt baggy, floppy and downright messy, but you need plenty of give in order to add the embellishing layers.  This is common with embellished RAW pieces.
  • Otherwise as usual Sabine tells you everything you need to know……..

Next steps

Another good relaxing project, like the Faux Cro, I’m definitely going to make another one of these when I have assembled enough Fire Polished beads (it does use quite a lot).  Perhaps this time I’ll go a bit wilder with the colours (I’m thinking some sort of outrageous red, pink and orange with lime highlights again).  Or perhaps something bright but wearable instead.

And I’ve got the pattern for Sabine’s Tweed bracelet to do as well yummy yummy.  Sabine has also put together some beautiful kits, and one day I will definitely treat myself……..


image

A quick comment about ordering from abroad before I get told off for listing MoreBeads4U:    I usually try to stick with local suppliers – although sadly I don’t have any ‘normal’ bead shops selling teeny beads locally, I use UK mail order shops where possible (mainly Stitch N Craft and Robins Beads).  However wonderful they are though, it isn’t possible for them to stock absolutely everything I need, and I have now found (through Etsy) a super supplier in Latvia for Czech beads (links above) – reasonable and prompt postage, and pretty much every colour and size of fire-polished beads I could want, competitively priced.  So while I continue to use and support my lovely UK suppliers when they sell the colours and shapes I need, and will always look here first, I do sometimes have to go elsewhere.  I don’t take this lightly, as shops like Stitch N Craft are so wonderful for the beading community – their class programme is probably the best in the world, they are very supportive of the Beadworkers Guild and bead groups and their range is absolutely wonderful.  So their website will always be the first one I go to so that I can support them in return.

Of course one day I will open my own bead shop, sell everything I want and consequently go bankrupt in a year.  But it will be fun.


Finished in the nick of time.

Why is it that I work so much better under pressure?  Or is it that I just think I do because I am a hideous procrastinator and it makes a good excuse?  Either way I have had nearly a year to get my four pieces done for this years Stitch ‘n’ Craft Four Seasons challenge, but with a week to go I was still faffing around with the construction of Autumn.  Pretty fundamental stuff…..

Anyway, I gave up at about 10.30 on Friday night, and in the cold light of day (OK the very warm and humid light of yesterday) I’m reasonably content with the pieces as a whole and my final work on Autumn is just fine.  I can’t show you any of them properly as that would spoil things, but there is a taster above.  All peyote pretty much (have reverted to my beadweaving roots), and only one piece using delicas (so running away from my roots there).  I labeled them up last night while dear husband was at a glamorous party, so tomorrow morning I need to scribble a quick note about presentation (‘please put necklace on bust, looks a bit odd otherwise, don’t really mind about the rest’), and then pack them up ready for posting.   And then I am free – at least for a couple of days and then back to prepping for the Folksy featured shop and coping with the school holidays.

So for this year at least I can bid a fond farewell to the four pieces that took over my beading life – adieu to ‘Crystal Garland’; ‘Tumbling Leaves’; ‘A ********* for Oscar ‘ (sorry, can’t give you the full name because it spoils it); and ‘The Very Hungry Caterpillar’.   Bye Bye.

PS I rather suspect dearest husband would rather I didn’t enter next year – something to do with stress, obsession – not sure?  He may be right because it does rather completely take over, but I’m reserving judgement until I know what next year’s challenge is……….sorry darling, and happy 7th wedding anniversary my sweet.  XXX

Birthday beaded bead

As usual I was stuck for a birthday present for my mother, and as usual had left it a bit late (under a week). But then inspiration struck on Tuesday as I remembered that Stitch ‘n’ Craft have started selling lovely Shibori Ribbon. Made by Shibori Girl, I’ve wanted to buy some for a while, but have held back as it’s not cheap.  However, I thought a yard of it would make a lovely necklace if I made a big beaded bead to thread on it, and it didn’t seem quite so expensive if it meant I could get a whole necklace from only a few hours work.

The colours that were very obviously Mummy’s thing were sadly out of stock, so I gambled on ‘Fallen Apple’, ordered on Tuesday morning and it was with me by Wednesday lunchtime – and it’s perfect for her. Some scrabbling around in my too large book collection turned up ‘Amphora’ in Marcia DeCoster’s Beaded Opulence, and I got started. I’ve made one before, which you can see below top left (reds and black).

My first attempt this time failed – the tension of the RAW base was much too tight (it seems to need to be very loose for this piece, presumably because of the shape and embellishment), and the colours I had chosen (coppers and lime) were much too brash. You can see that one in the middle below, half done and then hacked about a bit to get at the beads.   Fortunately the second attempt (bottom right), using much more subtle beads has turned out perfectly, and was all done in just a few hours.  I tweaked the design a bit, substituting copper 3mm pearls and matte copper 3mm fire polished beads for the 3mm bicones (Mummy is not really a crystal person), and using drop beads as the central few embellishments to add texture. I’m very pleased, although the ribbon is looking a little thin, so I will experiment with pressing the pleats a little tonight to widen it out. Hopefully Mummy will like it when we give it to her tomorrow.

20140628-150213-54133475.jpg

RECIPE:

‘Amphora’ – Marcia DeCoster’s Beaded Opulence page 107

Shibori Ribbon in ‘Fallen Apple’ by Shibori Girl (Stitch & Craft if you’re in the UK, or available through her Etsy shop and from other US suppliers if you’re elsewhere).

Beads (seed all by Miyuki, from Stitch ‘n’ Craft of course)

  • A (11), F (15), G (8), H (drops, substituted for 8s) – 2035 (Matte Metallic Khaki Iris)
  • B (11) – Custom Coated Vintage copper, also used instead of 15s around the Drops in step 3 above rows 6, 7 & 8)
  • C (3mm FP) – Brown Iris (Robins Beads)
  • D (3mm pearl substituted for bicones) – Copper I think (Robins Beads)
  • E (3mm FP substituted for bicones) – Matte Copper (Etsy –  MoreBeads4U)

LESSONS LEARNT:

  • Tension in first layer needs to be pretty loose.
  • The substitutions worked well.  However if you want to substitute drops in where I did then you will need to use 11s rather than 15s to surround them (as although the  top of the drop is over 3mm, the base is much smaller).
  • Marcia works with lovely subtle base colours – so it may be best to stick with these if you’re using one of her designs. She then uses several highlight colours in the upper layers, but I also found that using just one worked.
  • You can’t really see the fire-polished beads from the centre of layer 1 as there are two layers above – so don’t flap too much about having the perfect ones – use some OK ones and save the nicer finishes for something where they will be seen properly.  A darker colour than the rest of your base beads actually seems to enhance the design.
  • Good and quick – I’d say around 2 hours if you’re familiar with the design or an embellised RAW fanatic.

Summer is finished

Not the weather (although it does seem to have been and gone already), but the summer element of my Stitch ‘n’ Craft Challenge entry.  It’s taken longer than I had hoped, and as has happened with previous elements has rather taken over my beading time, so I am relieved to get it done.  I have so many other projects stacked up in my head, and so little time to do them (not helped by the baby coming down with chicken pox).  Stitch ‘n’ Craft is my favourite bead shop – great beads, light speed service and lovely people.  I first entered the challenge last year, largely to force myself to do some wholly original work, rather than just using other ‘ patterns and ideas, and it gave me a lot of confidence.  I’ve even produced one of the elements as a tutorial (hopefully available for sale soon, once dearest husband teaches me how to make the file smaller).  New ideas blossom out of the stretching work, but the trouble is there’s no time to work on them.  I’ve taken to keeping a notebook (as recommended by all proper beaders), so I hope that I don’t loose those ideas.

This year’s challenge features four pieces, one for each season.  Each season has a set palette, and must incorporate elements provided, so is a real push creatively.  All of the seasons have included elements I’d never normally choose to work with, and colour palettes that I’m not used to – I think the latter has been the greatest challenge as I’m somewhat of a creature of habit where colour is concerned, but I’ve come to enjoy some of the new palettes, and can’t wait to work some more in the winter scheme in particular which was completely new to me (and caused much bead buying).  The pastel shades of summer have been surprisingly uncomfortable as well, and with lots of green in Spring too I’ve been stretched (I love lime green – Miyuki Zest Duracoats are the best beads ever, but I rarely work with other shades).

Anyway, Summer and Winter are complete, Autumn is beaded and just needs making up, and then I must dash through Spring if I’m to finish by the end of July.  So I need healthier children soon………