2016 Secret Beadalong – Day 2

Today was Mini-Duo day – I’ve not used them before and I rather like them.  I particularly liked the simplicity of Bead 4.  Today was also a chance to use my favourite neon violets as well (always a bonus), and I also used some picasso finish ones I bought on a visit to Creative Beadcraft a little while ago.

Beaded Bead 4

image

Beaded Bead 5

image

Beaded Bead 6

image

More fun – thanks Jean!

image

2016 Secret Beadalong – Day 1

So National Beading Week 2016 has begun, and I’m taking part by joining Jean Power’s Secret Beadalong again.  I really enjoyed last year’s so far I love this one too.  I picked my beads a few weeks ago, and did my prep work as instructed, and now here’s my Day 1 beading:

Beaded Bead 1

image

Beaded Bead 2

image

Beaded Bead 3

image

Cute, fun, and not too tricky – a lovely trio.  See you tomorrow!

image

2016 Secret Beadalong

During last year’s UK Beadworker’s Guild’s ‘National Beading Week’, along with thousands of beaders from around the world, I participated in Jean Power’s fabulous 2015 Secret Beadalong.  As the 2016 NBW approaches I’m getting ready to take part again, and I really can’t wait.  The materials list is very intriguing – lots of ‘you can use 1 or 3 or 5 or 15 colours’ which obviously appeals to me, as I am unable to commit to just one; and Jean has used some of the new ever so dinky mini duos (quite a lot of them judging by the weight required).  On top of that a mix of feature beads in different sizes, and lots of seeds.  Unusually for Jean, no delicas (I have checked the list three times as this is not like her at all!!).

Secret Beadalong Days 1-5 Sarah Cryer Beadwork

As you can see from the picture above, and the blog posts I did through the week, last year, my colours were pretty loud – don’t get me wrong, I loved them and I love the finished piece, but I’ve not actually worn it.  And as the interim photos came through on the Facebook pages, I found myself wishing I was better at putting together more subtle colourways – I get lots of compliments on my bright work, but there are some lovely muted metallics out there that I’d like to try.  So with that in mind, earlier this week I sat down with my beads to pull a selection.

image

If you’ve signed up already, you’ll know from Jean’s list that there are far more bead packets here than there are listed.  This is partly because she’s said it’s OK to use multiple colours in one type, and given the prep I’m guessing at a component based design with the opportunity to swap across repeated components.   It’s also because I find it really tricky to commit to a colour or finish when I don’t know how it will sit in the design – for example I wouldn’t want the Magenta firepolished sat next to the Violet Neon minduos – visually too much and they are not exactly the same shade of magenta anyway.  And finally its because I am very indecisive about choosing beads – for most projects, whether I’m building them from scratch or following my own or another beader’s design, I will always pull more colours/finishes than I end up using, so the design/execution can evolve without me getting up from the sofa to root around in my stash.

Anyway, the colourway as it stands goes something like this:

  • Magenta – for highlights only, I’m going to try and restrain my use of this.  I’ve got some Violet Neon, some straight magentas, and some fuchsia crystals (which may not make the cut as in daylight they are too red compared to the others, but we’ll see how they sit).  So one ‘colour’ only.  Sort of……
  • Sliperit – both etched crystal and non-etched jet – wanton extravagance, and not really needed but I think used sparingly these will bridge the gap between the darker metallics and the magenta.  This finish is gorgeous, showing magenta, purple & copper, and I’ve got a range of sizes/shapes in my stash to play with.  I will though need to be careful with the Etched Seeds, as they are Czech made rather than Miyuki with an after factory Czech coating, which means the sizes are different, and the etching process which makes them look so amazing can impact the sizing even more.  And if I use them a lot I will have to reinforce the thread or use Fireline (which I used to love but have gone off) as they can have sharp edges inside………..
  • And then the base colours – mainly Miyuki 2002 which is a matte metallic dark silver with hints of bronze; but with some black picasso mixed in for fun.
  • And a spare packet of vitrail bicones, in case the fuchsias don’t work.  And some tarnished silver mini duos because I had them and it might all be a bit dark.  And whatever else I find between now and beading it!

So all in all not the subtle colourway I was planning, something much darker and more dramatic, but hey ho, the beads have spoken.  Watch this space as I start the prep work, and don’t forget to sign up here and take part!  If you subscribe to Jean’s mailing list (highly recommended – it’s only one mail a month but she usually includes a lovely discount code as well as news about classes, patterns and kits), or are in the UK and a member of the Beadworker’s Guild, you get a discount.  And whether you’re beading along with us or not, follow the dedicated Facebook page to see what we are all up to.


Buying on Etsy

As an Etsy seller I like to support fellow makers and suppliers, so as I can’t show you much of my current beading I thought it would be nice to look at some of the lovely things I’ve bought from them recently.

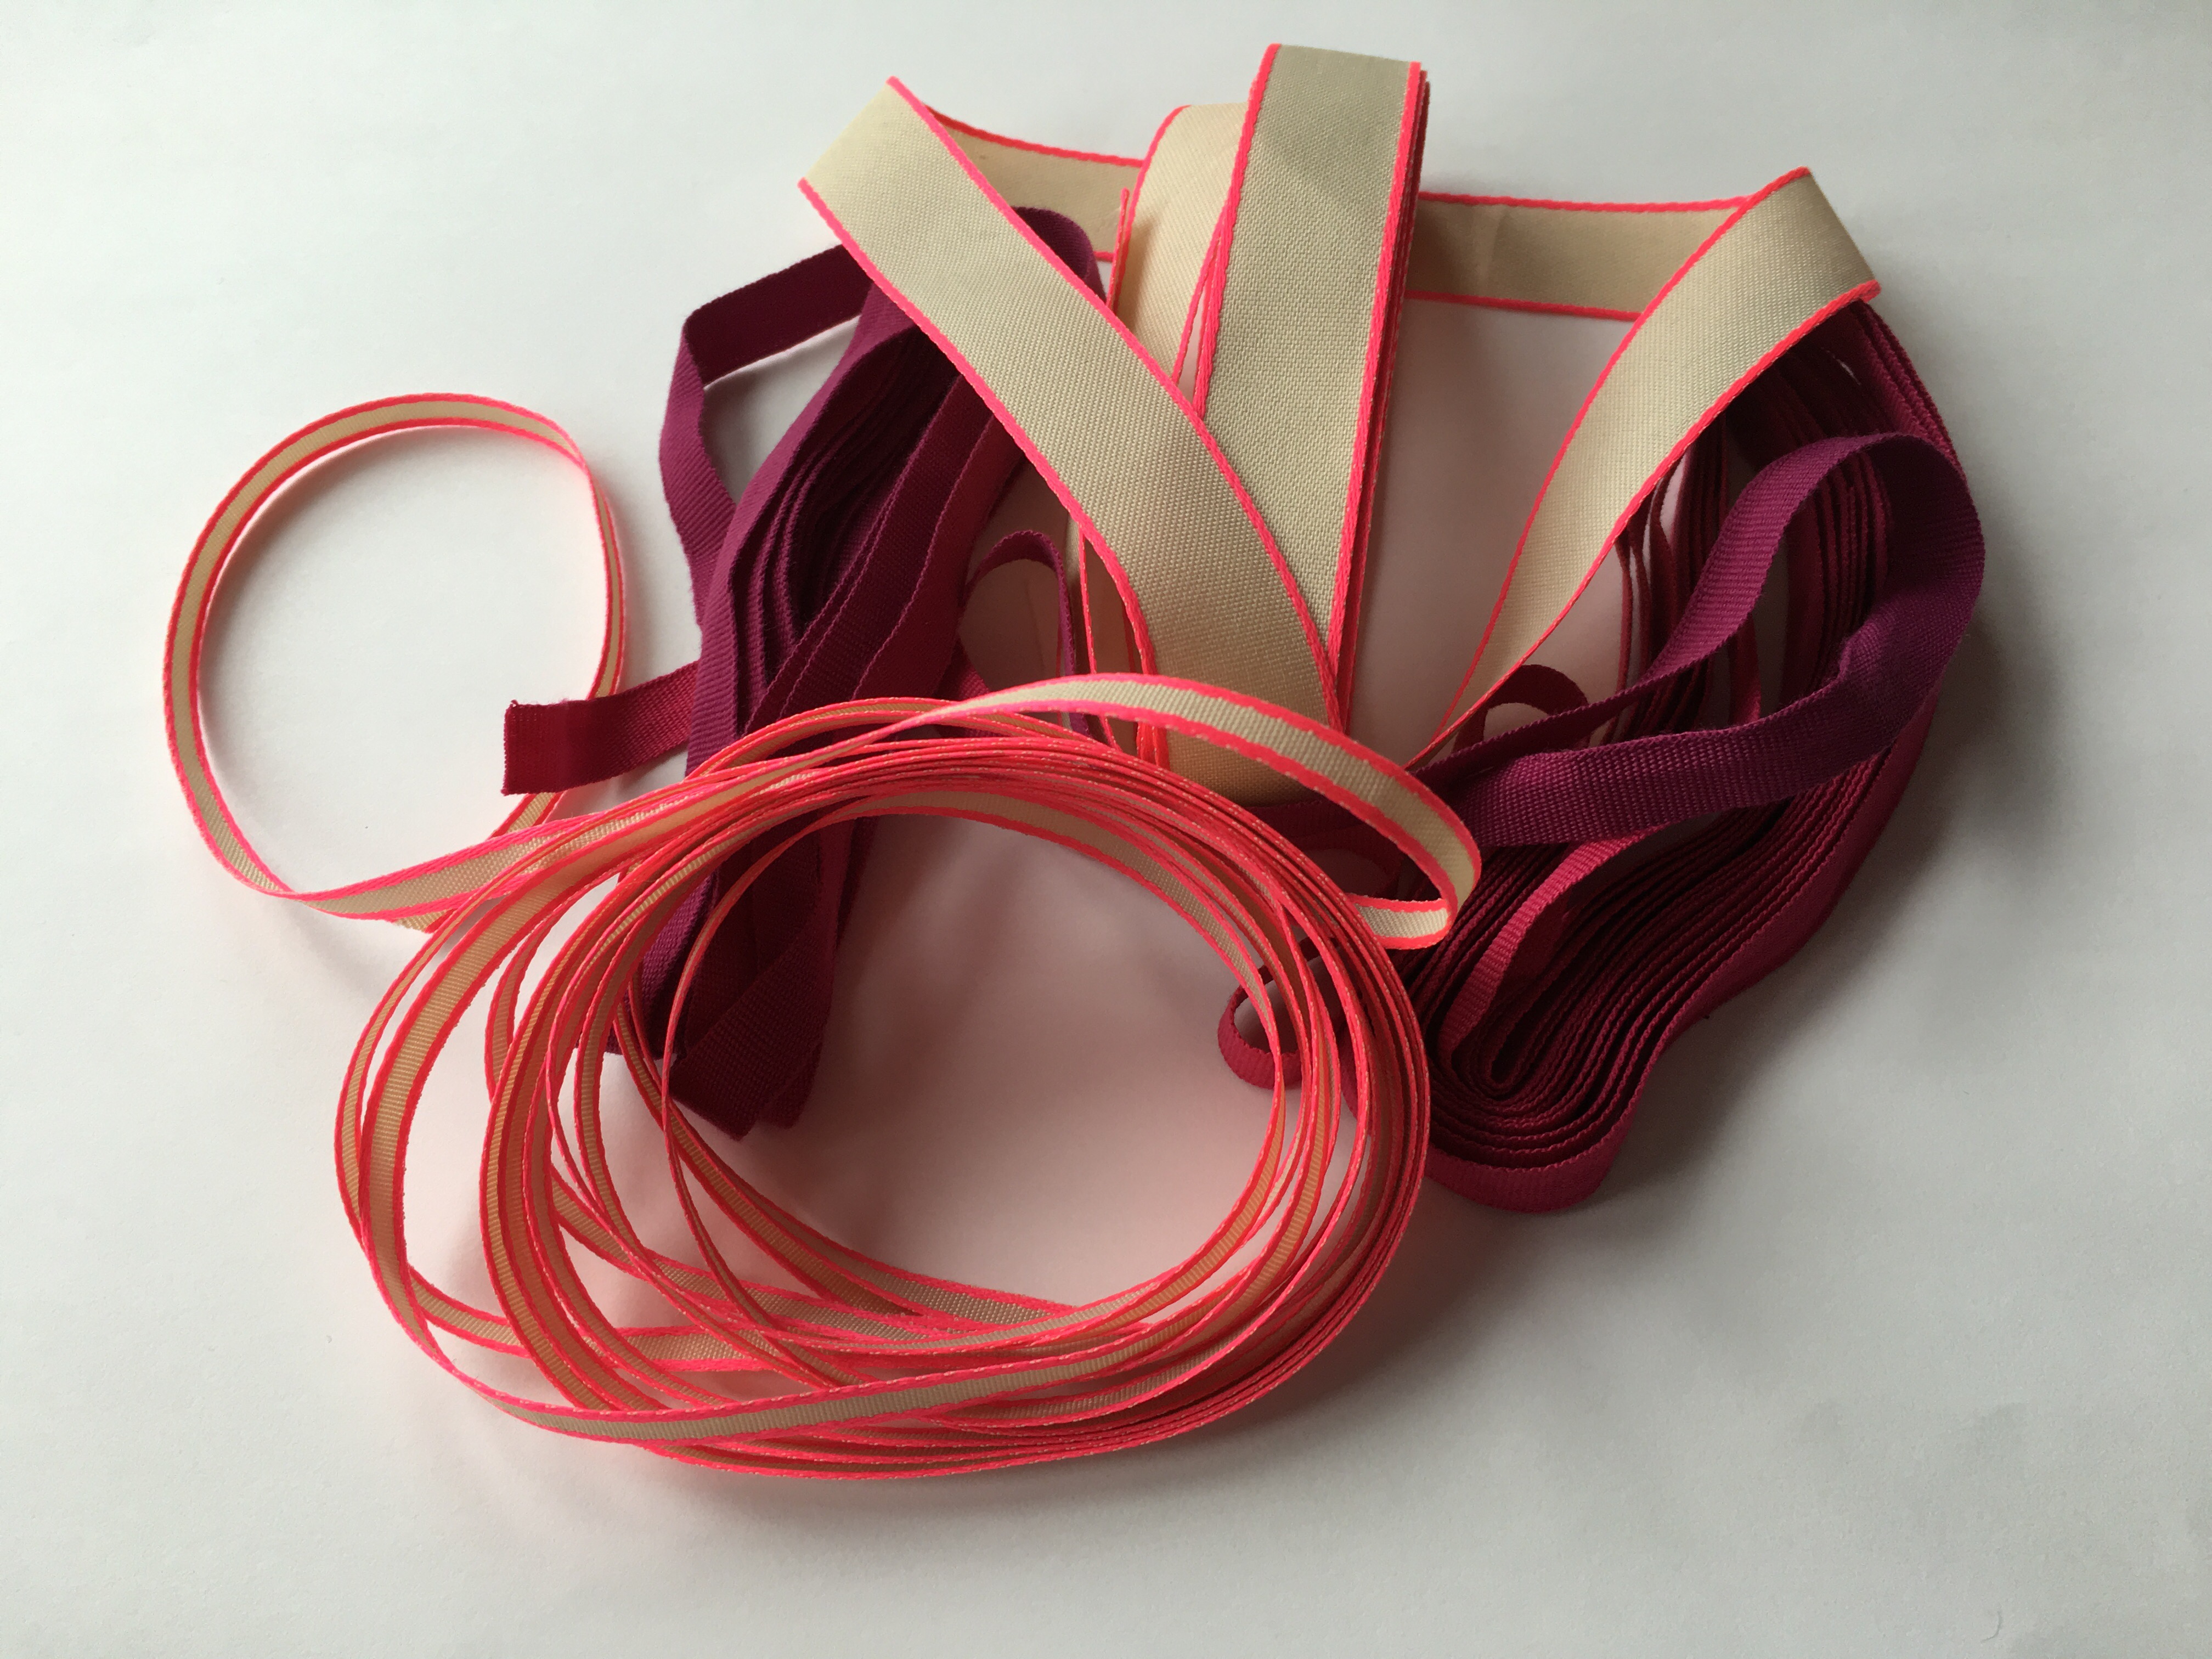
Nicole at Cloud Craft Sells lovely crafty things, and has some cracking ribbons – the pink fluorescent edges are rendered quite tasteful by the beige centres, and will work well with a version of my spiky beaded bead I have planned in tarnished platinum and neon pink.  The other two cotton ribbons will also support beaded beads, probably from last summer’s project.  It’s nice to find matte finishes like this – they work well with matte and tarnished beads, and tie well (unlike slippery satins).  Looking at her shop to write this post, I can see an interesting wooden cross stitch base which it might be fun to bead on as well…………


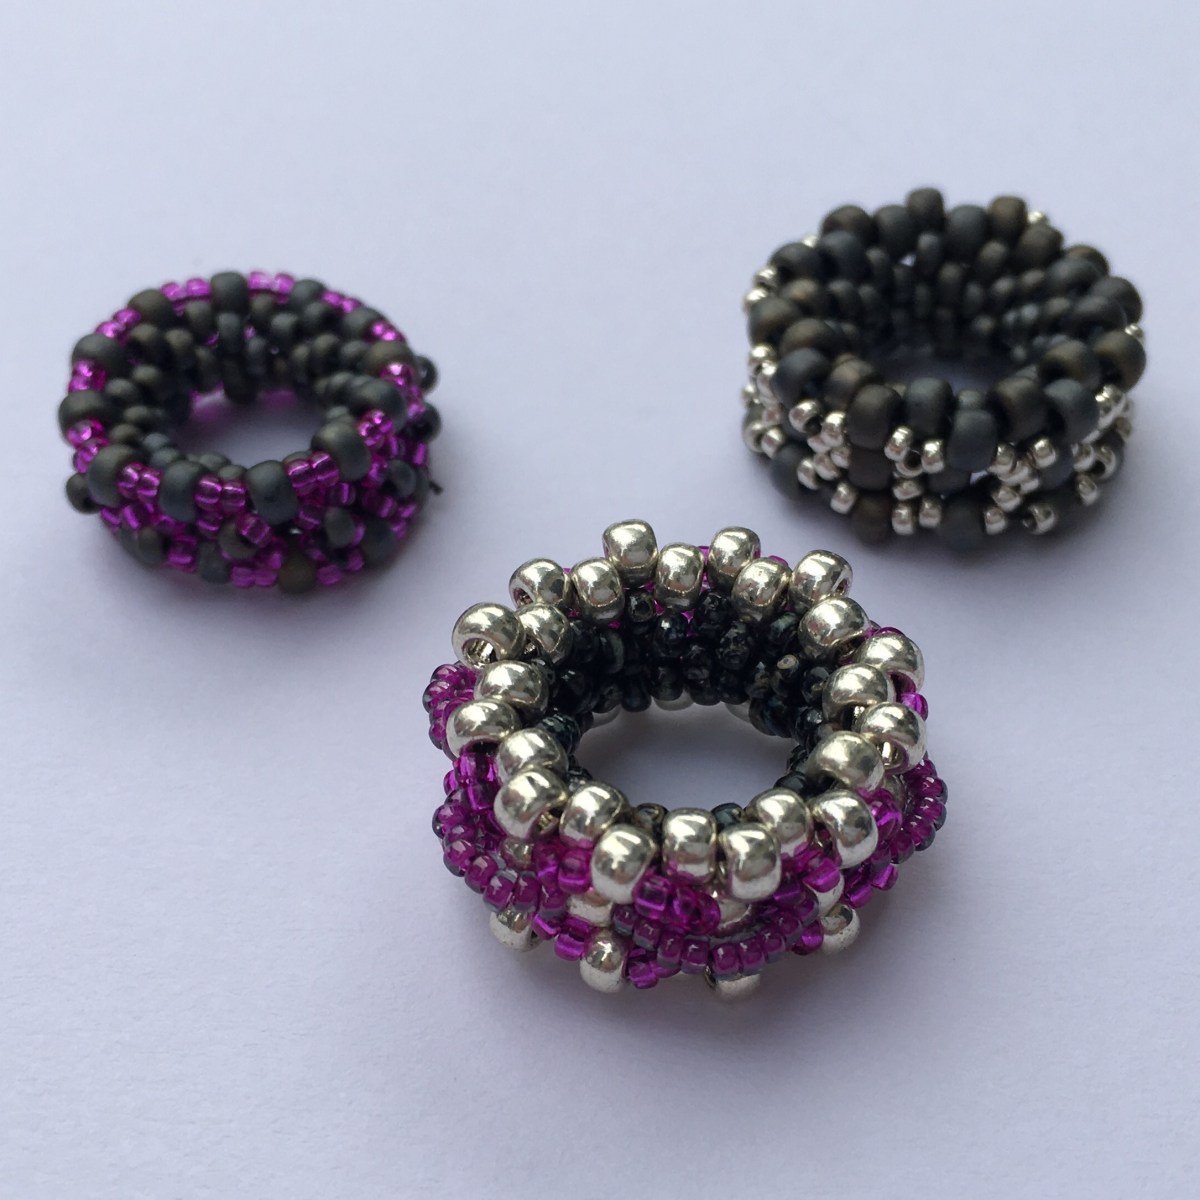
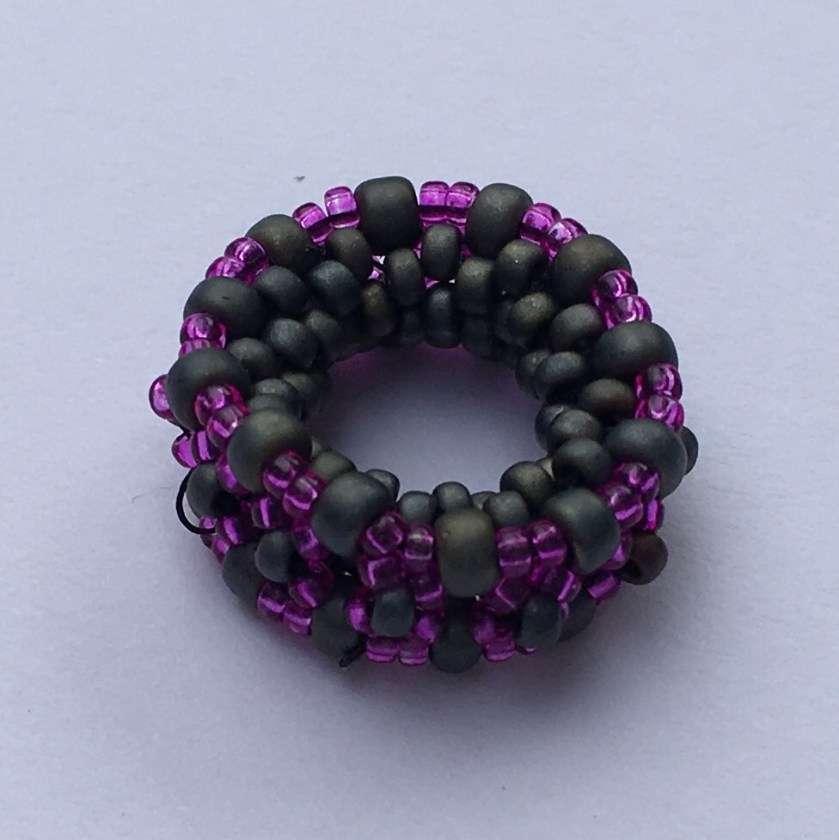
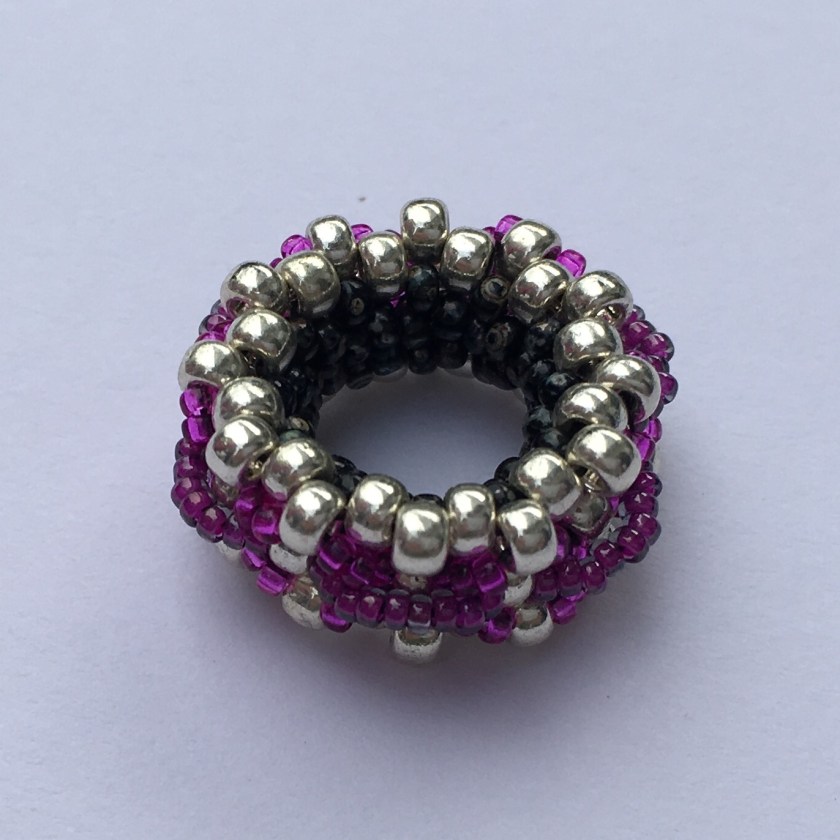
Some of you know that a while back I treated myself to a three month subscription to the CuriousityClub, from the Curious Bead Shop and this is my final pack.  I’ve enjoyed the surprise each month, and the beads are quite lovely. They are though a bit big for me, so I’ve found them tricky to use, and need to work out how to incorporate them into my usual work.  The colours are also more subtle than I usually go for, so I will try to be disciplined and won’t be renewing until I’ve actually used some of these. Instead I’ll perhaps hunt out a new monthly box, beady or otherwise, as I’ve really enjoyed the treat of these, (and before them the Lucky Dip Club) popping through my door.  It’s such a joy to come in from a hard day at work, or a hectic, wet school run, and find a little box of lovely surprises all for me.


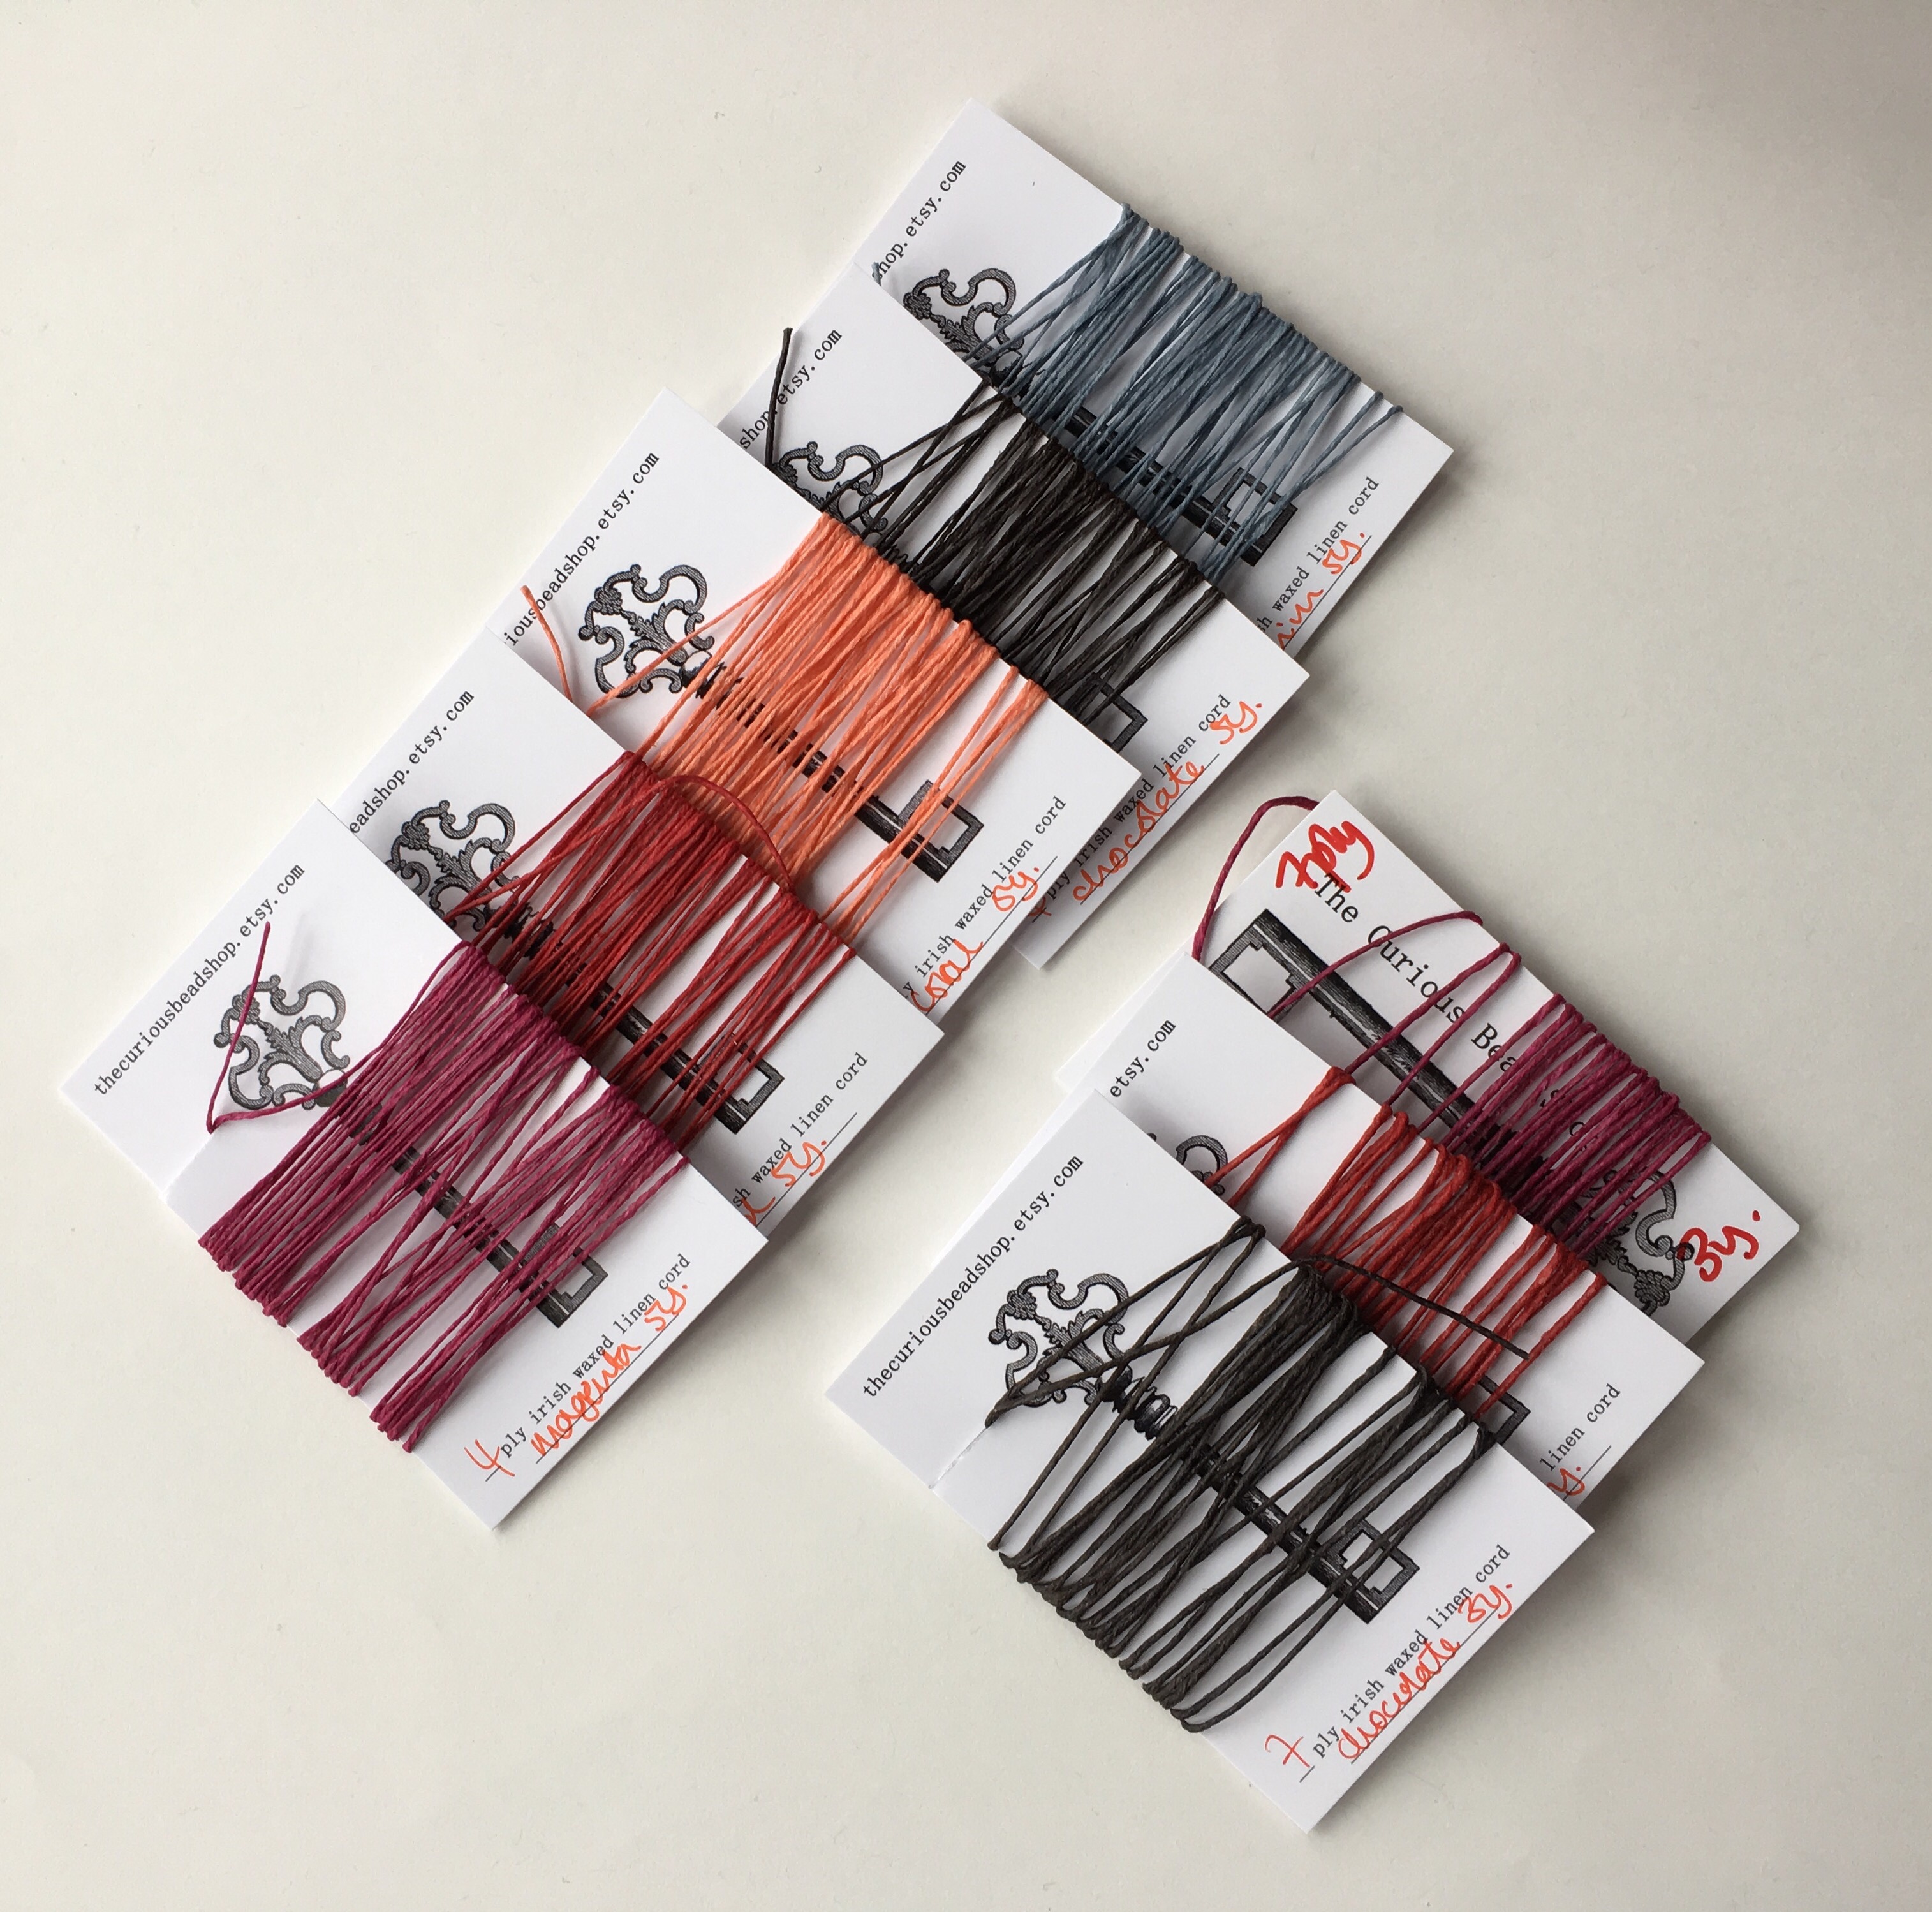
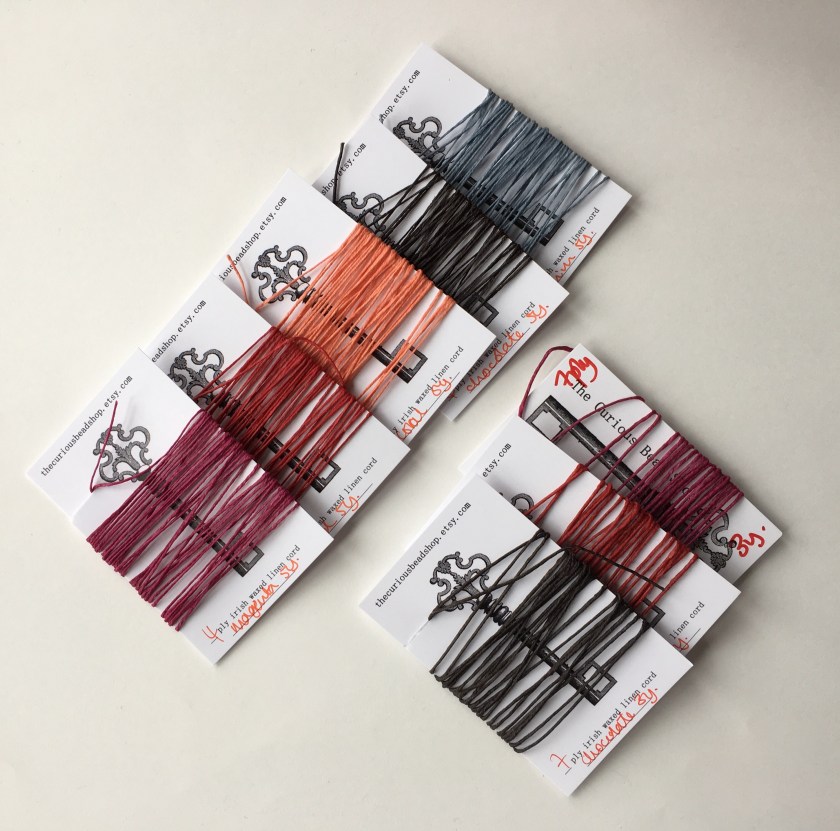
To use the beads from previous packs, I’ve invested in a few more of Rachel’s lovely waxed Irish linen threads – in two weights.  They’re really interesting to work with, as they are firm and very waxed, and really hold their knots.

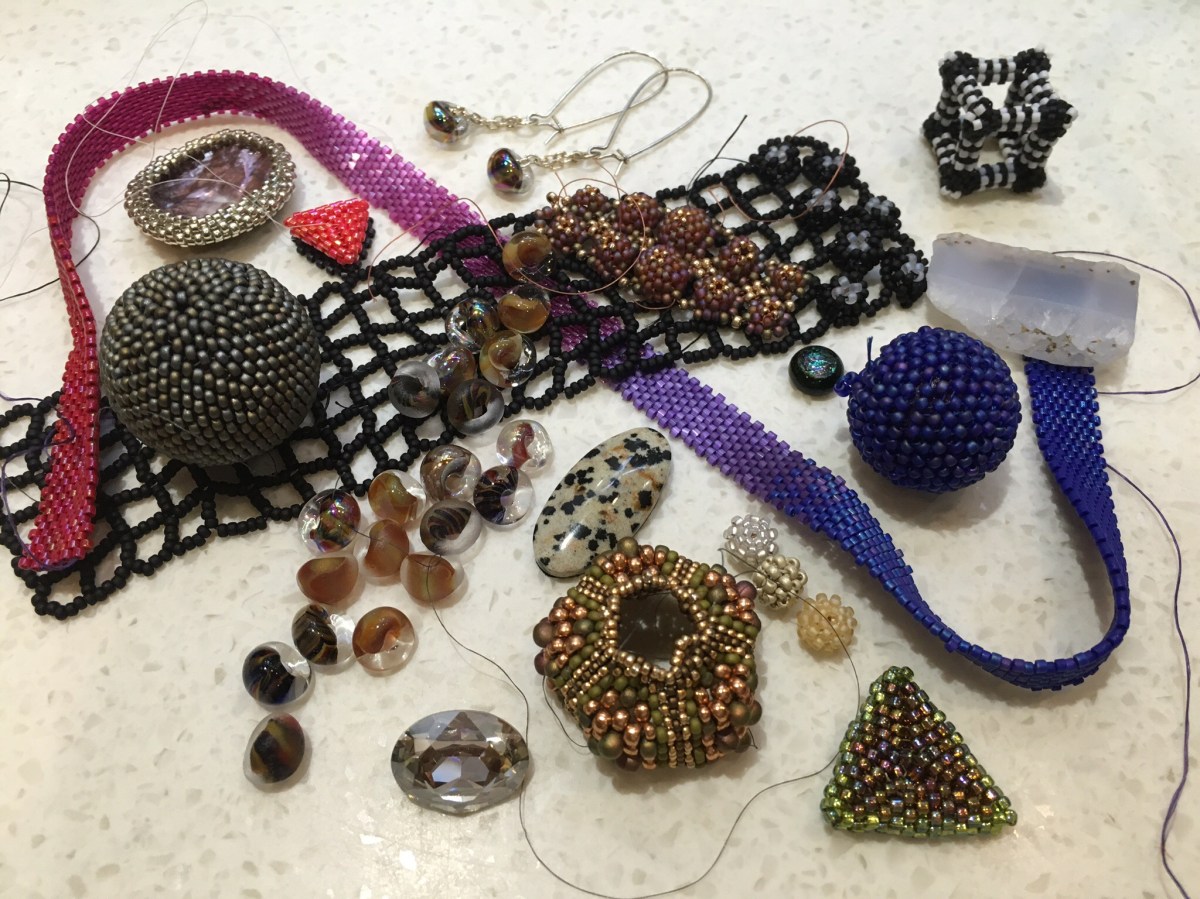
And of course I got a few additional beads in Sarah colours as well!  Some lovely etched magic blueberry farfalles down the bottom:

image

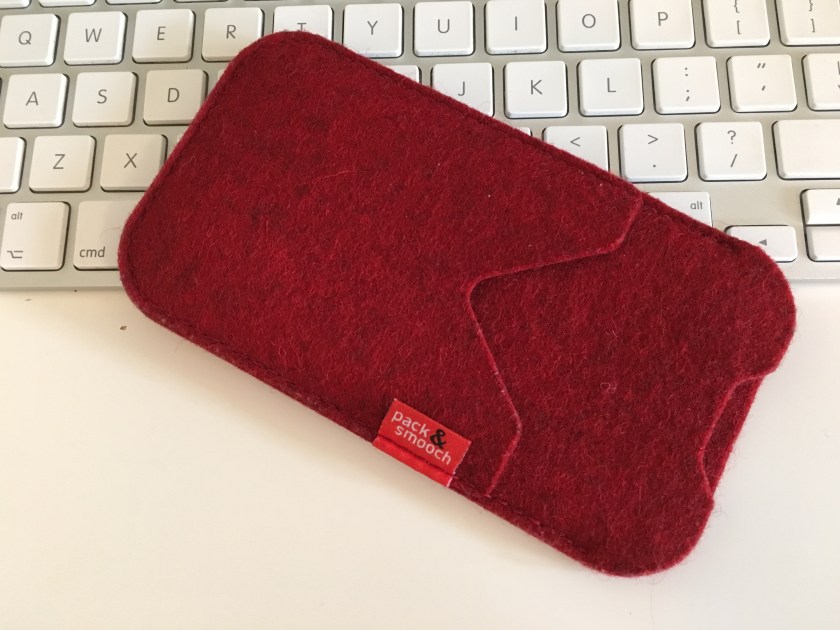
In case you were wondering, I don’t just buy beads and craft supplies on Etsy – I’m trying more and more now to ‘buy handmade’ for other products.  When boy 2 spilt yellow smoothie on my lovely raw wool iPhone case recently, I had an excuse to buy another one from Pack and Smooch – this time in red (it will be easier to find in my calico lined giant handbag).  The old case has protected my precious phone valiantly from drops and knocks, and absorbed the smoothie so well that the phone inside was quite dry.  And ironically when carefully wiped clean, the old one is yellow-stain free (but I’d already ordered a replacement at that point).  It’s a super case, looks good, works very well, and it’s a pleasure to buy a handmade product from an individual or micro-business – lovely quick, pleasant service.

image

And a recent mailing from Etsy which mentioned ‘Eco Jewellery’ intrigued me enough to make me click through – once I’d filtered to UK sellers to get rid of the US bias, I found these lovely earrings and bangles from MadeInTheForest.  I also bought some fab peacock feather earrings.  Obviously I don’t normally buy jewellery, I make it, but these aren’t something I would know how to make, were well priced, and they are such fun to wear as they are bright, unusual and light as a feather.

image

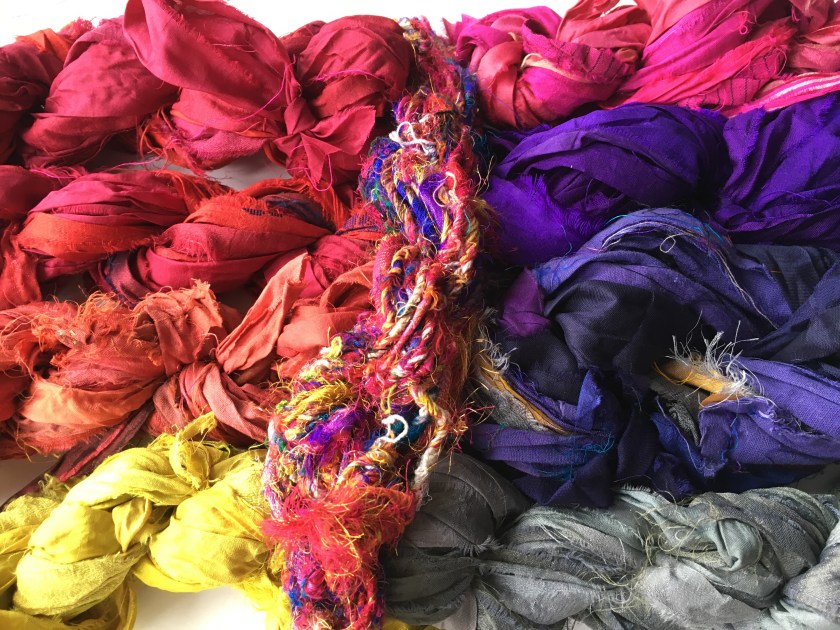
They got me thinking about replenishing my supply of sari ribbon – I’m using it more and more to hang pendants, as I’m finding it increasingly difficult to source interesting ready made cords  and chains that are of a good quality, but won’t impact the price too much – and I’m increasingly yearning for something more unusual, funky or individual which will complement my work, rather than hanging a hand made, unique piece from a generic, mass produced cord or chain.  That led me to YarnYarnYarns, and some lovely bundles of sari ribbon, plus some mixed hand dyed yarns as well.  When they arrived it was a lovely surprise to find them in a beautiful silk drawstring bag – so kind.  In the past I’ve done a kind of giant kumihimo braid to make bangles with this type of fabric, so I’m looking forward to perfecting that technique and maybe even working up a really chunky collar (with beaded embellishments of course).

image

And finally, Etsy in it’s wisdom then took ‘silk’ ‘ribbon’ and ‘hand-dyed’ and suggested I have a look Scahalrausch.  Usually Etsy’s suggestions are a bit unhelpful, as they tend to be for US based sellers, so mean prohibitively high shipping rates and pesky customs delays and fees, but as this seller is based in Germany, shipping to the UK was perfectly reasonable, and for now at least (Vote Remain please!!) no customs issues.  These hand dyed rolled silk cords are absolutely exquisite, and I am finding it hard to stop myself buying a length in every colour in the shop.image

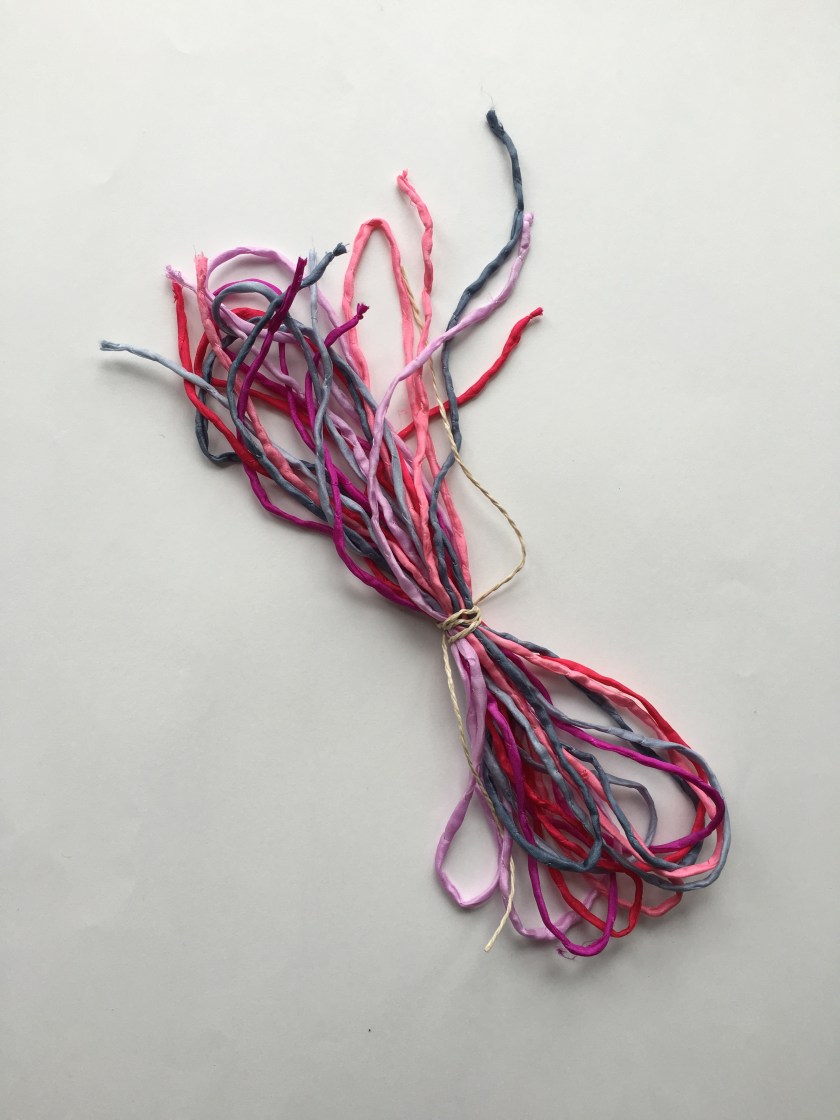
Bye bye – hopefully I’ll be posting about beading again soon.  I have my Jean Power Secret Beadalong colours to pick after all………..that should be worth about 5 posts as I change my mind constantly.

In search of beady perfection.

Recently I’ve not had enough time, or indeed energy to bead as much as usual. Space birthday parties, work, gardening, singing, 2 year olds who won’t nap any more, and life in general have got in the way, and despite strenuous efforts to create time (which largely consist of ignoring the housework), my beading time has suffered.

On top of all that, as some of you will remember I’m entering the Stitch N Craft Butterfly Challenge this year, and I made a rather rash promise to myself that I would ensure that the finished piece was the very best it could possibly be. In previous years I’ve met the brief, but run out of time or energy and haven’t been entirely happy with some of the compromises of technique or style I’ve made to get the pieces done – you can see my set for the ‘Four Seasons’ challenge above, and although I was contented with most of the pieces, it’s only the rattle (which was a real labour of love in terms of reworking) that I truly love.

So what should have been a simple, understated piece (and still is) has become a ritual sacrifice to the beady goddesses of perfection, reworked and tweaked so many times that I’m starting to be a little fed up with the sight of it.  It’s been an incredibly inefficient creation process – not that beadweaving is ever quick, but this one takes the biscuit.  I have only three tasks left on it now and I can’t quite bring myself to do them.  First I need to add the final elements (which I beaded ages ago, then ripped apart, then beaded again, then added to the main piece, then took off again – you get the picture).  Then I need to hide the tiny Swarovski butterfly provided somewhere on the piece (I’m thinking of hiding it in one of my hairy beaded beads), and finally I have to search out all of the sketches and notes I’ve made along the way, plus the photos I took in the sand dunes last year when I got my original inspiration, and somehow compile a journal of the evolution of the piece to send in along with the actual beadwork.  Oh and I need to work out how I would like it displayed and get any materials required, as I know that has let me down in the past.  I can’t show you the whole thing, as it is after all a competition piece, but I think I can safely reveal a few piles of beads and give you just a flavour of the variations and multiple attempts for the beaded beads that form about 10% of the final assemblage!  I think I have beaded about 20 in all – I only need six for the final design and I have unpicked most of the ‘slightly wrong’ ones, although you may see some mauve and silver beaded beads appearing in my shop soon!

For my own sanity I think I need to do as much of this as I can this week – which seems foolhardy given that it is the school holidays and I am being gradually worn out by the boys, and that I am also singing Belinda in a production of Dido and Aeneas two weeks today, have nothing to wear and haven’t quite managed to learn the music or blocking yet.  This has been exacerbated by the Beadworker’s Guild announcing that their Challenge theme next year is ‘Totally Tropical’ – I have a completely lush idea that I really want to start playing with, but really mustn’t until I’ve finished the butterflies, the tutorials, and maybe even a couple of UFOs…………………..oh dear.  And Sewing Bee has started again, so I really want to sew now as well (I do need to make Belinda’s cloak tonight so at least that itch will be scratched)!

From Petal to Pod – my beginnings (featuring some really big beads)

Prompted by Facebook chat with the lovely Cath Thomas, and inspired by her new ‘Petals to Pods’ project, I stole the boy’s fake Hama beads and made my first petals.

image

Cath’s technique is really clever, works up quickly and easily and has loads of potential for organic forms. Sadly Hama beads do not – too square and clumsy unless you truly scale up.  This is what Cath plans to do, and recently we saw an amazing example from the always imaginative Kris Empting-Obenland – her extraordinary fag bag.  However, trying the components this way though has allowed me to get the hang of them quickly, to learn that I’d like to spend some time with them, and to give me some ideas as to direction.  My plan is to try using size 8 seeds next to create some dramatic 3 petalled pods (lots of people are already doing marvellous flowers, so I’m going to branch out into pods).
At the end of the evening I thought I’d have a play with my old friend the Fortune Teller bangle – I used a modified RAW Rick rack start, with five repeats of five.

image

This on reflection may not have been the right size (I have always struggled to size these, and this one will currently go round my wrist about three times), but looking on the bright side, I don’t think a standard Fortune Teller would have worked later anyway, as these beads are far too square and chunky to form elegant horns.

image

So when I have time I will have a go at using this base to work up an entirely new shape, which may be a disaster, but will also be a useful creative exercise/learning opportunity.  And because it only takes 5 minutes to do a round, instead of many times that with delicas, I can learn those lessons nice and quickly!  And as previously, if the sizing can’t be rescued, I can zip up one side to make a bowl.……….


More UFOs

Last week I was hunting for my wire box (which should have been labelled, but the small people like to take the labels off, presumably to make life more fun), when I happened upon the UFO box. This should really be called the failure box, since this is where I put things I’ve given up on (genuine UFOs which I intend to finish live in a different box in a different room, and I’ve already blogged about them and done nothing to them since).

Amongst a tangle of hopeless failures and technical disaster zones I found several viable pieces, which I think got thrown in there in a hurry when I was clearing my stuff out of the spare room before we had the smallest boy.  As he is nearly two and a half you can see it’s been a while since I looked in there, so it was a pleasant surprise to find so much usable work! There were also some lovely beads and a finished pair of earrings……..

In no particular order we have:

  • The black net base for a Racel Nelson Smith Ootheca cuff.

image

  • Part of another Rachel Nelson Smith piece in lovely earth colours.
  • A finished black and white hollow cube – a sample with more zip beads on the corners than I now do, so an early point in the evolution of this series, but I now think rather fun.
  • Some lovely mushroom beads, and a pair of earrings made from them.
  • A couple of salvageable beaded beads – the giant pewter ones has issues at either end, but can be embellished to hide them, and the blue one was an attempt at using RAW which didn’t go well, but will be fine as an Anenome base.

imageimageimage


  • The teeny ones were going to be part of a big piece, but bored me.  They will now be a nice little pendant, hung as a trio.

image

  • A khaki and copper attempt at a sea urchin design, which failed as an urchin but could make a rather nice hollow beaded bead.
  • A long piece of peyote with graduated delicas that simply needs zipping round a wire core to make a necklace.
  • Assorted beads, stones and bits and bobs.

I did find the wire in the end, but got distracted and haven’t used it yet. Tomorrow…….


Canva

Etsy have redesigned their site, meaning that we all have to make new banners and other graphics. They recommended Canva, which is fun but poorly tested and weirdly inconsistent across app vs desktop, which is somewhat infuriating for an IT professional. After some swearing I’ve got the hang of banners, and have been playing with other layouts, and I’m starting to enjoy it.

So you will seeing a lot more of this type of thing from me (until I get bored, which will probably be soon). Anyway, the point of this bit of playing was to create a reminder that there is a sale in my Etsy and Folksy shops, with six gorgeous colour ways of my Baroque Tape Measure Materials Pack up for grabs (among other lovely things).  Apologies for the weird instagrammy effects, I haven’t yet worked out how to get rid of them……….

Multi-tasking

Yesterday the boys were ‘painting’ and I thought maybe this was an opportunity to make the Tatty Devine kit I bought through Lucky Dip Club last year.   Tatty Devine make fantastic and funny acrylic based jewellery – I lust regularly after their extraordinary dinosaur necklace, gin bottles, and double decker buses.

I’ve previously worked with shrink plastic and am planning to get into that again, and although this used acrylic components they’re pretty much the same at the assembly stage, so I felt that this would be a useful test of whether I enjoy this kind of assembly.  Plus I’ve had it for ages and it will go with loads.

image

It went well to start off with – it’s not a taxing kit as you simply have to open and close a few jump rings. The boys and I created together for a while quite happily – watercolour pencils aren’t too high on the messy play scale or so I thought.

image

And then just as I thought ‘wow this is great, one day I might even be able to bead while they draw’ this happened……..

image
Anyway, once that had been dealt with, I got the necklace finished.

image

It’s pretty, was simple to make and looks like a ‘real’ Tatty Devine piece, so on the whole I’m pleased.

image

The only step that gave me trouble was getting the smaller jump rings into the cut end of the chain – I’d have to say that this was a bit of a squeeze, and although the instructions warned me, and they probably work with this combination in their main product lines every day, I felt for a beginner kit a different chain would have been better.

image

The kit wasn’t cheap at £40. However I’ve ended up with a gift boxed Tatty Devine necklace, and some pliers, and given that their ready made pieces run from slightly less to much, much more, all in all it was a fair price and an enjoyably simple and quick make.  I probably would have preferred something a little less floral, but it’s still nice and it’s sparked some ideas.

Sadly there are no more available, but if you’re in London you can make some similar pieces with them at one of their workshops.