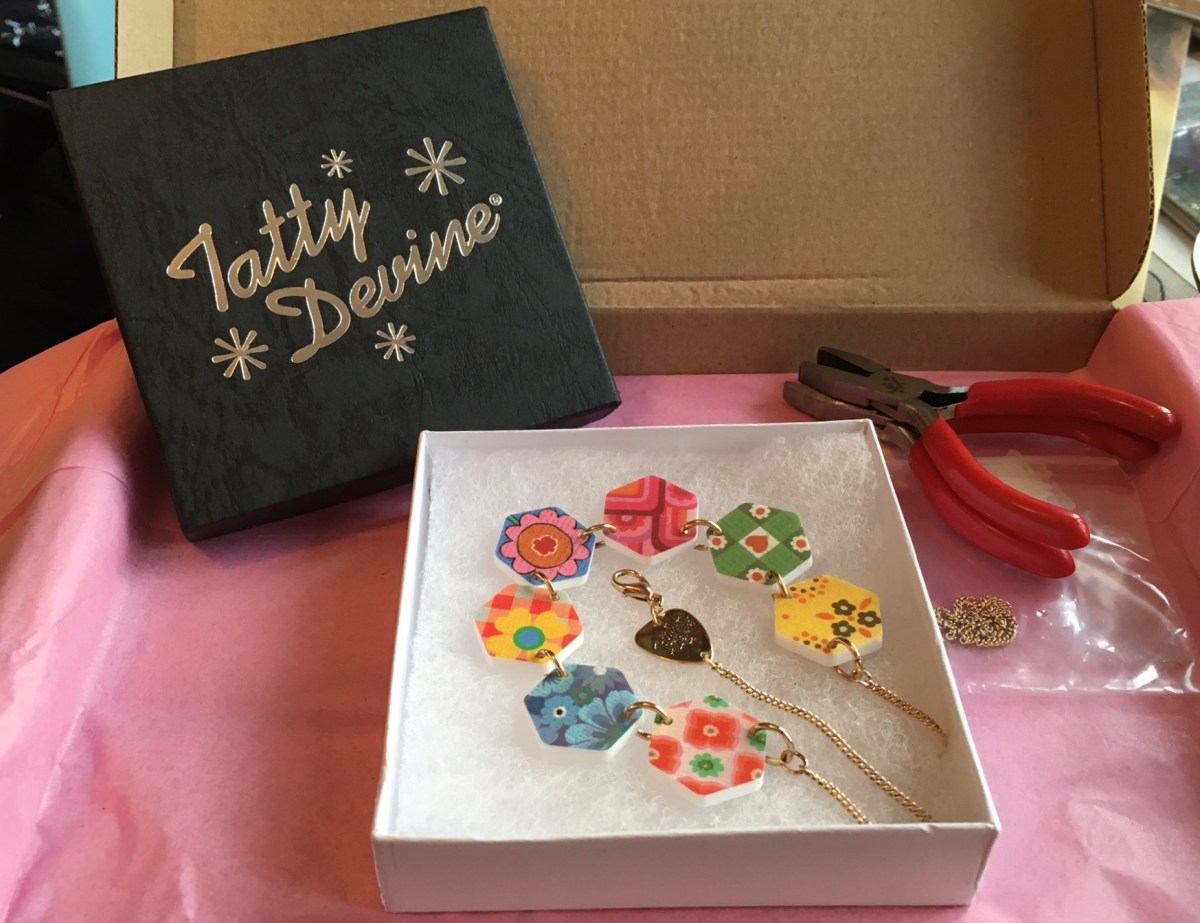
Yesterday the boys were ‘painting’ and I thought maybe this was an opportunity to make the Tatty Devine kit I bought through Lucky Dip Club last year. Tatty Devine make fantastic and funny acrylic based jewellery – I lust regularly after their extraordinary dinosaur necklace, gin bottles, and double decker buses.
I’ve previously worked with shrink plastic and am planning to get into that again, and although this used acrylic components they’re pretty much the same at the assembly stage, so I felt that this would be a useful test of whether I enjoy this kind of assembly. Plus I’ve had it for ages and it will go with loads.
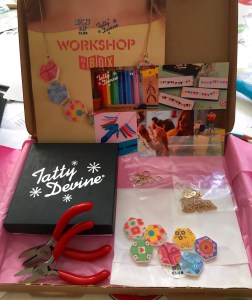
It went well to start off with – it’s not a taxing kit as you simply have to open and close a few jump rings. The boys and I created together for a while quite happily – watercolour pencils aren’t too high on the messy play scale or so I thought.
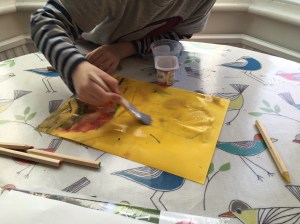
And then just as I thought ‘wow this is great, one day I might even be able to bead while they draw’ this happened……..

Anyway, once that had been dealt with, I got the necklace finished.
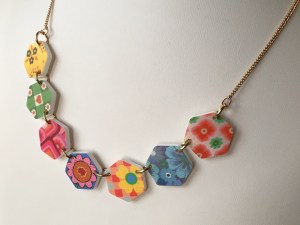
It’s pretty, was simple to make and looks like a ‘real’ Tatty Devine piece, so on the whole I’m pleased.
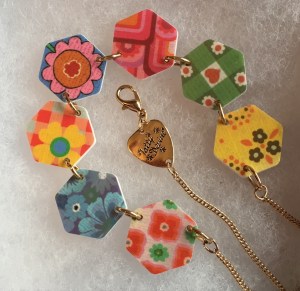
The only step that gave me trouble was getting the smaller jump rings into the cut end of the chain – I’d have to say that this was a bit of a squeeze, and although the instructions warned me, and they probably work with this combination in their main product lines every day, I felt for a beginner kit a different chain would have been better.

The kit wasn’t cheap at £40. However I’ve ended up with a gift boxed Tatty Devine necklace, and some pliers, and given that their ready made pieces run from slightly less to much, much more, all in all it was a fair price and an enjoyably simple and quick make. I probably would have preferred something a little less floral, but it’s still nice and it’s sparked some ideas.
Sadly there are no more available, but if you’re in London you can make some similar pieces with them at one of their workshops.


")