Johnson Solids Project

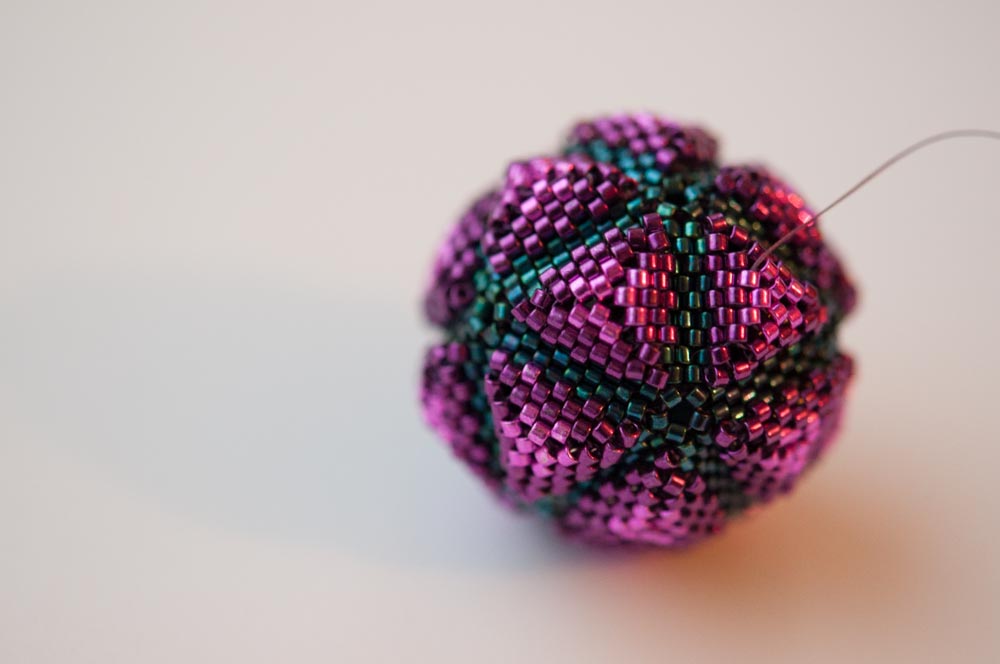
Last year the wonderful geometric beader Diane Fitzgerald began a community project called ‘The Johnson Solids Project’. It was a call to beaders internationally to join in making the 92 Johnson Solids out of flat peyote shapes.

Hexagons and triangles

Johnson Solids are three-dimensional shapes assembled from triangles,
squares, pentagons, hexagons, octagons and decagons. You can read more about them here. As beaders we’re used to working with their cousins, the Platonic solids, and sometimes also the Archimedean solids, but expanding into the Johnson solids gives us some great new shapes to work with.

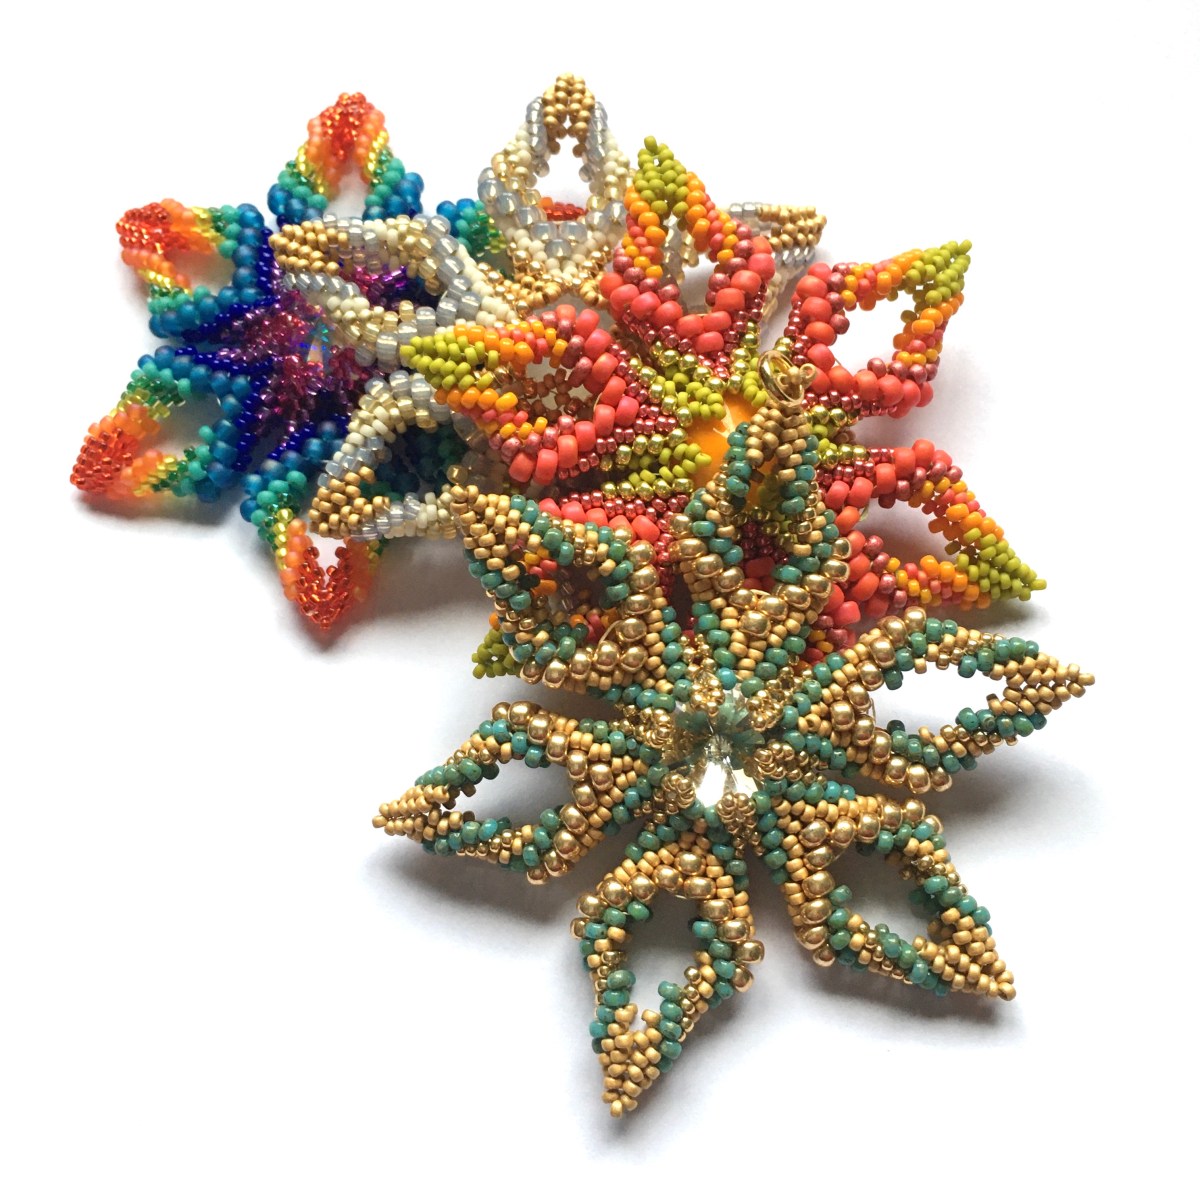
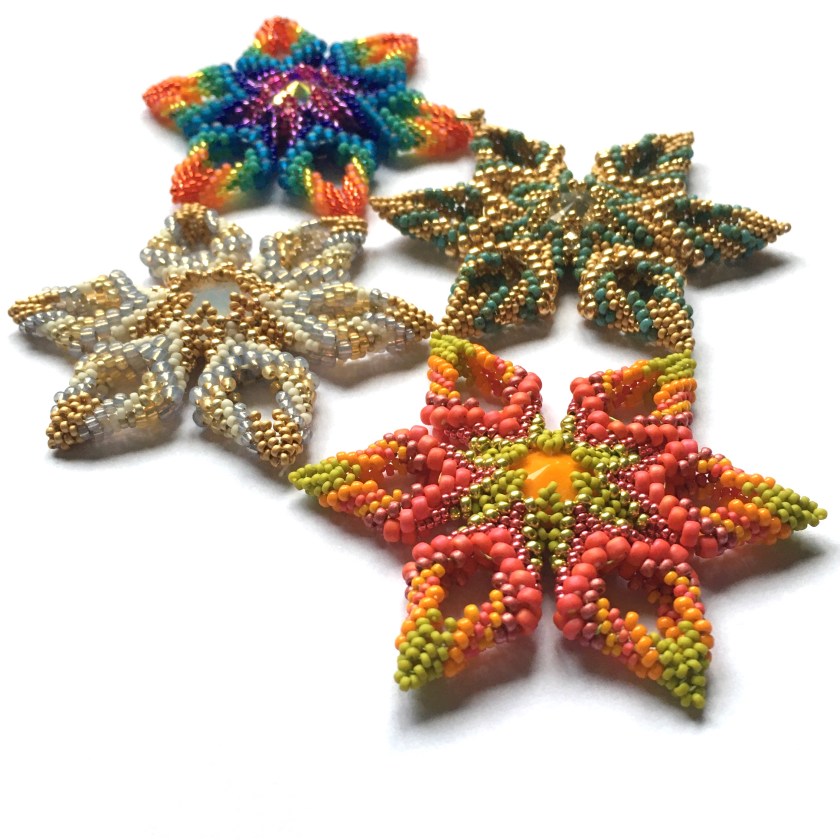
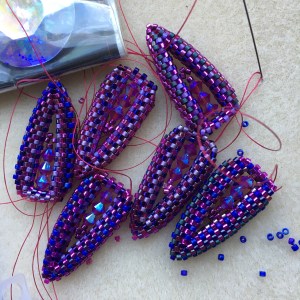
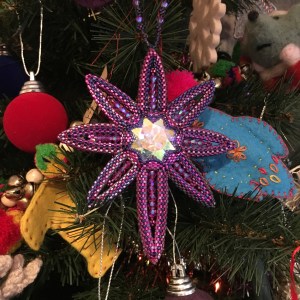
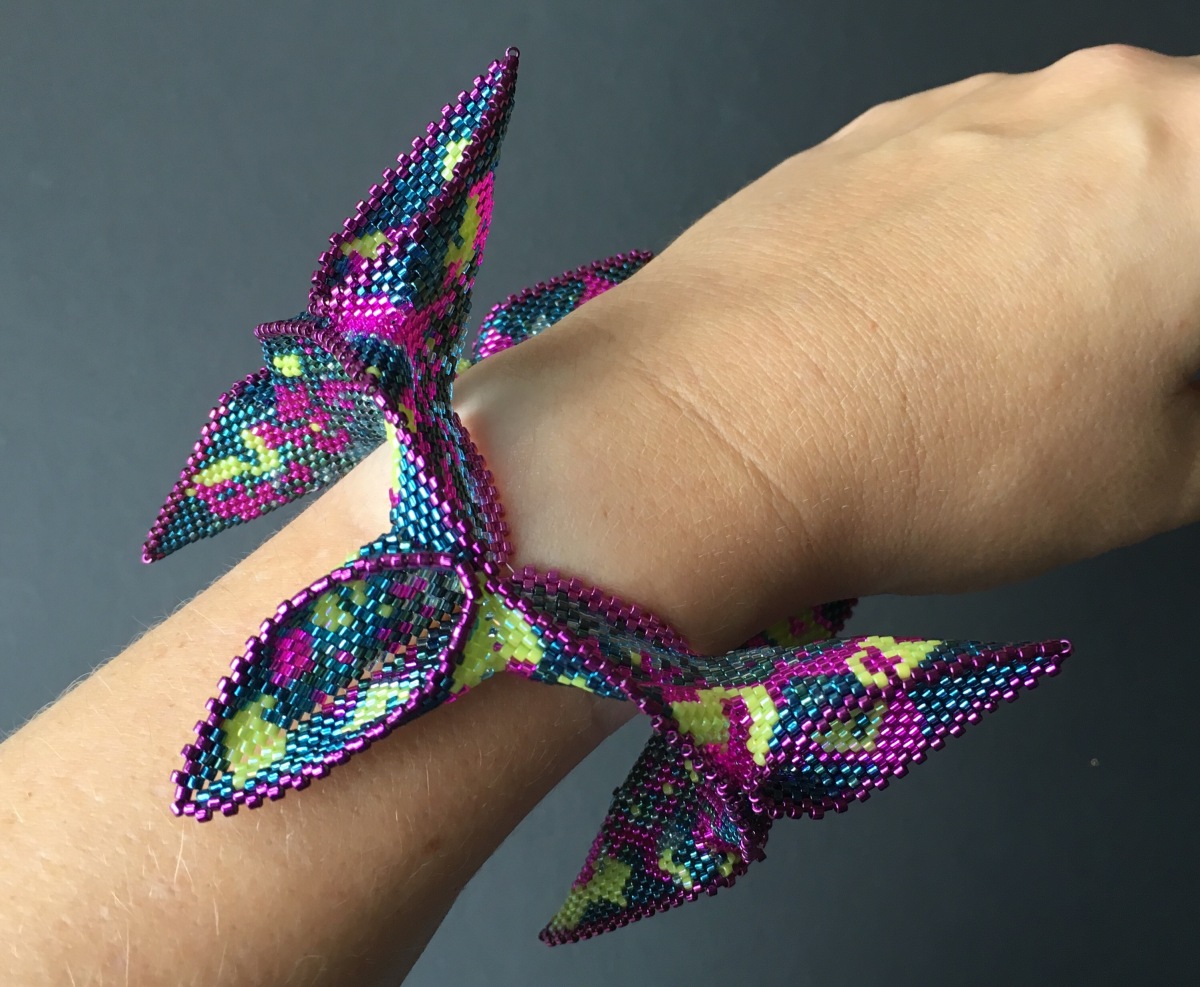
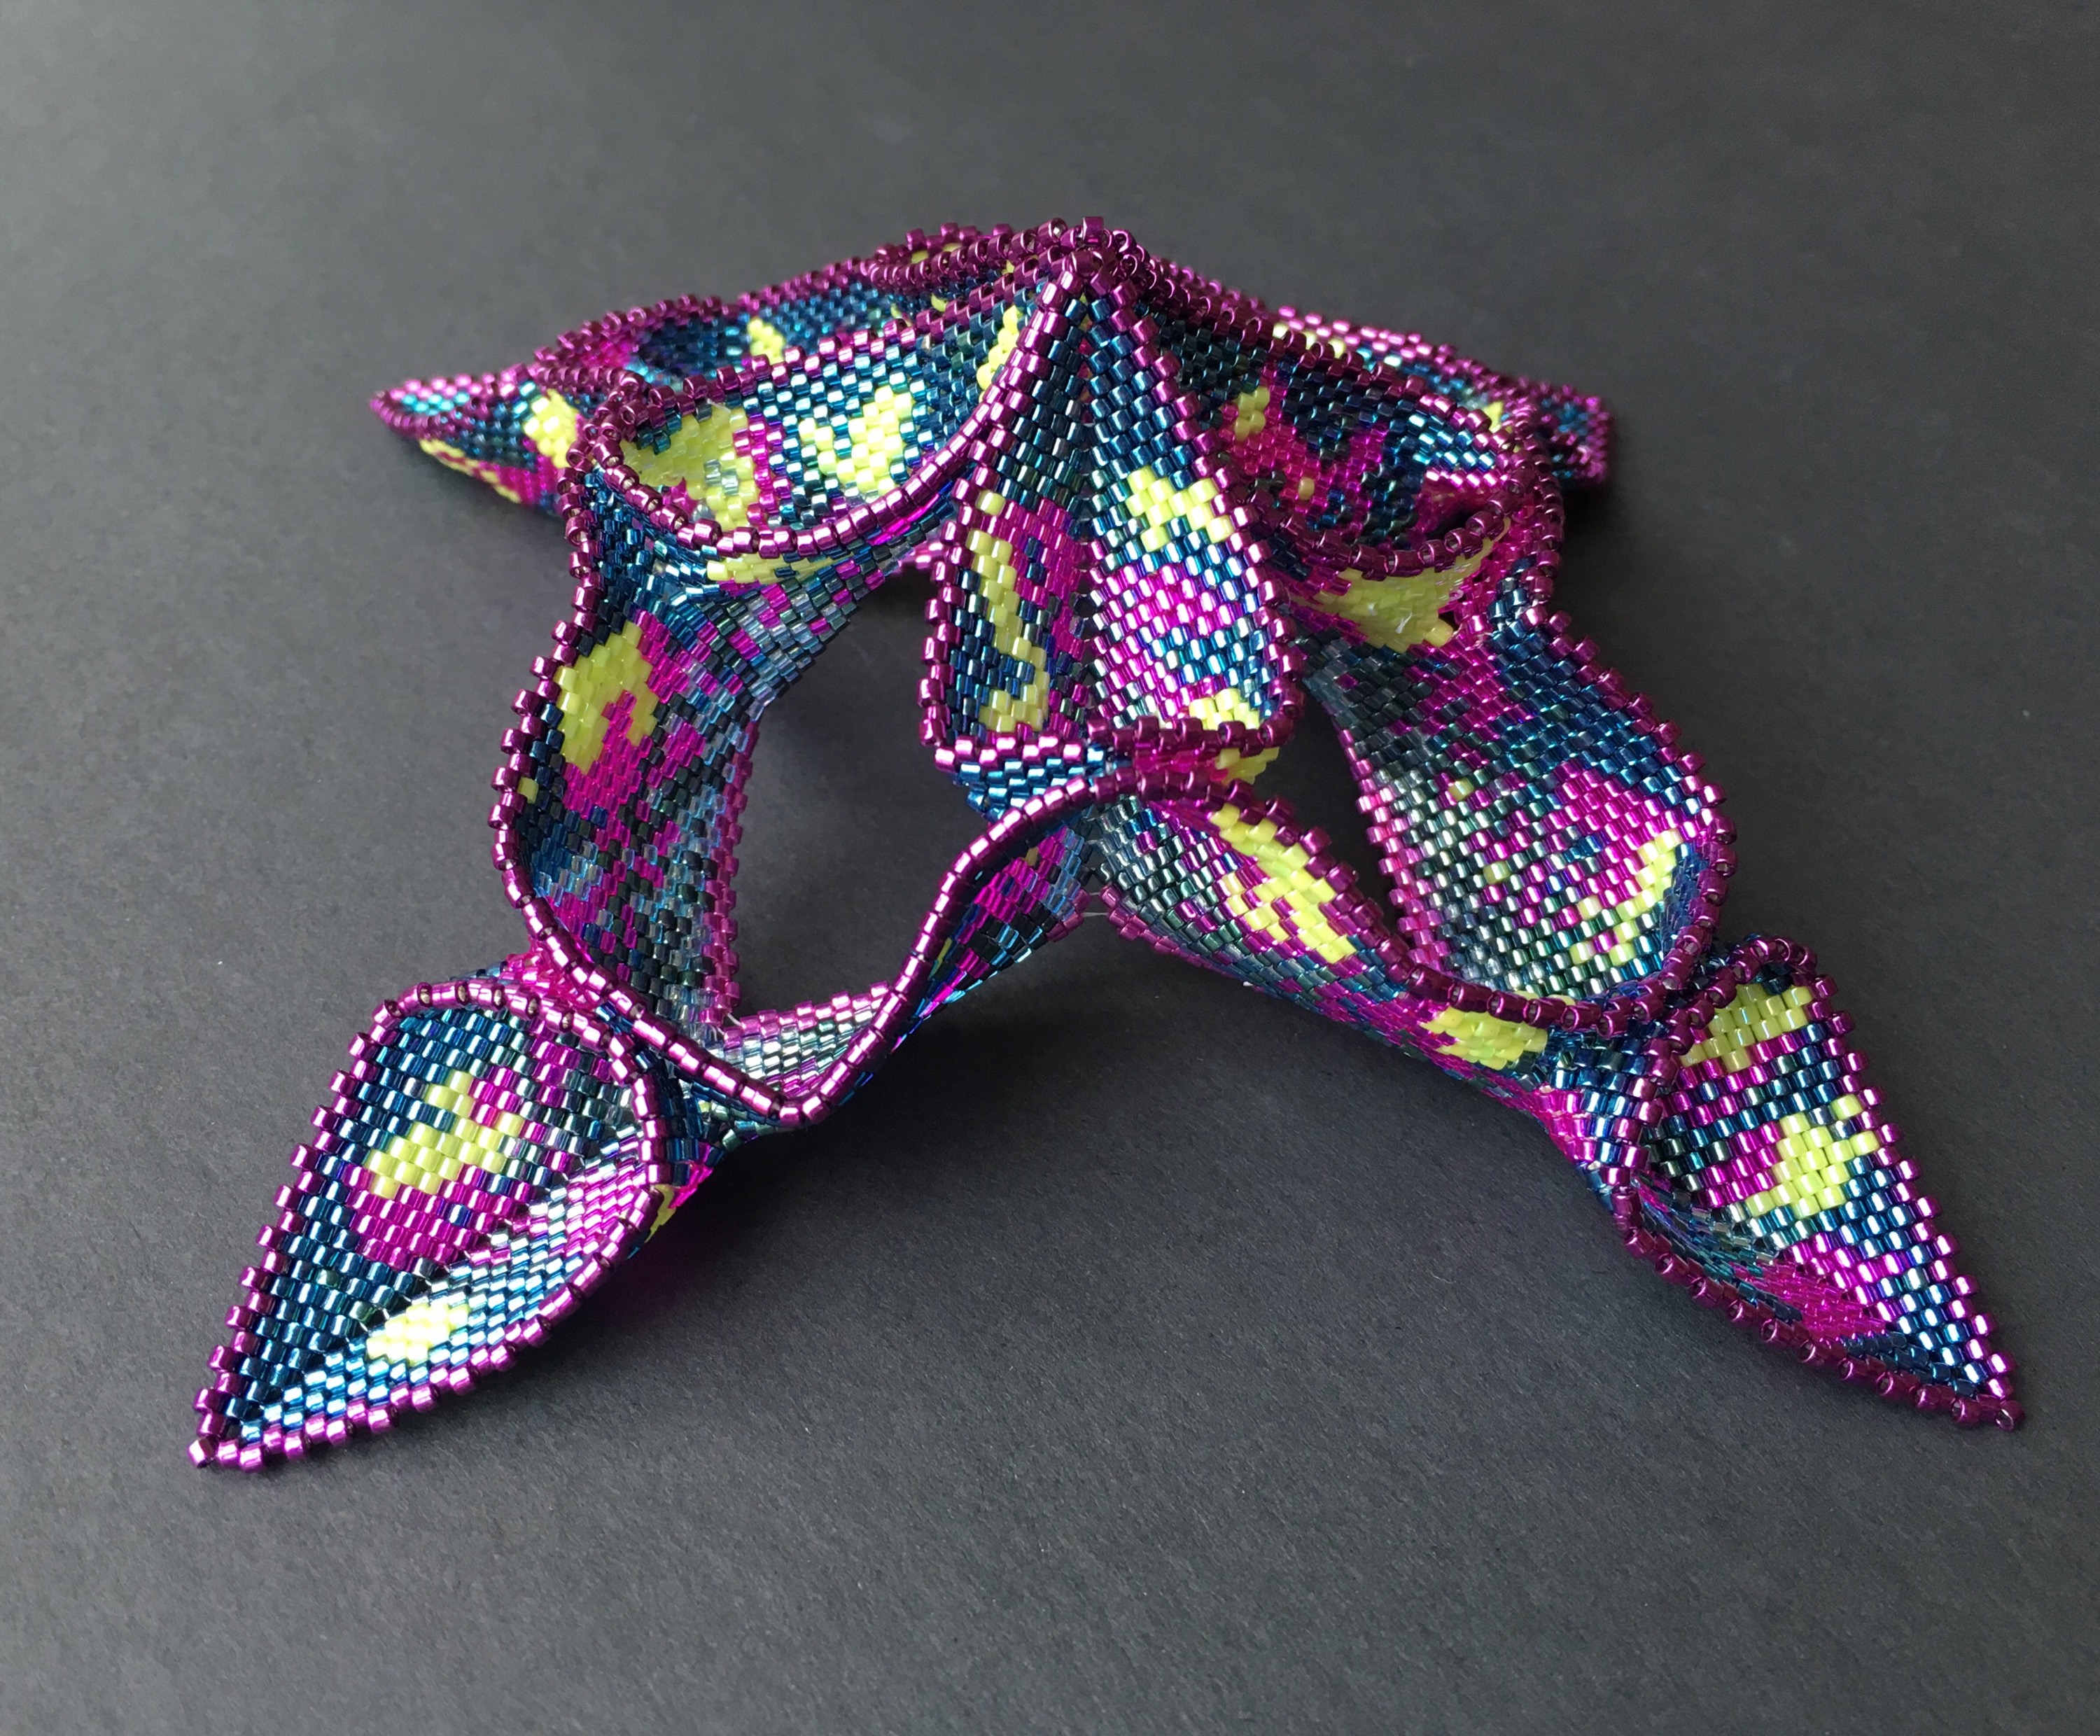
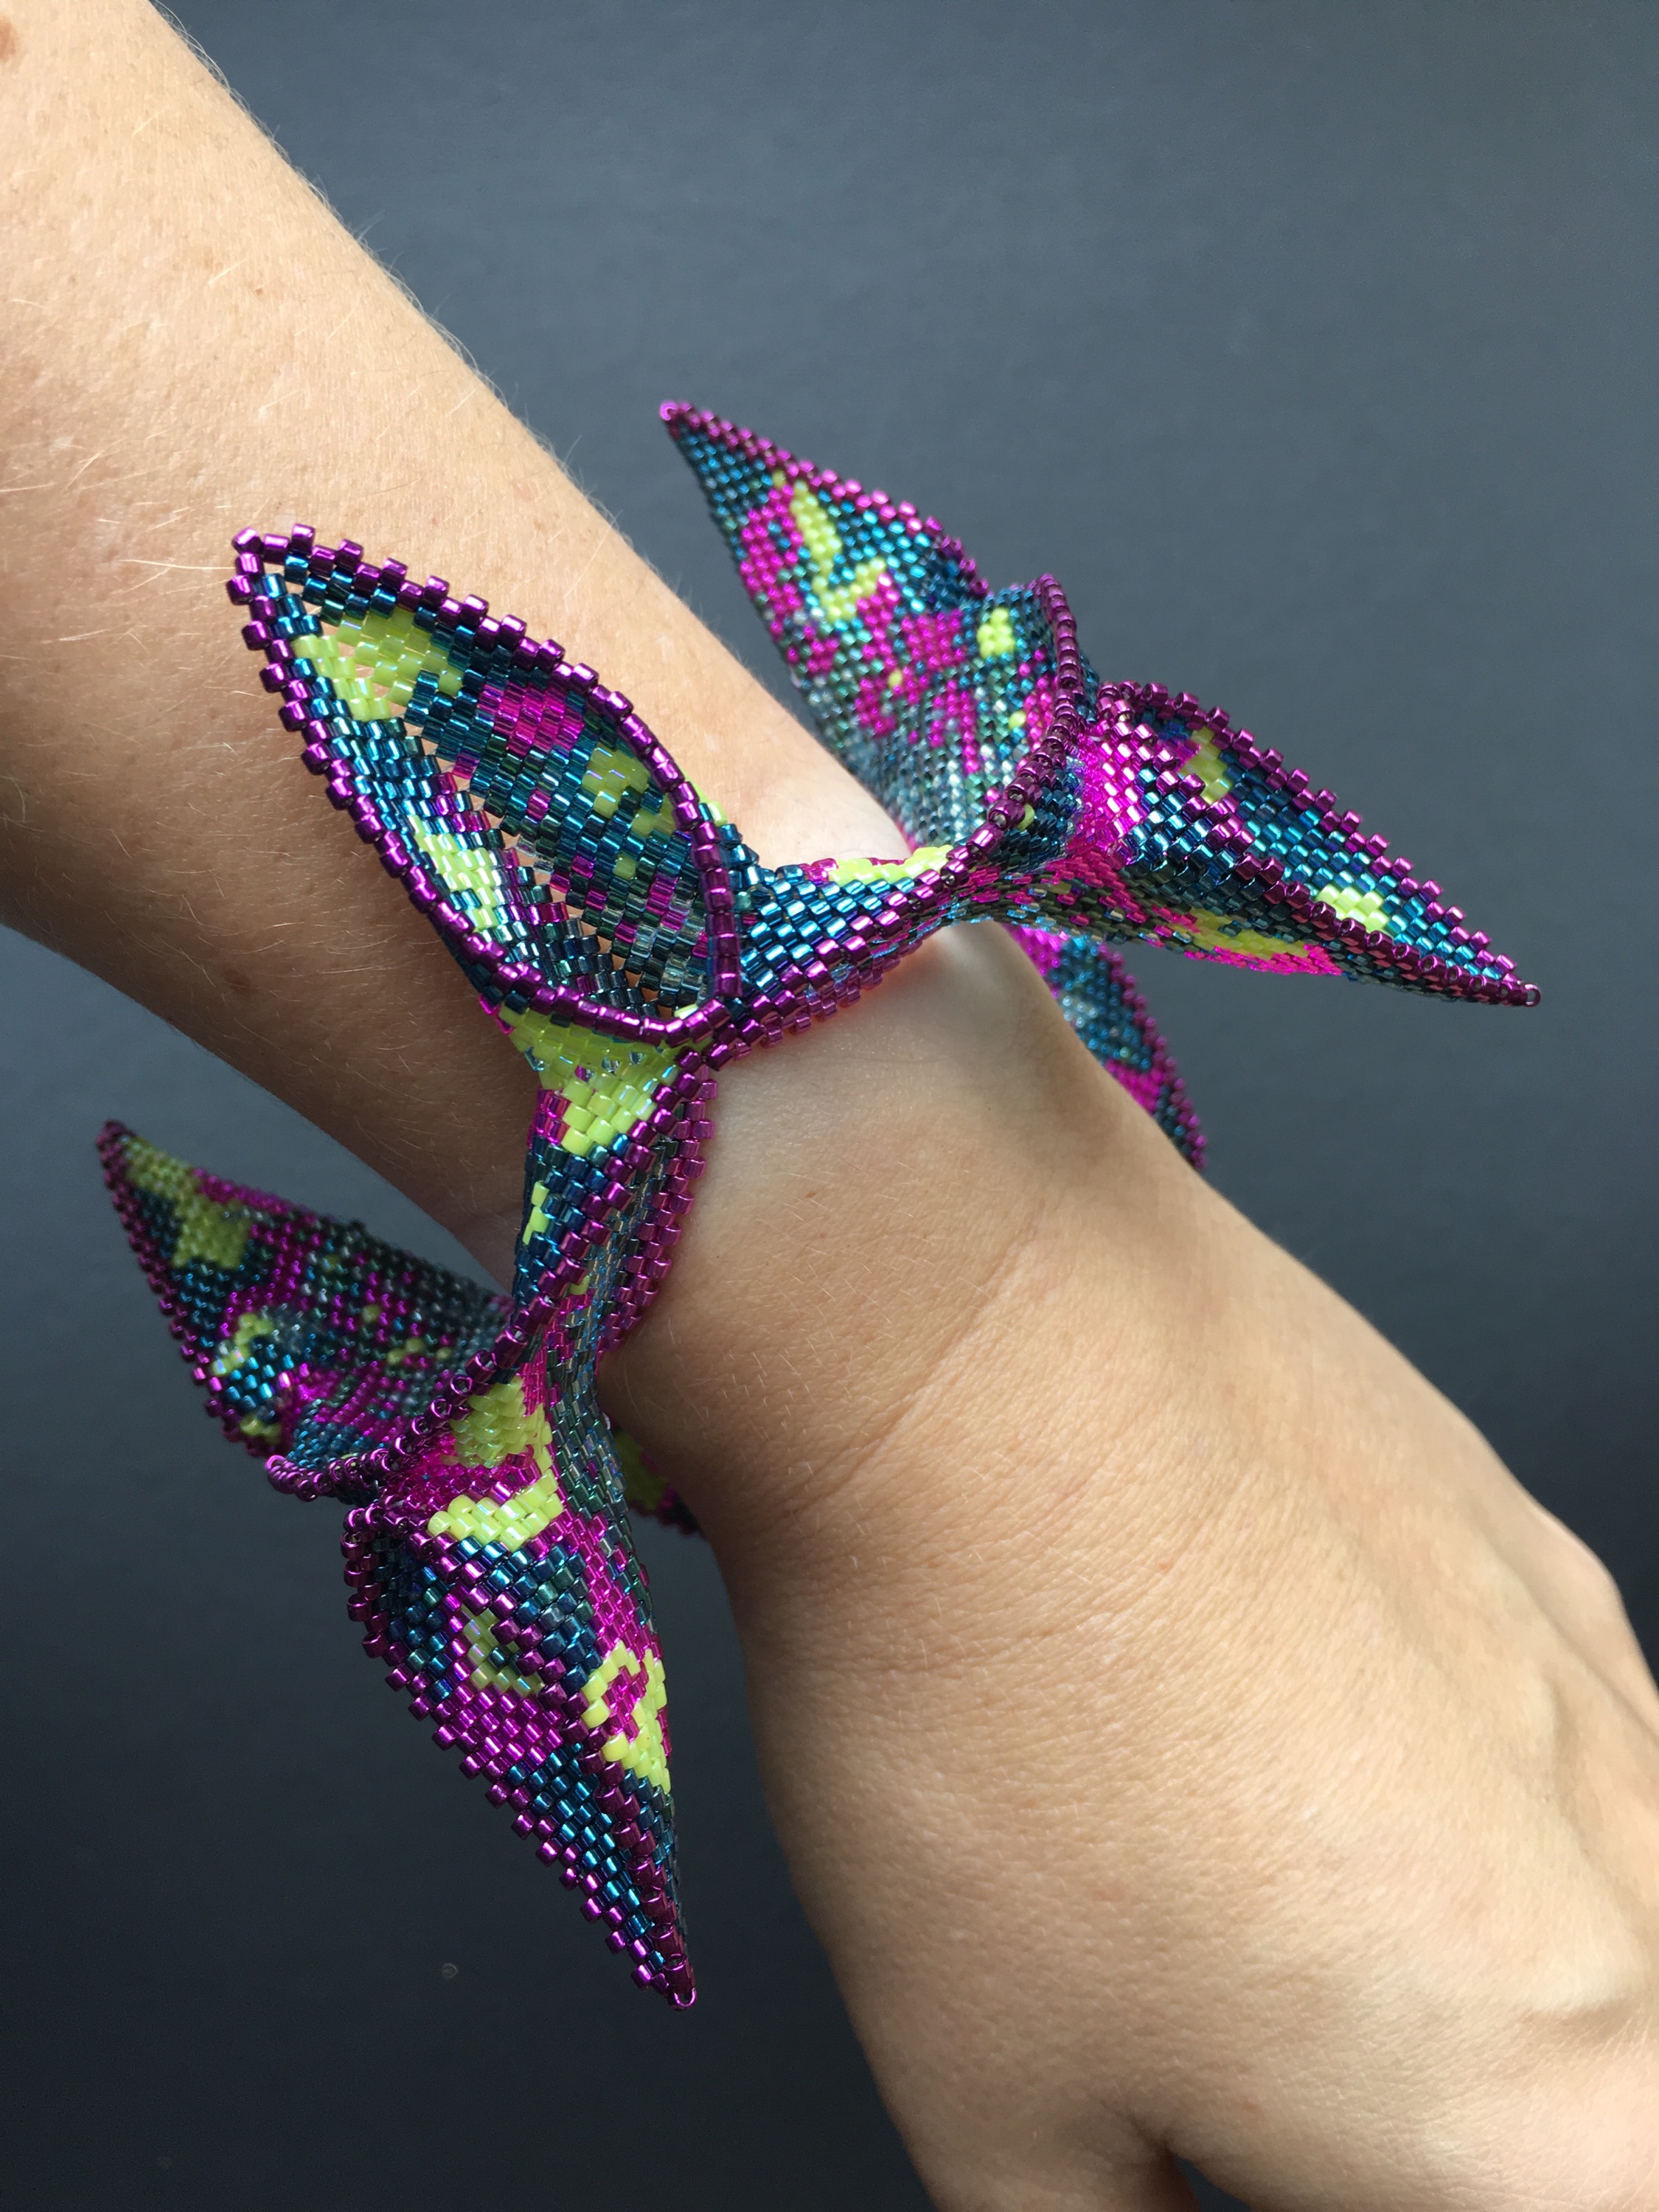
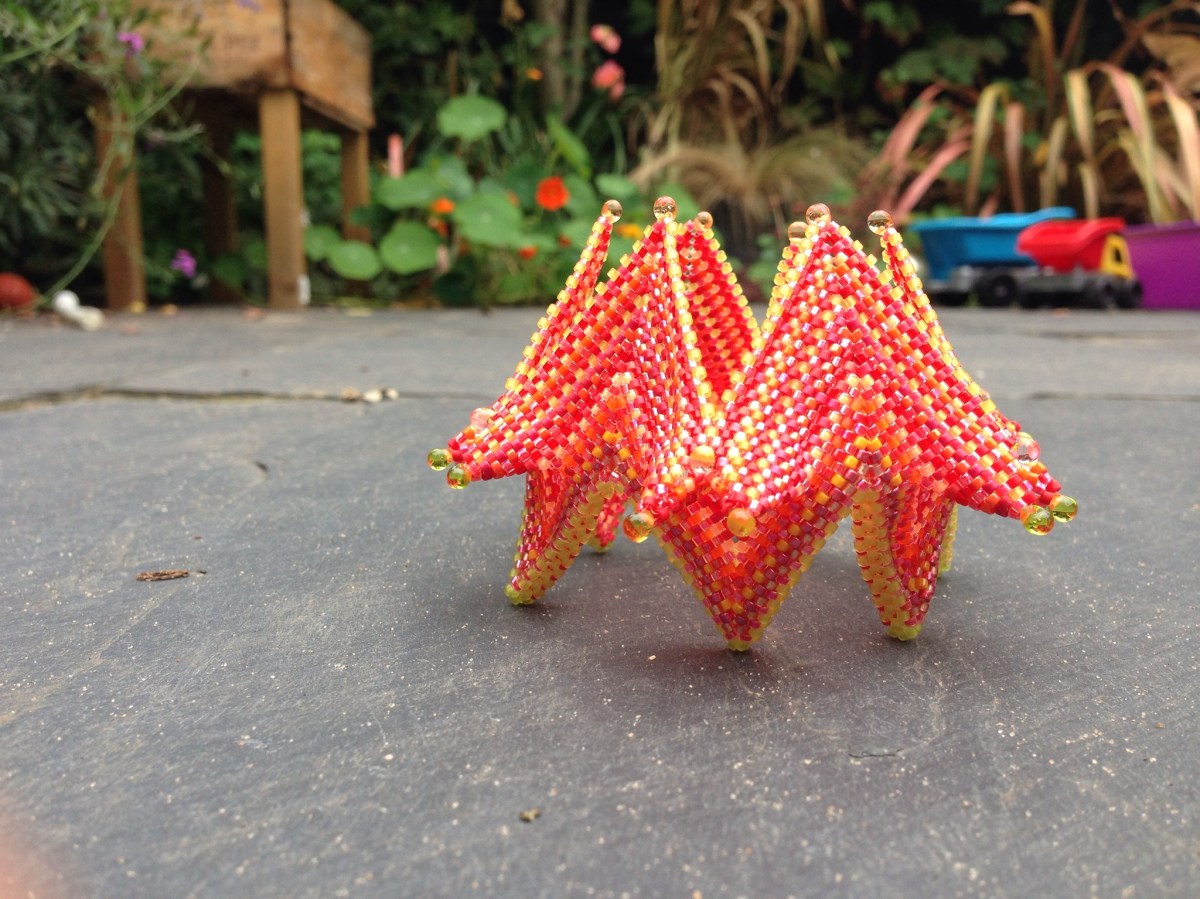
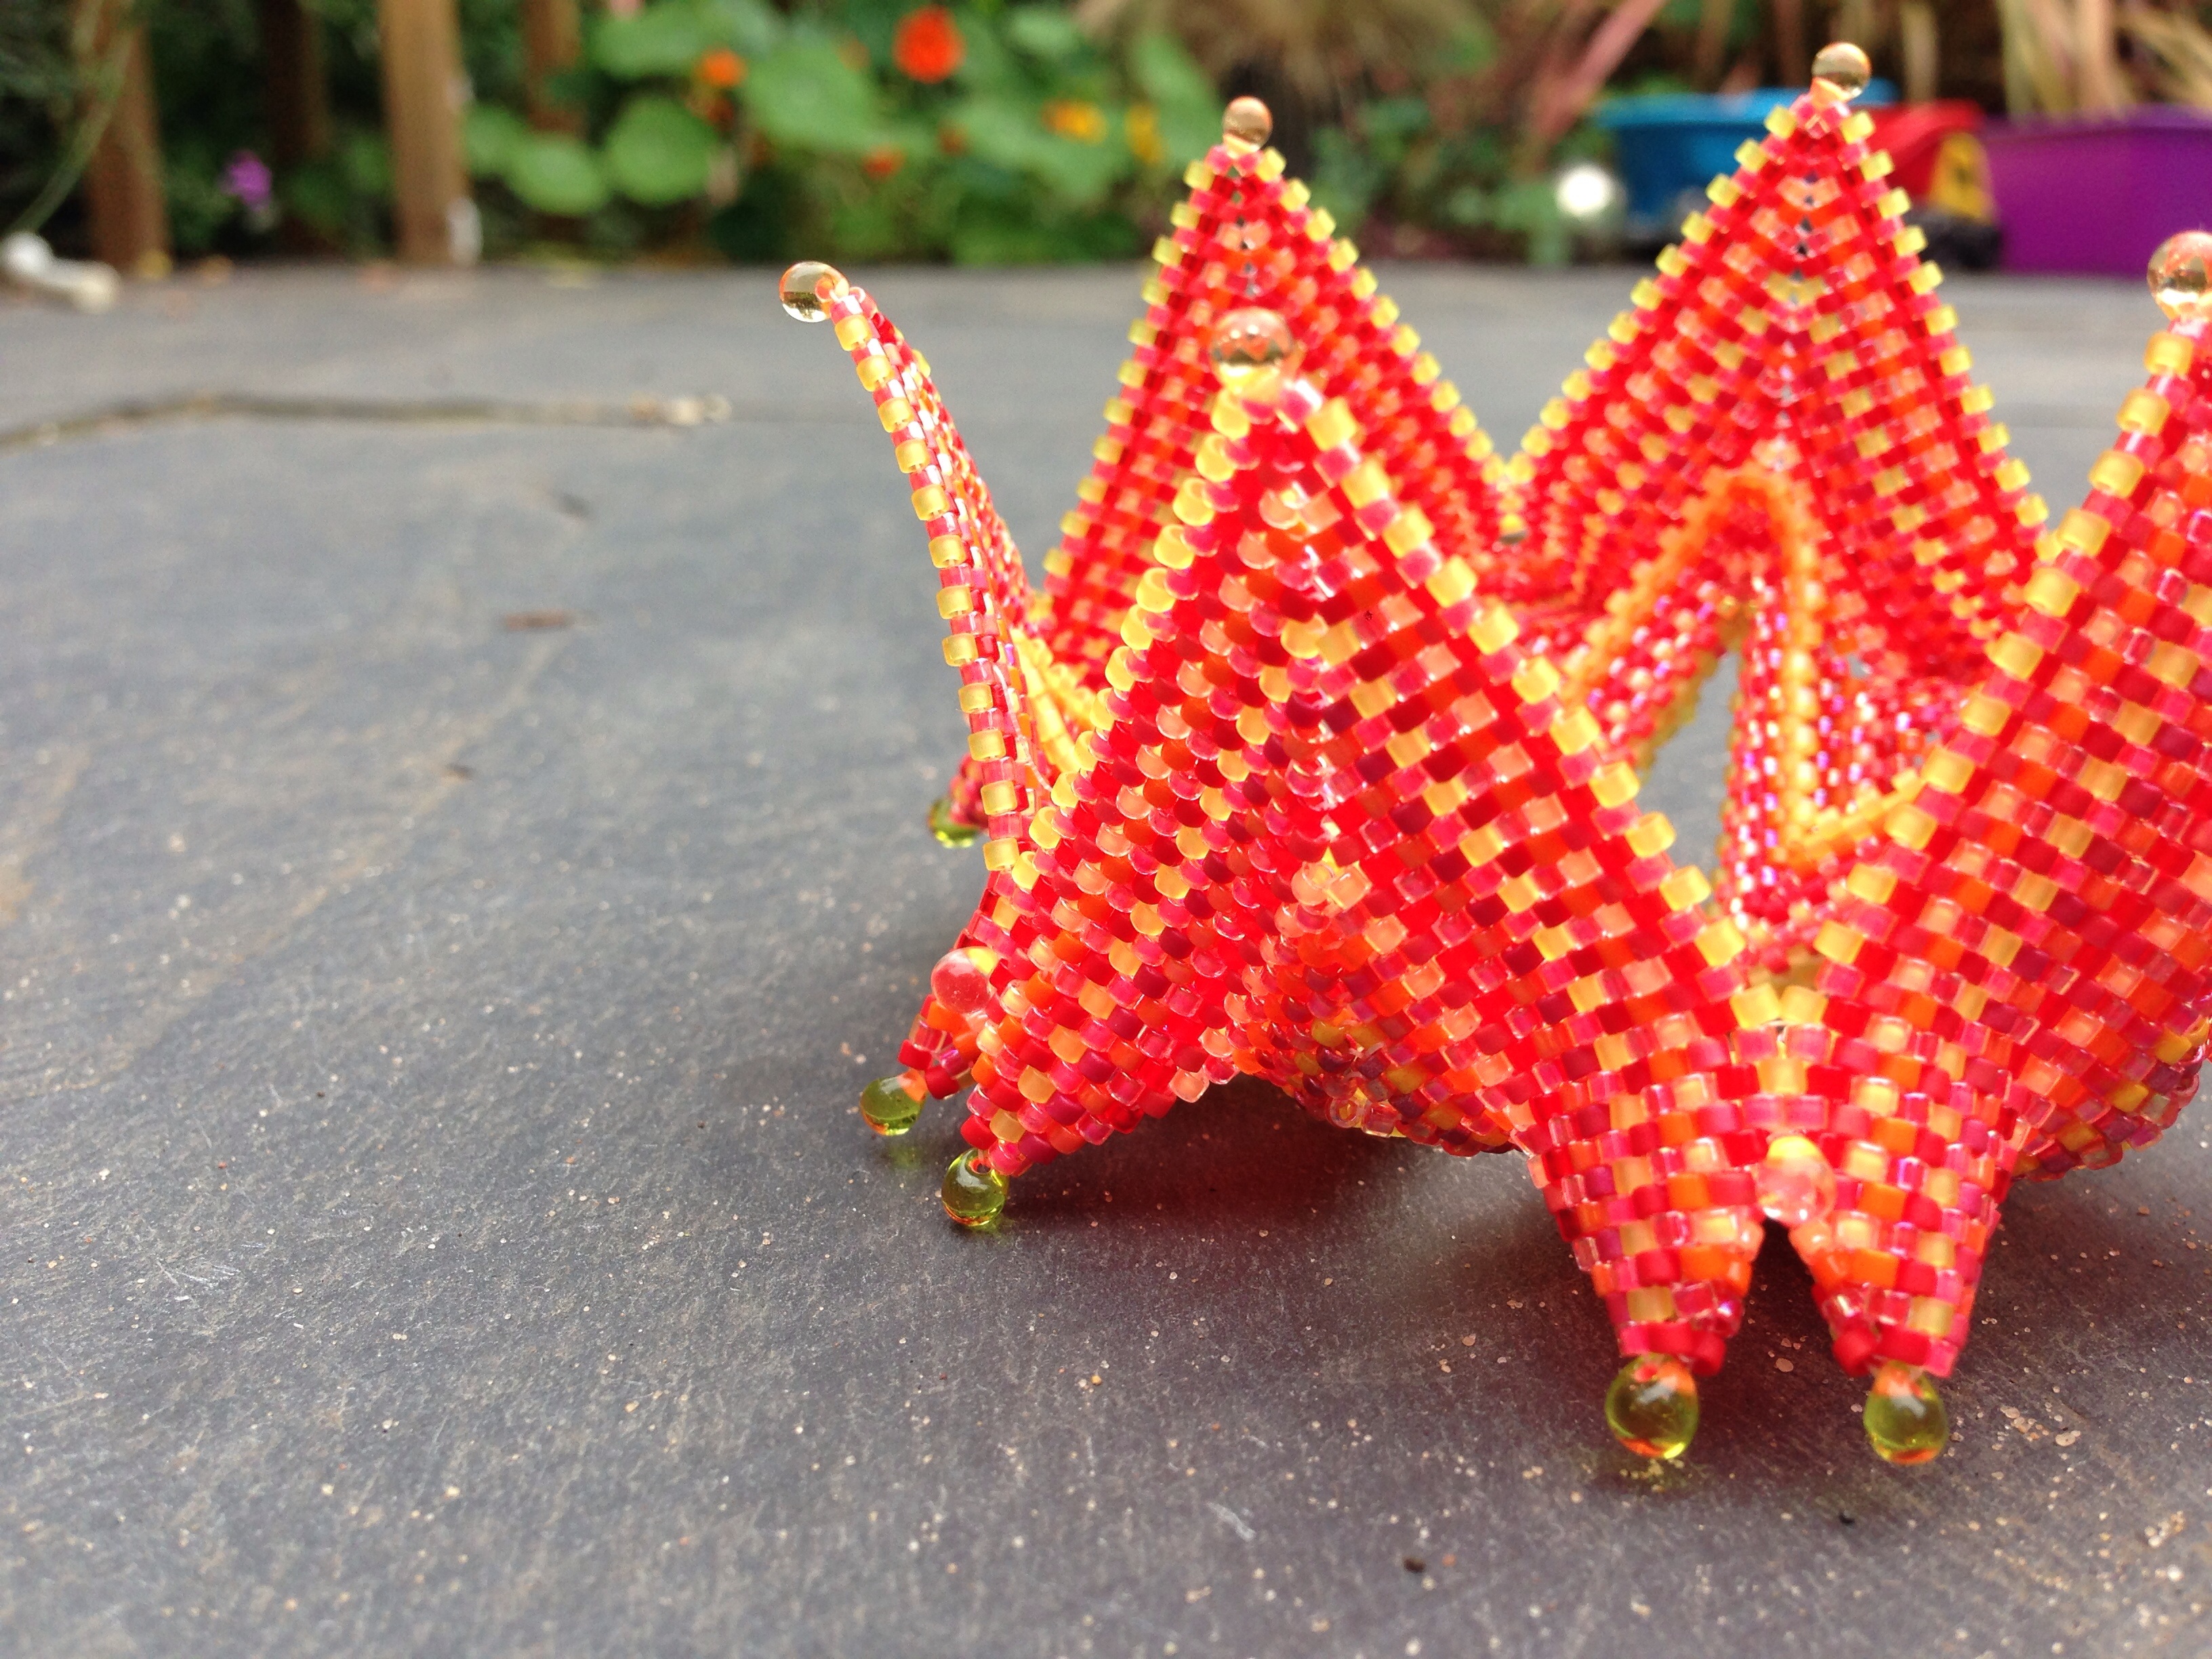
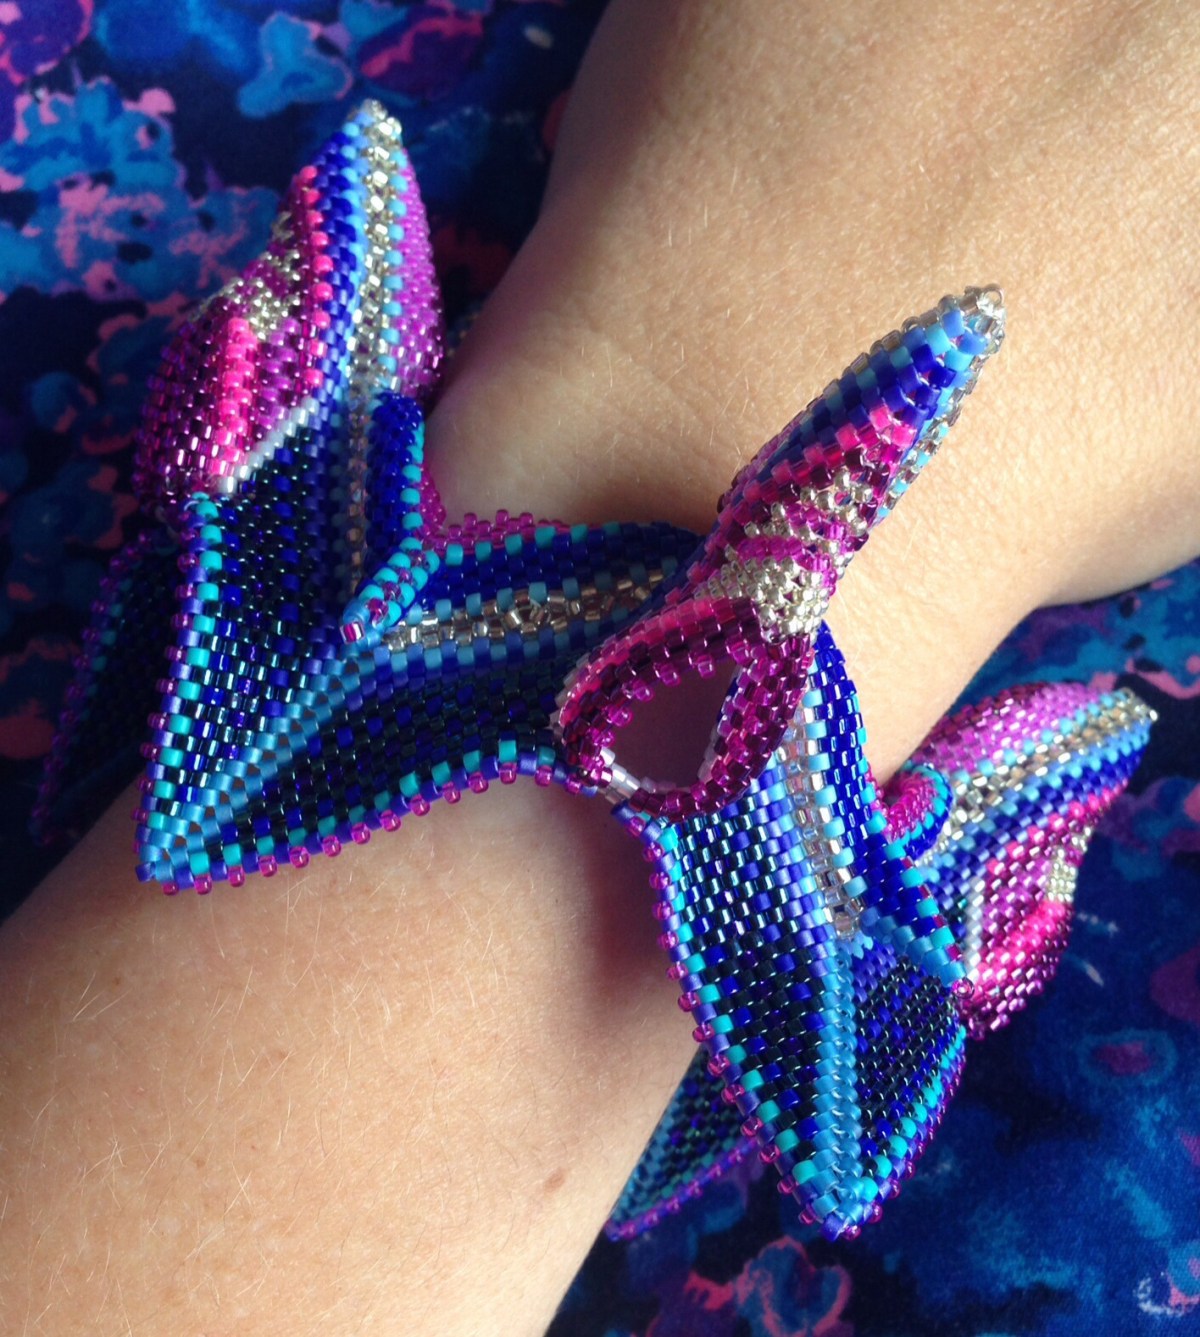
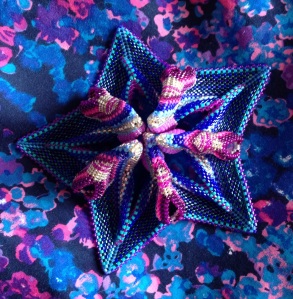
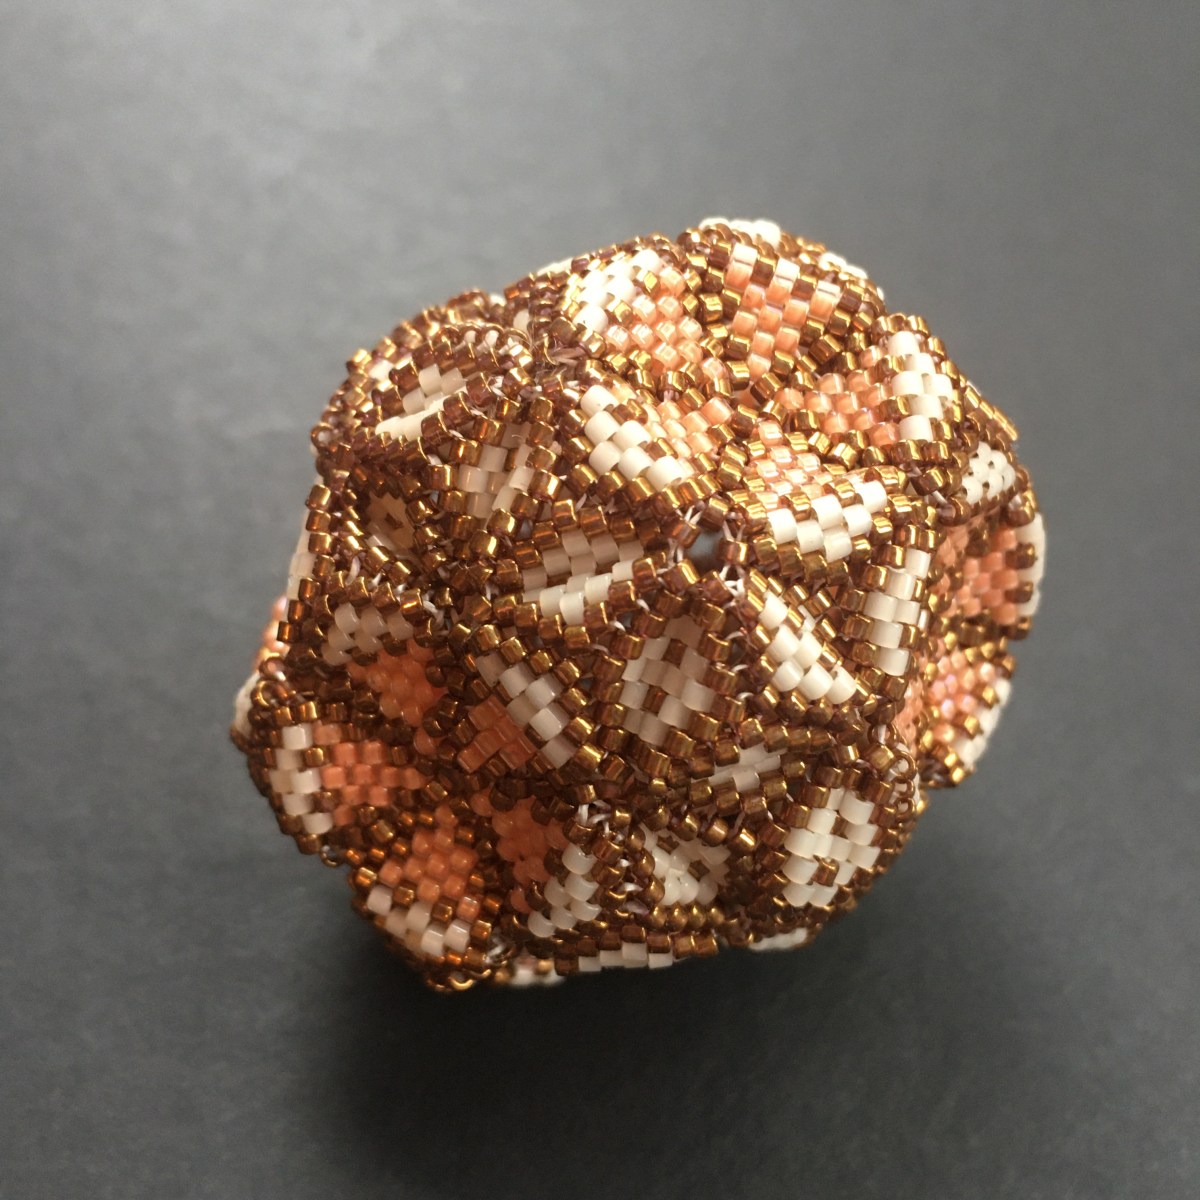
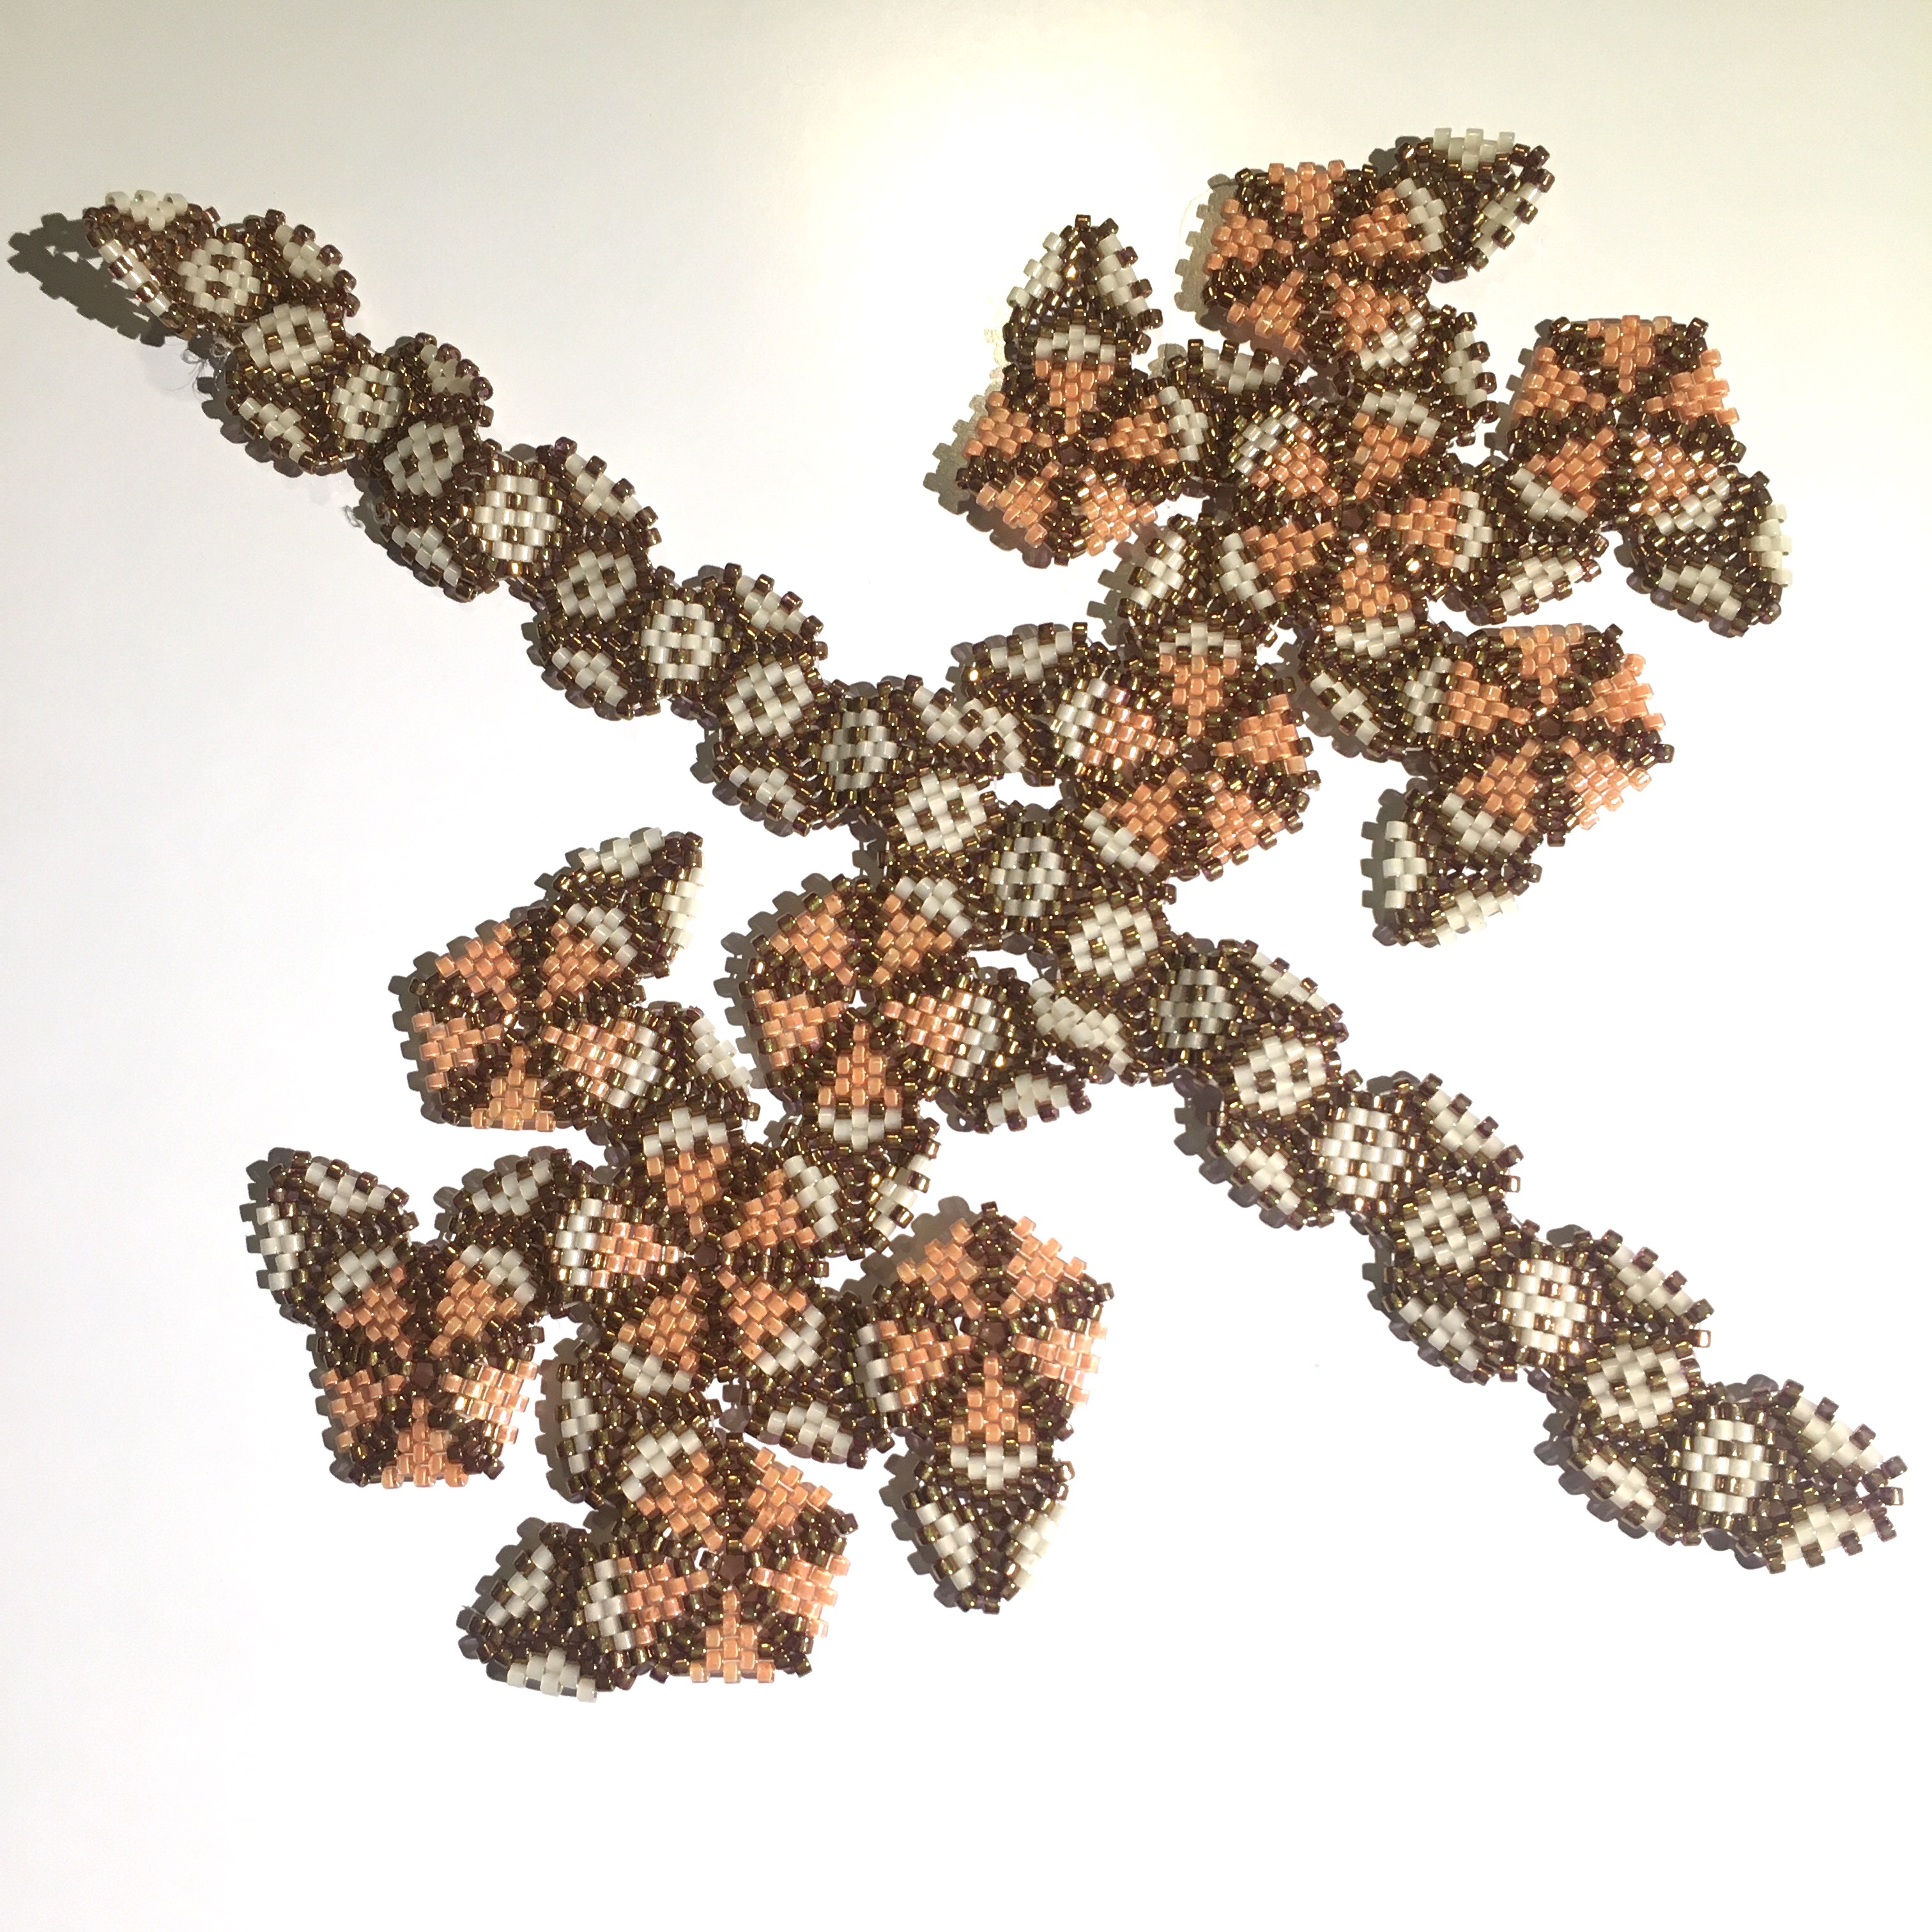
I wasn’t quick enough off the mark to get in on Diane’s first series, so when Sylvia Fairhurst and Patricia Verrier started a UK version I applied as quickly as I could, and was able to choose number 48, a ‘ Gyroelongated pentagonal birotunda‘. I chose this one because I wanted to challenge myself with one of the larger solids, but fancied trying one which resembled a shape I might want to remake – this one is kind of an egg shape. It’s also made of just triangles and pentagons and they’re two nice simple shapes to make in peyote.

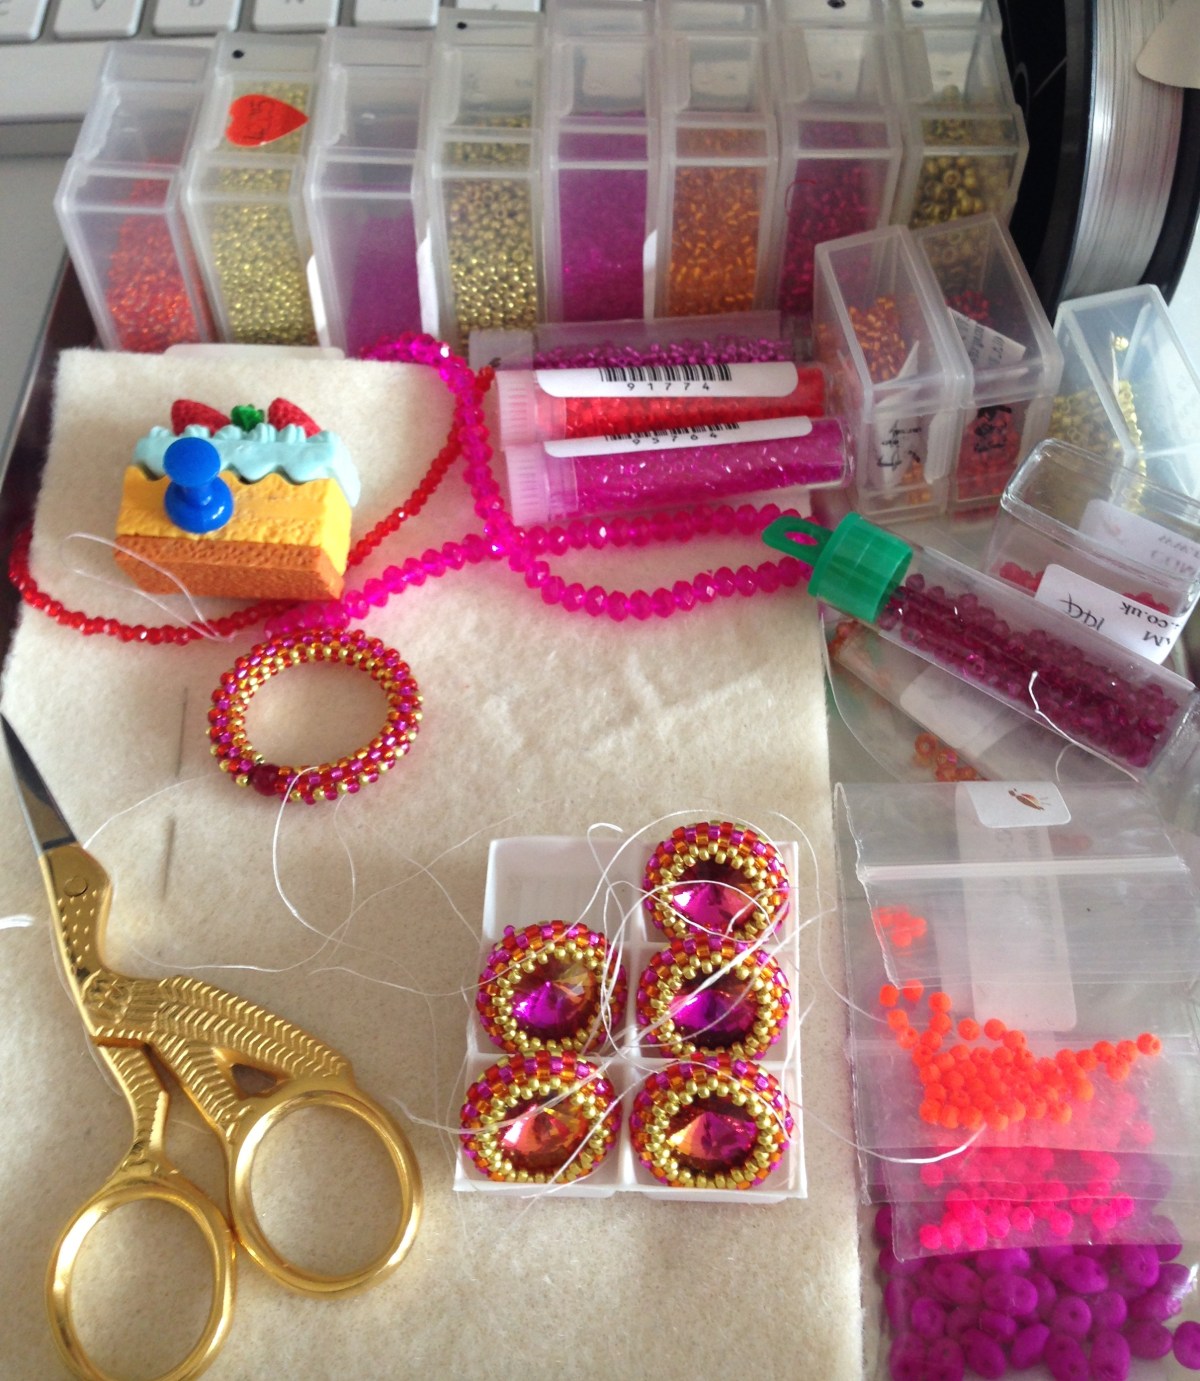
As with the original project the organisers specified that we should all use a set delica colour (22L) which is a bronze lustre for our increases -this gave me a bit of a challenge because it didn’t really work with my normal bright palettes, but I had a lot of creams and shell colours out to work on my sea pieces last year, so pulled a pale peach and a cream to use for the rest of each of the two shapes I’d need to make, which looked lovely next to the bronze and got making.

Triangles in progress….

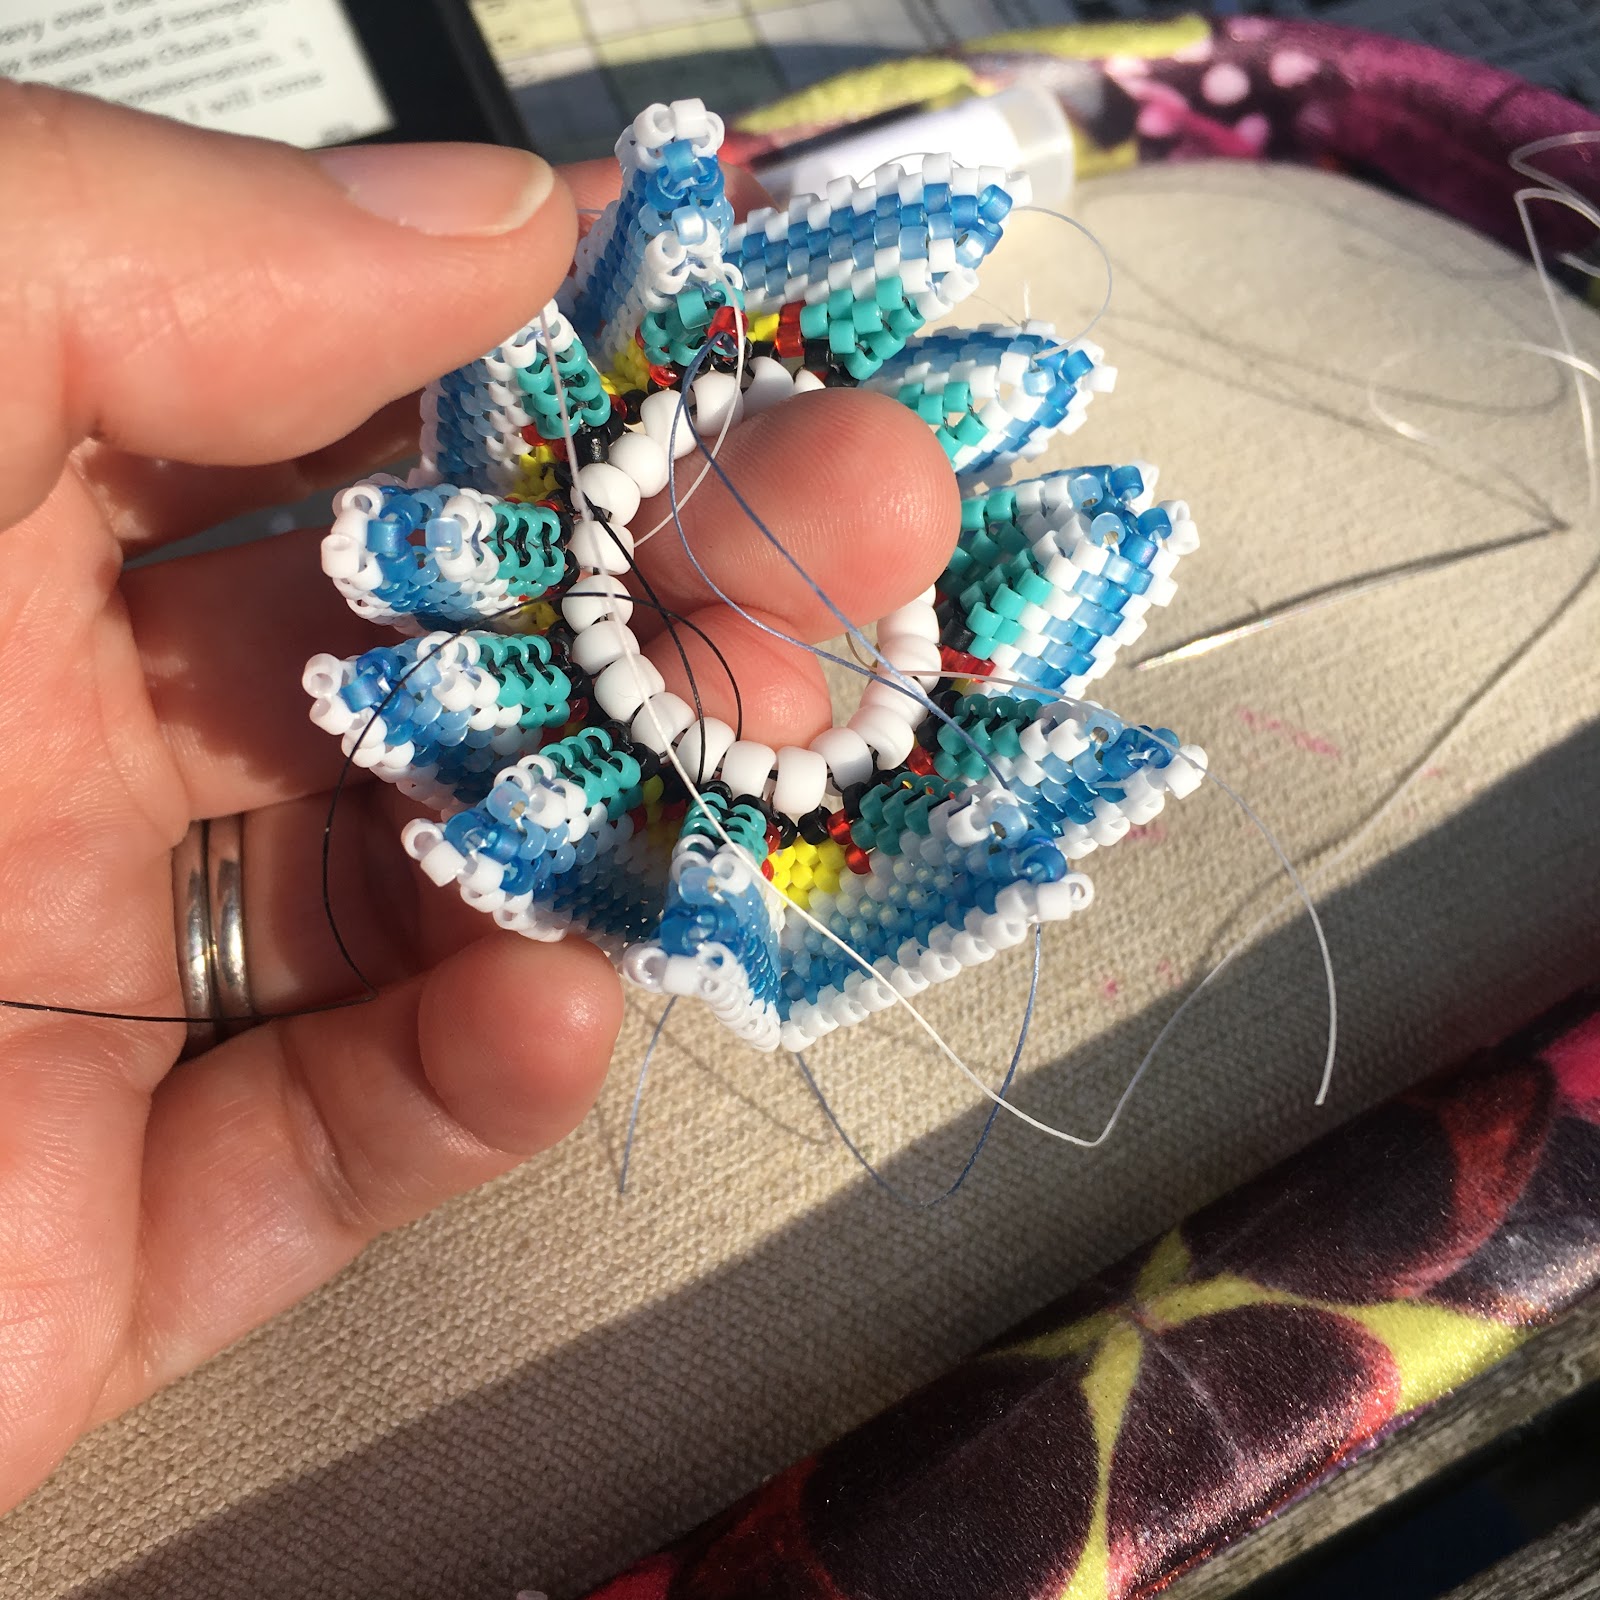
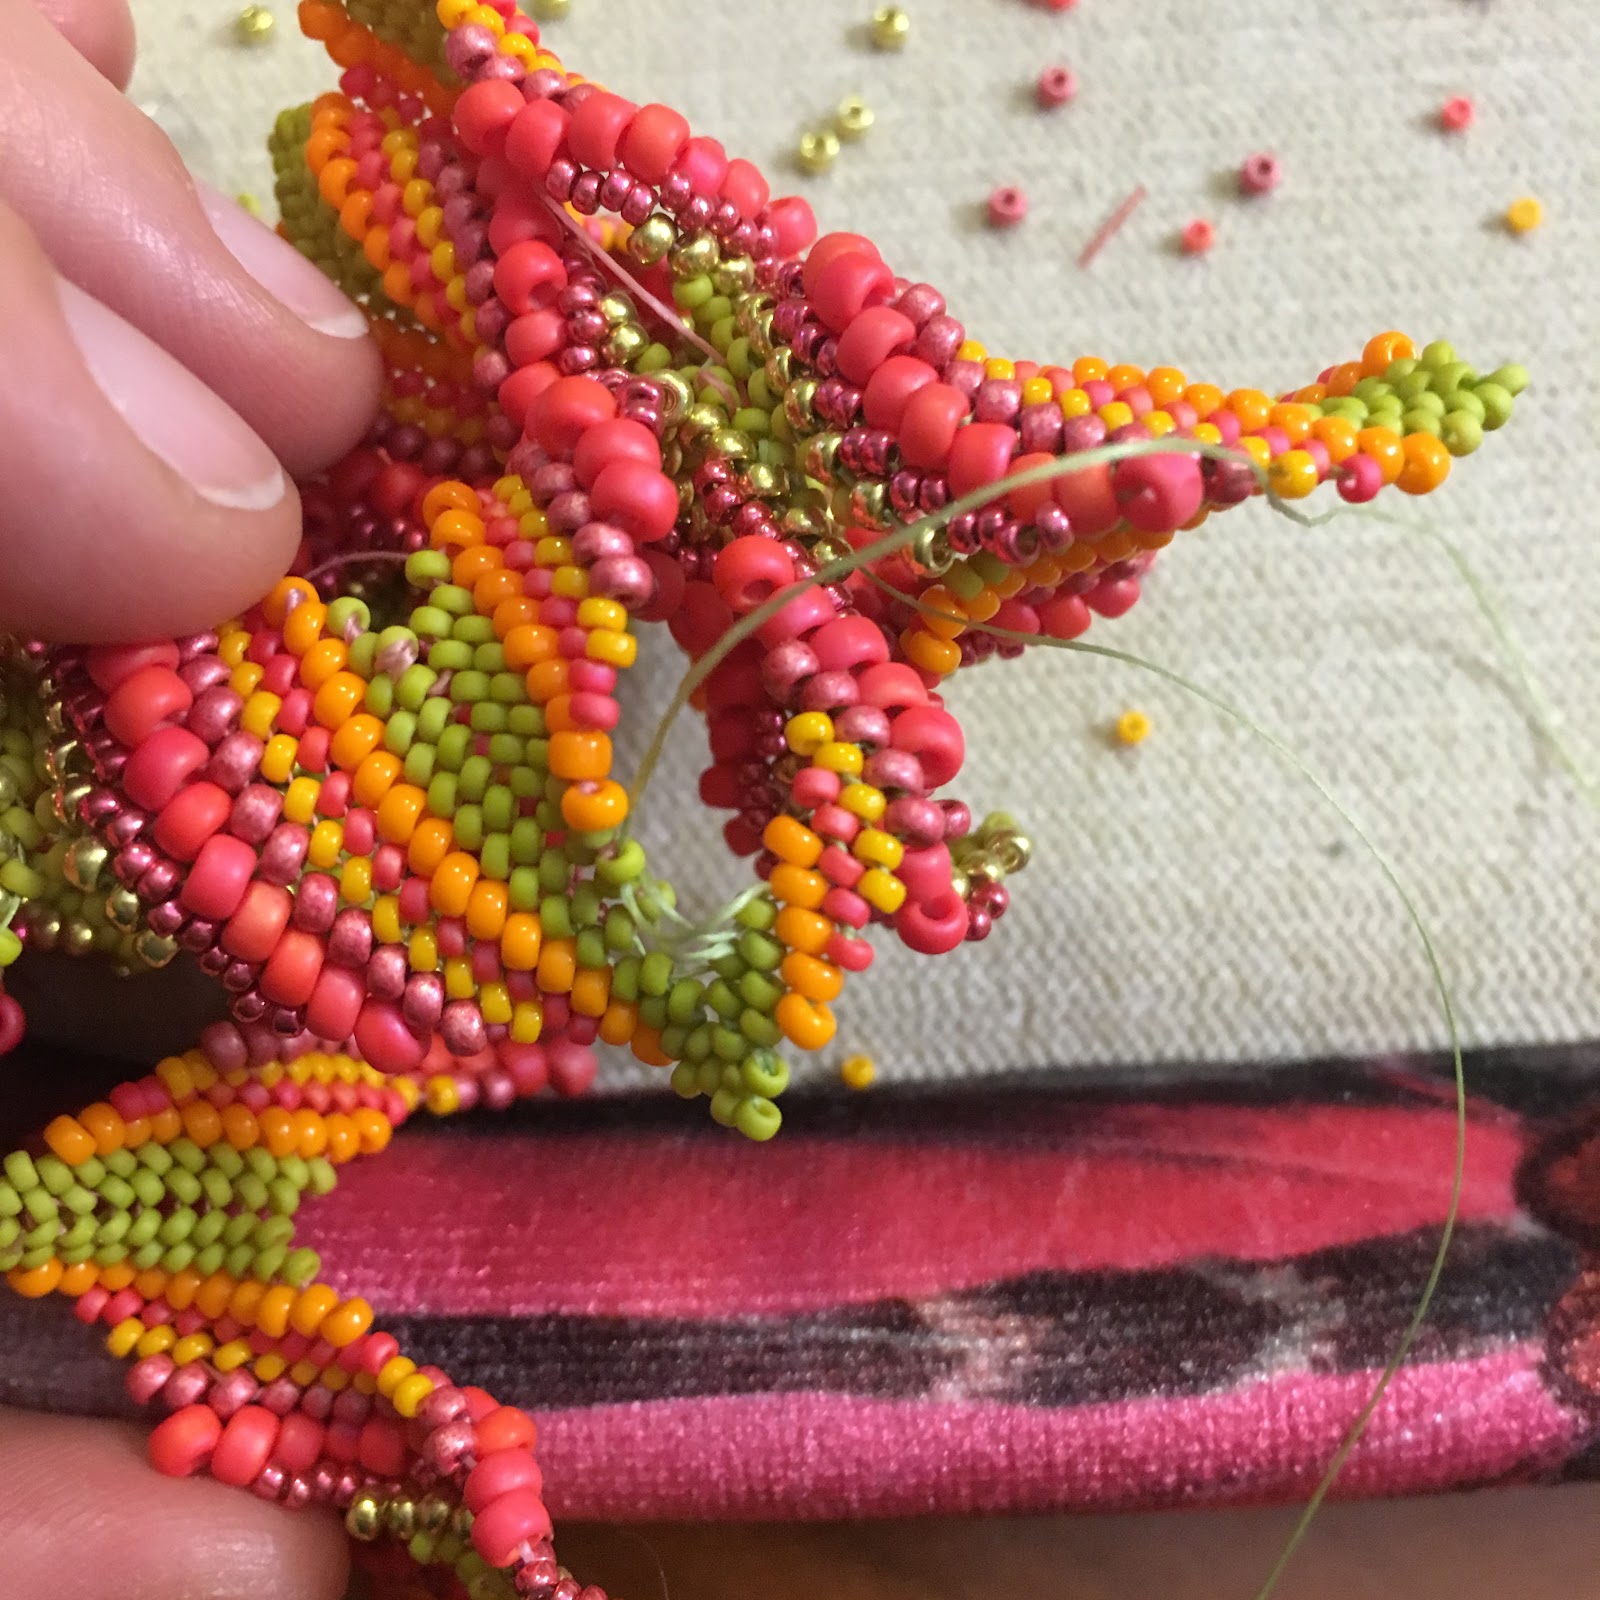
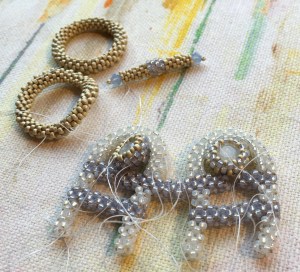
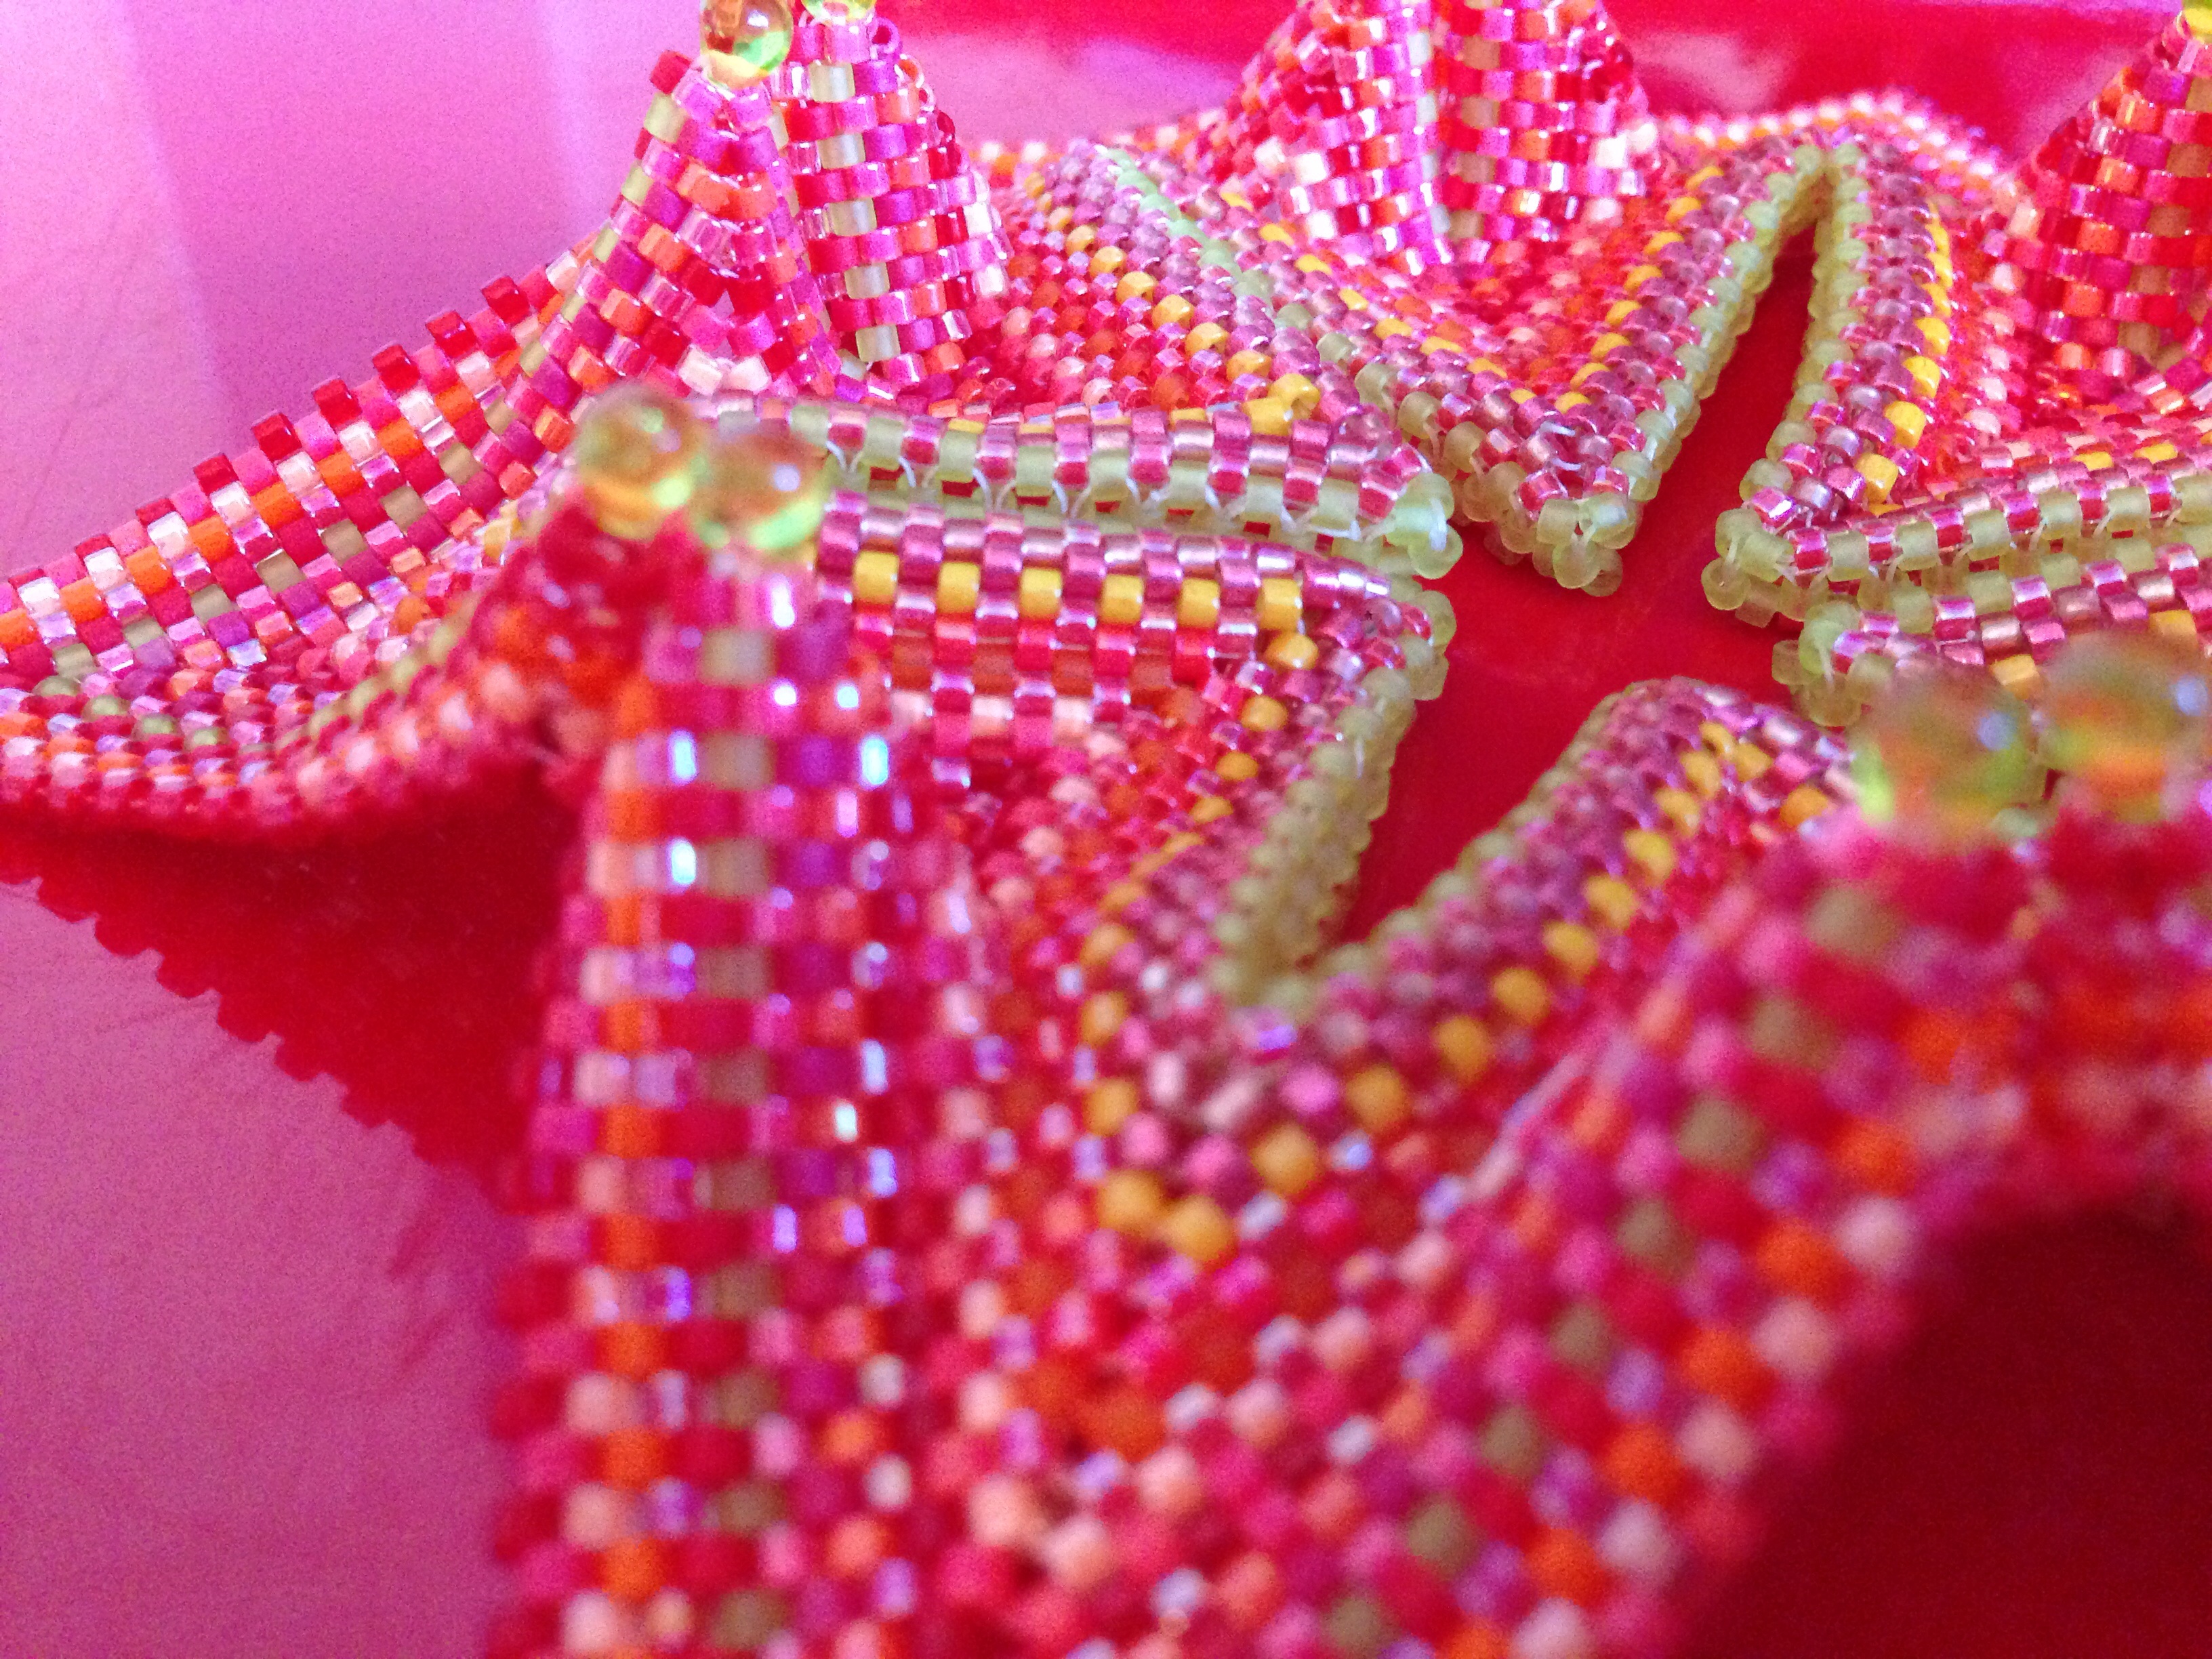
We all used Diane’s standard flat shapes (which are available from her Etsy shop, or if you can get it they are all found in her seminal book, Shaped Beadwork). My shape needed 40 triangles and 12 pentagons, and I chose to assemble the net as I worked (so each piece was attached in place before the next was made) – this was largely because I hate having stacks of components with loose threads waiting to be attached together, and it also helped me to ensure that I added the correct extra join beads – it’s much easier to spot errors in those if you’re joining as you go. If I’d been making this for myself I’d also have formed the overall shape as I worked, but because we wanted to have a collection of images of the flat nets before assembly, I made the net, which was actually nice as it gives a lovely view of the structure of the shape.

Johnson Solid No.48 – Net

So here it is – I finished it in plenty of time and sent it off to Sylvia last summer – the deadline was January 2021 so hopefully soon we’ll see the UK results. The last picture Sylvia posted of the collection so far looked amazing, and the images of the full string Diane has made of the US/International version are incredible.

If you’d like to learn more about the project there is a public Facebook group here.

Cellini Rick Rack Ninja Star

I’ve just published my Cellini Rick Rack Ninja Star (or Ninja Star for short) in my Etsy shop, and I thought you might be interested to hear about how it came about. This is an extract from the tutorial which you can buy here.

On holiday during Easter 2019, I took a set of seed beads in various sizes to work on my Cellini, and another set of delicas to join in with a CGB beadalong.  The CGB beadalong explored casting pods and spines, and as I beaded that I was also thinking about previous experiments with Cath’s diagonal Cellini, and pieces I’d made from Gwen Fisher’s tutorials.

It didn’t take long for me to wonder what would happen if I combined the two – so I took the bracelet I was making which had been cast off a CGB casting pod, and started to Cellini a strip with rick rack increases and decreases and corresponding Cellini reversals.  It worked, and started making nice shapes which seemed to have potential, so I cast off another from the Cellini strip – this time tubular rather than a strip. That made a pleasing shape which seemed to want to be a star, so I added a second layer, joined the points together, and the Cellini Rick Rack Ninja Star was born. Several versions later I’ve tweaked, un-tweaked and re-tweaked the method and thread path to make it efficient to bead, and here it is.

If you’d like to learn more about any of these techniques, and maybe experiment yourselves, then I’d recommend the following:

  • Jean Power’s book Geometric Beadwork, which covers Rick Racks in detail.  

jeanpower.com

  • Kate McKinnon and the Contemporary Geometric Beadwork movement’s books and blog, which use similar techniques, and will take you through new starting techniques.  If you’re already familiar with these you can find alternative start instructions for use with either casting pods or spines in this tutorial.

contemporarygeometricbeadwork

Cath Thomas’s work on Cellini Peyote, especially her Dimensional Cellini series, which also merges Rick Rack and Cellini, and which Cath kindly directed me to whilst I was finishing this design.

https://caththomasdesigns.indiemade.com/

  • Gwen Fisher’s mathematical Cellini explorations and tutorials.

Gwenbeads

  • And Cath’s Cellini Peyote Freaks Facebook group, where you’ll find lots of Cellini inspiration, materials and support (I should declare an interest as part of the admin team).  Simply search for ‘Cellini Peyote’ on Facebook.

Christmas Secret Beadalong 2017

Do you know I’ve done every one of Jean Power’s Summer Beadalongs, but never a Christmas one?  I’m not really sure why – it’s a very busy time of year for us, whereas in the summer I’m usually away with the family, with quiet evenings to work.  And I guess I’m also not a big kit buyer (all of the previous Christmas beadalongs have been kit only). So this year when Jean told me that she was releasing it as a pattern rather than kitting it, and that even better, it used standard delicas rather than the tiny 15 delicas and 15 seeds she featured in the previous year’s, I said ‘well I’ll do it then’. And do it I did. And I really enjoyed it.

I didn’t always manage to stick to the daily allocated beading – initially I got a bit ahead and then I had to have a big break and went from ahead, to right, to very behind, but it was an enjoyable process. The amount of beading was actually really just right for December – if I hadn’t had other pieces on the go (unplanned Christmas brooches, sudden ideas which just had to be tried, and several batches of cabochons), it would have been perfect. Each night’s work was under an hour for me, so had I not been distracted I could have made up for nights out and away from my beads comfortably.

But the pattern is lovely – very Jean, annoyingly clever, and the finished result is splendid. I went for a ‘change colour every row’ approach as that seems to be becoming my thing for peyote with delicas, and I love the finished effect, which used purples and fuchsias. It’s used up a few more beads from my stash, and meant I didn’t have to buy more to have enough of a single colour. The central crystal AB Swarovski crystal was also from my stash, as were the lovely fuchsia 2xAB bicones.  It’s now hanging from our desk light – it was far too lovely to send up into the loft when we took the tree down!

Jean has been making lots of these, and working on some variations using acrylic stones, different sized petals etc. I have a coral acrylic stone in my stash so I’m going to have a go at making a pendant sized one when I get some time – have a look at Jean’s various blog posts to see what she’s been up to and what that could look like. And if you fancy making one yourself then the pattern is still available here.

My 2016 beady to do list

After my obligatory blogger’s 2015 review, here’s my equally obligatory 2016 look ahead!  Thank you to my sister Susie for the apposite mug – it is sadly true as I spend a worrying amount of time thinking about what I want to bead.  This is probably because I have so little time to actually bead, so this year I want to make a plan and sort of stick to it, so I can always have something on hand ready to work on (rather than sitting around waiting for inspiration to strike because I’ve forgotten that really good idea I had three months ago).

So to begin, the projects I started in 2014 and didn’t touch in 2015 – the dreaded ‘unfinished but not quite a UFO yet’ box.

Planned for me to wear at my friend Jane’s wedding in the smartest venue imaginable.  Abandoned when I decided the dress was too short for said venue.  This was going to be a series of arches to mirror the digital print of the Ted Baker dress, and I think I’ll continue trying to work it out as it’s a lovely dress.  That said, when I pulled the bits so far to take a snap I wasn’t very impressed…….so for now this is back in the ‘maybe’ pile.

Arches - in progress - Sarah Cryer Beadwork

Planned for me to wear at same  wedding with smarter outfit, just as a simple short necklace.   Abandoned when I realised said outfit now too small.  I have plans to turn this into a shoulder covering cape of bezelled stones, connected by a cobweb of antique gold 3mm fire polished beads, but it could take a while to bezel enough stones for that!  The stones are a mix of vintage and new Swarovski, and were a very good exercise in working up similar bezels in lots of shapes and sizes. I’m a lot more confident in this one though, so it’s high up the list to actually do.  It would be a good holiday project as I’d only need the gold beads and chatons (not my normal case full of random pulls).

Sapphires & Gold - in progress - Sarah Cryer Beadwork

These are a variant on Jean Power’s Geometric Secret vessels – only with triangles instead of hexagons.  They’re lovely shaped things, but the one in 15 delicas (at the front) is rather more succesful than the one in 11s as it holds it’s shape, but I’ve never quite known what to do with it as a triangle is not a very wearable shape – it sticks out rather.  It could make a nice pendant hanging below a suitable bosom I suppose?  Not sure what to do with the other one?  Back on the ‘maybe’ pile.

Stepped triangles - Sarah Cryer Beadwork

This one may not make it – I was playing with twin beads to make a flat weave, but I’ve run out of the twins and can’t remember where I got them.  Luckily I do in theory log all my purchases (so I can cost up work/kits), so I should be able to work it out.  If I finish this it will have a long or box clasp and sit as a snug cuff, and I’d like to as it is my colour.  I’d say there is no more than an hour’s beading left to do once I’ve sourced the beads, so stays on the ‘to do’ pile.

Cuff - in progress - Sarah Cryer Beadwork

Maybe I should have included a section on ‘pieces where I’ve run out of beads’ – this one qualifies as well……..it will be a necklace once I’ve worked out how to elegantly extend it to a normal length (or tracked down some more beads).  This would make a nice beginners tutorial as it is super easy, but I think there are already quite a few similar ones around.  On the ‘to do’ pile.

Collar - in progress - Sarah Cryer Beadwork

This is a barely started Jean Power Affinity Bangle – using very cool rubber coated rondelles from my now defunct local bead shop.  I think I have enough to get me through it (I kept buying more in their drawn out closing sale), and I’ve made one before which was a joy, so I want to get going on this soon as the colours are more winter than summer and I think it will be lush!

Affinity Bangle - designed by Jean Power, beaded by Sarah Cryer Beadwork

So, that’s the really old stuff out of the way – just tutorials, last year’s unfinished pile, my long list of unstarted patterns and of course a ‘to try’ inspiration list to go.  This could be the longest set of New Year’s resolutions I’ve written (hopefully I’ll be better at sticking to them than I normally am).  Tune out if you get bored………….

Wings……

I’ve finished my latest Contemporary Geometric Beadwork influenced piece – a large pointy bangle.  The idea with this piece was to work with the ideas from CGB, but for the first time to ignore their finished pieces and patterns and see where I ended up.   I also wanted to work with a tube of sweepings from Stitch & Craft, to free myself up from the hours I tend to spend selecting colours!

  
I started with a MRAW band which I thought would be roughly the right size for a bangle (I was wrong – it was huge), then added some increases and decreases to form a zig zag.  I beaded that for a while, then added some increases halfway along each side to start to form peaks which I thought I could join together to start to shrink the piece down and make it human (rather than elephant sized)!  I planned to add some crystals to join the peaks together, but when I tried it they didn’t work, and left the piece a bit too wobbly.  After some unpicking I decided to stick to delicas, joined the peaks and beaded across either side of the join to make continuous lines and curves, surrounding the whole piece with a dark magenta metallic outline.

  
At that point I decided the original MRAW band wasn’t sitting correctly – the alternating zigs and zags meant that it needed to point in different directions so I couldn’t turn it into a CGB skirt to firm up the shape and make it smaller.  So that got unpicked from the inside out, and I added a couple of rows of peyote in fuchsia metallics, and the decreases sorted the sizing out.

  
So it’s all done, and available in my Etsy shop.  It’s also my entry for the Etsy Beadweavers Team October Challenge – ‘Abstract Painting’.  If you’ve got a moment pop over to our blog and have a look at the other entries (or search ‘EBWC’ on Etsy).  And if you could take a few seconds to vote for your favourite we’d really appreciate it.

National Beading Week

Here in the UK the Beadworker’s Guild’s National Beading Week will begin tomorrow (25th July).  There are lots of activities all over the country, at Bead Groups and in shops, but as I am a bit constrained by work and it bring the school holidays, I’m joining the beading community remotely in a few different ways.  Firstly, I’m taking part in Jean Power’s Secret Bead Along – I’ve completed my prep work which you can see at the top of this post with my beads all ready, and a bit of day 1 (a bit early but I couldn’t wait, photos tomorrow).  As you can see I have chosen very subtle colours.

Anyway, you can read all about it on Jean’s site or read my blog post containing the details here.  I’ll be popping a quick blog post out every day to show progress, and you can follow lots of other beader’s work on the Secret Beadalong Facebook group which Jean has set up.  Over 4000 beaders worldwide have signed up for this, which is absolutely amazing – Jean has done an amazing thing and it’s really very exciting and inspiring taking part.  For me the lovely thing is knowing that so many other beaders will be working on the same piece at the same time.  That includes that my little sister Susie Hoad, who I taught to beadweave a few years ago and got hooked on Jean’s work.  She is now a designer and teacher in her own right, and we plan to finish the last day’s beading together next Saturday, which will be just lovely.  Being Susie she is doing two colourways  (but she is a teacher so I guess she has nothing to do now school has broken up – or could it be that indecisiveness runs in the family?).

Secondly I’m going to kick off a project for this blog to celebrate the awesome range of beadweaving going on around the world – ‘Beading Beaded Beads’.  I’m going to be coming back to one of my original reasons for blogging – to show, review & comment on tutorials and patterns by other designers (as well as writing about my own original work).  I’ve put together a range of beaded beads, some from books & tutorials I already own, some from free tutorials, and some of my own designs, and the idea is that over the coming months I will focus on beading them.  I’ll be working from my stash, so I’m going with two colourways (as even my stash won’t accommodate the range of beads required to complete the various designs in one colour scheme) – bright fuchsia, lime, scarlet and orange, and fuchsia (again), indigo, cobalt and a bit of silver and gunmetal.  Hopefully I will end up with two very spectacular necklaces.  You can see the initial cut of designs on a Pinterest Board here, if you have any suggestions (or designs you’d like me to road test) then comment here or on Facebook and I’ll give them a try too.

I started beading earlier this week, and was hoping to have the first beaded bead to show off for the start of National Beading Week, but sadly the first beaded bead did not go well.  Out of fairness to the designer I’m going to have another go before I post about it………….probably just me being tired and being a bit of a tight beader.

May the 4th be with you……

Ok, so it probably won’t still be May 4th by the time I post this, and to be honest I’m not really a big Star Wars fan.   I mean why does Yoda keep saying ‘you are wise young Jedi’ to Anekin – he’s clearly not even slightly wise, since he got his girlfriend pregnant and changed the fate of the universe – use contraception you twit?  That said, DH is a fan, I do like the concept of Star Wars day, and I have this awesome Icos pendant by Jean Power to tell you about which reminds me of the Death Star.

As usual it was a lovely design to work, there’s one tricky bit at the corners of the outer puffs, but once you’ve cracked that it goes together very nicely.  I would really really love to do one with crystals – it will look fab and be even quicker, but for now I’m really pleased with this one.  I don’t have anything to mount it from yet – I’m undecided as to whether to bead a loop.  Jean uses a wire loop on what I assume is a headpin, but since I didn’t plan ahead and put it in before I zipped up the final seam I will need to either come up with an alternative or unpick a bit.  I’m going to wear it with a purple tunic I live in at work during the winter, so I have a while to decide, now the weather has improved at last.

Recipe

Jean Power’s Icos pendant tutorial

10g of Miyuki delicas:

1005 Metallic Purple Gold Iridescent (C1 & C2)

463 Galvanised Dark Magenta (rows 1-3 of C3)

422 Galvanised Fuchsia (rows 4&5 of C3)

Tips

If I had been more organised I would have used a cheaper finish delica for the inner rows of the base triangle (Jean does point out that these rows won’t be visible and labels them C1, but I was away and only had the three colours with me).

What’s next

My next version might be in 15s – using 11s makes a nice bold pendant, with a finished diameter of 35mm, but using 15s will make something quite exquisite.  I will save that for some daylight beading though as teeny beads hurt my eyes – so perhaps first I will do a crystal version.  Jean still has some crystal sets, and Perles and Co have stock in a few colours (Swarovski seem to have discontinued this shape).  Alternatively I’m feeling quite bold at the moment and have some new yellow sandals, so perhaps I’ll get Jean’s yellow plastic stones and work up a vintage colourway…………

Telling fortunes

I’ve had my electronic copy of Contemporary Geometric Beadwork 2 for a few weeks now, and with the bigger boy at school  at last I felt I had the time and energy to have a go at another piece. One of the loveliest pieces in book 1 was the Fortuneteller, and with lots of lovely examples in book 2 I felt inspired. It’s gone together very nicely (they really are deceptively simple designs in the end) and I’m really rather pleased with it.

image

I used a variety of shades of red, orange, salmon and peach delicas, including two of the newish luminous colours. In natural light the finished piece is very bright, but the yellow tones of artificial light do quieten it a bit.  Apologies for the failure to take photos in progress, but I don’t get much chance to get at my beads in daylight……

Babies and beading don't mix
Recipe
29g of delicas in around 15 different shades of salmon, red, orange, peach, yellow and pink, including luminous, mattes, metallics and transparents.  24 Miyuki drops (various colours, taken from a mix).

image

Tips & variations
I made their ‘small’ which is only just large enough. However I do expect it to stretch a bit in wear so I’d say this should be perfect. Their small is six repeats of the zigged band with 10 units on each side of the zig. My knuckles measure 21cm round.
I had a little trouble following the instructions towards the end so I ended up simply adding a drop to what I felt was roughly the right place, and zipping 3 beads only Jean Power style,  which gave about the same look, avoided making it any smaller and seems fine to me.
Next time I will vary slightly and add drops to the modified raw band (at the decreases) to match the other points.
I didn’t add drops in the final round (after zipping) as I felt the three already there were sufficient.
I used some transparent frosted lime beads for the raw band and edges. If I was making again I think an opaque bead would work better here (although I would still use transparent beads for some rows in the main fabric), or even a metallic. Alternatively I might use two colours in the RAW – one for the horizontal, one for the vertical beads, as that would more closely mirror my colour use in the rest of the piece and allow the band to blend more.

image

What next?

Another one I think, in more subtle colours (probably soft grey metallics and blues).  I am also wondering what this would look like in seed beads?

image


Zig-wing tastic

While we were on holiday I decided it was high time I made something for me – beading recently has been about competitions and the shop, rather than stuff for myself. As every beader knows, we are the strange people who have something to match perfectly with every outfit, and I seem to have acquired new clothes without beadwork to match. Chief among these are my new and very silly trousers (under the bangle above) from Boden, and whilst I rarely get to wear jewellery because of the littlest boy, their colours seemed to present an opportunity for something very loud. This isn’t quite as daft as it seems – I wear them with a plain navy blue top so some colour is needed to balance things out a bit.

I made a little pendant with some fluorescent pinks, blues and magentas, but it was still a bit dwarfed by the trews. Something truly epic was called for – and with some extra time courtesy of a few rest days at my parents with the boys, I finally felt ready to attempt a bigger piece from Contemporary Geometric Beadwork. I dug out a PDF they issued last year for the ‘Mowgli’ Zig Wing Bangle, and a big box of beads.

Here’s what I learnt:

IMG_1624.JPG

  • The modified RAW band is lovely. However, you will end up holding it while you bead, so make sure you use beads with a very permanent finish. I think I grabbed the first silvers I found, and they were galvanised so they’ve lost a little sparkle.
  • Their small/medium (5 points) is quite big. If I make another I might drop some repeats from each side.
  • The written instructions don’t quite match the diagrams for the beginning of the second side. Follow the diagrams, the words will give you about 4 extra rows – not the end of the world, but time-consuming, possibly affecting the sizing and probably not as nice.
  • Another time I think I will skip the ‘slipper’ join and shaping on the inside layer, and instead just zip that part together. It feels like this would make a better base for the outer layer and show that fantastic shaping with less distortion.
  • I didn’t keep a full count of hours – at a guess I’d say around 20? Certainly a reasonably big job compared to my usual pendants and earrings, but a lot quicker than expected.
  • Also actually much easier than expected – is basically plain peyote with some herringbone increases and decreases.
    I’ll be honest and say I didn’t find the instructions hugely clear – I can’t quite identify exactly why, but they do make the piece seem more complicated than it is. However the diagrams are good, with thread paths at critical points, so most intermediate beaders should manage fine if they concentrate!
  • I’m going to pop some drops or even seed beads into the RAW band at the point where the decreases will go next time, as they will form a nicer corner than delicas.
  • Kate recommends soft tension. She says this a lot and she is quite right! However this is tricky with delicas, and even trickier with matte beads. Try to relax, the fitting and shaping (as well as the finished feel) will be easier if you do.

All in all, I’m pleased. I’ll certainly have a go at another big piece from CGB ( now I know they are easier than they look), and I await CGB 2 with eagerness. If I am feeling really energetic I think I will treat myself to one of Barbara Brigg’s patterns from Etsy – they look incredible and should I think be nice and clear.

When I get a minute I will update with the finished weight so you can see what kind of volume of beads is involved.


More haste, less speed.

20140604-073658-27418244.jpg

I was trying to be decisive last night, so I sharpened my scissors and snipped all of the nasty thread ends off the pendant I finished a few days ago. Except that I snipped off the start thread without weaving it in, so it could all unravel any second (especially with a three bead start in size 15 delicas). Rude words were uttered.
Even worse, because I only started snipping so I could remove it from my board prior to working on something else, I had put away the thread so had an excuse to procrastinate about sorting out my mistake. So another UFO went back into my workbag. Naughty girl.